
Continuing along in this new series devoted to the best looking boards found in the wargaming world where I will highlight the art and layout of a different board in a wargame that we have played to show you the various talents of the artists and graphic designers involved. In my humble opinion, a well designed and attractive board can make all the difference in the world to me enjoying a wargame. Don’t get me wrong, the game has to be good, but if it’s also good looking it always is a better experience. A board can draw me in. Can make me feel that I’m there. Can set the stage for the thematic immersion that we all crave. And I have found many of these type of boards and I want to make sure that I share them with you.
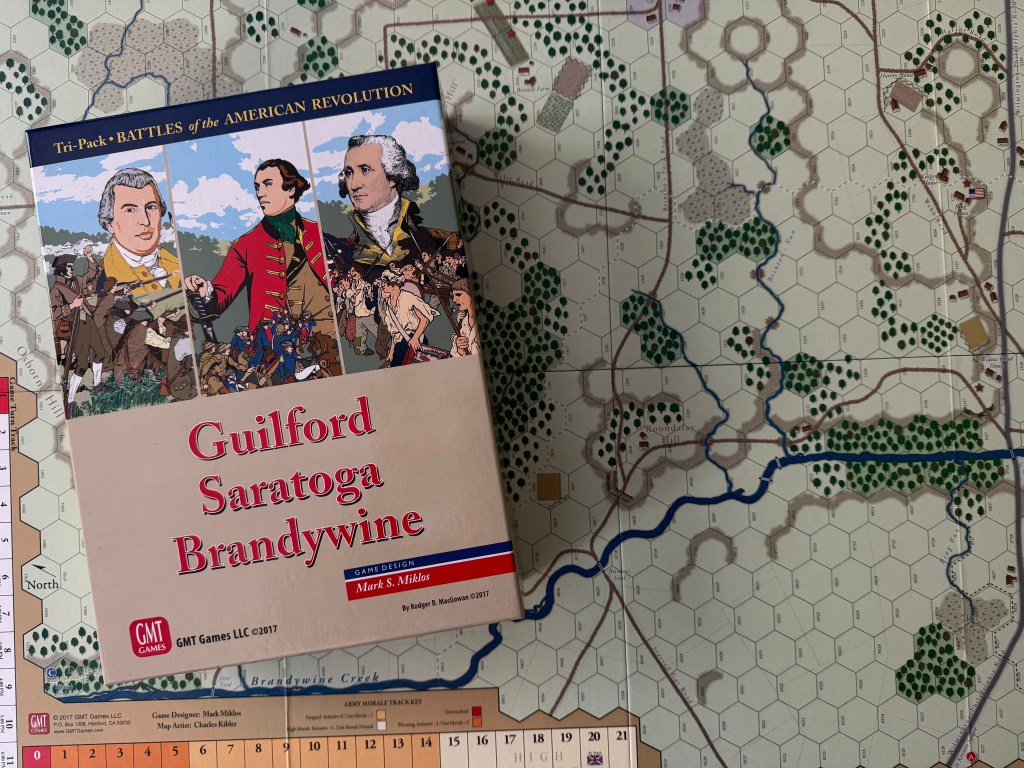
After owning the American Revolution Tri-Pack from GMT Games for a few years, we finally got it to the table in 2021 and played Brandywine. I really like tactical feeling games and this one is definitely in that genre as you are moving smaller, typically regimental, unit counters around the board. The Battles of the American Revolution Series are a long standing and well respected series of hex and counter wargames that portray specific American Revolutionary war battles. The series is designed by Mark Miklos and is published by GMT Games and there are a total of 11 Volumes in the series with the upcoming release of the newest volume The Battle of Green Spring: Prelude to Yorktown. The importance of Leaders is really highlighted in the games and we have had interesting discussions about the difference in leaders between the British and the Patriots as well as their casualty determination in combat. The rules also create a really interesting look at the period and we felt they were very appropriate for the setting and time. Really well done and the system felt very realistic. The combat is very attritional and there are not a lot of losses but rather retreats and disruptions. I really want to get into the other volumes in the series but alas we have not had the chance. We did however play Savannah at SDHistCon last November with designer Mark Miklos and look forward to other opportunities in the future.
The artist is the talented Charles Kibler who has done a ton of great looking boards including The Battle for Normandy (2009) from GMT Games, The Day Was Ours: First Bull Run (2021) from Revolution Games, Border Reivers (2023) from GMT Games recently as well as a slew of Advanced Squad Leader boards stretching back through the years and a lot of series games for GMT Games such as Great Battles of the American Civil War and Great Battles of the American Revolution. We have already highlighted one of his boards in Storm Over Jerusalem from MMP. He is very effective at creating great looking terrain and weaving in very nice details to highlight the main functions of the board.
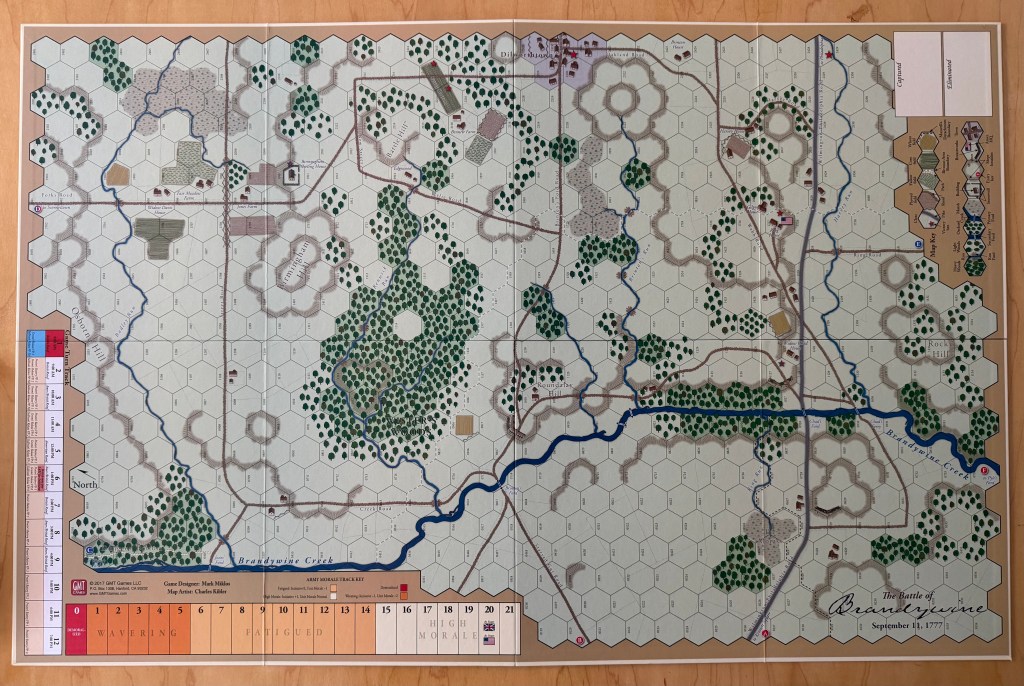
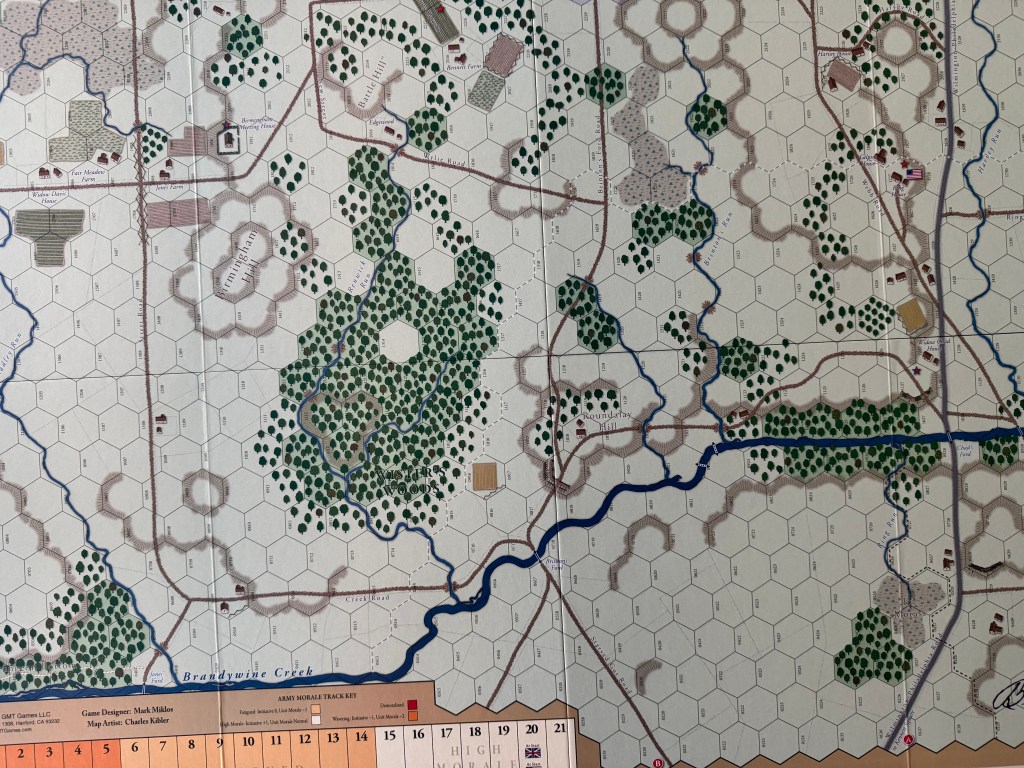
The board for Brandywine consists of a single 22″x34″ map. In my copy of the game, which is included in the American Revolution Tripack, the board is mounted and double sided and includes the board for Saratoga on the backside. When laid out, the board is quite a looker as it is very clear what the battlefield is and you can immediately get a feel for the layout of it and the geography.
Located generally at the center of the board is Wister’s Woods. It holds a prominent position to the northeast of Brandywine Creek. There is a ford located on the southwestern edge of the forest called Brinton’s Ford but it was not a major part of the battle. Those fords which were hot are Chad’s Ford and Chad’s Ferry located to the east. I wanted to highlight this large section of forest as it is really indicative of Charlie’s approach with the wooded portions of the battlefield. He would color the hexes light green and then intersperse darker little trees throughout the hex to show the thicker forested sections. When seen together in one area, the difficulty in traversing this area becomes evident against the stark cream color of the clear hexes around. I also really like the smaller creeks that wind their way through the woods here called Renwick Run as they move west toward the Brandywine Creek.

As the forks of these 2 creeks come together, there is a fairly large elevated hill denoted by 3 hexes (hexes #1012, 1112 and 1113) and shown with slope hexside lines going up to the highest point in the hex. The actually is quite a bit of different elevated areas found on the battlefield and the brown lines really create a nice offset to the clear hexes that give it some life and a bit of motion. Also, if you look at the woods closely, and particularly at the trees themselves, you will see that Charlie has added some fall foliage to the board with differing shades of red and brown. As the battle was fought on September 11, 1777, the woods would have just started to show hints of their fall colors but would not have all broken out as it was a bit too early. Sometimes in the east, a dry hot summer can cause trees to turn a bit early in late August but this spotty color is perfectly appropriate for the time and season and is a nice touch to the board.
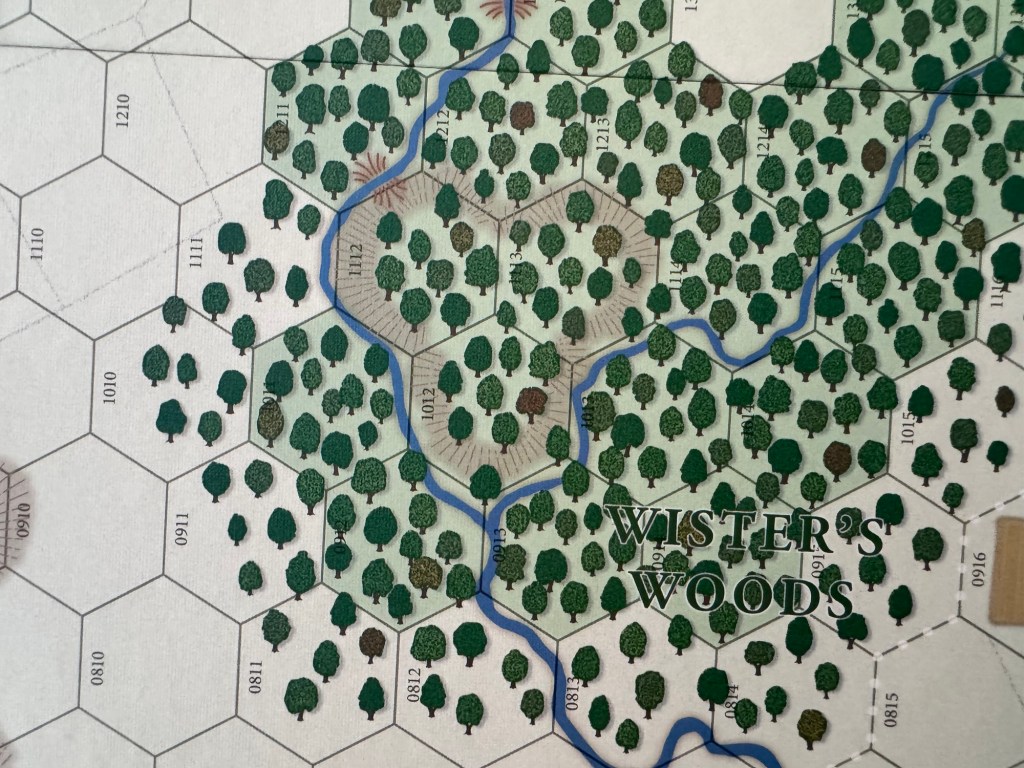
I also really appreciate the nice script chosen for the name of the battle in the bottom right hand corner of the board. I can see a surveyor having written that with their quill feather pen and ink pot in the late 1700’s and the script fits perfectly with the time and custom of the era. I really think these type of small graphical choices are the straw that stirs the drink in these wargame boards for me. This type of detail just gives me a feeling of authenticity and of belonging. Just a really nice touch.
As we move east toward the top of the board we come into some more elevated terrain with a nearby town shown called Dilworthtown. As I mentioned in the preamble to this post, I really am grateful that Charlie showed these types of buildings on the board as they add a nice touch to the feel of the situation as the battle took place within a few thousand yards of settled areas and farmsteads in the area. If you look at Dilworthtown, you will notice that there are multiple building types including homes, outbuildings and larger structure that are probably community gathering spots. You can even make out a steeple on one of the buildings which denotes a church, which would have been a center point of any small settlement in the late 1700’s. There also is even a fence shown in the town. I also like the red star shown in hex #2419 that denotes this hex is a Victory Hex for the British as is nearby hexes #2215 and 2315. The red star really stands out against the backdrop of light blue used in the town hexes and against the roof of the 2 long buildings, probably which are farrowing houses or large chicken coops. The small farm to the north of Dilworthtown called Bennett Farm is also a nice touch.

Another great example of the little details with buildings and the local villages is a clump of farms and the famous Birmingham Friends Meeting House located just to the east of Chad’s Ford. The Meeting House was built in 1763 and the building and the adjacent cemetery were near the center of fighting on the afternoon of September 11, 1777. You will note the half blue/half read star in hex #1910 which means this is a Victory Hex for whoever is holding it at game’s end. Also, units located in the Birmingham Meeting House hex are not required to attack during the Close Combat phase. This is mostly due to the somewhat fortified nature of the building as it offers some cover to the defending troops. Also in combat, if a Retreat result is called for the units in the Meeting House need not retreat.

Now, let’s move on to take a closer look at the centerpiece of the board in Brandywine Creek. The Brandywine was a central point for most of the action on September 11th and the Patriots attempted to stop the British from crossing at Chad’s Ford on the creek. General George Washington was determined to prevent the British from capturing the American seat of government, Philadelphia which was located about 31 miles to the east. Taking up positions along Brandywine Creek, Washington believed that his army blocked all fords across the Brandywine.
Opposing Washington was Sir William Howe and an army of 15,500 British Regulars and Hessian troops. Hidden by heavy fog, the British moved into position. General Wilhelm von Kynphausen was ordered to demonstrate against the Americans’ front at Chads Ford, while the bulk of Howe’s forces crossed the Brandywine further upstream. The battle had been raging for hours by the time Howe’s force appeared undetected on the Continental right flank. Washington dispatched troops under General John Sullivan and William Alexander, “Lord Stirling,” to shore up his right flank. However, despite putting up a stiff resistance, the Continentals were eventually overrun by Howe’s men. Knyphausen’s troops also hit the American units that remained near the Quaker meeting house (Birmingham Friends Meeting House) at Chadds Ford and Washington’s line eventually collapsed.
The Brandwyine Creek is shown as a considerably thicker blue winding line through most of the board. It starts off the map to the right and winds to the northwest where it runs off the board. In the picture below, you can see Brinton’s Ford over Brandywine Creek as well as 2 secondary fords located to the south. The use of the cream colored clear terrain hexes was absolutely genius in making the various features stand out. The dark blue of the Brandywine really creates a feeling of a solid and impassable line of demarcation and I love its feeling of permanence. You can also make out a bit closer view of Wister’s Woods and the 2 smaller tributary creeks coming into the Brandywine.

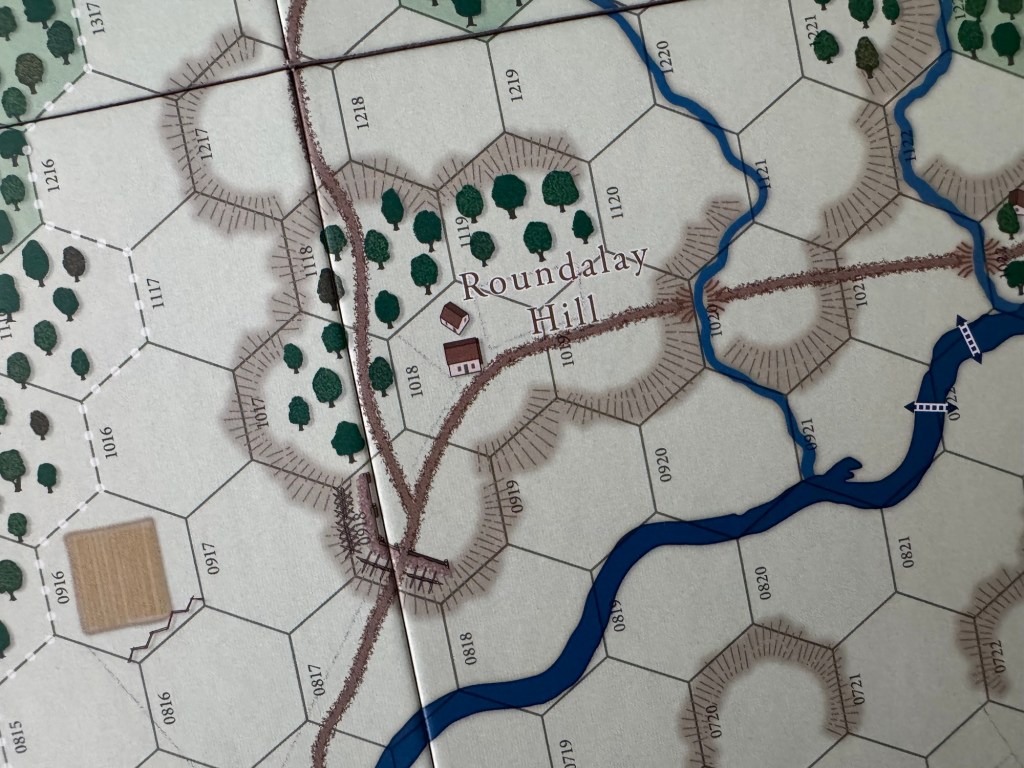
Another great example of smaller buildings and elevated slopes is shown in the closeup of this area below where we can see Roundalay Hill sitting to the northeast of the 2 secondary fords. We can also see some rudimentary breastworks drawn in hex #0918.
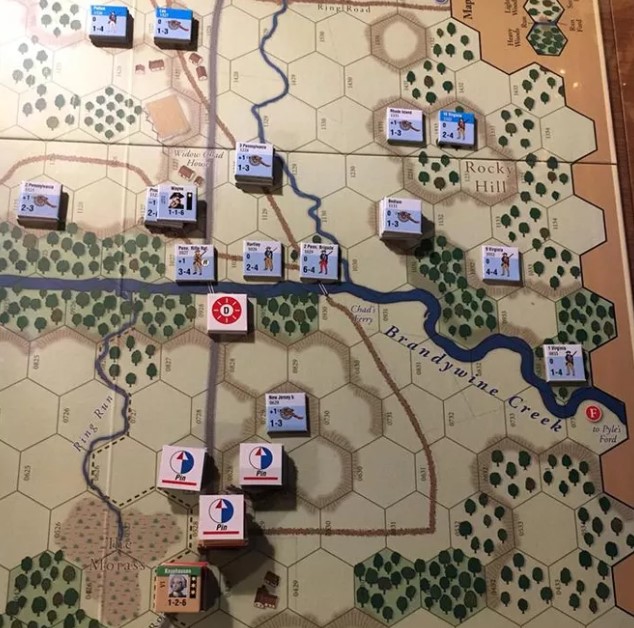
In playing the game, we really liked was that Brandywine Creek played a major role in the game. The fords across the creek were hard to pass because the Patriots had lined that area with defensive cannons and sharpshooters. Each time the British tried to cross, the Patriots fired and forced them to retreat with some good dice rolling. This caused some real tactical decisions to need to be made by both sides to take advantage of or overcome the terrain. Very well done part of this battle.
As the Brandywine moves to the north, we see Jones’s Ford as well as a prominent view of Creek Road that follows the creek and crosses it in the far right of the picture.

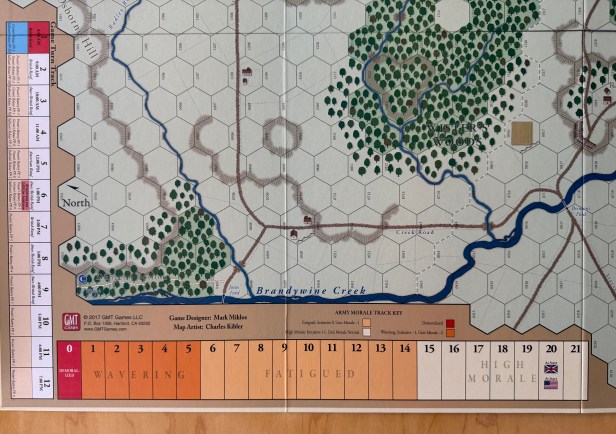
As always, when we look at these beautiful boards, we have to make sure that they are playable and that the aids and tracks drawn on the board are easy to view and useful. Such is the case with this one as Charlie did a good job of adding the boxes, tracks and terrain guide right on the board itself making it easy to access the types of terrain as you play.

And the Turn Track and Morale Track are also very prominent on the board and no one will have any difficulty differentiating where they are on both as the use of bright colors aid in a quick identification of the status. High Morale is shown on the far right in a cream color and it quickly changes to light orange showing Fatigued and then Wavering is shown as bright orange.
We had a great time with Brandywine and have since played another entry in the series called Savannah. We are going to explore more of this series in the near future and really look forward to experiencing more and seeing more of the gorgeous boards they play out on.
Here is a link to our video review:
If you are interested in Battles of the American Revolution Tri-Pack: Guilford, Saratoga and Brandywine, you will have to pre-order a 2nd Printing copy from the GMT Games website or from our friends at Noble Knight Games:
GMT Games: https://www.gmtgames.com/p-1052-american-revolution-tri-pack-2nd-printing.aspx
Noble Knight Games: https://www.nobleknight.com/P/2147683210/American-Revolution-Tri-Pack-Guilford-Saratoga-and-Brandywine
The next board that we will take a look at in the series is Ardennes ’44: The Battle of the Bulge from GMT Games designed and illustrated by Mark Simonitch.
Here are links to the previous entries in the series:
Kekionga!: A Dark and Bloody Battleground, 1790 from High Flying Dice Games
Campaigns of 1777 in Strategy & Tactics Magazine #316 from Decision Games
Battle Hymn Volume 1: Gettysburg and Pea Ridge from Compass Games
From Salerno to Rome: World War II – The Italian Campaign, 1943-1944 from Dissimula Edizioni
This War Without an Enemy: The English Civil War 1642-1646 from Nuts! Publishing
Holland ‘44: Operation Market-Garden, September 1944 from GMT Games
Maori Wars: The New Zealand Land Wars, 1845-1872 from Legion Wargames
Imperial Struggle: The Global Rivalry – Britain & France 1697-1789 from GMT Games
Stilicho: Last of the Romans from Hollandspiele
Nevsky: Teutons and Rus in Collision, 1240-1242 from GMT Games
A Most Fearful Sacrifice: The Three Days of Gettysburg from Flying Pig Games
Donnerschlag: Escape from Stalingrad from VUCA Simulations
Keep Up the Fire!: The Boxer Rebellion Deluxe Edition from Worthington Publishing
Liberty or Death: The American Insurrection from GMT Games
Lanzerath Ridge: Battle of the Bulge from Dan Verssen Games
Salerno ’43: The Allied Invasion of Italy, September 1943 from GMT Games
Bayonets & Tomahawks: The French and Indian War from GMT Games
Undaunted: Normandy from Osprey Games
Traces of War from VUCA Simulations
SCS Ardennes II from Multi-Man Publishing
Almoravid: Reconquista and Riposte in Spain, 1085-1086 from GMT Games
Walking a Bloody Path: The Battle of Fallen Timbers, August 20, 1794 from High Flying Dice Games
All Bridges Burning: Red Revolt and White Guard in Finland, 1917-1918 from GMT Games
Storm Over Jerusalem: The Roman Siege from Multi-Man Publishing
Iron, Blood, Snow & Mud from PHALANX
North Africa ’41: The Western Desert, March to December, 1941 from GMT Games
-Grant
