Continuing along in this new series devoted to the best looking boards found in the wargaming world where I will highlight the art and layout of a different board in a wargame that we have played to show you the various talents of the artists and graphic designers involved. In my humble opinion, a well designed and attractive board can make all the difference in the world to me enjoying a wargame. Don’t get me wrong, the game has to be good, but if it’s also good looking it always is a better experience. A board can draw me in. Can make me feel that I’m there. Can set the stage for the thematic immersion that we all crave. And I have found many of these type of boards and I want to make sure that I share them with you.
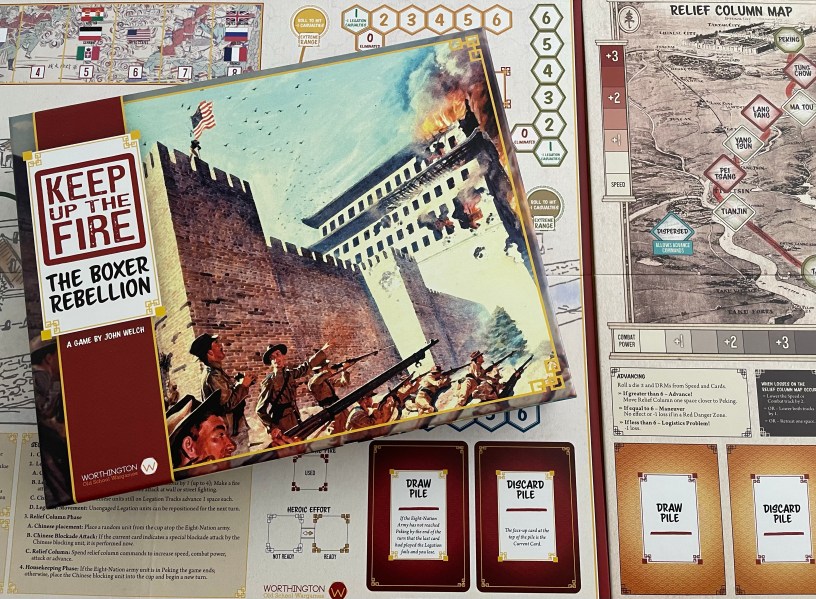
Keep Up The Fire!: The Boxer Rebellion Deluxe Edition from Worthington Publishing is a States of Siege Series game that focuses on the Boxer Rebellion that took place in Peking, China in 1900. The Chinese “Boxers”, also referred to as the Society of the Harmonious Fists, along with the Imperial Manchu forces of the Qing Army, were determined to expel the various foreign powers there from their Legations which served to house foreign heads of state, ambassadors, business people, and a handful of troops to provide security. These Legations were seen as unwelcome Imperial intruders into the sovereignty of China. This situation is perfect for the telling through the mechanics of the States of Siege Series.
But typically, the boards for the States of Siege Series are nothing to write home about. They are very functional, with their tracks and boxes laid out well to ease and assist play, but the graphics and presentation are never really great. Some of them are frankly downright ugly! But not so with the Deluxe Edition reprints put out by Worthington Publishing. I have played several of these games, including Levee En Masse, Soviet Dawn, Malta Besieged and Cruel Necessity and each has their improved boards, which look significantly better than their first editions. But the one that stands head and shoulders above the rest is Keep Up the Fire! The Boxer Rebellion.
The board for this entry in the series is really quite stunning! There are actually two boards, the main game board that shows the various walls of the Legation Compound built around Fort Halliday and then the Relief Column Map where the player tracks the progress of the Eight-Nation Alliance Army consisting of troops from Germany, Japan, Russia, Britain, France, the United States, Italy and Austria-Hungary attempting to fight its way through Qing held territory to make it to Peking to save the day. This two board setup really creates two games within the same box as the actions taken to defend the Legation Compound are separate of and have no bearing on the progress of the Eight-Nation Army and to win the game the player must avoid being overrun at the compound while making their way to Peking with the relief column.
The board is illustrated by Tim Allen who has a long history of designing the boards in several entries in the States of Siege Series including Zulus on the Ramparts!: The Battle of Rorke’s Drift (2009), Ottoman Sunset: The Great War in the Near East (2010), Cruel Necessity: The English Civil Wars 1640-1653 (2013) and Hapsburg Eclipse: World War I in Eastern Europe (2014). But with this Deluxe Edition from Worthington Publishing, Tim really amped up his game and has outdone himself with the creative use of a drawing of the compound itself which creates a truly immersive and thematic touch to the game that creates a deeply engaging and enjoyable experience.
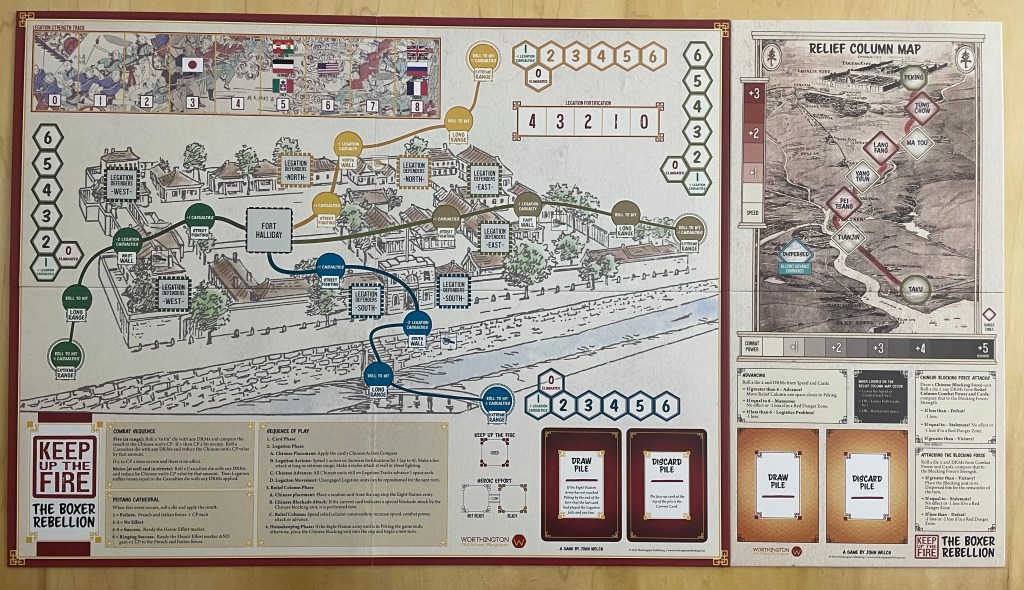
As you can see in the picture above, Tim first drew the Legation Compound itself at the center of the board with its walls, buildings, gates and even the nice trees lining the streets outside the walls. At the center of the Legation Compound is the Fort Halliday Box, which is what the player must defend at all costs to keep the advancing Boxers and Qing Army units out of or lose the game. From the center, he laid out the 4 tracks where the Boxers and Qing Army units will be placed and will advance one circle (or sometimes the Boxers will move 2 circles) at a time toward the defenders.
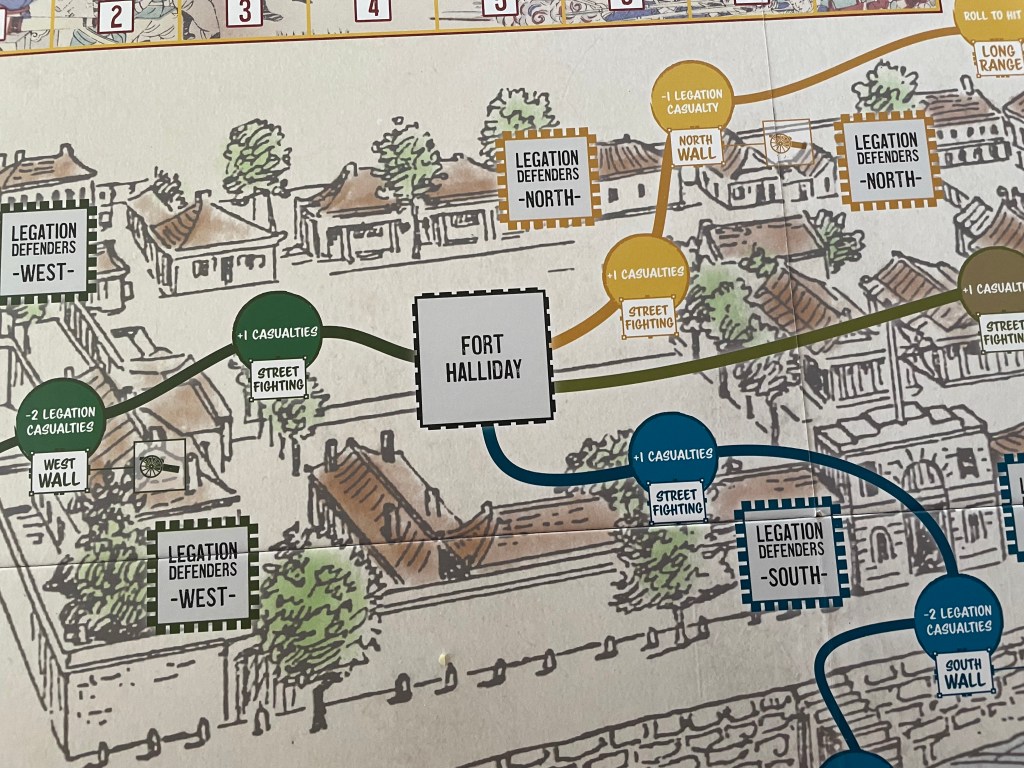
The really great graphical element about the tracks is that they are meandering thick colored lines that give the feeling of movement toward the objective for the enemy units. Tim could have drawn symmetrical and straight lines that connected to Fort Halliday but he chose to use curving lines to show the motion of advance. The four tracks are all colored differently, with the Western approach being green, the Northern approach being yellow, the Eastern approach brown and the Southern approach blue. The colors here coordinate with the defender boxes along the walls as well to tie them together and give the player an understanding about what defenders can attack what tracks.
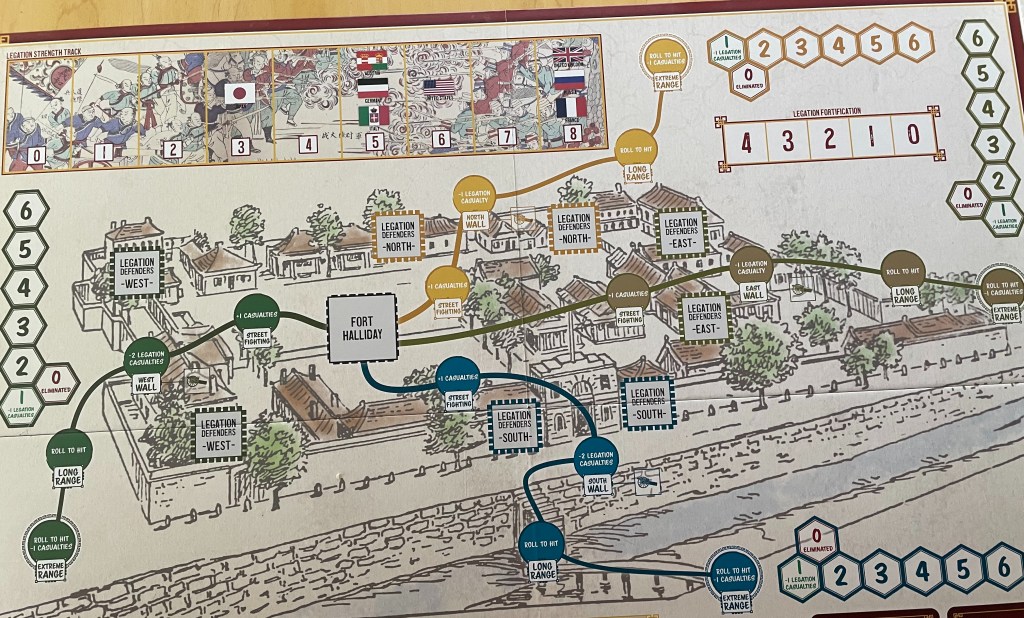
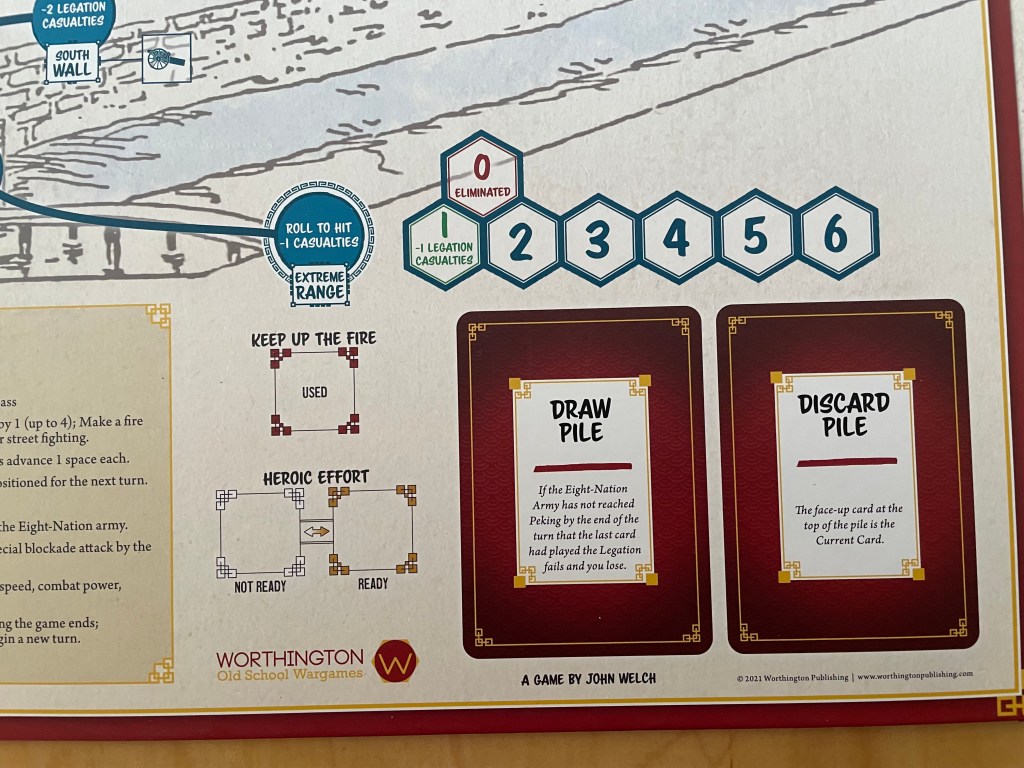
The other interesting thing about these tracks is that each of the circles has a different modifier or outcome that will be derived when attacking there or being attack from the circle. For example, in the circle in front of the gates you will see “-2 Legation Casualties”. This means that when a Melee attack is attempted here by the player, they will take -2 casualties from the simultaneous attack back of the attacking units. This is a great connection to the benefit of the walls and the ability for the defenders to utilize them in their defense. Once the gates are breached and the advancing enemy has settled in the Street Fighting circle, you will see that there is noted there “+1 Casualties”. This applies to both the attacker and the defender as both are in the open and fighting in the street.
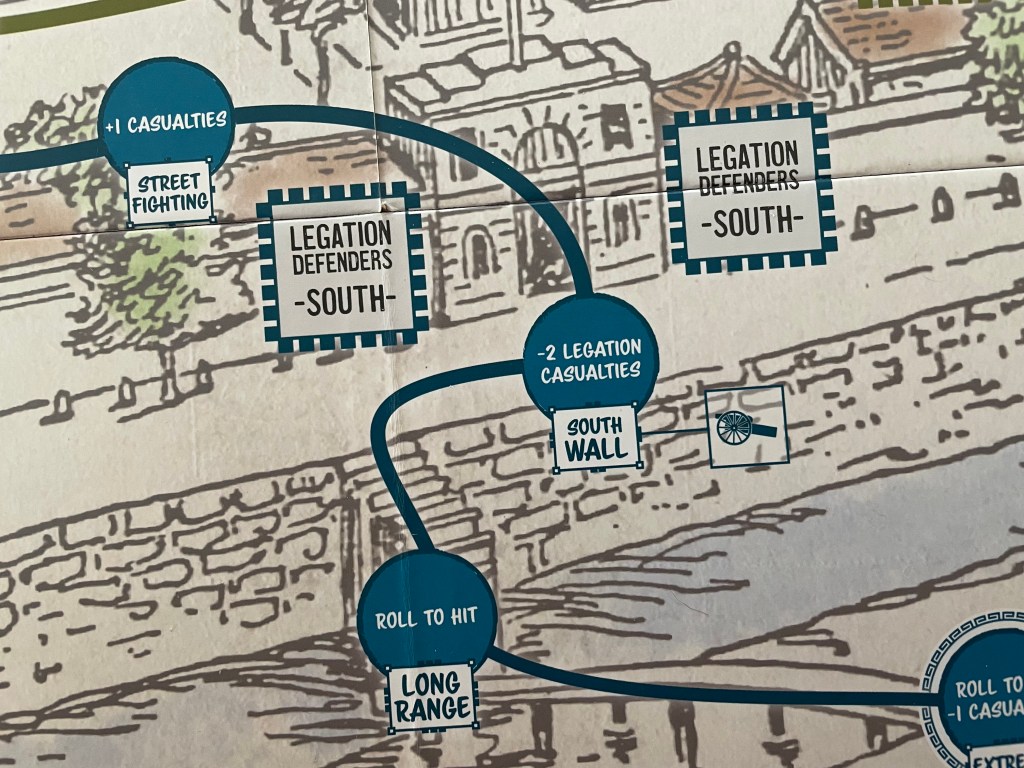
The other really impressive part of the South Wall is the detail given to the canal that runs from the west to the east. You can see the detail of the masonry side walls in meticulous detail as well as the turbidity of the moving water. The canal plays no part in the game and doesn’t offer any form of movement restriction to the enemies advancing down the tracks but it sure makes the board look that much more appealing.

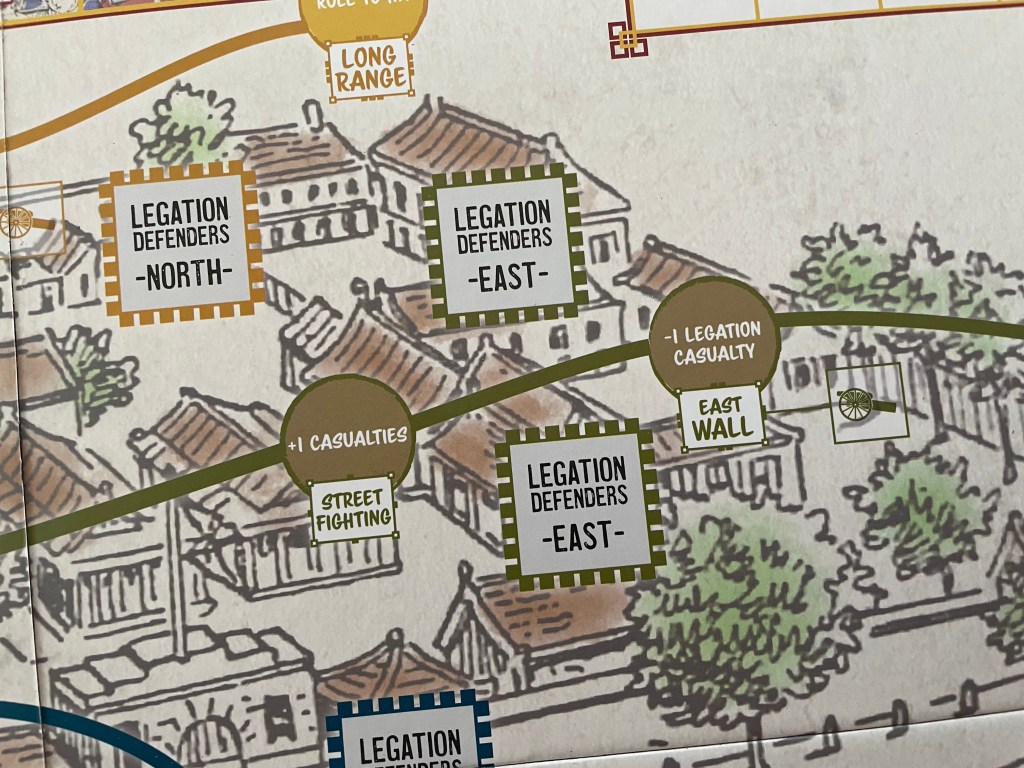
The East Wall is also really visually appealing as well as it seems you can see the various details of the numerous buildings in this quarter better than in others. The buildings are not necessarily symmetrically built or laid out but they do have the appearance of being built from the same materials and design. Some are two stories, some have what appear to be porches and all of them have lots and lots of windows which is accurate as there wasn’t full access to electricity yet and the inhabitants would have had to rely on sunlight to light the houses and buildings during the day.
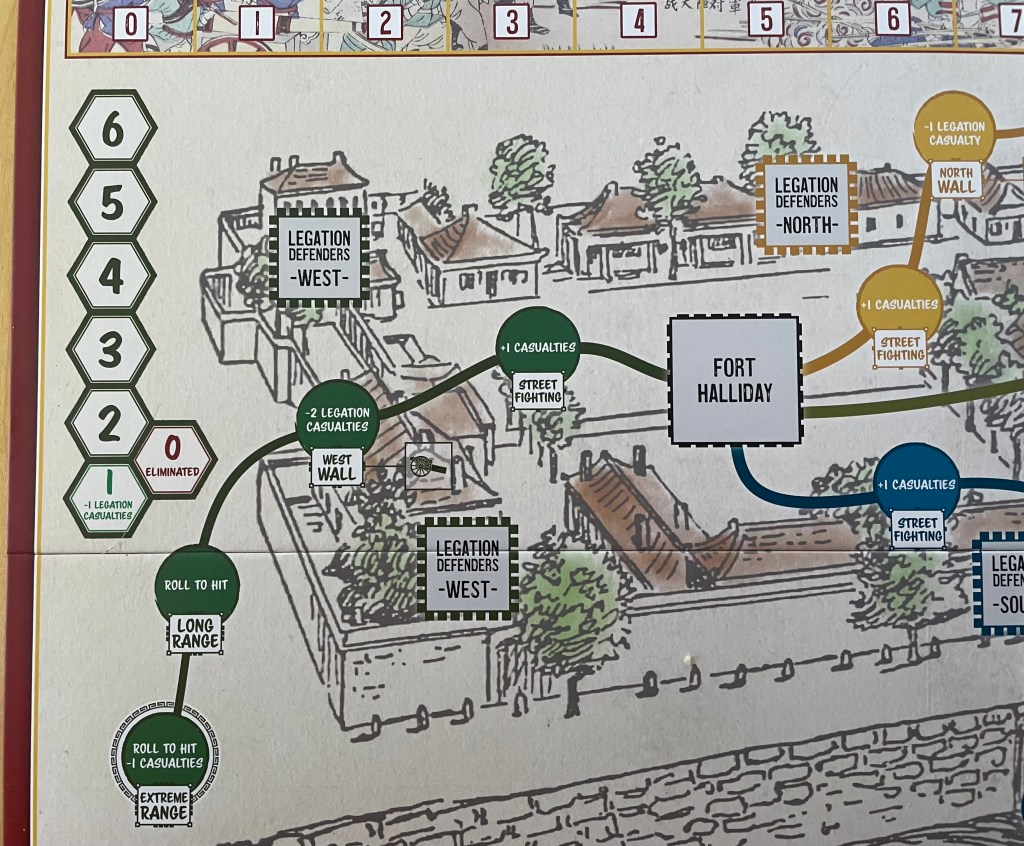
The West Wall has some of the best examples of what I would describe as defensive towers as the corners of the wall here are definitely different than others. The building there seems to be built into the wall and offers some high vantage points for better views over the wall and into the approaching road. I will also point out the Enemy Track shown on the left made up of hexes numbered from 0-6. This represents the Combat Value of the attacking units as well as their number of soldiers. As the enemy takes hits from the rifle shots of the defenders, their Combat Value will drop making them easier to hit. Once they have taken enough hits to reduce the track to 0, the attacking unit will be removed from the board. The really interesting part of the combat is that you roll to hit but after you hit you also roll a D6 and modify the result by the defender abilities (such as +1 Casualties) as well as the modifiers listed in the circle that the attacking unit is currently located in. You will rarely eliminate an enemy unit with one hit and it will normally take 2-3 such hits to dispatch them.
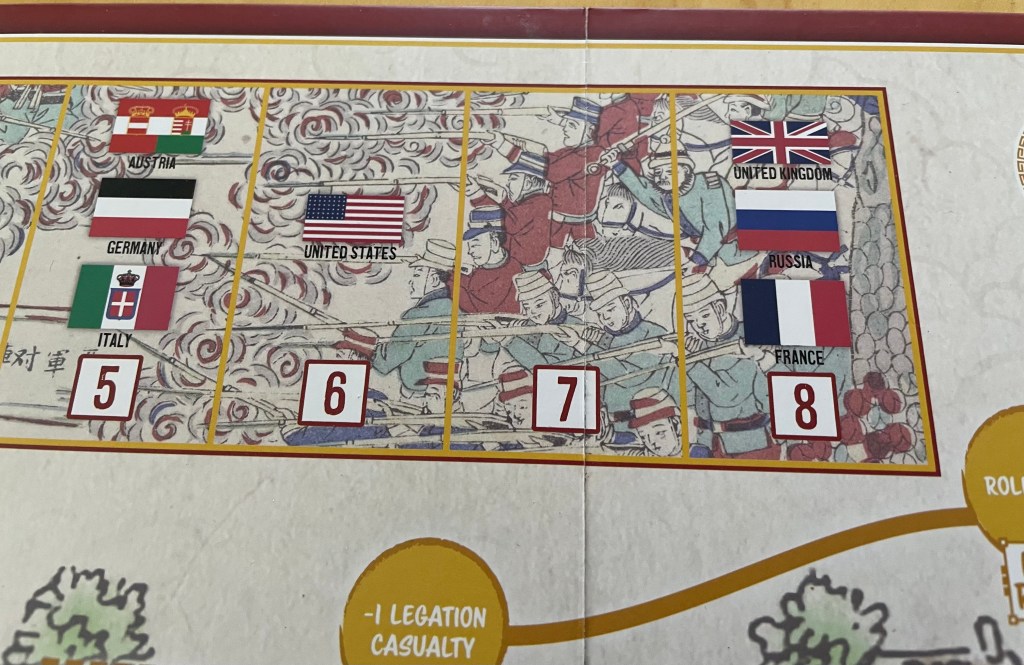
In the upper left hand corner of the main board is located the Eight Nation Alliance Casualty Track where each of the defending units, represented by a square counter placed in the Defender Boxes on the walls, tracks their casualties throughout the game. Each of these units has a different starting value and will degrade over time until the unit is rendered ineffective when it reaches the zero space. At that point, the unit on the board will be removed from the game and a hole in the walls defense will be exposed.
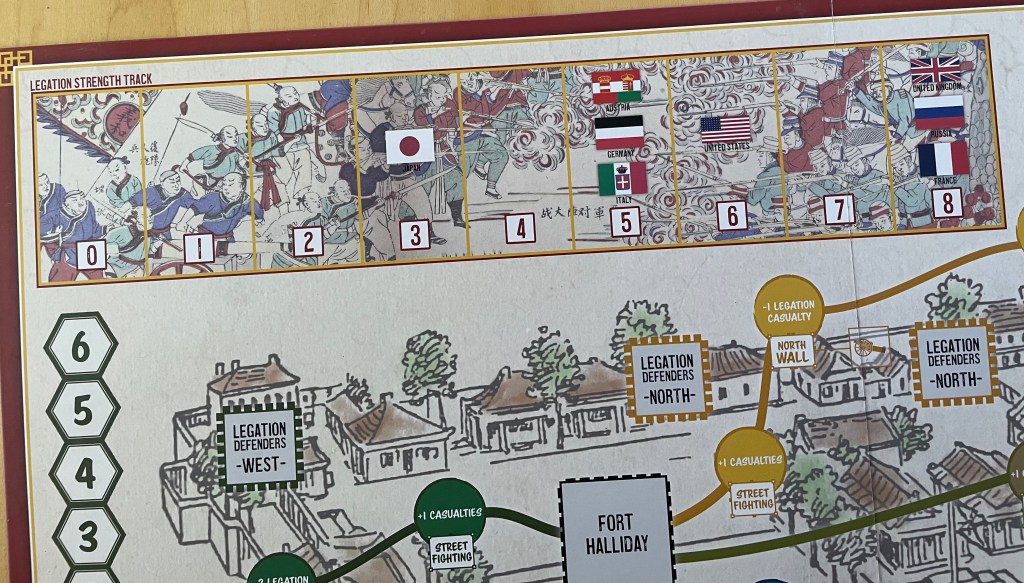
This box is very beautifully done as the background shows a painting of the fighting in the Legation Compound. Each of the nations flag is also shown here in their starting position and this box is extremely colorful and pretty to look at. Definitely very functional but also extremely aesthetically pleasing!
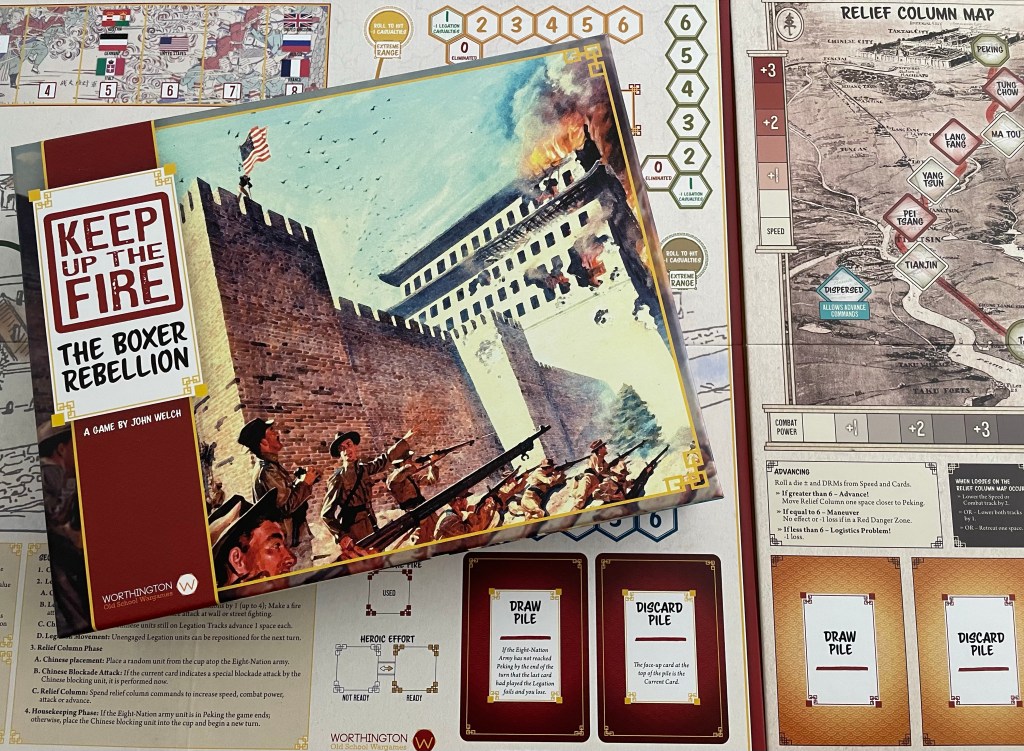
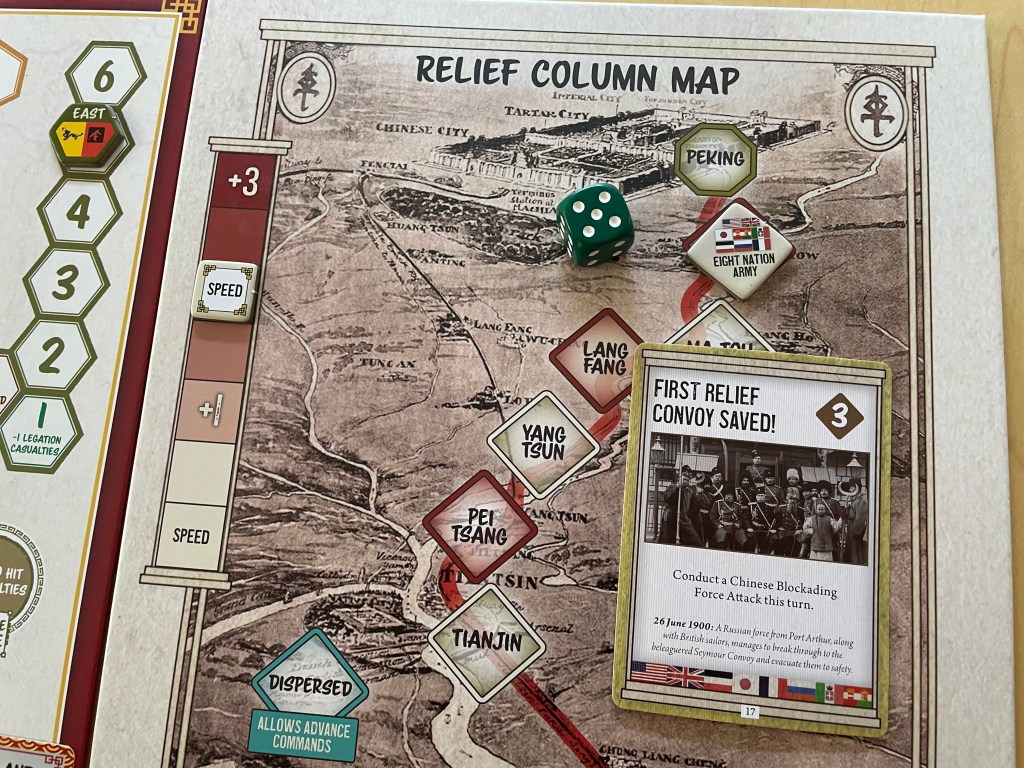
Next, we will take a look at the separate Relief Column Map that tracks the progress of the Eight Nation Alliance Relief Column army that is making their way across hostile Qing Army held territory to attempt to relieve the besieged Legation Compound in Peking. The Relief Column starts in Taku and must move space by space to get to Peking prior to the end of the Draw Deck or the fall of the Legation Compound. You will notice the two tracks on the side and bottom of the board which is the Column Speed and the Column Combat Value. The Speed Track is the modifier that the player will get to the die roll to attempt to advance a space on a track once the Qing Blocking Army is defeated. The Combat Value Track is the modifier the column will receive when attempting to defeat the Blocking Army. When I look at this board, I get the feeling that I am examining a topographical map of the area as we look for a means of advancing. The backdrop is that of a drawing of the countryside leading up to Peking and shows the flowing Peimo River and its tributaries. In the distance is a nice drawing of Peking showing its varied districts by name including Chinese City, Tartar City, Imperial City and the Forbidden City. In the corners of the board are found various Chinese characters which brings a feeling of connection to the subject.
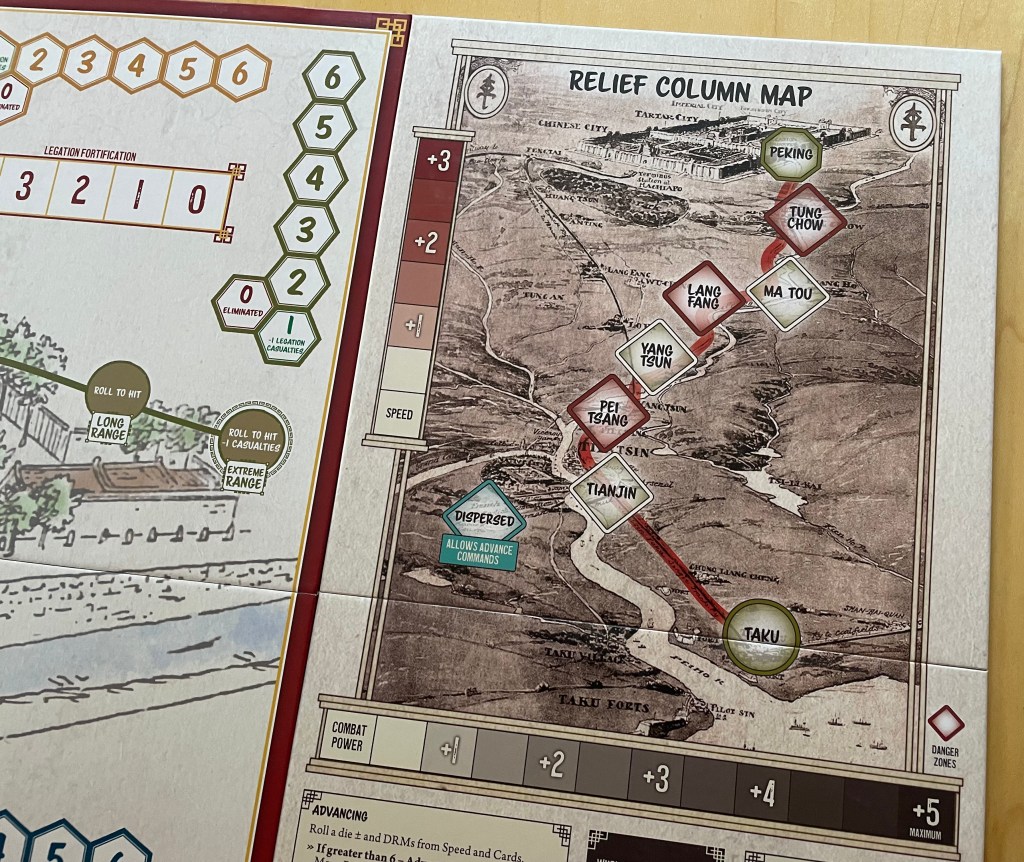
The Danger Zones, the squares that are shaded red, are dangerous areas for the Relief Column as various Events found on the Relief Column Cards may force them to retreat, take additional losses in combat or be unable to attack. These Danger Zones stand out from the other areas and reinforces the trouble that awaits the Relief Column in their difficult advance.
Finally, a good looking board is great but remember we are here to play the game and whether or not the board helps with that endeavor is also an important aspect to review when passing judgement on its aesthetic. And Keep Up the Fire! looks good but also is very functional as the entire Sequence of Play is printed on the bottom of the board along with the Combat Sequence and special features such as the Peitang Cathedral process.

The board also has spaces for the various card Draw Decks and Discard Pile. In addition to that, there are a few special areas where various counters are located including the Keep Up the Fire Box and Heroic Effort Box.
I have had a great time playing Keep Up the Fire!, partly because the board and its other components are absolutely beautiful and the production value on this one is extremely high, but also because it is an interesting game with some very tough choices to be made about how to best advance the Relief Column and defend the Legation Compound. I have played this one about half a dozen times and have only ever won once as I was able to move the Relief Column pretty quickly toward their goal of Peking.

We posted an interview with the designer John Welch on the blog and you can read that at the following link: https://theplayersaid.com/2021/02/15/interview-with-john-welch-designer-of-keep-up-the-fire-the-boxer-rebellion-deluxe-edition-from-worthington-publishing-currently-on-kickstarter/
Here also is a link to a video review put together by Alexander:
If you are interested in Keep Up the Fire! The Boxer Rebellion Deluxe Edition, you can order a copy for $75.00 from the Worthington Publishing website at the following link: https://www.worthingtonpublishing.com/collection/keep-up-the-fire-deluxe
The next board that we will take a look at in the series is Liberty or Death: The American Insurrection from GMT Games designed by Harold Buchanan and illustrated by Terry Leeds.
Here are links to the previous entries in the series:
Kekionga!: A Dark and Bloody Battleground, 1790 from High Flying Dice Games
Campaigns of 1777 in Strategy & Tactics Magazine #316 from Decision Games
Battle Hymn Volume 1: Gettysburg and Pea Ridge from Compass Games
From Salerno to Rome: World War II – The Italian Campaign, 1943-1944 from Dissimula Edizioni
This War Without an Enemy: The English Civil War 1642-1646 from Nuts! Publishing
Holland ‘44: Operation Market-Garden, September 1944 from GMT Games
Maori Wars: The New Zealand Land Wars, 1845-1872 from Legion Wargames
Imperial Struggle: The Global Rivalry – Britain & France 1697-1789 from GMT Games
Stilicho: Last of the Romans from Hollandspiele
Nevsky: Teutons and Rus in Collision, 1240-1242 from GMT Games
A Most Fearful Sacrifice: The Three Days of Gettysburg from Flying Pig Games
Donnerschlag: Escape from Stalingrad from VUCA Simulations
-Grant
