Continuing along in this new series devoted to the best looking boards found in the wargaming world where I will highlight the art and layout of a different board in a wargame that we have played to show you the various talents of the artists and graphic designers involved. In my humble opinion, a well designed and attractive board can make all the difference in the world to me enjoying a wargame. Don’t get me wrong, the game has to be good, but if it’s also good looking it always is a better experience. A board can draw me in. Can make me feel that I’m there. Can set the stage for the thematic immersion that we all crave. And I have found many of these type of boards and I want to make sure that I share them with you.
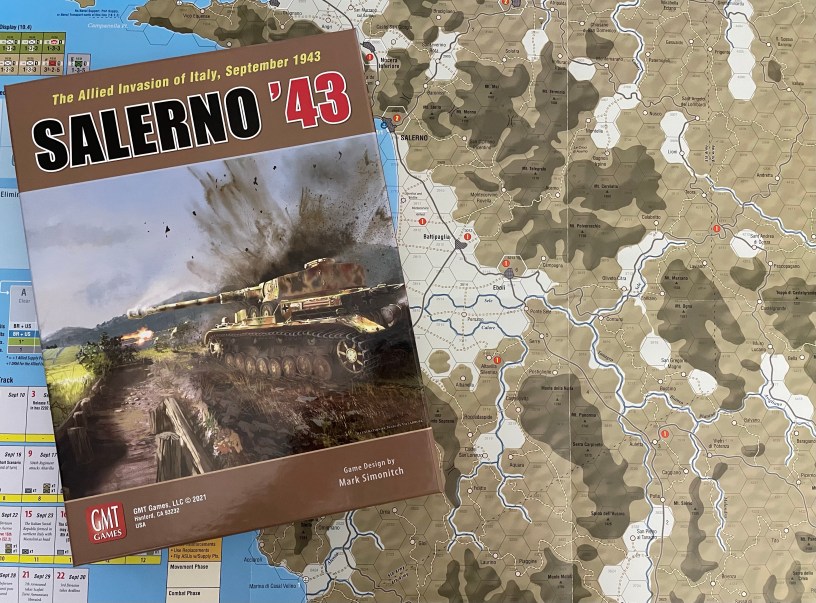
Mark Simonitch is a veteran game designer and artist as he typically does much of his own map and counter artwork and layout. This is now the 2nd time we have featured one of his boards in this series and it will not be the last. He has designed some really great wargames including titles such as Ardennes ’44: The Battle of the Bulge (2003) from GMT Games, Normandy ’44: D-Day and the Battle for Normandy (2010) from GMT Games, The U.S. Civil War (2015) from GMT Games and most recently Salerno ’43: The Allied Invasion of Italy, September 1943 (2022) from GMT Games. I would characterize Mark’s style as clear and very functional but he always puts nice touches on terrain and important aspects such as bridges, roads and cities. His maps just seem to pop and really set a great mood for his games.

Salerno ’43 is a regiment/brigade-level game on the Allied invasion of mainland Italy in September 1943. Two British and two American divisions land in the Bay of Salerno defended by the full strength 16th Panzer Division, which is soon reinforced by five other German mechanized divisions. For 8 days the survival of the beachhead is in doubt, and emergency measures are taken to reinforce the beachhead with the 82nd Airborne Division. With their counter-attack stopped and the British Eighth Army approaching from the south, the Germans withdraw their left flank to avoid being trapped. However, their right flank stubbornly holds back the British from pushing north to Naples.
The game is a well designed game that has a short scenario of 8 turns and a full campaign game of 24 turns. I think that this game is very good and will be one that you can play over and over again until you get the strategies down and can really stretch its legs at that point. But the game plays fast and furiously and was frankly a very good way to spend a Friday evening for 4 hours.
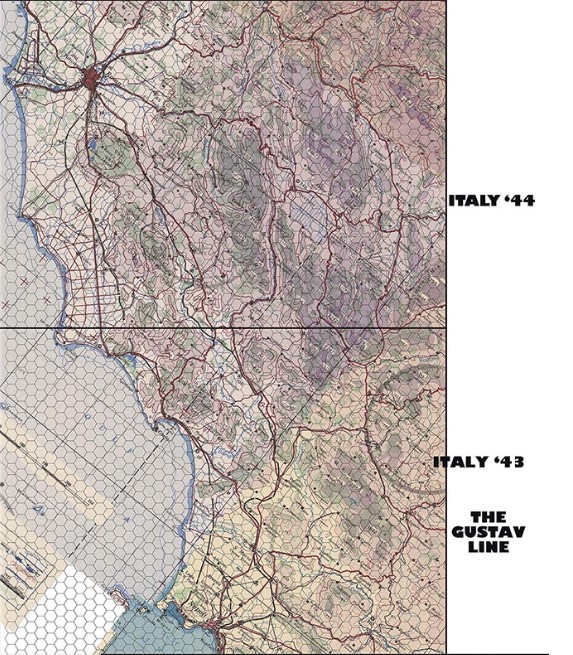
The good news is that there are two more games planned that will link with Salerno ’43. The Gustav Line (Italy 43′) will take the fighting through Naples, across the Volturno River, and up to Monte Cassino. Anzio ’44 (Italy ’44) will cover the Operation Shingle invasion and the fight at Cassino. Here is a map that can be found on the game page on the GMT Games webpage showing the general locations of the two follow-up volumes. These games are still a ways off though as Mark has been busy with a few other designs.
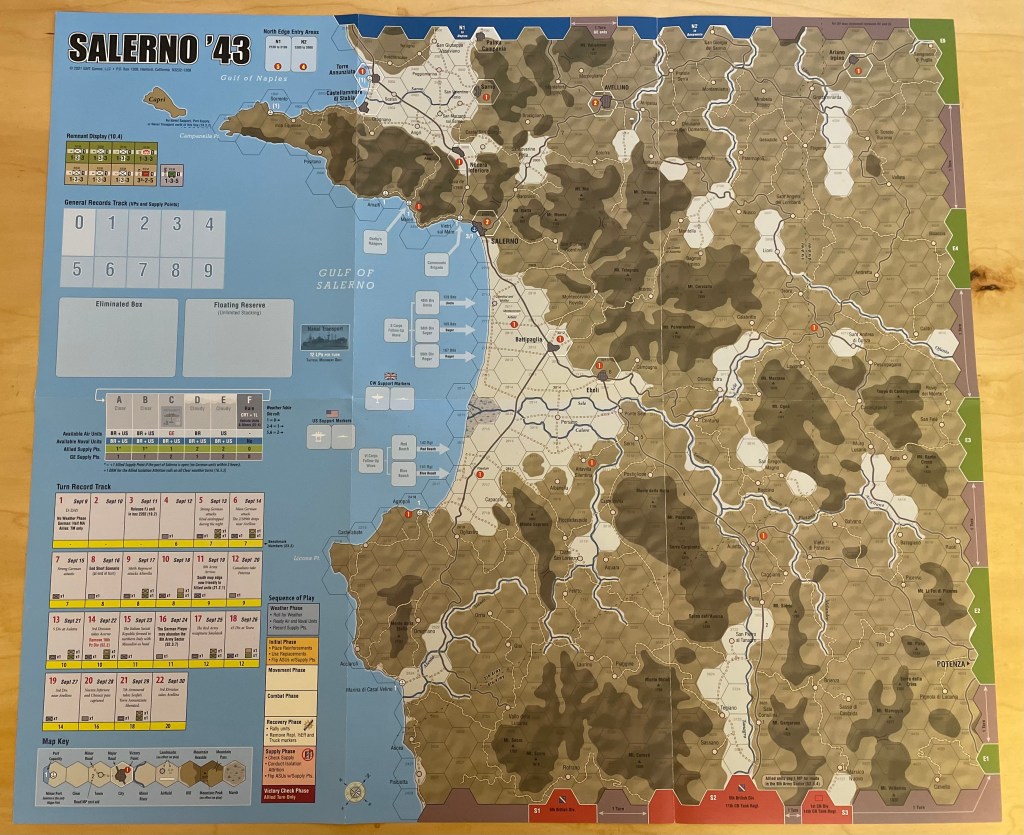
The board is a single sheet that measures 22″ x 25 1/2″ and is simply gorgeous to look at. The Gulf of Salerno takes up a full 1/3 of the board on the left and the ocean is used as dead space for the location of the various administrative tracks such as the General Records Track, Turn Record Track, Remnant Display, Weather Table, Available Air Units, Allied and German Supply Points and a simplified Sequence of Play to aid the players in going through the game.
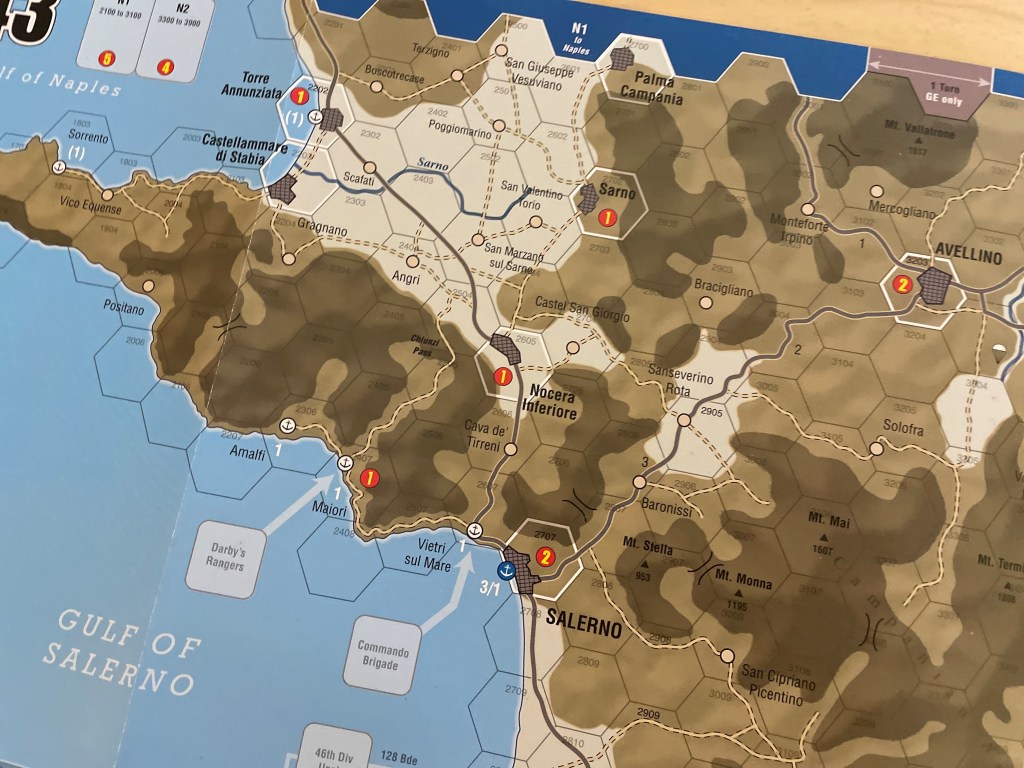
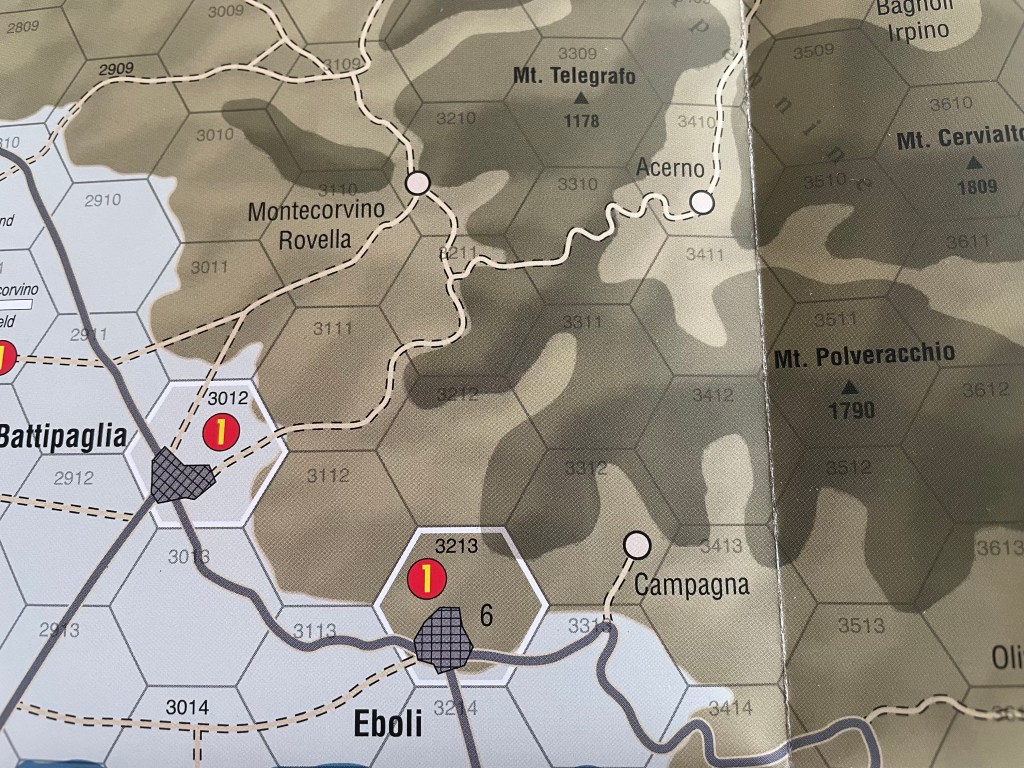
Terrain is the key to the Italian Peninsula. As a defender, you will have to only choose to defend a few key spots in order to box in the Allied advance. The mountains are the definite highlights, particularly those that are surrounding the Salerno Plain as they are very steep and rugged mountains. In the game, Mechanized units are not allowed to cross mountain hex sides and Non-Mechanized units will be Disrupted and likely out of supply if they do cross. The focus on the map is the Salerno Plain and the two main exits of that plain towards Naples in the north and east towards Eboli.
Units are always halved attacking across a Mountain hexside. In addition, any unit that moves or attacks across a non-road/non-pass Mountain hexside is Disrupted and can’t recover until it is back in supply. It represents them crossing but with with very little equipment. In later games in the system, Mark has let slip that he will include mule counters so players can bring supply across a Mountain hexside.
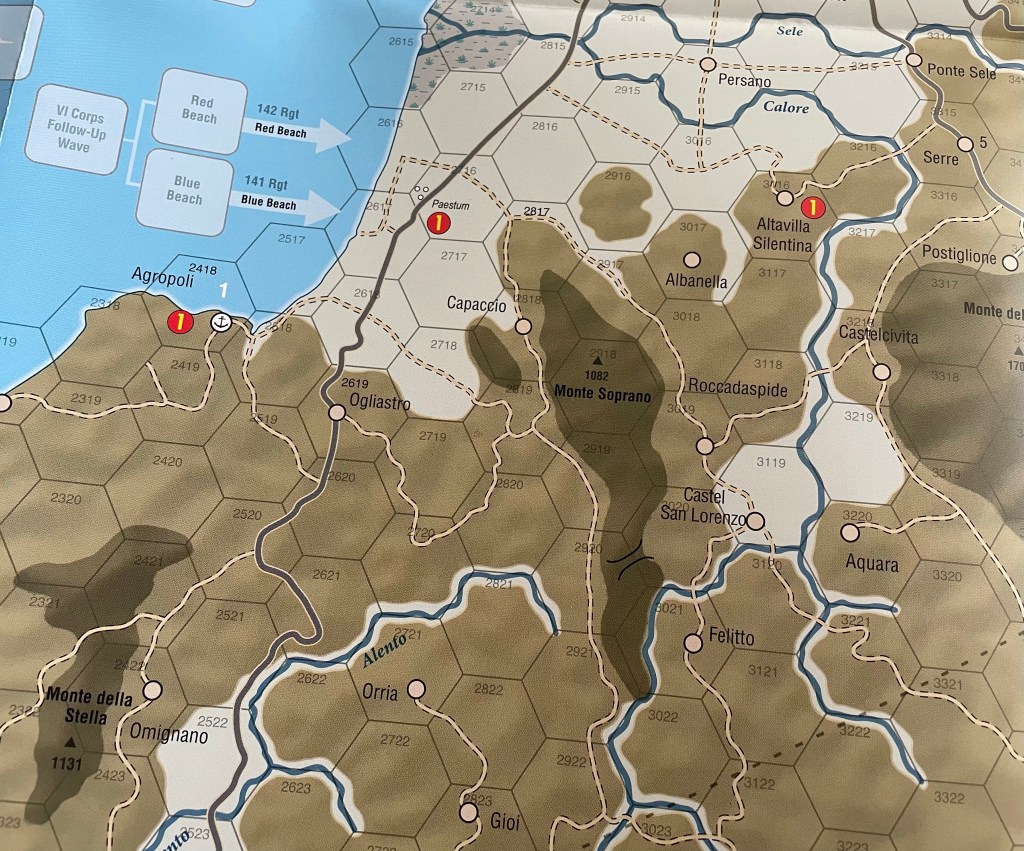
In the following picture, you can see the defining peak on the southside of the landing area is Monte Soprano and it has a very imposing feeling with the choice by Mark to use the darker browns to represent the higher elevation points. The road splits as it encounters the peaks in hex 2817 and goes around the bulk of the high ground. I love the look of this as it not only creates an interesting choice for the defenders and attackers on how to go about getting through this area but the roads as shown here graphically create a sense of a border for the lower foothills of the mountains. Such a very nice graphical feeling here of the elevation and its preeminence in this area!
The other key piece of terrain on the board is the type of roads that are available including Primary Roads and Secondary Roads. Primary Roads are represented by the thick black lines that look like proper roads in an atlas. While Secondary Roads are represented by a tan line that has a dashed black border. The movement costs for Non-Mechanized units is 1 per hex of either of these road types but for Mechanized units, including Tanks, Trucks and Mechanized Infantry, the movement cost for a Primary Road is 1/3 movement point and for a Secondary Road is 1/2 movement point. This is extremely important for the Germans as their reinforcements come from either the top of the map or the bottom of the map and if you don’t include the movement benefits for the roads it will take 3-4 turns to get to the front where those units are needed. The roads are laid out on the board with a serpentine twist and really follow the flow of the landscape in the mountains.

On the north side of the landing area is the City of Salerno. The first thing that jumps off the page graphically to me about this city is the use of the dark grey cross hatching that shows that this is a population center. This cross hatching is reminiscent of buildings and development and shows the mass and weight of the area. As you know, the Allies chose this area due to the beaches being open and clear with good water depth and excellent sea approaches with a lack of shoals. The city itself was a key staging area for future offensives toward Rome and you can definitely feel the gravity of that area due to the choice of color and design. You may also notice that other population centers on the board, namely Nocera Inferiore to the north and Sarno and Avellio to the northeast, have the same cross hatching showing their population and strategic importance.
Ports in the game are very important as they allow for the players to use Naval Transport as well as act as Supply sources for troops that might be cut off from the main force as they invade the coastal areas to the west of Salerno. On the board, the major Ports are blue colored circles with an anchor in the center and the minor Ports are white colored circles with an anchor. I like the look of these Ports and was very impressed that they stuck out so well against the brown colors used for the elevated hills and mountains as well as the blue color of the ocean. You may also see a bit of a difference on the board of the Ports located at Sorrento and Torre Annunziata. These areas had heavy naval mines laid in the Bay of Naples which hindered the Allies from using these ports. In the game, these two Ports may not be used for any purpose (transport or supply) and their Landing Point value is in parentheses to indicate this.
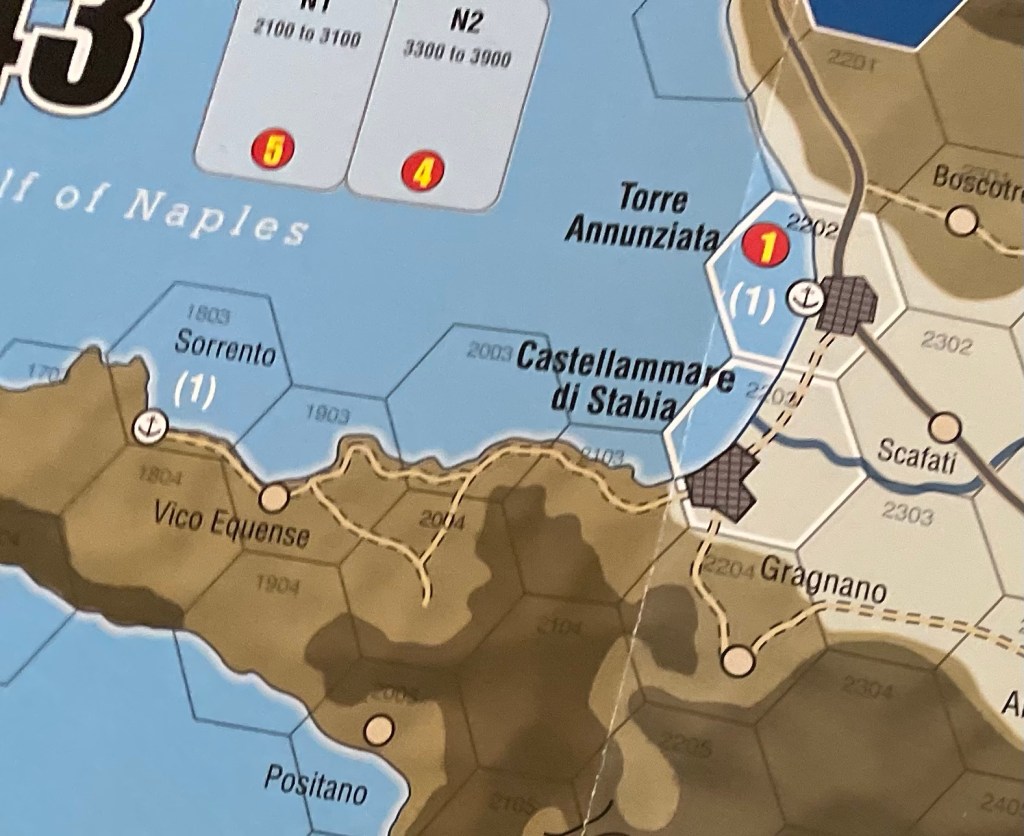
You may also notice that there is a distinct lack of the Amalfi Coast Road located to the west of Salerno along the Gulf of Salerno that runs between the towns of Amalfi and Sorrento. Mark Simonitch intentionally left this road off of the board due to some issue with playtesters who were using it to supply a multi-division force along the road to rush up the west coast. This famous scenic road, which runs along cliffs and through tunnels, would never have been used to supply even a single regiment as it was far too vulnerable to sabotage and demolition and also a very twisting and difficult road.
The layout of the mountains and the roads being where they have to due to terrain also means though that the Allied player can plan on the German reinforcements coming from specific areas and this is a benefit as this allows for them to move their units where needed and to get them into favorable terrain for defense once contacted. I love that the terrain causes these limited axis of advance options as it makes it pretty tough on both sides. There are only a few ways to get where you need to be and you must not stray from those areas. It really reminds me a lot of Hell’s Highway in Holland ’44. The terrain in Salerno ’43 is a major character and you must figure it out in order to accomplish what you need to do and also to do it well!
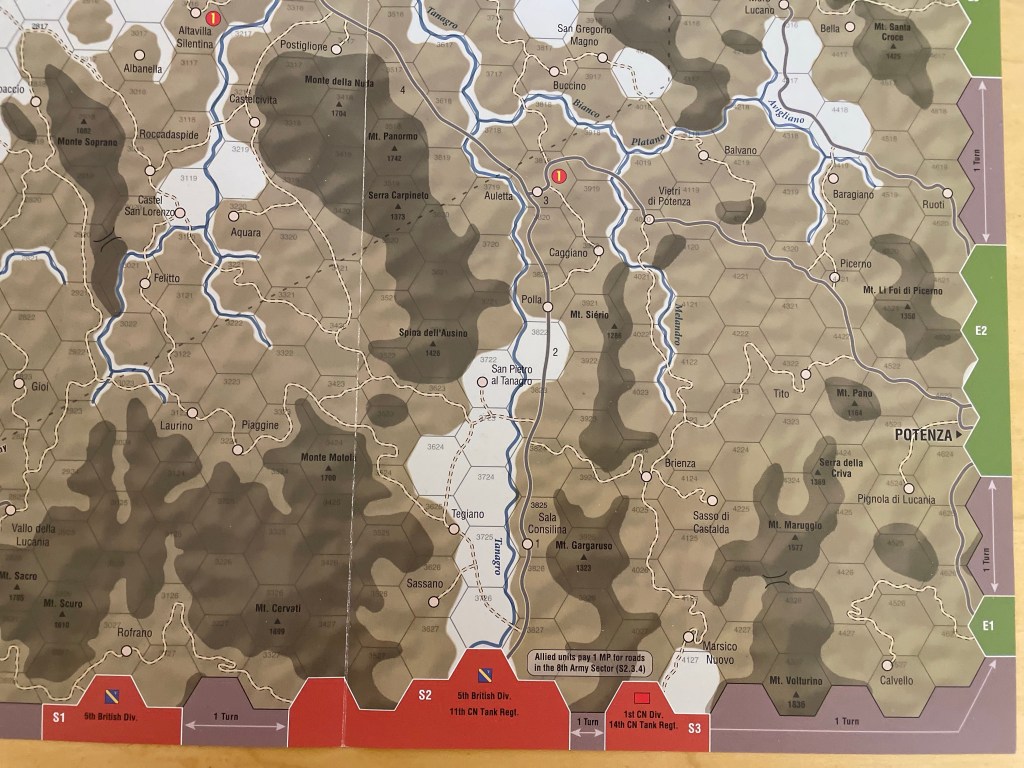
There are several Entry Areas located on the board and they are identified by both a color and a letter and number such as E5 or E4, etc. Allied 5th Army Reinforcements are placed in the Floating Reserve Box found on the left side of the board in the ocean while the Eighth Army reinforcements
and all German units are placed in an Entry Area according to their Entry code: N = north map edge, S = south map edge and E = east map edge. German reinforcements may arrive in any Entry Area matching their entry code. Allied 8th Army reinforcements must arrive in the Entry Areas specified on the reinforcements schedule. In the picture below, you can see both the S or South Entry Area and E or East Entry Area on the map edge which is colored red and green.
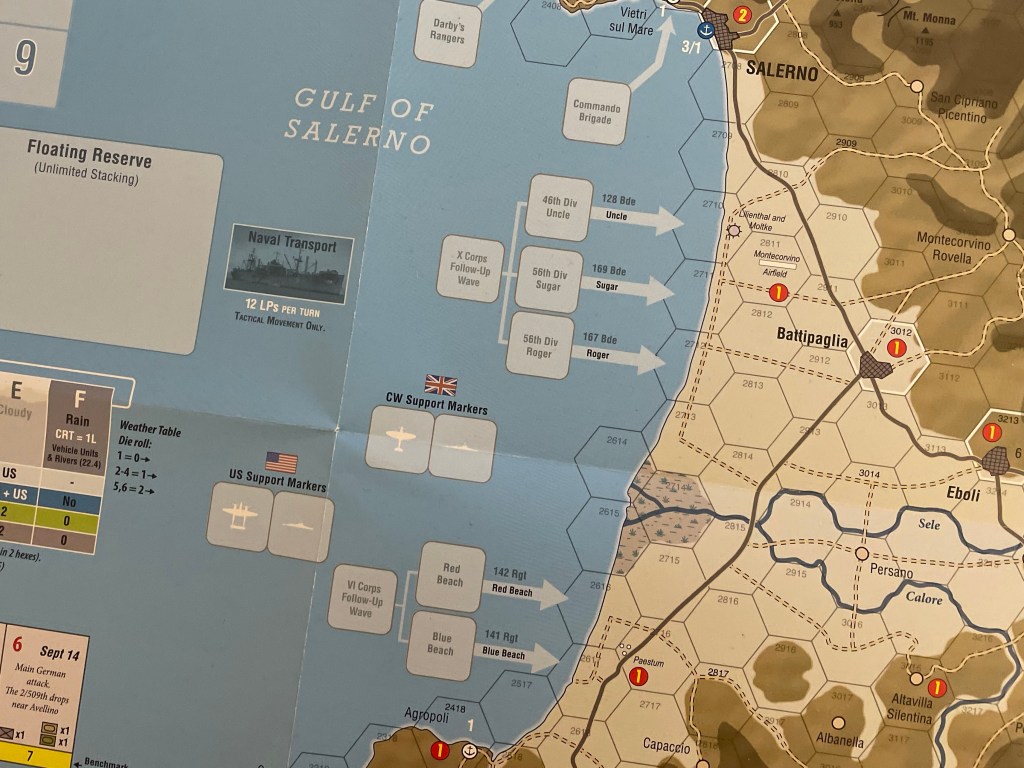
Let’s now take a look at the landing areas where the Allies chose to come ashore to drive out the German occupiers. As you can see in the picture below, there are 9 Allied Landing Boxes in the form of beaches/ports, 5 for the Commonwealth and 4 for the Americans. These are designated from north to south as Rangers, Commandos, Uncle, Sugar, Roger and a 2nd Wave area behind them, then Red Beach, Blue Beach and a 2nd Wave area behind. The landings use a special CRT called the Invasion CRT and it has 3 columns, one for just the Rangers and Commandos, one for Uncle Beach and then one for all other beaches. There are no modifiers for this CRT and the player simply rolls for each of the invading stacks of units and the consults the appropriate table for the results. There are also spaces for Support Markers such as Air Support units and Naval units that have limited ability to fire on beach hexes. The arrows coming from these Landing Boxes is a very nice touch and gives the players the impression of motion and advancing upon those beach areas.
Once the Allied player is on the beaches, they have a very daunting task ahead of them as the terrain once again raises its ugly head here and provides plenty of opportunities for the defending Germans to settle in and snuggle themselves in between the various mountains and hills located to the east. Mt. Telegrafo, Mt. Polveracchio and Mt. Cervialto all present foreboding dark obstacles to the Allies. I love the use of the different shades of brown for the elevated terrain as I have said before. I also really like the effect that Mark used of shading the lighter foothills to give them a bit of depth and to avoid just having a straight flat color. This shading almost seems to outline the slowly rising ridges and knolls of the foothills as they advance into the higher and darker colored elevations. This effect is found all over the board and is a really nice touch by Mark to give this board some real depth and a feeling of presence. As you look at the board you can literally feel the elevation and I think that an artist able to accomplish that with just a flat piece of paper and some color has some real palpable skill and ability.
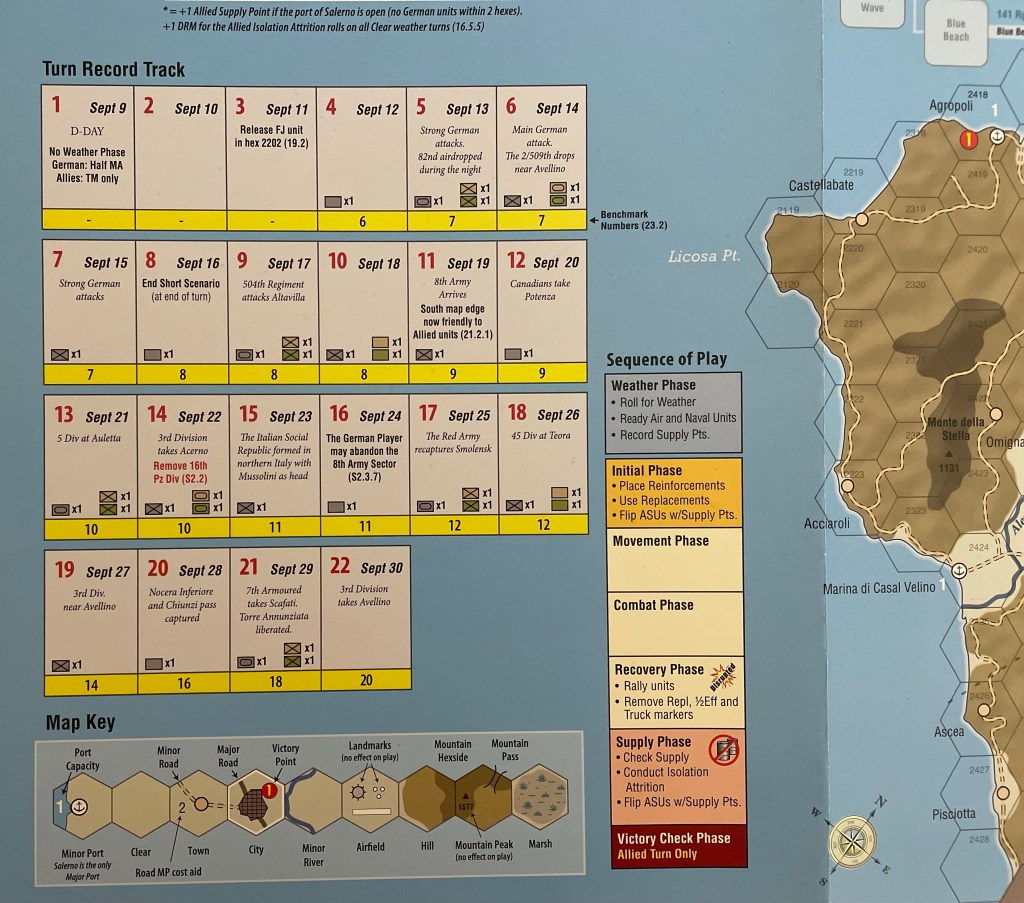
As we always do tin these posts, we have to take a look at the on-board play aids that help the players keep track of important in-game information such as the Turn Record Track. As is the case in all of these games from Mark and GMT Games, the Turn Record Track is very clear and prominent on the board and provides all of the required game information such as turn number, the date, reference to various historical bits of information, unit availability and termini of the various scenarios.
The Sequence of Play is also conspicuous in this area and is a great aid to keep the players focused on the game and to keep them out of the rulebook as much as possible and their mind on the tactics and strategies they must use to either advance the invasion inland or stop it cold in its tracks. The final aid on the board is the Terrain Effects Chart and it is very well done with clear examples of each type of terrain found in hexes on the board as well as bits of very helpful information about markings. A perfect example of how a wargaming board should be organized and laid out to assist the players in playing the game.
Aside from being a great looking and well organized board, the game itself is superb and serves as both an introductory entry into the ’40X Series of games designed by Mark Simonitch but also that provides lots of great opportunities for wargamers to expose new gamers to the hobby with a both attractive product and an easy to grock set of rules and game. We had a blast with this one and would love to get it back to the table soon.
Here is a look at our unboxing video for the game showing off the fantastic components:
Here also is a link to our interview with the designer Mark Simonitch and you can read that at the following link: https://theplayersaid.com/2021/05/17/interview-with-mark-simonitch-designer-of-salerno-43-from-gmt-games/
We also did a video review and you can watch that at the following link:
If you are interested in Salerno ’43, you can order a copy from the GMT Games website for $42.00 from the following link: https://www.gmtgames.com/p-868-salerno-43.aspx
The next board that we will take a look at in the series is Bayonets & Tomahawks: The French and Indian War from GMT Games designed and illustrated by Marc Rodrigue.
Here are links to the previous entries in the series:
Kekionga!: A Dark and Bloody Battleground, 1790 from High Flying Dice Games
Campaigns of 1777 in Strategy & Tactics Magazine #316 from Decision Games
Battle Hymn Volume 1: Gettysburg and Pea Ridge from Compass Games
From Salerno to Rome: World War II – The Italian Campaign, 1943-1944 from Dissimula Edizioni
This War Without an Enemy: The English Civil War 1642-1646 from Nuts! Publishing
Holland ‘44: Operation Market-Garden, September 1944 from GMT Games
Maori Wars: The New Zealand Land Wars, 1845-1872 from Legion Wargames
Imperial Struggle: The Global Rivalry – Britain & France 1697-1789 from GMT Games
Stilicho: Last of the Romans from Hollandspiele
Nevsky: Teutons and Rus in Collision, 1240-1242 from GMT Games
A Most Fearful Sacrifice: The Three Days of Gettysburg from Flying Pig Games
Donnerschlag: Escape from Stalingrad from VUCA Simulations
Keep Up the Fire!: The Boxer Rebellion Deluxe Edition from Worthington Publishing
Liberty or Death: The American Insurrection from GMT Games
Lanzerath Ridge: Battle of the Bulge from Dan Verssen Games
-Grant
