Continuing along in this new series devoted to the best looking boards found in the wargaming world where I will highlight the art and layout of a different board in a wargame that we have played to show you the various talents of the artists and graphic designers involved. In my humble opinion, a well designed and attractive board can make all the difference in the world to me enjoying a wargame. Don’t get me wrong, the game has to be good, but if it’s also good looking it always is a better experience. A board can draw me in. Can make me feel that I’m there. Can set the stage for the thematic immersion that we all crave. And I have found many of these type of boards and I want to make sure that I share them with you.

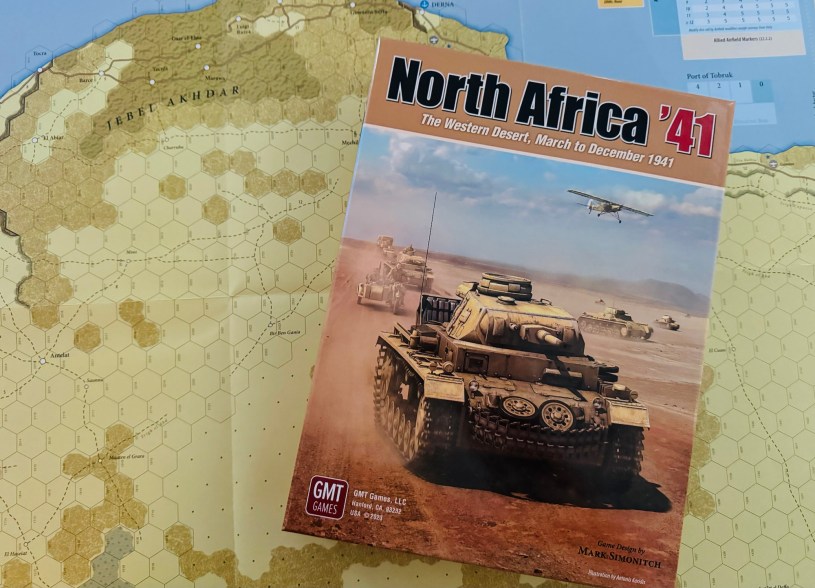
Mark Simonitch is a veteran game designer and artist as he typically does much of his own map and counter artwork and layout. This is now the 3rd time we have featured one of his boards in this series and it will not be the last. He has designed some really great wargames including titles such as Ardennes ’44: The Battle of the Bulge (2003) from GMT Games, Normandy ’44: D-Day and the Battle for Normandy (2010) from GMT Games, The U.S. Civil War (2015) from GMT Games and Salerno ’43: The Allied Invasion of Italy, September 1943 (2022) from GMT Games. I would characterize Mark’s style as clear and very functional but he always puts nice touches on terrain and important aspects such as bridges, roads and cities. His maps just seem to pop and really set a great mood for his games. Such is the case with the board for North Africa ’41: The Western Desert, March to December, 1941 from GMT Games. I always love a good North Africa wargame! To me, the reasons that I love it are several but the focus on supply and how difficult it was in this theater as well as the various elements of infrastructure used to perform that supply, such as shipping, ports, trucks, etc. are always good fun. I also love the scope and scale of the North African Theater. The front covered an area over 2,000 or so miles stretching from Morocco on the western coast of the Atlantic, through Algeria, Libya and onto Egypt. Names such as Tunis, Kasserine Pass, Tripoli, Benghazi, Tobruk, El Alamein, Malta (I realize not a part of Africa but an important cog in this theater) and Alexandria. There is something about this theater and the games we have played we have absolutely loved.
Well, when you pair this interesting theater with a great system in the ’40X Series and a great designer and artist in Mark Simonitch, you have a recipe for a really tasty treat! And after playing the game in 2023, I was amazed with how much I loved it even though many of the systems and hallmarks of the ’40X Series, such as the infamous ZOC Bonds, were not really present but there were other interesting things to take their place. And then there was the beauty of the board.
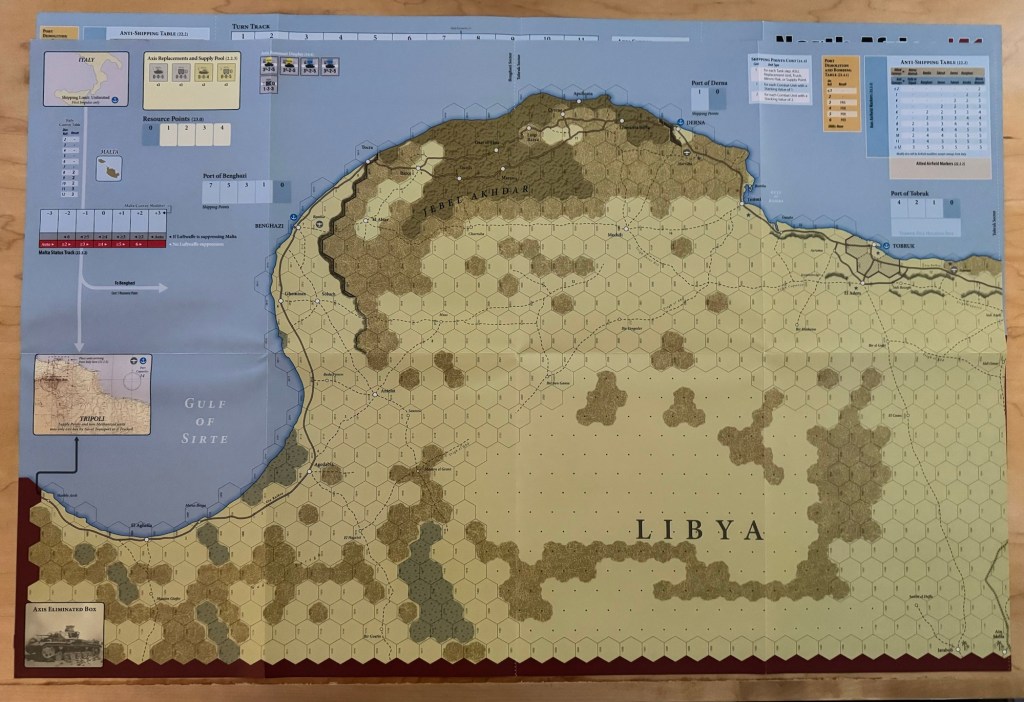
The game comes with 2 large boards, including a 22” x 34” Map Sheet and a 22” x 28” Map Sheet. These 2 boards laid out take up quite a lot of space on your gaming table and will not be easy to find plexiglass that matches the size unless you play smaller scenarios and intend on using just one of the 2. But when both are laid out, they are a breathtaking sight!
One of the things about a North Africa game is the size and scope of the theater. The front covered an area over 2,000 or so miles stretching from Morocco on the western coast of the Atlantic, through Algeria, Libya and onto Egypt. Names such as Tunis, Kasserine Pass, Tripoli, Benghazi, Tobruk, El Alamein, Malta (I realize not a part of Africa but an important cog in this theater) and Alexandria. There is something about this theater and size that is impressive. And the size of the boards equals that scope.

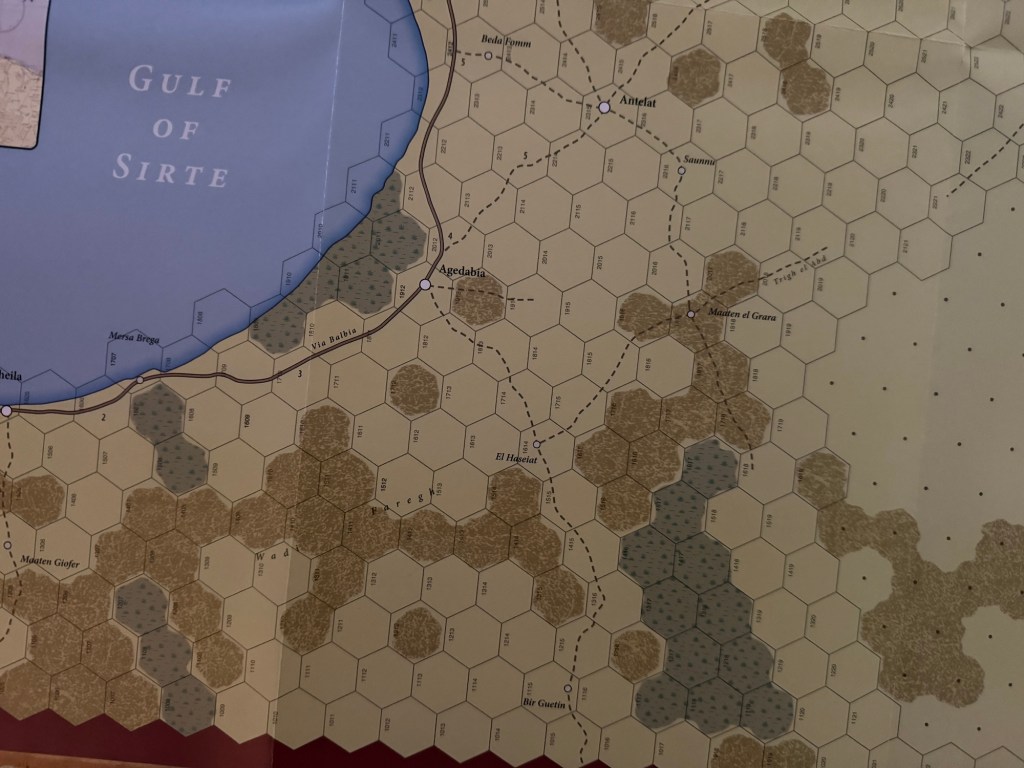
You might be thinking that I am daft. I mean how can a game set in the deserts of North Africa using all those shades of brown, tan, sandy yellow and grey be nice to look at?!? Well you might have a point but the overall aesthetic of the board just works and I found myself staring at the board a lot as we played. There is a lot of detail on the board itself including various terrain elements, an interconnecting web of roads, towns, cities, ports and other important features that all stand out against the backdrop of the lighter color scheme.
For example, here is a closer look at the area of the Jebel Akhdar, which is a heavily forested, fertile upland area located in northeastern Libya. It is located in the modern districts of Derna, Jabal al Akhdar and Marj and consists of a mountainous plateau rising to an altitude of 3,000 ft. cut by several valleys and wadis. It forms the north-western part of the peninsula that sticks north into the Mediterranean Sea, with the Gulf of Sidra on the west, and the Levantine Basin on the east. Here Mark uses darker shades of brown to set this area off from the surrounding desert that has just the plain tan tone used. This area of the board typically is used for unit transport from the ports to the west Benghazi and the Sirte Box which is an abstracted transit box connecting back to Italy through Malta.
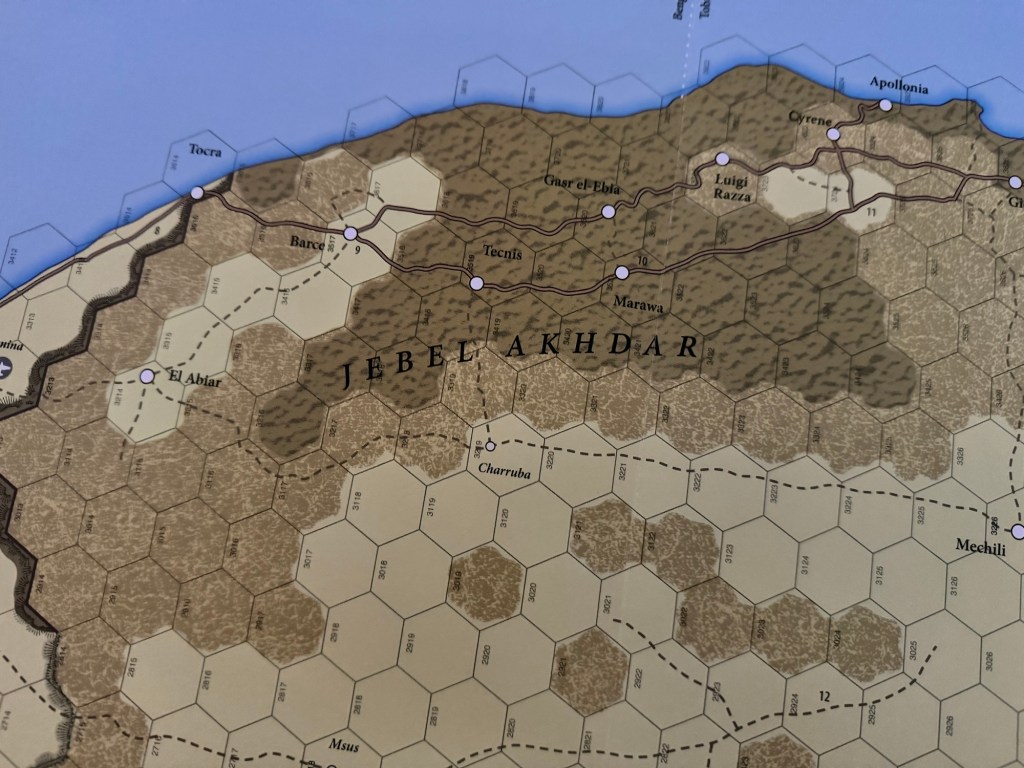
One of the nice graphical touches here is the use of various broken up dark colors like black and gray to represent elevated terrain and mountains. You can see the black highlights of lines that represent the rise and fall of the high plateau in the area and it gives this area some form of substance as the hexes seem to be solid and immovable obstacles that can only be traversed on the lonely single lane tracks (roads) that run through the area. These tracks are the Allied players lifeblood as they will have to get a continual transit of truck units bringing units and supply points and then returning back to the ports to pick up more. The trucks have Extended Movement as long as they are on the tracks and can cover a considerable amount of terrain in each movement phase.
One other comment about the terrain and its effect on gameplay. I feel that if you cannot master the land and how to maneuver through its inhospitable terrain you will find your units and your efforts are in trouble. One recommendation that I have for new players of this one is to take some time to study the layout of the boards looking specifically for pinch points and bottlenecks where units can get jammed up but also to pick out key solid defensive positions and roadblocks where you can effect enemy supply and movement to prevent your units from getting outflanked and eliminated and also cause delay to your enemy’s movements.
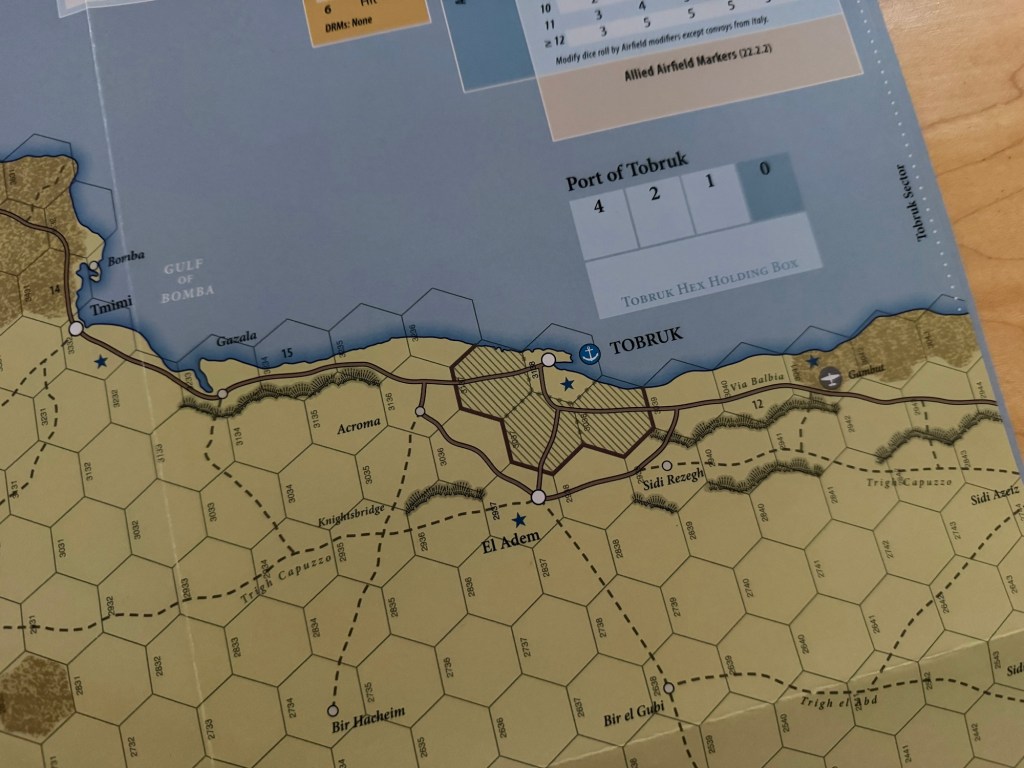
As we continue looking to the east of the Jebel Akhdar we come to the port of Derna. You will notice the Port Box that is located above the anchor symbol in the Mediterranean Sea. The number showing on the port is its Port Capacity and is then multiplied by 2 to determine the number of units it can keep in supply. Port Supply is identical to regular supply except Ports may only supply these limited number of units. The player controlling the port must then decide which units are in supply and which are not during each of their friendly Supply Phases. The Axis player will get to supply a number of units on the board that totals the supply they derive from their various ports. Ports may be damaged by the owning player (if in the case of having to vacate but not wanting the invader to benefit from the port) or the enemy player. No matter the case, the process to damage a port is the same and involves rolling one die and consulting the Port Demolition and Bombing Table. Each hit scored will move the Port Capacity marker one to the right on the Port Track. This is very important to the game and I really enjoyed this action.
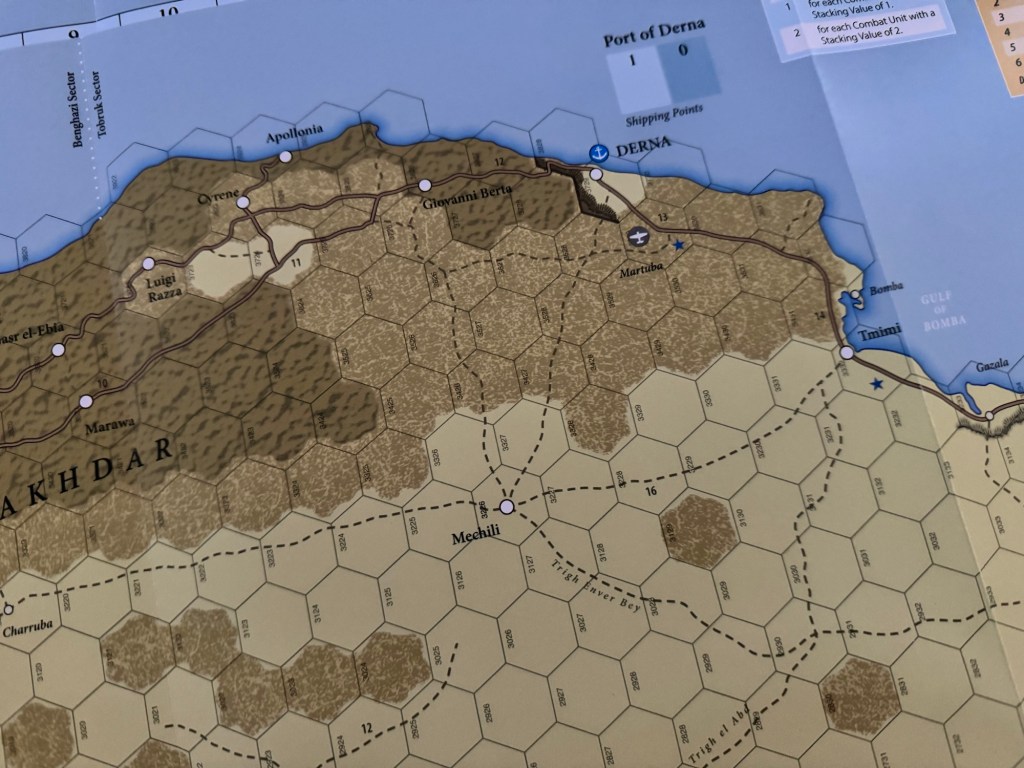
As we move to the east, we come to the major Port of Tobruk where lots of the action will take place. Tobruk is a key piece of the North African puzzle militarily and has a strong naturally protected deep harbor. It is probably the best natural port in northern Africa, although due to the lack of important nearby land sites it is certainly not the most popular. The city is effectively surrounded by a desert lightly populated with nomadic herdsmen who travel from oasis to oasis.
There are many escarpments located to the south of Tobruk, as is common across Cyrenaica and the eastern half of Libya. These cliffs generally have their high sides to the south and their low sides to the north. This constitutes a substantial physical barrier between the north and south of Libya in the Tobruk area. As you can see on the board, these are identified by dark and thick lines across the north hexside of each Escarpment hex and then there is cross hatching and lines that flow downhill showing the slope and its direction. Non-Mechanized units must spend one additional MP to cross an Escarpment hexside and Mechanized Units are prohibited from crossing them. This creates quite the barrier to movement in and around Tobruk and must be wisely used by the defender to slow the Axis advance and siege. I just love the graphic representation here as it feels permanent and solid and gives me the impression that I shouldn’t mess with this terrain.
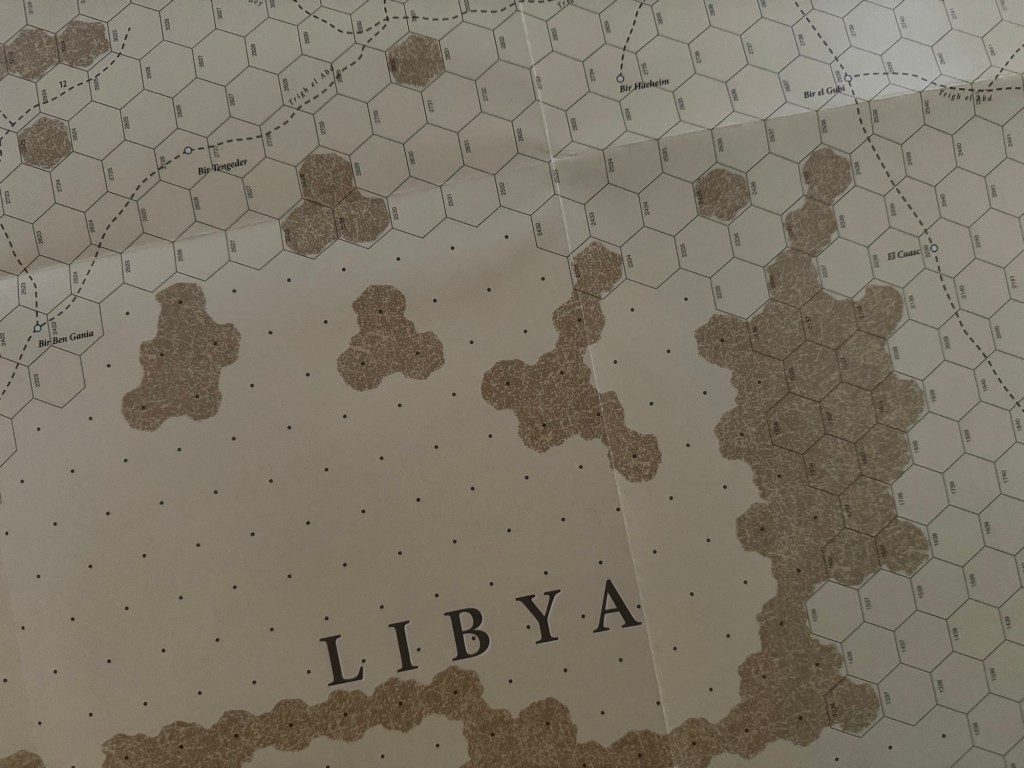
Another very interesting graphics choice was how Mark chose to represent the Trackless Desert terrain on the board. Trackless Desert is distinguished on the map by the absence of the hexagonal grid found in the more playable portions of the board. This is simply a graphics solution chosen to highlight the area and also to minimize its sense of use in the game and for all purposes the hexes still exist. No unit may move, Retreat or Advance After Combat into more than two consecutive Trackless Desert hexes in a single Movement or Combat Phase. After moving into a second Trackless Desert hex, the unit must either stop or, if it can, continue movement in non-Desert hexes. These Trackless Desert hexes are mostly found in Libya on the bottom or southern most part of the board.
Marshes are also identified clearly on the board and are the lone feature that uses gray with smaller green dashes and bushy looking grasses sticking up. These don’t really effect game play at all though as the roads through the areas where Marshes are located off the Gulf of Sirte and Qatarra Depression near Alexandria have a good network of roads that players will not want to stray from. I do always appreciate how artists tackle these types of terrain and it seems that the tufts of grass are a somewhat universal sign for them. The added green color is a nice touch though on a board that is general monochromatic with its other terrain features and hex colorizations.
While this is not the best board that I have highlighted in this series, it truly is a magnificent example of a desert war game done well. It is very easy for artists depicting deserts in North Africa to simply over use tan and brown. Mark did use his fair share of these colors, after all what other colors are you supposed to use, but he also broke the colors up with interesting uses of accents, tones and terrain features such as Escarpments to bring life to the sands. I just really love this game and probably am projecting my love of the game to the board but I do think that this one is a good looking example of wargame art!
If you want to know more, you can check out our video review at the following link:
I also wrote an in-depth look at the game and its systems in my First Impressions post and you can read that at the following link: https://theplayersaid.com/2024/01/24/first-impressions-north-africa-41-the-western-desert-march-to-december-1941-from-gmt-games/
If you are interested in North Africa ’41: The Western Desert, March to December, 1941, you can order a copy for $65.00 from the GMT Games website at the following link: https://www.gmtgames.com/p-962-north-africa-41.aspx
The next board that we will take a look at in the series is Battles of the American Revolution Volume II: Brandywine from GMT Games designed by Mark Miklos and illustrated by Charles Kibler.
Here are links to the previous entries in the series:
Kekionga!: A Dark and Bloody Battleground, 1790 from High Flying Dice Games
Campaigns of 1777 in Strategy & Tactics Magazine #316 from Decision Games
Battle Hymn Volume 1: Gettysburg and Pea Ridge from Compass Games
From Salerno to Rome: World War II – The Italian Campaign, 1943-1944 from Dissimula Edizioni
This War Without an Enemy: The English Civil War 1642-1646 from Nuts! Publishing
Holland ‘44: Operation Market-Garden, September 1944 from GMT Games
Maori Wars: The New Zealand Land Wars, 1845-1872 from Legion Wargames
Imperial Struggle: The Global Rivalry – Britain & France 1697-1789 from GMT Games
Stilicho: Last of the Romans from Hollandspiele
Nevsky: Teutons and Rus in Collision, 1240-1242 from GMT Games
A Most Fearful Sacrifice: The Three Days of Gettysburg from Flying Pig Games
Donnerschlag: Escape from Stalingrad from VUCA Simulations
Keep Up the Fire!: The Boxer Rebellion Deluxe Edition from Worthington Publishing
Liberty or Death: The American Insurrection from GMT Games
Lanzerath Ridge: Battle of the Bulge from Dan Verssen Games
Salerno ’43: The Allied Invasion of Italy, September 1943 from GMT Games
Bayonets & Tomahawks: The French and Indian War from GMT Games
Undaunted: Normandy from Osprey Games
Traces of War from VUCA Simulations
SCS Ardennes II from Multi-Man Publishing
Almoravid: Reconquista and Riposte in Spain, 1085-1086 from GMT Games
Walking a Bloody Path: The Battle of Fallen Timbers, August 20, 1794 from High Flying Dice Games
All Bridges Burning: Red Revolt and White Guard in Finland, 1917-1918 from GMT Games
Storm Over Jerusalem: The Roman Siege from Multi-Man Publishing
Iron, Blood, Snow & Mud from PHALANX
-Grant

Thanks Grant. This game board has meaning for me. My father was a Canadian pilot who flew missions in a Wellington bomber from mid 1942 to mid 1943 from bases near Cairo against places like Tobruk and Derna.
LikeLiked by 1 person
Nice. Thanks for sharing.
LikeLike