
I have been scouring the earth for good games covering one of my favorite historical periods in the American Revolutionary War. I have played 12 of them to date, and you can read about them in my Gaming the American Revolution – Ranking the Games We Have Played post that I update every year around the 4th of July.
One new game that I found and played is Don’t Tread on Me: The American Revolution Solitaire Board Game from White Dog Games. Don’t Tread On Me is a strategic-level solitaire simulation of the American Revolution and is based on the popular Vietnam Solitaire: Special Edition game system from White Dog Games. This game though takes a very different perspective on the conflict as the player plays as the British side along with American Loyalist forces against the forces of George Washington and the Continental Congress as controlled by the game system’s AI. I really like this one as it is not only about battle, although it does definitely have its share of conflict, but it features a number of interesting aspects about the revolution including political control, state loyalty levels which change over time and due to events and the outcomes of battles, and even a system dealing with the naval aspect of the conflict in dealing with smugglers and their attempt to bring the rebels arms and ammunition.
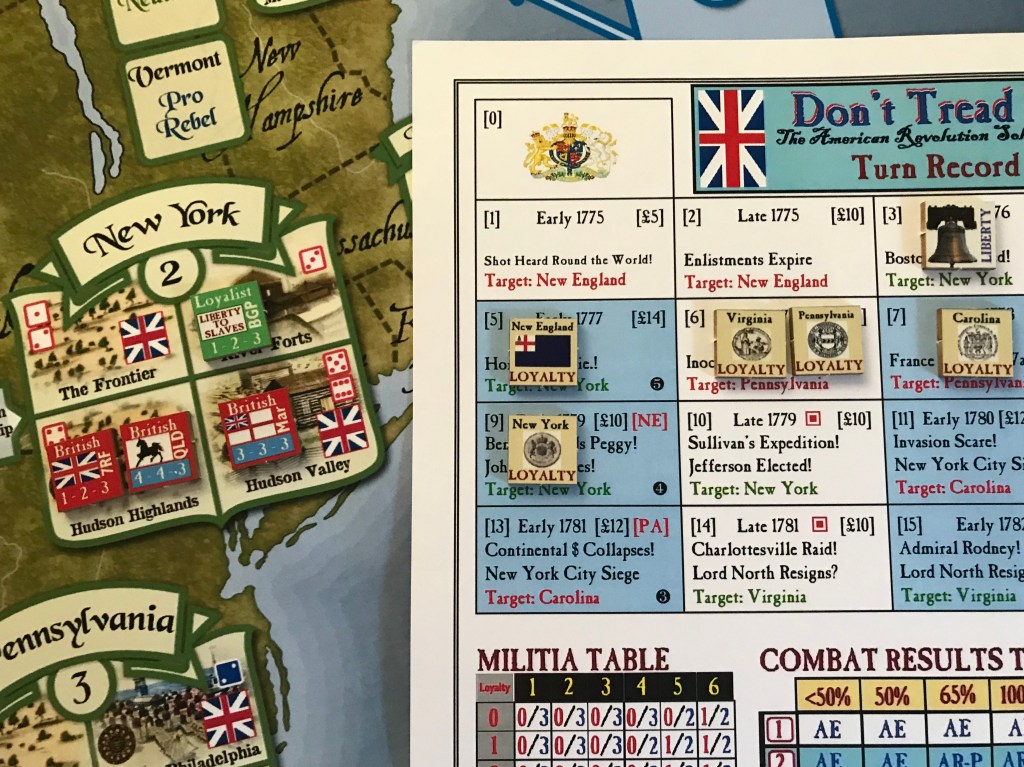
In Action Point 1, we covered the map and its various Counties and their terrain types and the Turn Record Track to give perspective to how the action plays out and how the player must meet the demands of Lord North and King George III. In Action Point 2, we looked at the differing units and their abilities as well as the anatomy and meaning of the values on the counters. In Action Point 3, we started taking a deeper look at the various phases of the Sequence of Play beginning with the Smugglers Phase and the Naval Phase. In Action Point 4, we examined the British Ground Phase, which deals with so many different aspects including Winter Attrition, Amnesty, Paroles, British Unit Purchase and Deployment and Moving around the map. In Action Point 5, we moved to the Battle Phase and dove into the procedure used, examined the use of Militia and looked at the interesting Combat Results Table and finally looked at an example. In Action Point 6, we examined the Place Rebels Phase and the Rebel Campaigns Phase and the differences behind Minor and Major Campaigns. In this Action Point, which is the conclusion to this series, we will cover the Logistics and Liberty Phases and will also review the various victory conditions.
Logistics Phase
After all the campaigning is done and both sides are planning to enter Winter Quarters for the season, we come to the end of the Sequence of Play. But, that doesn’t mean that there isn’t action or important steps left to take as the British player must still try to figure out how to quell the rebellion and build loyalty among the rabble rousing colonists. Enter the concept of buying loyalty with Trading With the Enemy. We all know that money talks and when you are being besieged by a foreign power that is supposed to be your parent, you will take what you can when you can get it. The presence of the British Army often sustained the local economy, paying farmers
and merchants real money for their goods, as the soldiers had to eat and needed various services. It is said that many shopkeepers of the time would say that “peace would be bad for business”.
Trading with the Enemy
The British player may now spend any remaining pounds they might have from the current round to try to improve Loyalty in any State. The only real condition of this action is that the target State must contain at least one Lobster Unit. While money talks, without the threat of force or the ever present occupation, most Colonists wouldn’t have bitten on this offering. For each £1 spent, the British player may raise any one State’s Loyalty by +1 that meets the requirement. The player can also raise the Loyalty a number of times only constrained by the the number of Counties in that State that are currently occupied by Lobster Units up to a maximum of 4.
This actually sounds a lot simpler than it really is though for several reasons. One I found that I spent almost all of my pounds each turn to purchase new Units and activate my Frigates to fight off the Smugglers in the Sea Zones. I have rarely had more than 1 or 2 spare pounds to spend in this way. The second reason is that I never liked to have my Units spread thin in a State that they occupied by spreading them out into each of the Counties in a State. Other than those two things, this purchasing of Loyalty can really be a life saver as you continue to try and smother the fires of rebellion. Remember that high Loyalty Levels in States means that the British will summon more Militia during Battles while the Rebels will find less volunteers to fight. This won’t always make a huge difference in these Battles but sometimes can be the tipping point to move to the next column on the Combat Results Table.

Naval Transport
Getting troops where you need them can be a challenge. Remember, the American Revolution was fought throughout 13 different Colonies (States in this game) and there was no mass transit or even really good roads to convey all of the needed implements of war and troops all those miles, stretching nearly 1,500 from the upper reaches of Massachusetts to the very southern edge of Georgia. The only real mass transit was by sea and it still took a while to travel. During the Naval Transport segment of the Logistics Phase, all British Units may now be moved to any County in any State, even within the State the Unit is already in, as long as that County does not contain a Rebel unit. The only exception to this movement rule is that British Units may use Naval Transport to go to Québec even if Rebel units are located there. But this movement is not free and will cost £1 for each British Unit moved by sea. Also, if there happen to be any British ground units at sea these may now be moved back to land at this time following the same restriction. The Units at sea may be landed free of charge in
any Rebel-free County in the State connected to the Sea Zone where they started or they may be moved elsewhere but the player will have to pay the normal Naval Transport fee of £1.
You must also remember that the presence of the French Fleet will block a Sea Zone to the use of Naval Transport. No British Ground Unit may move by sea into, out of, or through a State connected to a Sea Zone inhabited by the French Fleet. After Naval Movement is complete, the player can now do a sort of Naval Reset and can move any Naval Units in the In Harbour Box, Boston or the Caribbean back into the At Sea Box.
Reconvene Congress
The final step in the Logistics Phase is to Reconvene Congress. If the Congress Marker is currently on its in Flight side, it now reconvenes which simply means they will find a new home and settle in. The player will roll a die and if the roll is 1, Congress will convene in New York, if the roll is a 2-4, Congress will convene in Pennsylvania and on a 5, in Virginia and the Congress Marker will simply be placed into the appropriate American Leadership Box.

If the roll happened to be a 6, then Congress will remain in Flight and the player moves the Liberty Marker one box to the left, which remember is a good thing for the player as you want to keep Liberty low in order to win the game. Once Congress convenes in any State, reduce that State’s Loyalty by -1. But if Congress convenes in Virginia, also add +1 to the Loyalty of Pennsylvania, New York and New England. If Congress convenes in New York, then add +1 to the Loyalty of Pennsylvania, Virginia and
Carolina and move the Vermont Marker to the Pro-British Box. This rule seems to capture the concept of the local populace seeing the Rebels in disarray and being chased from the State to State and lessening their faith and support in the rebellion.
Liberty Phase
The Liberty Phase is generally a phase that is good for the British player and you will be hoping for good results each Turn that it is applicable.
Enlistments Expire
On Turns 2 and 4 only, all Continentals on the map must roll to see if their soldiers who were only signed to one-year contracts will either re-enlist or go home. The distinction here is Continentals and not COS Units. The player will roll 1 die for each Continental Army on the map. On a roll of 1-4, the unit’s enlistment is expiring and they will be returning home and as such are placed in the Rebel Force Pool. If the State is where George Washington
is currently located, then the Unit is only placed in the Rebel Force Pool on a roll of 1-3. Remember, don’t roll for any COS units.
State Control and Liberty
Next up we move to the State Control and Liberty segment. The Liberty Marker keeps track of the cumulative tally of how successfully the Rebels have denied the British player control of the majority of States over the course of the Revolutionary War. To win the game, the British player must simply keep the Liberty Marker low. Easier said than done though as it will fluctuate up and down after various actions and outcomes such as when the Rebels defeat the British in Battle. The game really revolves around this concept of control of a State based upon what Target State has been identified on the Turn Record Track.
Remember that to control a State means that the British player must have the only Units located there. British and Loyalists Units all count for control purposes while Hessians and Indians do not. The players’ objective each Turn is to control at least three different States, of which one of those controlled must be the Target State. If the player meets that objective at this point, the Liberty Marker will not move. If you fail in this task though, the Liberty Marker will advance 1 space on the Turn Record Track. It has been a while since we discussed the Target State so let’s revisit that concept. Each Turn the Turn Record Track will designate one State as the Target. If the player does not control the Target State at this point in the Sequence of Play, then the Liberty Marker advances, no matter how many other States you do control. This concept of the Target State is what Lord Germain, who served the British Crown as the Secretary of the Colonies, believed was the part of the Colonies that was the most important to control and repress as the war progresses.
After this control is determined, the player will look at each State individually for any modifications to the Loyalty Level. The following conditions can modify the Loyalty Level of a State at this point in the Sequence of Play. If a State has no Units of either side located in it, its Loyalty Level will not change. But, if a State is British controlled then increase that State’s Loyalty by +1. If a State has only Continentals, COS, or French Units located in it, it is said to be Rebel controlled and will result in the State’s Loyalty Level being reduce by -1. But, if George Washington, Thomas Jefferson or Congress is in a State, then reduce that State’s Loyalty by -1 for each of them being there. Finally, if Indians or Hessians are in a State, reduce that State’s Loyalty Level by -1, but no more than -1 total for that State this Turn.

In addition to worrying about State control, the player must also worry about the fate of Québec. At this point in the Turn, if there are any
Rebel Units located in Québec, then Québec is considered to be Rebel controlled and will result in the Liberty Marker advancing one space. This advance of the Liberty Marker is in addition to the normal advance for missing the control condition for the Turn and may make the Liberty Marker advance more than 1 space in a Turn, once for normal State Control and once for Québec. This is the only situation in the game when the Liberty marker can move up twice in one turn.
Victory and Defeat
I know that this series has been a long one and has spread out over the past three months so I cannot expect that you will remember things that we discussed in the first few posts so let’s cover how the player will win or lose the game. It ties directly into the position of the Liberty Marker at the end of Turn 16. If the Liberty Marker ever reaches 9 or higher, then the British player is catastrophically defeated and the Rebels have won the Revolutionary War. It’s time to celebrate right?!? Let’s party like its 1776! No, this is the historical outcome and means that the British have lost control of the Colonies and America is birthed. Frankly this is hard for me as I play this one. I love the game and how involved it is and how it includes so many historical elements but I am still fighting against myself but more on that later.
If the Liberty Marker hasn’t reached 9 or higher at this point, the player will simply continue the game to this same point of Turn 16, to find out the associated level of victory. The final position of the Liberty Marker will determine the level of British Victory and the less the Liberty means you have done better. Although, there is an out in the game if at this point during Turn 14 or 15 which are considered the Lord North Resigns?
Turns, if the Liberty Marker is in box 7 or lower, the British player may concede American independence and end the game with a Marginal British Victory which equates to a final Liberty Marker position of 6-7 below. That is effectively how the war ended, with the resignation of Lord North, the British Prime Minister, at a time when Britain could have chosen to continue fighting the costly war. But of course, if the Liberty Marker is below 8, you can always keep playing the last two turns to try to improve upon your level of victory.
Here are the Levels of Victory that are found in the rule book:
9 or higher: British Disaster. The treacherous Americans and their foppish
French allies have laid Britain low. The Thirteen Colonies are lost; the French restore their rule in Canada; even Gibraltar has fallen to the Spaniards! King George abdicates and a fractious Parliament tries to provide political direction in the context of economic and moral disaster. Chaos reigns in Scotland and Ireland, while in England itself there are portents of a new Oliver Cromwell at every turn….
8: Marginal British Defeat. You have lost the Thirteen Colonies, and fighting
goes on for years over the Caribbean and Gibraltar. But the reparations you pay to France give the French Monarchy a new lease on life, averting a French Revolution and giving King George and his ministers precious time to right the ship of state. An age of uneasy peace ensues – it could have been so much worse!
6-7: Marginal British Victory. You have lost the Thirteen Colonies, but you
retain Canada and vital outposts in the Caribbean and Gibraltar. Your fleet is ready to give the French a proper whipping. Trade with the Americans quickly picks up where it left off, and within a decade Britannia is back to ruling the waves and the world economy, while the bankrupt French sink into revolutionary tumult.(This is the historical outcome.)
4-5: Substantive British Victory. An isolated New England is all that
remains of the “United States.” The reconciliation of the remaining Colonies, under generous terms of autonomy offered by the victorious British forces, has ended America’s experiment at republican broil for the time being. Emerging threats from France and Spain make it easier for His Majesty to make his case to the Colonists that an economic and political association with the British Empire is in everyone’s best interests at the present time.
0-3: Cosmic British Victory. The quick implosion of France into atheistic despotism following the collapse of the American revolution leaves the English speaking world terrified but united. Lord Washington enters politics as a beloved symbol of reconciliation and peace. A surge of support for the Monarchy in America takes place as revolutionary Republican France guillotines its enemies by the thousands. And the Second Great Awakening lends a new religious shine to the growing spirit of American loyalty.
This game is big, and long, and very involved. It is an experience more than it is a game and I thoroughly enjoyed its twists and turns and in trying to understand how I best should go about trying to defeat those pesky rebels. This statement is in essence my only real complaint with the game. I just am not sure that I like to play the antagonist in a historical simulation that is so close to my heart. I find myself rooting for the Rebels during the game, wishing that they will roll well in Battles, and in some ways that my efforts to capture their Smugglers will fail each round. But, once you get beyond that, the game is really overall interesting and an excellent experience and is one of the most interesting strategic level games on the Revolution that I have ever played.
The design also does a really great job of incorporating elements from history into the game play and I love the various events that can happen and change the game considerably from turn to turn. It keeps you on your toes for sure and combines the military and political parts of the war well.
My only complaint with the game is that it is a longer game, taking about 3-4 hours to play as it is very involved and has a lot of steps during each turn. I find myself getting fatigued mentally with having to keep up with all the steps and phases and sometimes near the end of a Turn find myself longing for it to end so I can take a break. Not because the game is uninteresting but because it is just very involved and there are lots of things to check and keep up with. The game is also very challenging and I have found that I am not that good at it as I have yet to be able to find my go to strategy to see success. I have played 3 times now and really have not done well at all! Definitely a game though that is well suited to allow for you to play a few turns and leave it setup to return when you have time. I think that this one will stay in my collection and be a game that I play every year around the 4th of July.
-Grant

This is a very in depth analysis, thank you. The American Revolution has always been a fascinating point in history to me.
LikeLiked by 1 person
Thanks Grant for the review. Just picked this one up and went through all of your action points. Very informational indeed. Clarified some questions I had (especially the rebel campaign phase). Looking forward to getting this to the table soon!
LikeLiked by 1 person