
I have been scouring the earth for good games covering one of my favorite historical periods in the American Revolutionary War. I have played 12 of them to date, and you can read about them in my Gaming the American Revolution – Ranking the Games We Have Played post that I update every year around the 4th of July.
One new game that I found and played is Don’t Tread on Me: The American Revolution Solitaire Board Game from White Dog Games. Don’t Tread On Me is a strategic-level solitaire simulation of the American Revolution and is based on the popular Vietnam Solitaire: Special Edition game system from White Dog Games. This game though takes a very different perspective on the conflict as the player plays as the British side along with American Loyalist forces against the forces of George Washington and the Continental Congress as controlled by the game system’s AI. I really like this one as it is not only about battle, although it does definitely have its share of conflict, but it features a number of interesting aspects about the revolution including political control, state loyalty levels which change over time and due to events and the outcomes of battles, and even a system dealing with the naval aspect of the conflict in dealing with smugglers and their attempt to bring the rebels arms and ammunition.
In Action Point 1, we covered the map and its various Counties and their terrain types and the Turn Record Track to give perspective to how the action plays out and how the player must meet the demands of Lord North and King George III. In Action Point 2, we looked at the differing units and their abilities as well as the anatomy and meaning of the values on the counters. In Action Point 3, we started taking a deeper look at the various phases of the Sequence of Play beginning with the Smugglers Phase and the Naval Phase. In Action Point 4, we examined the British Ground Phase, which deals with so many different aspects including Winter Attrition, Amnesty, Paroles, British Unit Purchase and Deployment and Moving around the map. In Action Point 5, we moved to the Battle Phase and dove into the procedure used, examined the use of Militia and looked at the interesting Combat Results Table and finally looked at an example. In this Action Point we will examine the Place Rebels Phase and the Rebel Campaigns Phase.
Place Rebels Phase
I feel like we have covered this Phase in a roundabout way with my previous discussions on the Smuggler Phase but I want to give this a bit more attention to give you an idea for how the process works. I also want to say that this is actually a pretty stressful Phase only for the reason that you have to work so hard to clear out States so that you can count them toward your required 3 controlled per turn and with one die roll this can be undone if a COS Unit or a Continental Unit slips through your fingers.
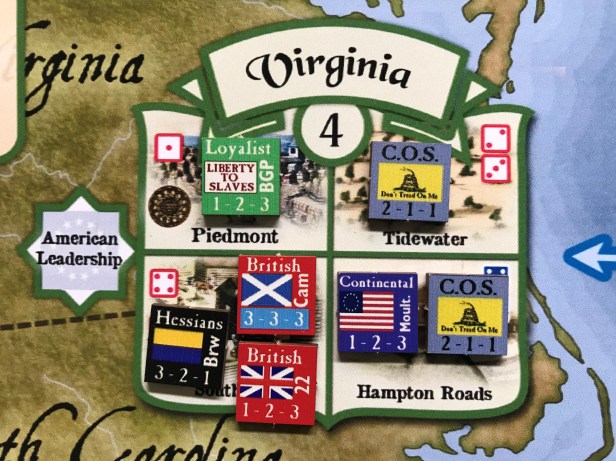
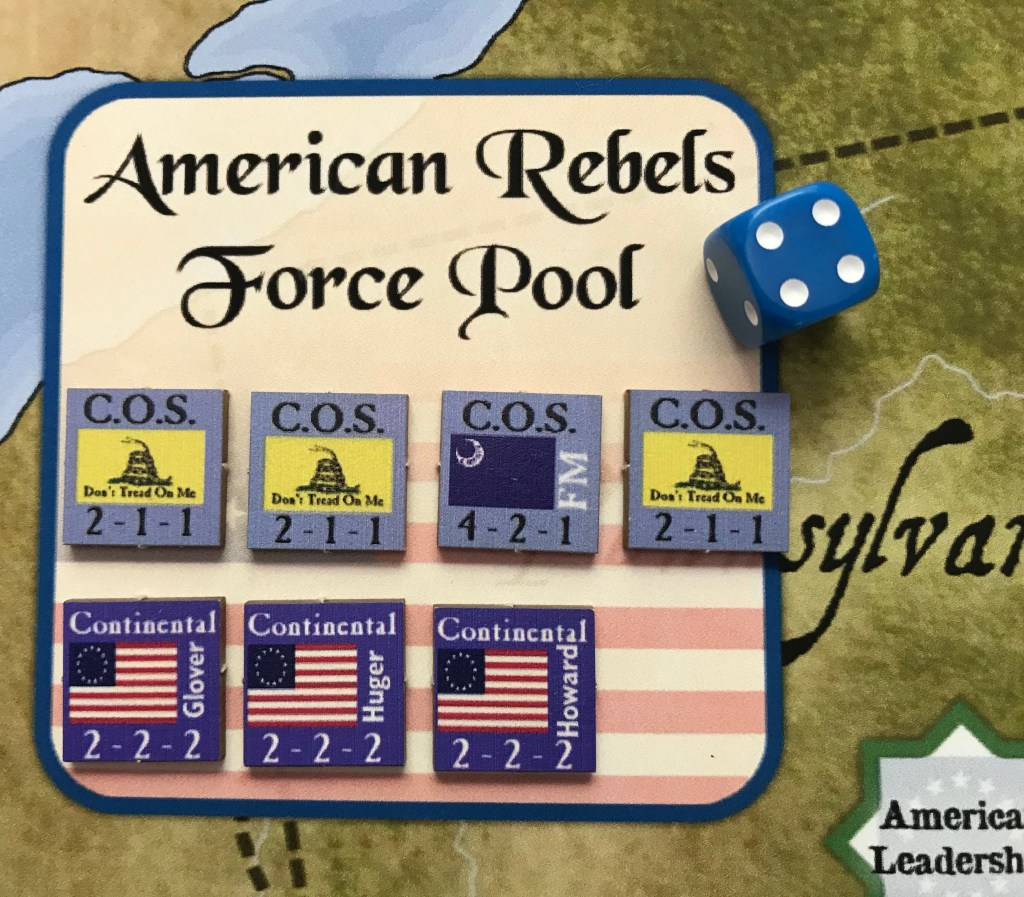
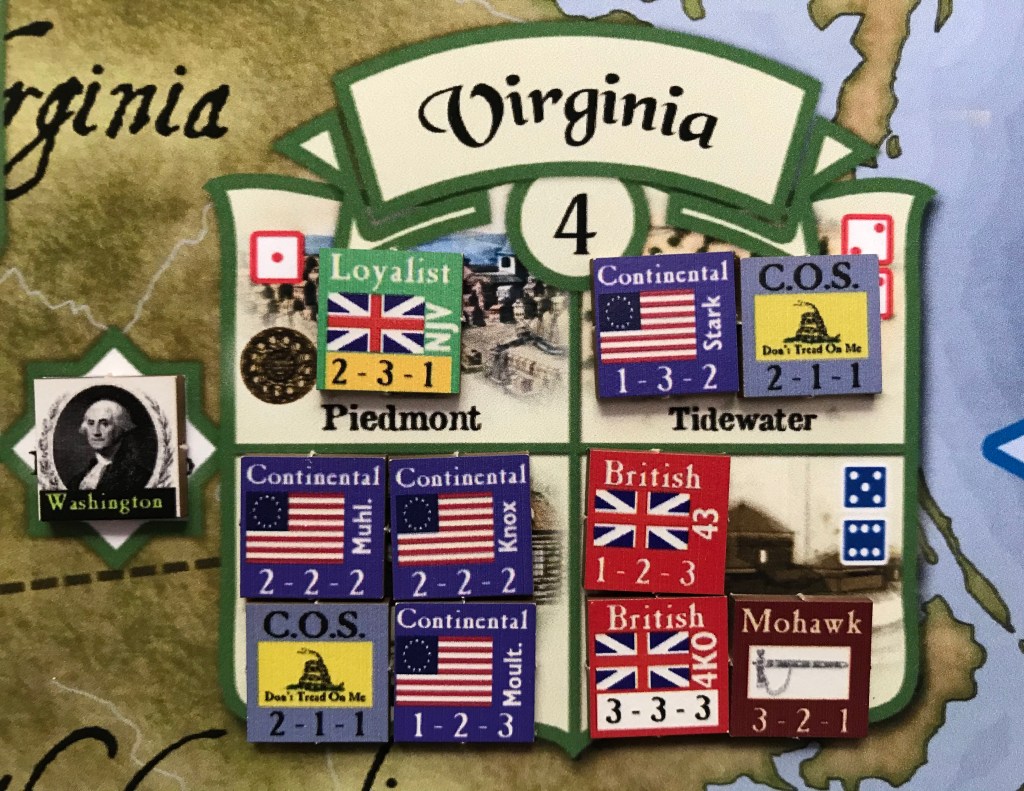
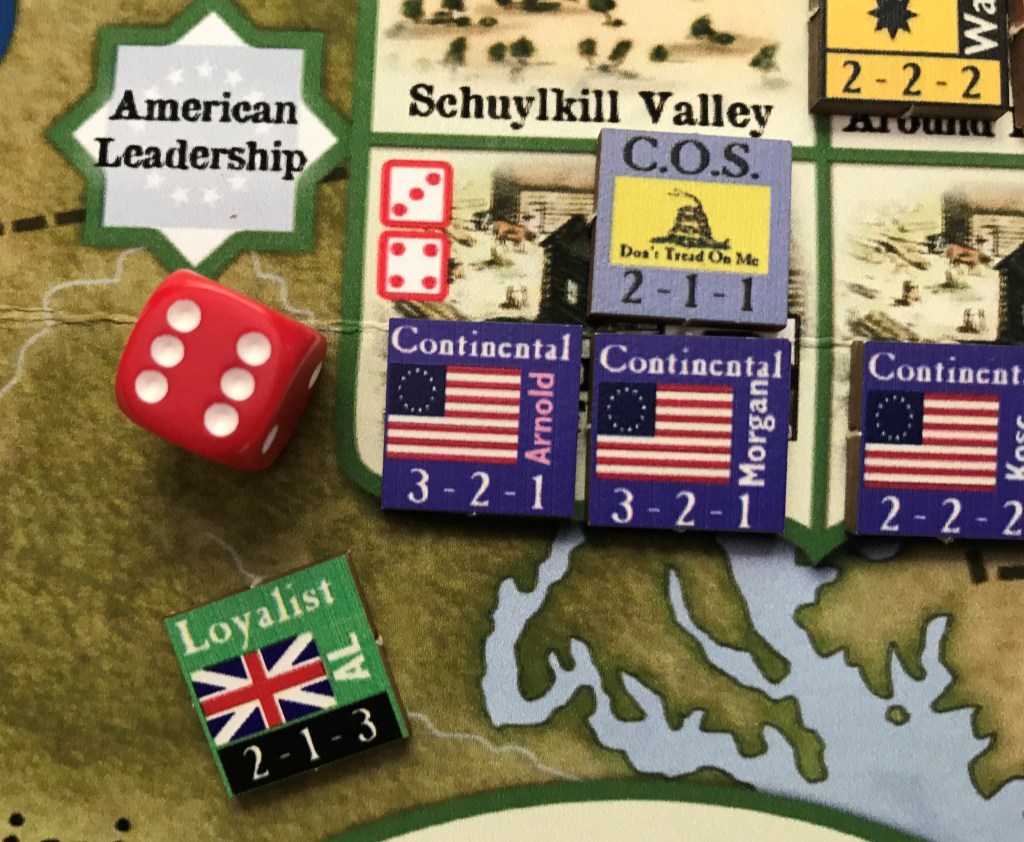
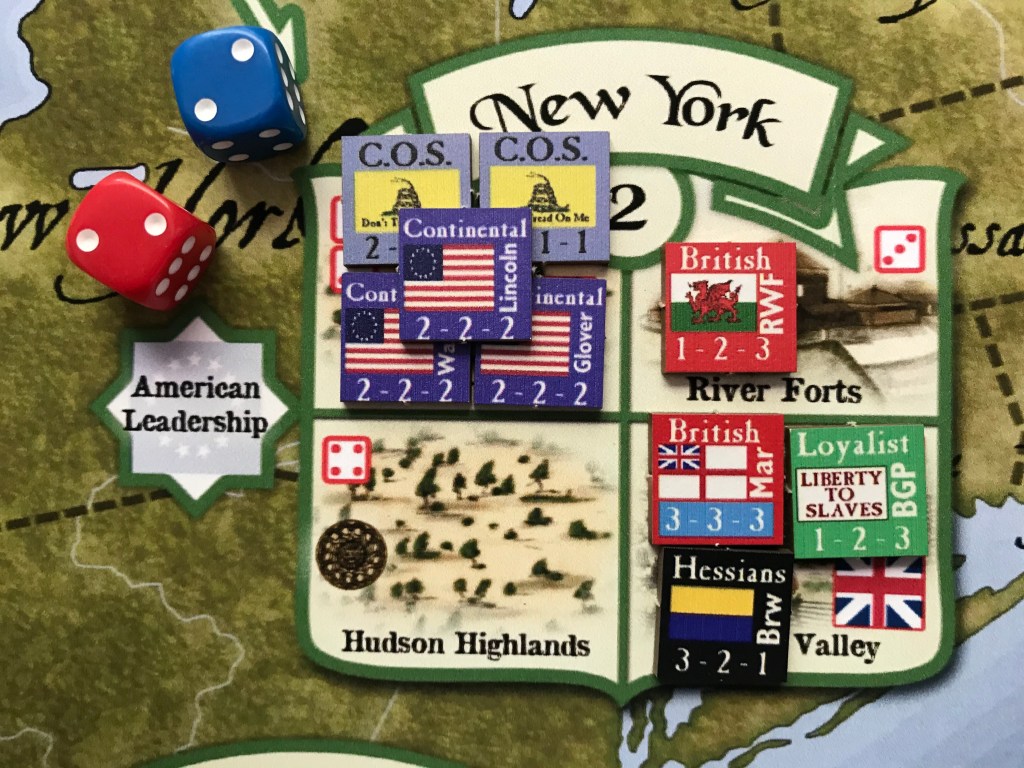
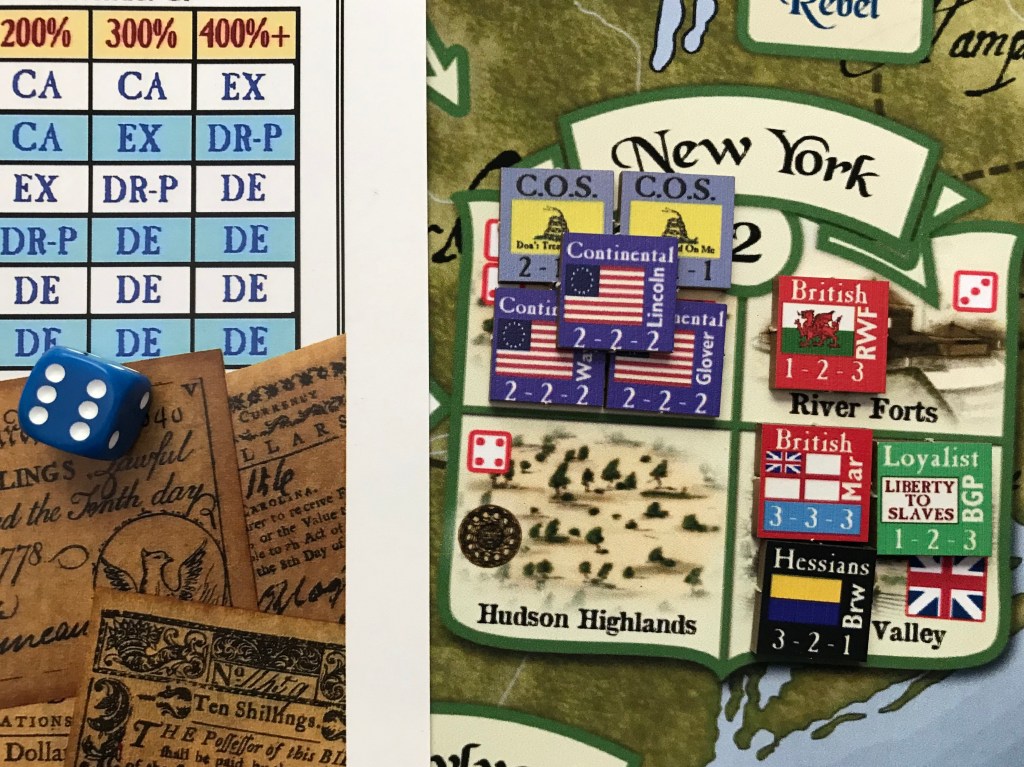
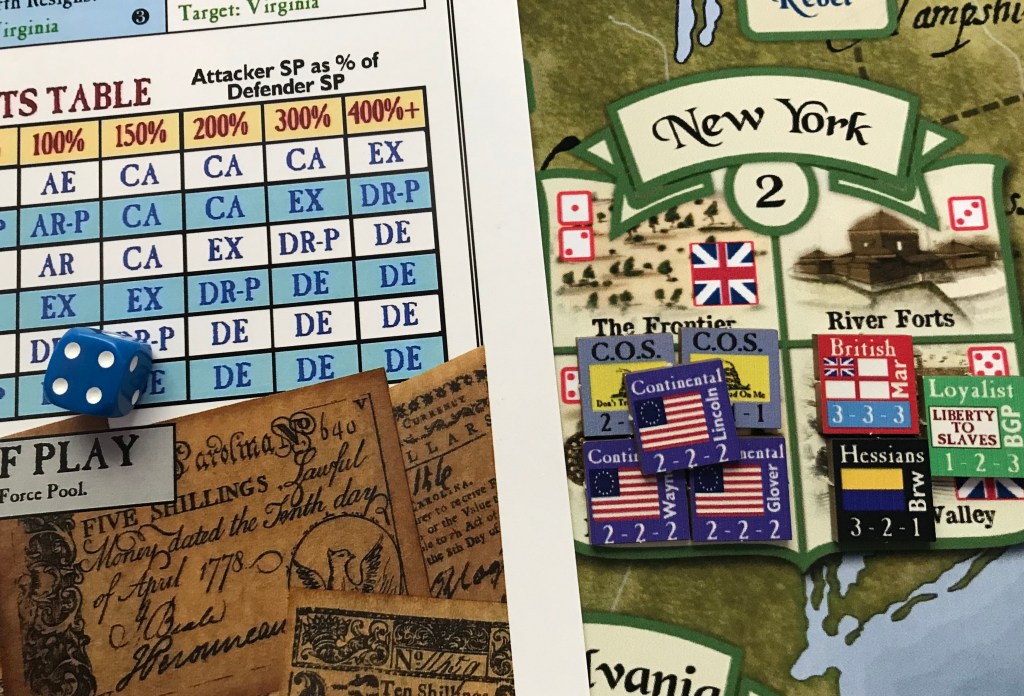
During the Place Rebels Phase, there are only two types of Rebel Units that will be deployed onto the map including the Committees of Safety (COS) Units and Continentals. The COS Units are simply your armed militia, which at this time were referred to as Minutemen. They were trained in drills, marching and shooting but were really just farmers, blacksmiths, merchants, and the like and didn’t have much formal military training. This is reflected in the game and their assignment of Strength values as the COS Units are typically better when they are fighting in the Wilderness as compared to being in the open or behind prepared defenses. Continentals are much better Units and this is due to their improved training and better armaments. Continentals generally are still better fighting in the Wilderness or on Farms but that is not always the case as some Units are very good in Towns or Forts, such as the 1-2-3 Moultrie Continental.
Here is the breakdown of the 16 different Continental Units:

Now that you have been given a refresher on the differences between the different type of Rebel Units, and their different Strength values, let’s take a look at how they are deployed.
COS Units Deployment
If there are any COS Units in the Rebel Force Pool at the start of the Place Rebels Phase, the player will simply roll a die to select a State.
If a State is chosen on a roll of 1-5, roll another die to select a County inside that State and then place one COS Unit in that County. Remember that the Counties are numbered 1-5 and then each County in the State has one or two die images shown with a number that are used for this purpose. If the original State roll resulted in a 6, the player will have to place two COS Units randomly in the Target State by rolling two dice and referring to those numbers. No more than 2 COS Units may ever be deployed at this point in the Turn.
There is one special item that you have to keep an eye out for though.
If the special FM COS Unit is in the Rebel Force Pool, the first COS placed into Carolina must be this unit. It may not deploy in any other State although it may advance into another State as the result of a Rebel Campaign. This unit of course represents the Swamp Fox Francis Marion who was the war’s greatest guerrilla fighter and the model for Mel Gibson’s
character in the movie The Patriot.

Also keep in mind that Rebel Units will deploy into a County regardless of the presence of any other Rebel or British player Units. In fact, if they deploy to a County where British Units are already in there will be a Battle initiated during the Second Battle Phase just after this Phase.
Continental Army Units Deployment
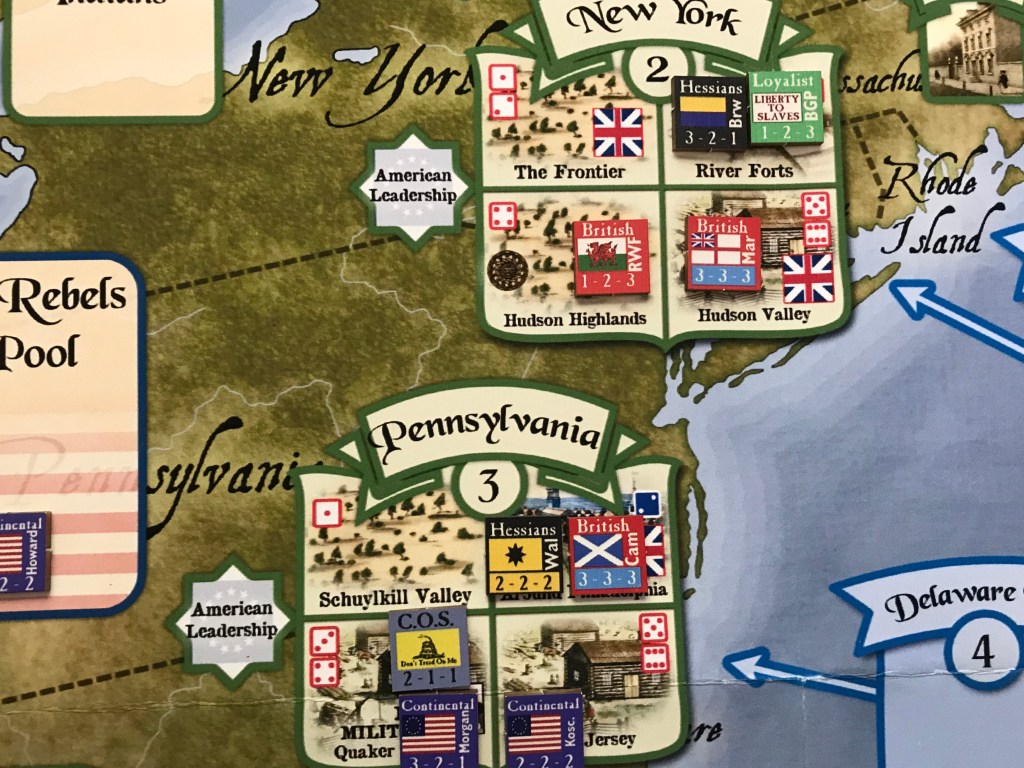
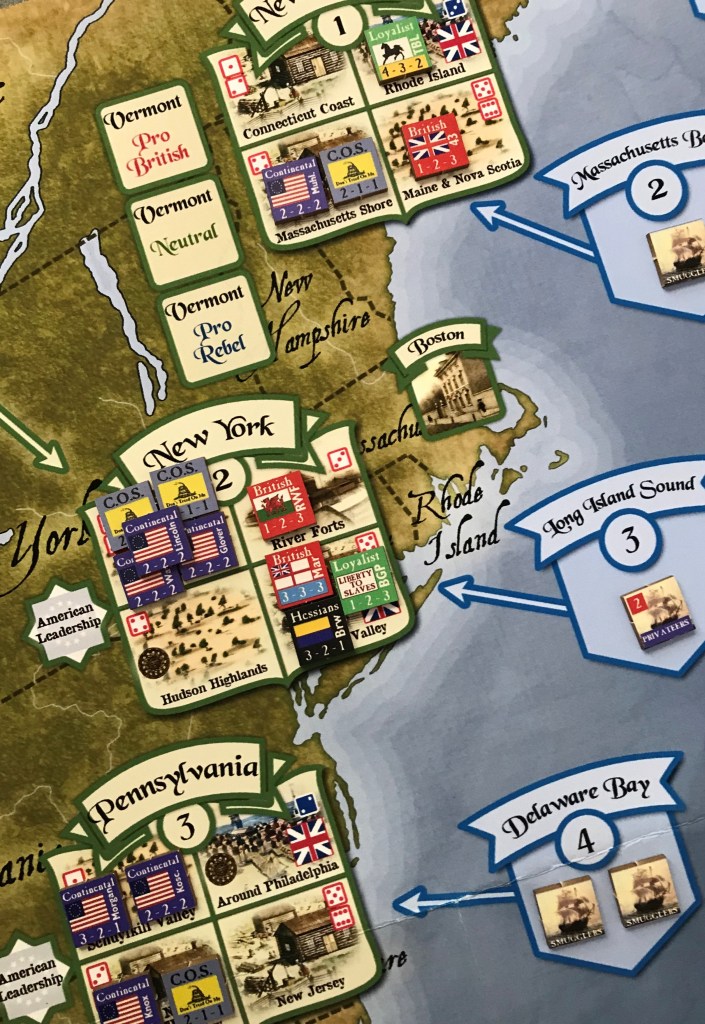
If you remember back to our 2nd post in this series where we discussed the Smugglers Phase you will remember that each of the 6 Sea Zones connects to one State on the map except for Zone #1 which is called the North Atlantic Sea Zone. The North Atlantic Sea Zone connects to whichever State is the current Turn’s Target State for the British.

The process of deploying Continental Units is also very simple. The player will roll a die and the result is the first Sea Zone to deploy Continental
reinforcements to this Turn. Once the starting State is determined then each other State will follow in numerical order, with 1 following 6. For each Smuggler or Privateer Unit located in a Sea Zone the player will roll 1 die and place a randomly drawn Continental Unit in that numbered County of the State.
I read the design notes from Ben Madison about this portion of the game and he had the following to say about why reinforcements for the Rebels arrive in this manner. Here is what he had to say:
“This shows Rebel reliance on French aid, smuggled across the Atlantic
into U.S. ports. The French sent muskets, powder, cannons, uniforms,
shoes, advisors, vast sums of cash, and eventually almost 10,000
soldiers to aid the Rebel cause. Without French aid, our Revolution
would have quickly collapsed. Their reward for all this help was the
nightmare of the French Revolution and two centuries of derision in
America itself as ‘cheese-eating surrender monkeys’”.
Back to the process. If in the unlikely circumstance that a Smuggler Unit is able to place a Continental in a State, but there are no more Continentals in the Rebel Force Pool to place, then rather the player will reduce the Loyalty Level of that State by -1 instead. I really don’t like it when the Loyalty Level is messed with so make sure you have a sustained campaign to eliminate Continentals so they can reform in the Rebel Forces Pool to avoid this.
If you remember, I complained a bit about the generally nominal role that George Washington plays in the design. Now, is where he earns his money though. If Washington is in play, he is now placed in the American Leadership Box of the State that contains the most Continental and French Units. But there is a limiting factor. If the current Turn is a New York City Siege Turn, the player must place Washington in the New York Leadership Box instead. Washington’s presence in a State will lead to a Planned Operation during the Rebel Campaigns Phase which can be really bad for the British player.
In addition to the special rule for Washington, there is also a rule for the turning of the infamous traitor Benedict Arnold. If the Continental Arnold Unit is on the map and there is a Lobster Unit in the same State, and it is
Turn 9 or later, the British player may attempt to turn Arnold against the Rebels. The player will roll a die and on a result of 1-2, Arnold is shot for Treason and will be removed from the game). On a 3-4, Arnold escapes to the British lines and the player will remove the counter but add the AL Loyalist unit to the British Force Pool. On a 5-6, Arnold’s scheme of handing over West Point and the key to access to the Hudson River succeeds the same result as 3-4 will happen but will be augmented with the addition of all the Continentals stacked with Arnold will be placed into the Prisoners of War Box. I hate to cheer for this to happen but this event can be a major boon to the British player during the late stages of the game. Frankly, I feel like you almost need to turn him in order to have a good chance by that point.
Rebel Campaigns Phase
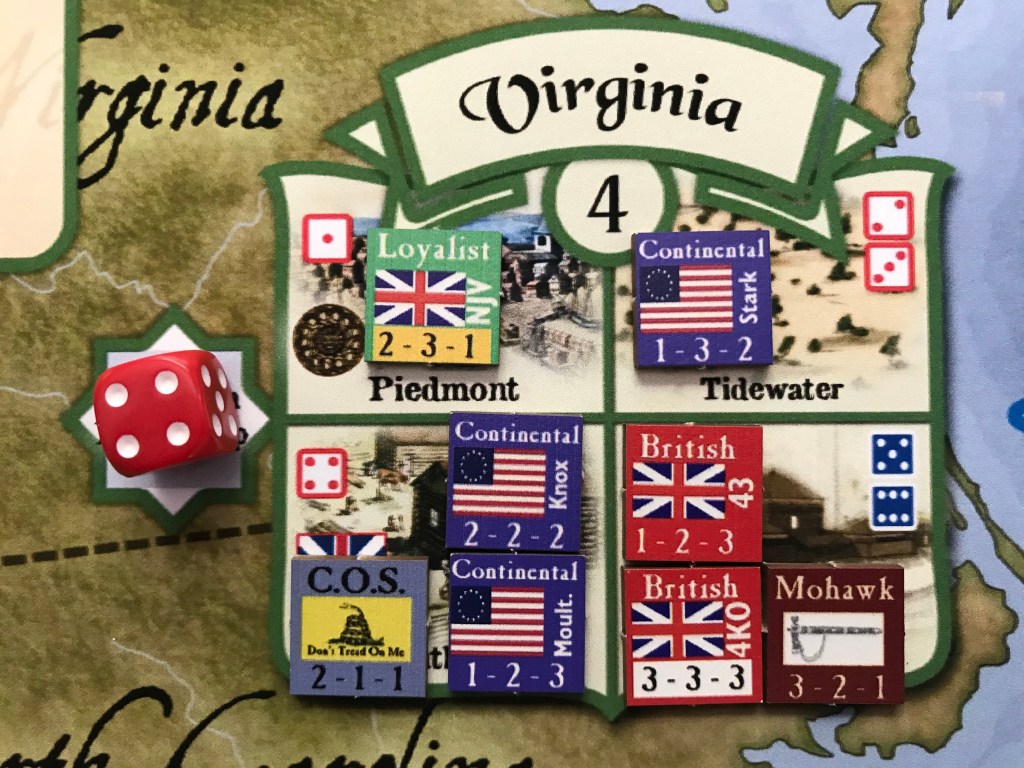
If there were not Rebel Units placed in Counties where you have your British Units during the Place Rebels Phase, never fear. They will find you soon enough. During the Rebel Campaign Phase you will have to deal with the Patriots on the move as they spread out to try to push you out of States and take aware Control. In this Phase, a Minor or Major Campaign may occur in any State but not in Québec. If there are any Battles triggered due to the actions of this Phase, Rebels will be the Attackers and the British player’s armies will be the Defenders.
The procedure is pretty involved but not difficult. The player will first roll for whether there is a Minor or Major Campaign and then place Rebel reinforcements that are in addition to the Rebel Units already placed previously in the Place Rebels Phase. Roll 2 dice to choose 2 different States using the States assigned numbers to coincide with the die rolls. If the roll happens to be doubles one Major Campaign occurs in that one State. If the rolled Campaigns are Minor there will one Battle conducted in each indicated State.
If the rolled Campaign is Major, this is where it can start to snowball. Major Campaigns can be very bad as you will have to add in any Extended Support from States that have no British Player units present. Once any reinforcements and Extended Support are added, the player will conduct the one Major Campaign until either the Rebel force takes any losses or
retreats, or the State is emptied of all British player units. If the Major Campaign leaves the State empty of all British player Units, you will then proceed to conduct a Planned Operation.
But, before proceeding to the Campaigns, the State or States that were rolled will now receive Rebel Reinforcements. Think of this as the local populace seeing the Continental Army on the move and getting excited and grabbing their guns and powder horns and rushing to join the fight. If there are two different Minor Campaigns going on in two States, the Reinforcements will be one randomly drawn Continental Army Unit from the Rebel Force Pool, which will be placed in the lower-numbered State of the two and then one COS Unit from the Rebel Force Pool, placed in the higher numbered State. Remember that is the FM COS Unit (Francis Marion) is available and the chosen State is Carolina, then it will be placed in Carolina.
If just one State is Campaigning, meaning it will be a Major Campaign, that one State will receive both the one Continental Unit and one COS Unit as reinforcements. These may then be joined by Rebels from other States. The placement process for these Rebel Reinforcements in the State in this order of priority. The lowest-numbered Rebel-occupied County then move any
Rebel forces in higher-numbered Counties in that State to that County where Units were just placed. If there are no Rebel Units or presence there, place the reinforcements into the lowest-numbered empty County in the State. Next you will place them in the lowest-numbered British-occupied County in the State. This will typically be the 1 or 1-2 County.
Now that we know the process of choosing the type of Campaign as well as how to place reinforcements let’s take a look at each of the different types of Campaigns.
Minor Campaign
On a roll of 1-5, a Minor Campaign can occur in each chosen State. If the
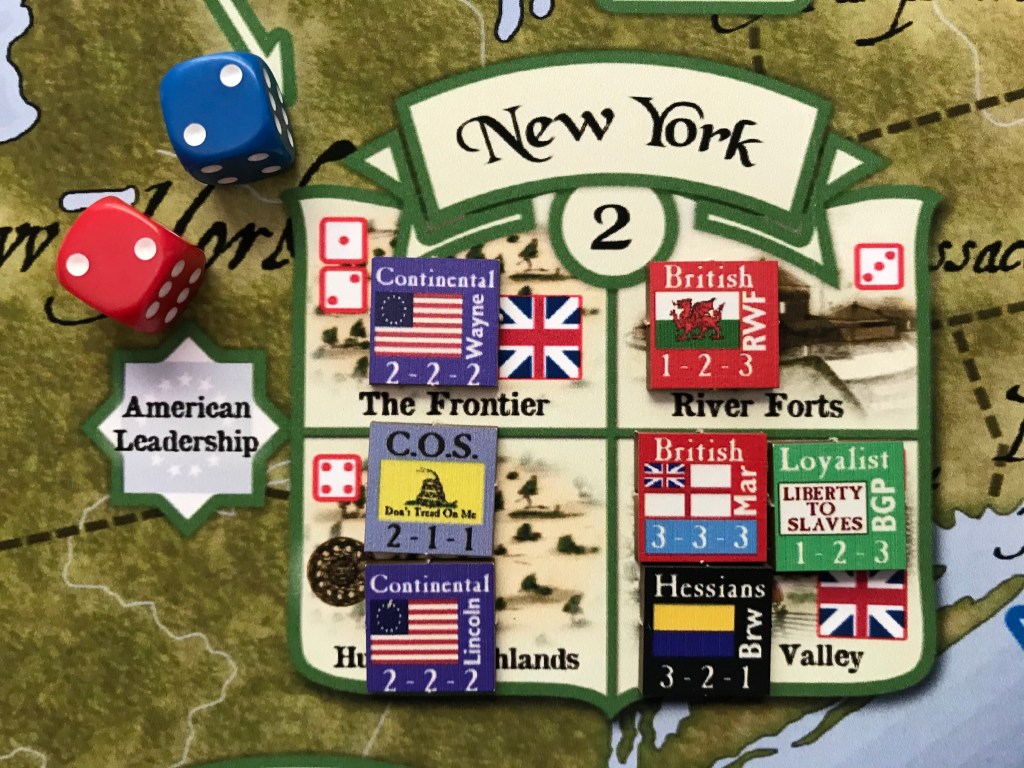
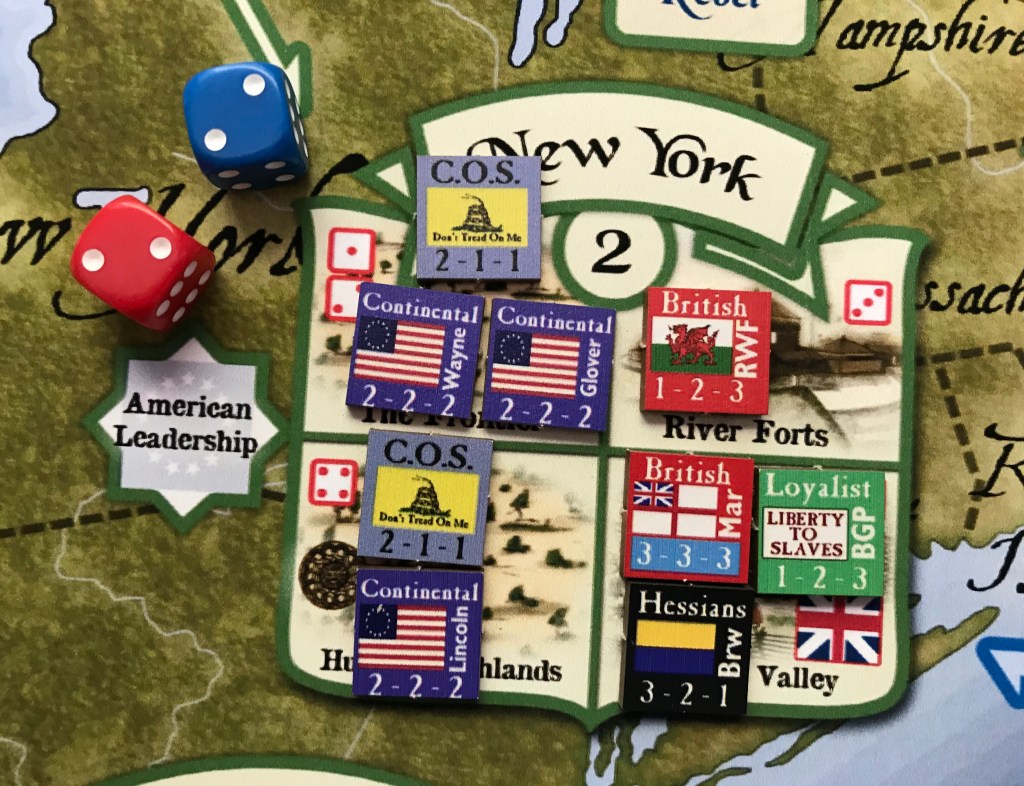
State happens to be devoid of any British player Units, all Rebels in that State must be placed in the Critical County of that State. A Critical County is simply the most important County in that State and typically was the historical locus of Rebel sentiment and opposition. In New England, Pennsylvania, Virginia and Carolina, the Critical County is the blue die County and includes Rhode Island, Around Philadelphia, Hampton Roads and Charles Town. In New York, the Critical County is Hudson Valley.
If the State does contain British player Units, then the Rebel Units in that
State will launch a Minor Campaign which consists of only one Battle against the British player Units there, The Attack Protocol as it is referred to in the rules is that the Rebel Units will attack British units already in the same County as the Rebel stack of Units or will attack the ‘nearest’ British forces to the left in the form of the next lower numbered British location from the Rebel position or attack the nearest British forces to the right (the next higher numbered British location from the Rebel position). A normal Battle will now occur as discussed in our last post. This will now end the Minor Campaign in that State and the player should either move to the next Minor Campaign or to the Major Campaign. These Minor Campaigns are not necessarily pitched battles between large armies but are more like skirmishes and are not intended to end the British presence but to simply cause them trouble.
Major Campaign
If a State experiences a Major Campaign, after placing reinforcements and checking to see if the Major Campaign is augmented by Extended Support, the fun can start. If the State has no British player Units, then place all Rebel Units in the Critical County of that State. The player will then proceed to the Planned Operation against the Target State if necessary.
If both sides’ Units are present in the State, Rebel Units in the State will attack the British Units using the same Attack Protocol as a Minor
Campaign. A Battle now occurs and the Rebel stack then moves through
that State, attacking each County in turn fighting Battles until it either takes any losses being defined as an EX or AE result or if forced to Retreat as part of an AR or AR-P result. If that happens, the Major Campaign grinds to a halt. But if the Rebels are successful in ridding the State of all British player
Units the Campaign does not end. Instead, it may expand even further into what is referred to as a Planned Operation.
I know that I have mentioned both Extended Support and Planned Operation so let’s now get a look at what those aspects are like. These two elements are referred to as Rebel Strategic Coordination and I like to think of them as the “Swarm”. When blood is spilled, or rather the promise of it covering the battlefield, it brings every Patriot out from the corners they are hiding in!
Extended Support
If a Major Campaign occurs in one State, all the other States, except for Québec, are checked to see if they can provide Extended Support for that Major Campaign. Every State containing only Rebels moves all its Rebel
Units into its own Critical County. If there happens to be more than 2 Rebel Units in the State, then the player will leave 2 of them behind in the form of randomly chosen Continentals, if possible or otherwise COS Units. They don’t want to totally abandon their territory. The rest of the Rebels in that State, whether they are Continentals or COS Units, will be added to the Rebel stack in the Major Campaign State and will add their strength to the fight in the Major Campaign. This can be really bad if there are several States with only Rebel Units. That is why I like to have at least some form of presence, either with British Lobster Units or Loyalist Units, in each State to avoid this dog pile.
Planned Operation
If a Major Campaign is successful in sweeping the State clean of British presence, or if there were no British Player units there to begin with, place all the State’s Rebels in the Critical County. If the Campaign State is not the Target State, the Rebels conduct a Planned Operation if they possess more than two Rebel Units. This Planned Operation will follow the same procedure as the Extended Support. These forces will reinforce the Rebels in the Target State. If the French Army happens to be in any State or in Boston, that Unit will immediately be placed in the Planned Operation stack regardless of its current location. This is bad enough as remember that the French Army is the most powerful Unit in the game with very high Strength values. As if that is not bad enough, next, put George Washington into the Target State’s American Leadership Box and immediately launch another Major Campaign in the Target State. This is the bad thing about George Washington being on the map as you basically have to survive several Major Campaigns in succession. And it will never be easy. In fact, I have lost many a game when this happens as it is just really difficult to fight off a large stack with such good odds on the CRT.
If this Planned Operation is completely successful place the remaining Rebels in the Critical County of the Target State. This will set up a later Major Campaign that may be your death knell in the game.
So, after covering this process, I hope you see that there are several things that you have to worry about. Not allowing your Units to be kicked out of States is the first thing you should focus on because their presence stops the Rebel Units from relocating from States to assist in other ongoing Campaigns. Second, you cannot allow the Rebels to build up too much momentum and debark too many reinforcements into the States and have to continually fight against the Smugglers. As the process can be random, you need to hope that your rolls are good and that the Privateers shot is off, or you may find 4-5 Rebel Units per Turn coming ashore to fight. Finally, you have to keep the Rebel stacks to a manageable level. Remember that as Units pile up this improves their odds of a bad result for you on the CRT as you fight against them and have to keep those Units down. Regular attacks are a good idea but not if you have no chance. You have to know when to attack and when not to and that is part of what the game is about.
In Action Point 7, which will wrap this series up, we will cover the Logistics and Liberty Phases and will also review the various victory conditions.
-Grant

Grant, so glad to see this series of posts. I played through the game this summer but had some questions along the way. It was a bit long, but I just broke it up over several days. I think this is one I need to play every July!
LikeLiked by 1 person
I think my only complaint also is that it is very long.
LikeLike