
Lanzerath Ridge is a solitaire wargame that takes place on the first day of the Battle of the Bulge December 16, 1944 during World War II. In the game, the player takes control of a small group of American soldiers who must defend against the attacks of German paratroopers and fusiliers. The goal is simple but very difficult as the player has to attempt to do as well or better than the historic defenders by holding the attackers from taking the town of Lanzerath, Belgium to delay the advance of an entire SS Panzer Division. With limited actions each round, the player has to utilize their limited resources to attack the advancing German forces while also trying to accomplish objectives such as denying the Germans their equipment and strategically withdrawing to live to fight another day. The game lasts four rounds and each round has its own Assault Deck from which enemy counters are drawn along with nasty surprises such as mortars and MG42’s.

In Action Point 1, we took a look at the game board focusing on the Defender Combat Positions and Assault Tracks for the enemy Assault Counters. In Action Point 2, we examined the various Defender Counters and their Special Attributes and Action Designators. In this Action Point, we will dive into the makeup of the Enemy Attack Deck and discuss how the cards drive the assault and work against the player.
Enemy Attack Deck
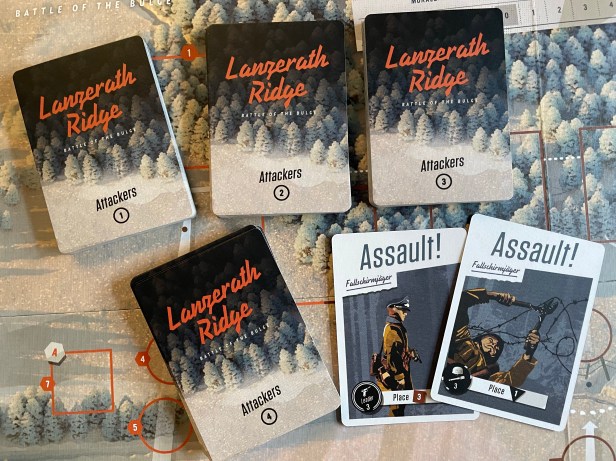
Lanzerath Ridge is divided into four distinct Attack Periods, each of which is represented by a deck of Attacker Cards. These four Attack Periods are based on how the battle unfolded historically as the German attackers probed the defensive line time and time again looking for a weakness to exploit.
Attack Period 1 began at approximately 10:30am and was the 9th Fallschirmjäger Regiment’s initial assault consisting of two platoons from the regiment’s 2nd Company charging straight up the hill at the
defenders with no attempt at subtlety.
Attack Period 2 began around 11:00am and the attack also consisted of a straight-forward charge up the hill, though limited efforts were made to attempt to attack the defenders’ flanks.
Attack Period 3 began around 2:00pm and was supported by extensive machine gun and mortar fire, but again not much effort was made to attempt to flank the defenders.
Finally, Attack Period 4 began at dusk with the 9th Fallschirmjäger Regiment being joined by men from the 27th Fusilier Regiment. Together they launched coordinated attacks against the defenders’ right and left flanks, which eventually penetrated the lines, overrunning and capturing the defending American forces.
Now that you know the history that the game is based on, and the basis for the four separate Attack Periods in the game, I want to point out the way the Enemy Attack Deck is handled here and the disposition of Enemy Assault Counters at the end of each deck is very different from the previous 3 volumes in the Valiant Defense Series. In Lanzerath Ridge, at the conclusion of each Attack Period when that period’s deck is exhausted, the player grabs the next Attack Period Attack Deck and then removes all Enemy Assault Counters from the board and sets up the board state the same at the outset of each new Attack Period. I remember during my first play at the end of Attack Period 1, I thought to myself that this game was going to be very difficult as I had lots of Assault Counters left on Assault Tracks 1 (brown square) through 4 (brown square) and some of those Assault Counters were right on top of me in circle 3 on one of those tracks. But, when the Attack Period was over and I read the instructions for the next Attack Period they were all removed. I thought this was weird and started reading the Companion Book to see the facts about the way the German forces went about the assault.
There are 3 different types of Attacker Deck Cards as follows:
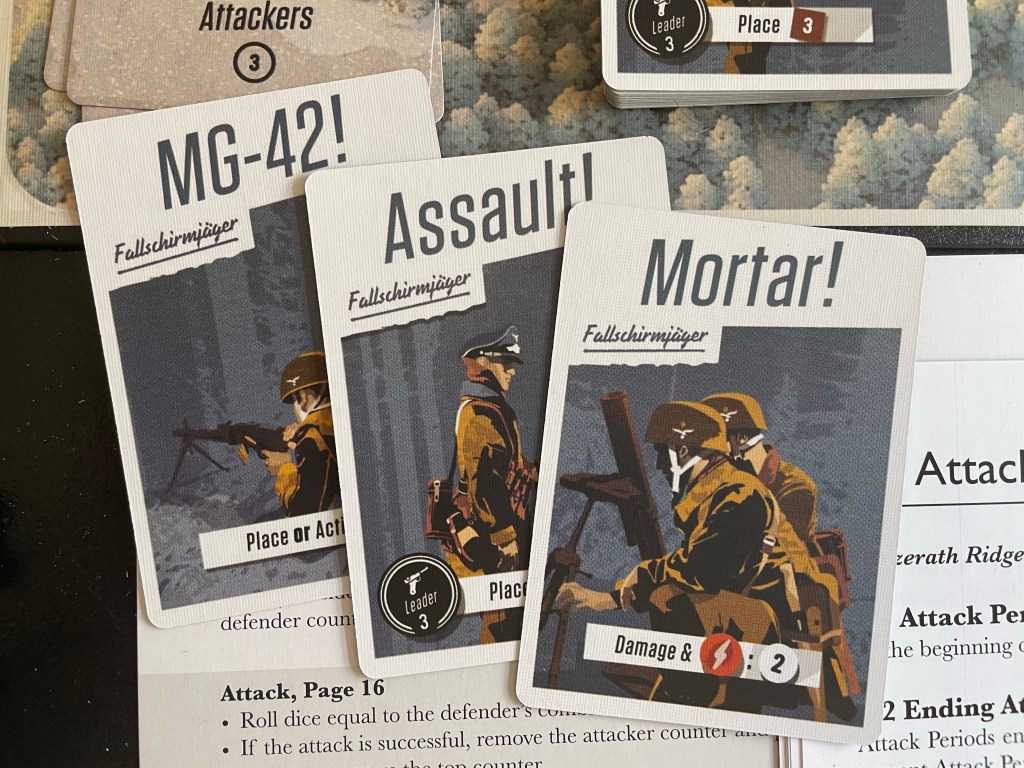
Assault! – these are the cards that bring out enemy units to be placed on the Assault Tracks.
MG-42! – these cards bring out nasty MG-42 counters that are placed in their special boxes adjacent to the Assault Tracks that will fire on a random Defender Combat Position.
Mortars! – these cards don’t show up until after Attack Period 1 but take a shot at all units within a randomly determined Defender Combat Position.
Let’s take a look at each of the types of cards and show you how they work.
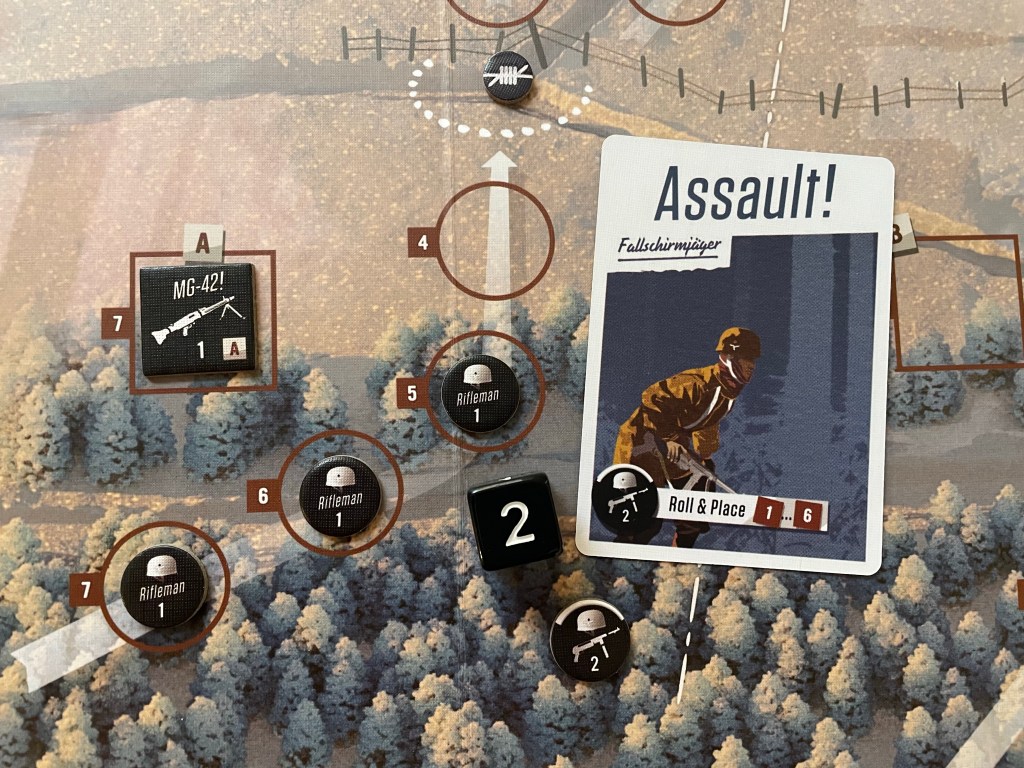
Assault!
The Assault! Cards consist of four different types of soldiers and each has their own combat value and abilities. These include Rifleman, Sub Machine Gunner, Grenadier and Leader. The Rifleman is the weakest unit as it just has a Combat Value of 1, which is only used in Close Combat when they enter a Defender Combat Position after the placement of an Assault Counter on one of the Assault Tracks that pushes the counters into the defenders. The Sub Machine Gunner and Grenadier differs from the Rifleman only in their Combat Value, with the Sub Machine Gunner having a CV of 2 and the Grenadier a CV of 3. The Leaders are the only unit that has some special abilities. The Leader has a Combat Value of 3 but also when a Leader is present on an Assault Track where there are other Assault Counters already adjacent to a Fence Token, the token will be removed from the board and placed off to the side.
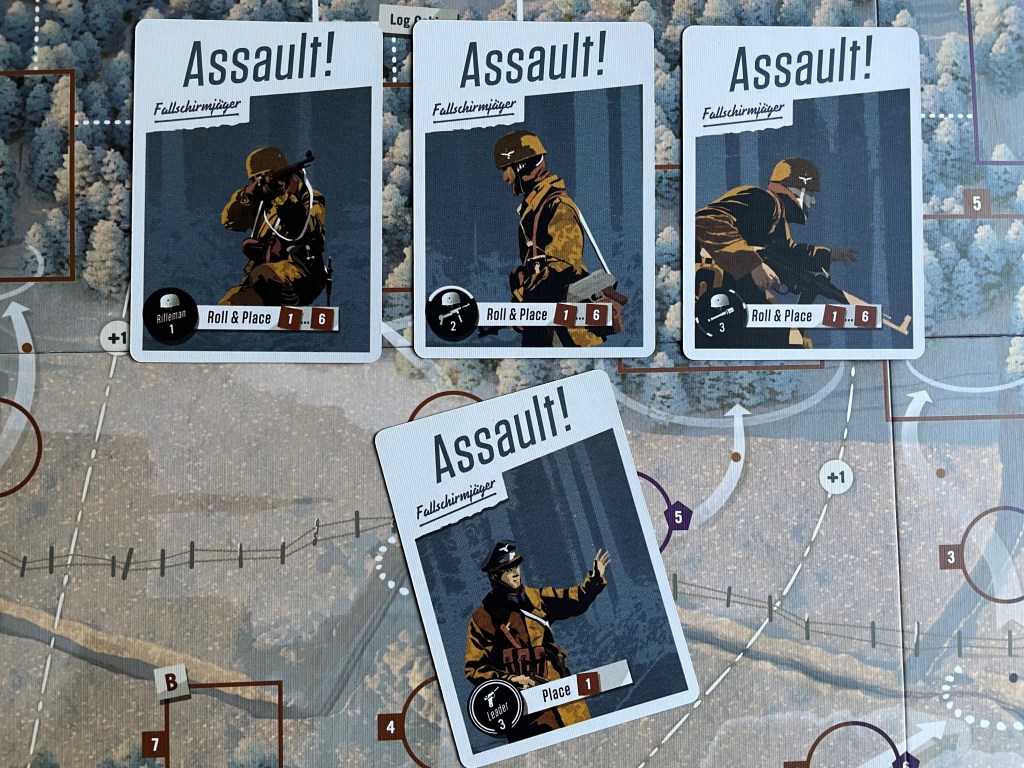
When the player draws an Assault! Card, they will simply place the corresponding Assault Counter from the supply into the bottom circle furthest from the Defender Combat Positions on that Assault Track, whether it is open or not. Placing these Assault Counters is representative of the German attacker’s advance on the defenders positions at Lanzerath Ridge. Placing each Assault Counter is a very simple process but is broken into two distinct steps. Once an Assault! Card is drawn, the player will refer to the bottom of the card to see which Assault Track it is supposed to be placed on. There are three different designations for this placement and will include either 1 (orange hexagon), 1 (black triangle) or 1-6 (brown square). With the 1-6 (brown square), the player will roll a D6 and place it on the rolled track. Once placed, next the player will have to advance any existing Assaults Counters on that track. If the advance of Assault Counters pushes an Assault Counter into a Defender Combat Position, the player will have to immediately resolve an attack against the defenders in that position.
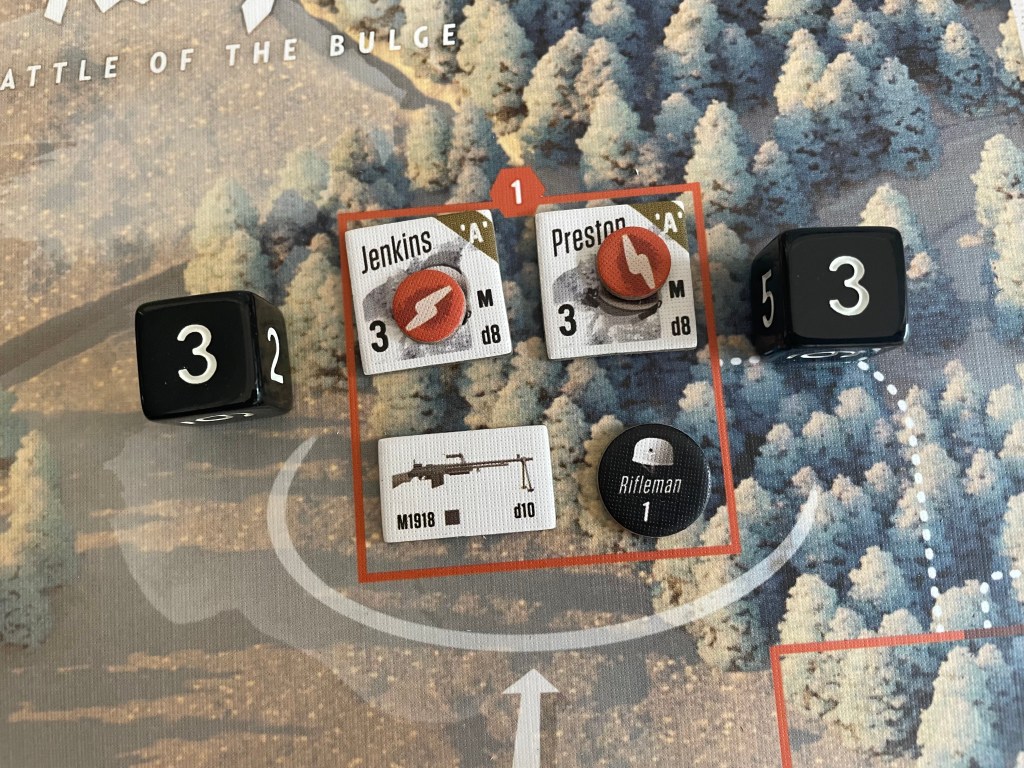
This is done by adding up the total Combat Value of the Assault Counters moving into that position and rolling an equal amount of D6’s. The player will then roll the number of dice equal to the Total Combat Value against each of the defender counters in the position. If at least one of the dice rolled is equal to or higher than the defender’s Valor Rating, this will result in a Disrupted Token being placed on the defender. If a defender already has a Disrupted Token on it, the defender will then become a casualty and will be removed from the game. Also, if an Assault Counter advances into a Grenade Token, this means that the booby trap located there is now resolved and will remove the first Assault Counter that enters that space and the Grenade Token will be returned to the supply.
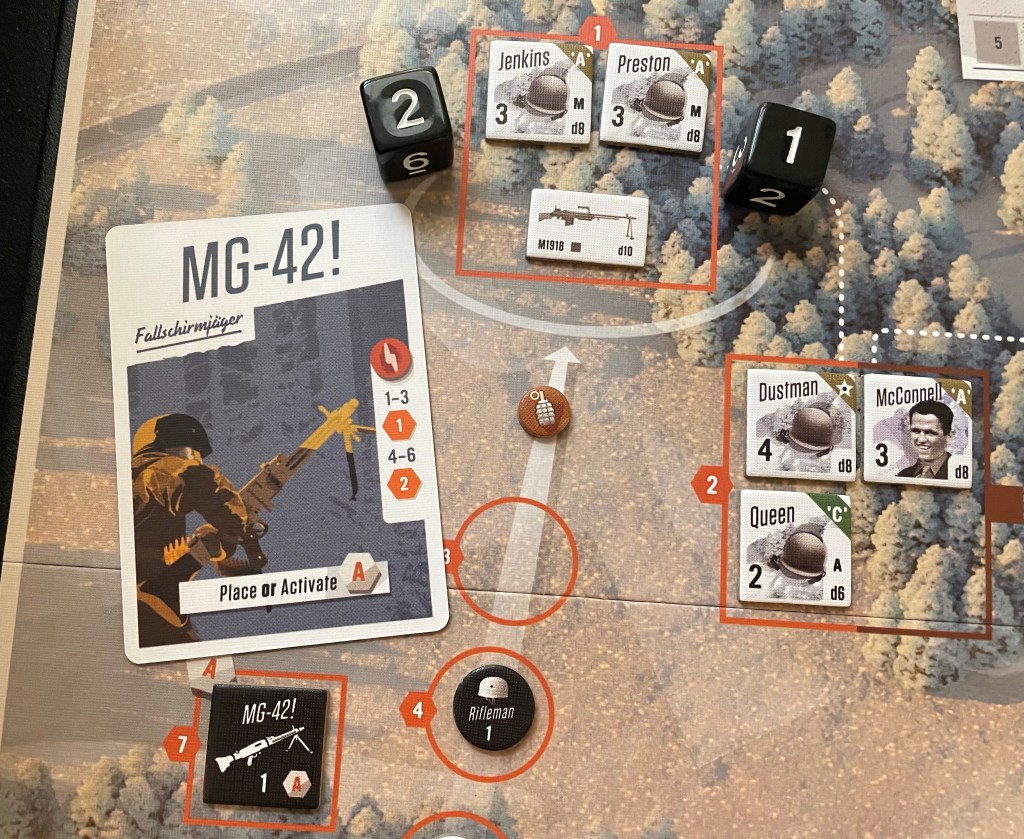
MG-42!
When an MG-42! Card is drawn, the effect will be determined by whether the associated MG-42 Position is already occupied by an MG-42 Counter or is vacant. You will hope for your sake that the position is vacant as then it will not get to fire at your units. When you reveal an MG-42! Card corresponding to an MG-42 counter space that is unoccupied, the player will simply have to place the matching MG-42 Counter in that space. You can go ahead and breath a sigh of relief! You are spared for the moment. But once that MG-42 Position is occupied, and a matching MG-42! Card is drawn, then it will get to fire at your units.
There are 4 different MG-42 Positions found on the board adjacent to the different Assault Tracks and there are specific MG-42! Cards tied to each of those positions found in each of the different Attack Decks.

In Attack Deck #1, there are 8 MG-42! Cards with 2 each for the four different MG-42 Positions. In Attack Deck #2, there are just 4 MG-42! Cards one for each of the MG-42 Positions. This number is 4 less than in Attack Deck #1 and it is important to be aware of this as you can plan somewhat for how to deal with these menaces. In Attack Deck #3, there are again 8 MG-42! Cards with 2 cards for each of the locations an in Attack Deck #4, there are no MG-42! Cards so you can take a breath! The reason it is important to understand how many of each type of cards there are is so that you can plan to attack the MG-42 Positions in order to keep them unoccupied so that when the next MG-42! Card is drawn it will not fire at your positions but will instead just be placed in the appropriate position. Also knowing that there are less during Attack Deck #2 allows you some time to get rid of the resident MG-42’s in each Position so that the draw of the MG-42! Cards will not lead to a fire attack. Also, you don’t need to worry about the pesky MG-42’s in Attack Deck #4 so you don’t have to spend your precious Attack Actions on getting rid of them but can instead focus on the glut of Assault! Cards found in Attack Deck #4.
When the MG-42 Position is occupied and the card is drawn it will result in an attack on the defenders. This is done by rolling a six-sided die and comparing the result to the MG-42! Card. The result indicates the defender Combat Position that is attacked. If the Combat Position is unoccupied, there is no effect but if the Combat Position is occupied, then the player will roll one six-sided die for each defender in the Combat Position and compare the result to the defender’s Valor Rating. If the result is equal to or higher than the defender’s Valor Rating, place a Disrupted Token on the defender. If a defender already has a Disrupted Token on it, then the defender becomes a casualty and will be removed from the board and will decrease the Morale Token on the Morale Track by one step.
Mortar!
When a Mortar! Card is drawn, the process is nearly identical to that of the MG-42! Card. The player will first check to see which Defender Combat Position is targeted. The card will either instruct you to roll to determine the position or it will give a specific position to be targeted. If the Defender Combat Position is
unoccupied, there is no effect. If the position is occupied, the player rolls one six-sided die for each defender in the Combat Position and compares the result to the defender’s Valor Rating. If the result is equal to or higher than the defender’s Valor Rating, the player will place a Disrupted Token on the defender. If a defender already has a Disrupted Token on it, the defender becomes a casualty and will be removed from the board causing a decrease in the Morale Token one step on the Morale Track.
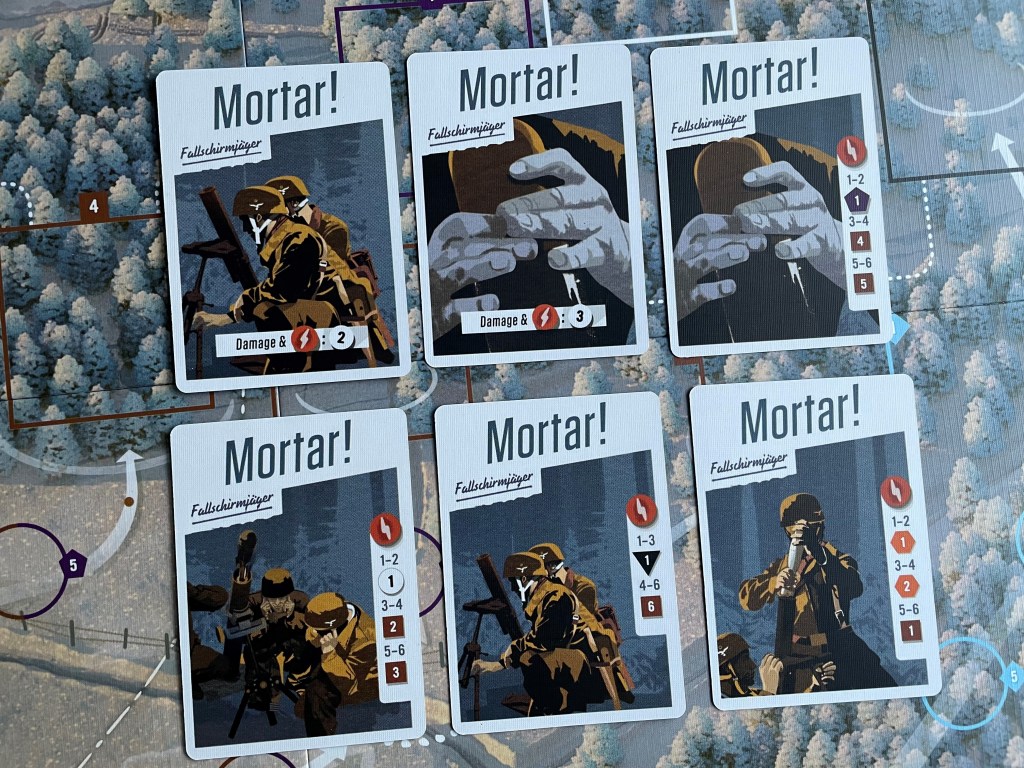
Mortar! Cards don’t show up in the Attack Decks until Attack Deck #2. In Attack Deck #2, there are just 2 such Mortar! Cards and they both attack 2 and 3 (white circle) Positions, which is where the Radio Jeep and the Artillery Jeep is located. Attack Deck #3 has 6 Mortar! Cards and Attack Deck #4 has zero Mortar! Cards. So if you can survive them for two Attack Periods you are in the clear!
Assault! Card Makeup per Attack Period Deck
Now that we have looked at the different type of cards, and discussed how they work and what the effects are of each of the three types of cards, I want to take a closer look at the makeup of each of the 4 Attack Period Decks. I want to particularly focus on the number of different Assault! Cards and the units they place but also where they place them. I believe that knowing what Assault Tracks are more likely to get Assault Counters will help you as you plan your defense of Lanzerath Ridge.
Attack Deck #1
In Attack Deck #1, you will find that there are a total of 24 cards with 16 of those or 66.7% being Assault! Cards. Of these 16 Assault! Cards, 10 of them are placed on an Assault Track with a random D6 die roll so they can be placed on any of the brown square circles. The other 6 Assault! Cards are all Leaders and they are assigned one per each of the brown square tracks. You will notice that not one Assault! Card will be placed on the 1 (orange hexagon) track or the 1 (black triangle) track. That means that you can just focus on the brown square tracks and keeping them under control. There are 8 MG-42! Cards in Attack Deck #1 but they get placed in the MG-42 Positions and not on the tracks. Among this 8, there are 2 that will be placed in the A (hexagon) MG-42 Position but these do not affect the Assault Tracks themselves and you don’t have to worry about getting overrun on this track during Attack Deck #1.
Attack Deck #2
The heat gets turned up a bit in Attack Deck #2 as there are a total of 27 cards with 21 of those or 77.8% being Assault! Cards. Of these 21 Assault! Cards, 7 of them are placed on an Assault Track with a random D6 die roll so they can be placed on any of the brown square circles. 6 of the remaining 14 Assault! Cards are all Leaders and they are assigned one per each of the brown square tracks. For the first time, 8 of these Assault! Cards will be placed on the 1 (orange hexagon) track or the 1 (black triangle) track with 4 each. That means that you have to start paying attention to those tracks and cannot simply focus your attention on the middle tracks. The 4 of each of those track’s Assault! Cards can lead to Enemy Assault Counters getting into your Defender Combat Positions so you must keep them at bay.
Attack Deck #3
In Attack Deck #3 there are a total of 27 cards with just 13 of those or 48.1% being Assault! Cards. Of these 13 Assault! Cards, 7 of them are placed on an Assault Track with a random D6 die roll so they can be placed on any of the brown square circles. The 6 remaining Assault! Cards are all Leaders and they are assigned one per each of the brown square tracks. So here we see that the German assault ignores the flank positions and goes up the middle. This is important to know so you can focus on the middle tracks in order to do better as at this point of the game, things are getting quite hairy, especially with the addition of the German Forward Observers to the tracks which give the Mortar! Cards more attack dice making them even more deadly.
Attack Deck #4
Finally we come to the last Attack Deck. In Attack Deck #4 there are a total of 27 cards with all 27 of those being Assault! Cards. The Germans have taken the kid gloves off and are coming for the defenders with an all out assault! Of these 27 Assault! Cards, 5 of them are placed on an Assault Track with a random D6 die roll so they can be placed on any of the brown square circles. 6 of the remaining 22 Assault! Cards are Leaders and they are assigned one per each of the brown square tracks. Now things get interesting on the flanks. There are 8 Assault! Cards that place units on each of the orange hexagon and black triangle tracks and this is the point that you can lose the game as if you are not prepared, and don’t have your units positioned to anticipate this attack, you just wont have enough actions to hold them off.
I hope this Action Point gives you insight into what you are up against but also gives you some inside information about the makeup of the decks that you will be defending against. Understanding what is coming at you, and from what general direction, will give you the upper hand in the game. And it is historical as several of the defenders were trained in intel and would have been very proficient in identifying the German tactics as they were assembling and approaching the defenses.
In Action Point 4, we will examine the very interesting new Vehicle Counters and their uses.
-Grant

Really enjoying these. Looking forward to Action Point 4.
LikeLiked by 1 person
Thanks Jack. Such a good game and the design makes these pretty easy to write as it just all makes some good sense.
LikeLike
Grant,
Yet another great dive into an excellent game!
Having just finished my “learning” playthrough, here are a couple of my take-aways.
In the set-up for Period 3 (Rule 2.3) consider moving the dismounted M2 and a gunner into defense position orange rectangle 2 (Rule 4.1.7). This position is the only one not on an attack route and it can fire on the US right flank and across the open field (albeit with range defense modifiers).
Always keep in mind what it takes to remove a defender’s Exhausted status. This can be done by a defener with an Assist [A] attribute, and by Bouck and Slape but, as a Major Action, it Exhausts the initiating defender. Bouck and Slape can only be un-exhausted during the inter-period. Using one of their attributes too early in an attack period can have serious repercussions. Use the Inspire attribute instead [Rule 4.3.2].
As you have previously written, the map is magnificient.
As a matter of perspective though, I wish it had been drawn with the solo player behind the US position.
LikeLiked by 1 person
Great write up. I’ve only played Pavlov’s House out of this series and it was really cool but unfortunately I’ve learned I just don’t enjoy solo gaming. Every time I have the time or opportunity to I always choose to do something else.
LikeLiked by 1 person