
Undaunted: Normandy is a tactical card based game that uses very interesting mechanics to simulate small squads of soldiers from the 30th Infantry Division and their enemies the defending Germans in and around Normandy, France as you battle over Control of various Objectives on the modular board.
In Action Point 1, we looked at the deck makeup and how you “build” the deck into a well oiled fighting machine. In Action Point 2, we dove into the various unit types and their actions and special abilities. In Action Point 3, we looked at the modular board and how it works in the design. In this final Action Point we will discuss strategies about how to defeat your opponent through offensive attacks as well as through stratagem and deck manipulation.
The Most Indispensable Unit on the Battlefield is the Scout!
As we discussed in Action Point 2, the Scout is the unit that paves the way for the rest of the platoon to attack or defend objectives. They are highly versatile cards that have four different actions/abilities. The abilities and the advantage that I wish to focus on in this post though comes in the form of deck manipulation, both of your deck and by affecting the enemy’s deck.

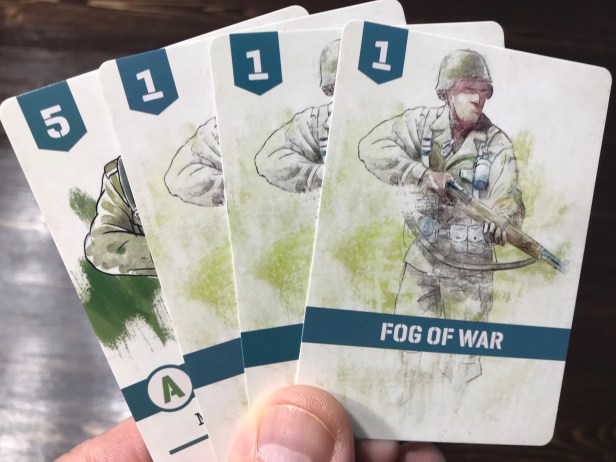
The Scout’s Recon ability allows it to remove a Fog of War Card from your hand and remove it from the game and then draw a new card to replace it. This drawn card can then be used as normal during this round. This is very powerful as it not only slims down your deck, removing the useless space eating FoW Cards, but gives you a new and possibly very important and needed card at that very time. A lot of wargamers think that card drawing is based on luck, and there is some truth to that belief. But, I can tell you that having the right cards in your deck and drawing the right cards is not luck. If you have used the Recon ability when possible you will have rid your deck of useless cards meaning that your good cards will be drawn more often. This is what deck building is about, taking out the bad cards and allowing the good cards to be drawn more often.
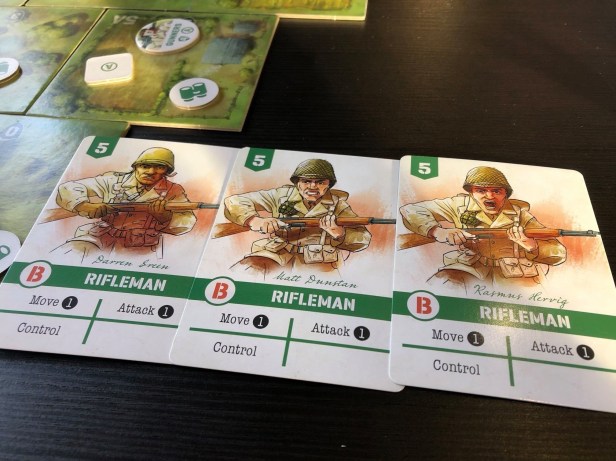
This past weekend, I saw a Facebook post from one of the co-designers David Thompson about his “lucky” draw to end a game of Undaunted: Normandy. I know that he was most likely trying to play the role of the humble victor but this draw was anything but luck. You see, in order to be able to draw 3 B Squad Rifleman cards at once takes more than just luck. He had to put those cards in the deck using his Command Cards ability to Bolster and add them in but also most likely thinned his deck down using the Scout’s Recon ability and also probably Hunkered Down (we will discuss this point a bit later in this post) as well to get useless cards for the situation (not useless cards for the game but cards that had served their purpose to that point and were no longer needed to win) out of his deck. This then allowed his deck to be more efficient and increased his odds of drawing the cards needed to win. Without understanding the exact situation he was facing in that game, or how he was going to need those 3 cards to win, I can only guess that he needed to move his B Squad Rifleman counter on the board at least 2 tiles to reach an Objective and then used the third card to take Control of that Objective for the points necessary to win!
The second point that I wish to make with this post about the Scout is the ability to Conceal their movements and the actions of their Squad by creating confusion among the enemy. The Conceal ability allows the player to force their opponent to add a Fog of War card from the opponent’s Supply to the opponent’s deck. If the Scout can do this 2 or 3 times in the first few rounds (say by having a Scout that they play to Conceal followed by the play of a Command Card such as a Squad Leader to Inspire the pick up and replay of that just played Scout to Conceal again), the opponents deck will have multiple Fog of War cards (remember they start with 2 FoW cards) to clog up their movements and abilities on the battlefield. This will force your opponent to have to deal with this problem immediately and this will hamper them as they cannot do their Conceal action and their Scout action very efficiently with only a few Scouts available to them. You have succeeded in affecting their plan and efforts and will see that their draws are not as powerful as they might be drawing 1-2 FoW cards in their 4 card draws and are only able to take 1-2 actions per turn. I love seeing Alexander discarding 2-3 unused Fog of War cards from his hand as I have simply loaded him up with plays of the Scout’s Recon ability. I simply love the Scout as they can really begin to mess with your opponent and prepare the way for your forces to be more efficient and deadly in future attacks on the battlefield. Don’t underestimate a sustained campaign of hand clogging as it will pay dividends over the course of a full game.
When in Doubt, Hunker Down!
An overlooked part of the game that follows along the same principle of the Scout’s Recon ability to thin your deck and make it more likely to draw out a certain card when needed is Hunker Down. Hunker Down is a simple principle that should be used when needed. To Hunker Down, you simply choose a card in your hand that you have drawn and return it to the Supply taking it out of your deck. This card is eligible to later be Bolstered and returned to your deck but the benefit is that you remove that card now to improve your draws later after your shuffle your deck. You have to be careful when Hunkering Down though as you don’t want to return a card that has a Bolster action as this is your only way to get a card back from the Supply. This tactic shouldn’t necessarily be used during the early game either as you need all of your cards and their abilities to properly prepare the battlefield for your ultimate success and victory. This should be used nearing the end of a match when you just need that extra draw capability to get a card you really need, such as a Rifleman when you are trying to take Control of an Objective to win the game or a Command Card that you need to be able to Inspire your already utilized cards to perform their actions again, such as a devastating fire Attack with your Machine Gunners on an enemy Scout moving into new terrain to prevent them from opening the way for their Squad to move up on Objectives.
Let me give you another example of why this might be important.
In your deck, you can have up to 5 Rifleman cards from a given Squad, usually starting with two cards in the deck. If you have prepared your deck well, by getting rid of the space eating Fog of War cards, and by Bolstering all of your available Rifleman cards, you have increased your chances of drawing multiple copies of Rifleman cards from the same Squad when needed, but you need to do a bit more preparation by getting rid of units that you don’t want to draw because you don’t need them any longer. By Hunkering Down your Scout cards lets say that have already performed their Scout ability to get access to a terrain tile that contains an Objective, you have increased the odds that you will set yourself up for that amazing “lucky” draw later in the game as you move in to take that final Objective. In a deck of 20 cards, if you have 5 Rifleman you have a 1 in 4 (25% percent) chance of drawing a Rifleman card with each card draw (remember that each round you will draw 4 cards). If you are able to Hunker Down 2 Scouts and a Sniper card that you no longer need, as you have already Scouted the battlefield and aren’t planning on making any Attacks, all of a sudden you only have 17 total cards with 5 of those being Rifleman. This has now increased your odds to nearly 1 in 3 (or a 29.4%) chance for a Rifleman with each card draw.
As you can see, there are many ways to prepare your deck making it more efficient for the task that you need to accomplish at the right time in the game. Luck in Undaunted: Normandy can be defined as preparation meeting the odds of drawing cards. The harder you work to prepare, the better your chances are and I like that type of control in my games.
Attack Smart
In the final point in this post, I want to give some advice on how best to Attack your opponent. We have looked at the different unit types in the game and discussed what each can do and their role in the squad. This gives you an idea of what units are the most important and what units give only a supporting role.
The key to this advice is understanding the importance of different unit types during different points in the game. During the early game, Scouts are your most important units as they can prepare your deck, clog up the deck of your opponent and Scout the terrain tiles so that your units can move up on Objectives. But in the late game, they become dispensable. Machine Gunners and their powerful Attacks (2 dice) and Suppression (4 dice) are very important in the early game and again in the late game but they too become dispensable once your Scouts have opened the way and your Rifleman are needed to move up on Objectives to Control them for the victory.
So what units should you Attack at what times? Well, the answer to that is to look at the battlefield situation.
In the early game, Scouts are a good target as they are necessary to allow your Squad to move into new terrain tiles. If you remove the Scouts from your opponent’s deck, they will be unable to Control objectives because the Rifleman will not be able to move up. Rifleman are also excellent targets in the early game as if they are totally removed from the deck the opponent will have no way to Control objectives as they are the only unit in the Squad with that ability.
During the mid game, I will begin to focus more closely on Rifleman as typically your enemy Scouts will have done their work and are now only really good for deck thinning and clogging up your deck. Still a very important part of the game but less important at this point.

During the late game, I typically focus only on Rifleman as they have typically already scouted the needed Objectives and are ready to begin moving up to Control them. Remember, that each of the Rifleman that you score a successful hit on will force your opponent to remove one of their cards first from their hand, then from their discard and finally from their deck. Each card removed means they cannot draw that card again to take the action that they need to.

I have played many games now and at first I was always interested in trying to eliminate my opponents muscle in the form of their Machine Gunners and Snipers. I simply thought that if I could hamper his effectiveness at combat, that I would win out in the end. I lost a lot of my early games. But with those losses came lessons on how to use each of the units in my Squad. I now believe that I know how to use my units and their abilities to give myself the best chance of winning each and every match. This doesn’t mean I will win every time but I now have a better shot with a more honed and efficient deck, having clogged my opponent’s deck up with Fog of War Cards and by attacking the appropriate units for the situation on the battlefield.
I hope that you have enjoyed this series of Action Points on Undaunted: Normandy. I have enjoyed writing them and playing the game. I have found that this game is really smart and well done and gives players a chance to understand some of the aspects of how a Rifle Company functioned on the battlefields of World War II. I know that the series is expanding and they are currently working on a North Africa setting that will add vehicles into the fray. I can’t wait to see some British Crusaders and Matildas along side American Shermans running up against Italian M13/40s and German Panzer Mark IIIs and IVs in the desert. Should be great fun!
-Grant
