
With this new My Favorite Wargame Cards Series, I hope to take a look at a specific card from the various wargames that I have played and share how it is used in the game. I am not a strategist and frankly I am not that good at games but I do understand how things should work and be used in games. With that being said, here is the next entry in this series.
Card #36: Supply Lines from Stilicho: Last of the Romans from Hollandspiele
Stilicho: Last of the Romans is a very well designed and interesting solo experience that plays in 60-90 minutes. But, due to the unforgiving nature of the random card draws and its reliance on dice luck, that admittedly can be mitigated through cagey card play and proper decisions, the game can be over very quickly. In fact, my very first play a few years ago lasted only 2 rounds and was over in about 15 minutes. Remember that the historical Stilicho only made it to Round 3! The cards are at the heart of the game here and make it a very tense and decision filled experience. Having to analyze each card, measuring its utility against the board state and what pressing matters the player must address while also fretting over having to discard a good Event Card that just isn’t useful at this point in time to take an action can be really agonizing. I think that this design works even better than its predecessor Wars of Marcus Aurelius.
Surges are the newest and most devious addition to the system used in Stilicho and they simply make the game that much more difficult but I do enjoy having to figure out how to deal with this new mechanic. The Surge Display holds enemy cards that have a Surge effect and once the row is full with 3 of these cards, they will trigger the Surge Effects which do things like advance the enemy on a Front, or sometimes twice, reinvigorate a demoralized enemy army or even advance the deceiver Olympius on his track which will lead to you losing your head as the Emperor listens to his honeyed words and begins to lose faith in you and you military prowess! Luckily, there are 4 Roman Cards found in the deck that specifically address the Surge mechanic and provide the player with ways around the nasty effects. I really keep an eye out for these 4 cards and protect them in my hand so that I can use them when things are getting bad!
One of my favorite parts of the game is the combat. You have a standing army that you assign a leader and also place on a specific track that is attacking barbarian hordes in that region and have to go about trying to destroy them and quell their resistance to Roman rule. This combat is brutal and sometimes is very challenging if you don’t have the right leader, enough soldiers and the right cards in hand. As you drive the barbarians back toward their homeland though, their defensive abilities improve as they are more familiar with the terrain as they are fighting on their home court. When you get to the very end of their tracks at their Home space, this Terrain Value bonus will increase to +7 or higher and makes winning combats very, very difficult…unless of course you have the right cards in your hand! One of my favorite cards for this situation is Supply Lines.

Supply Lines is a Battle Card, as it has the crossed swords located in the upper left hand corner of the card, which means the event can only be used during a Battle. But it is a very important Battle Card as it will help the Romans be able to fight and reasonably defeat the barbarians as they are retreating back toward their Home Space. The effect of good supply lines is abstracted here in a benefit that reduces the Defense Value of a space in Germania Magna (the home of the Vandals) or Illycrium (the home of the Goths) by half. As you can see in the picture above, the Vandals Home Space has as defense Value of +7 and this will be added to their Combat Value printed on their counter which is a 4. This will give the Vandals a base Combat Value of 11 while located in this Home Space and to that you will add the results of a D6 roll to create a final Combat Value of between 12-17. This range is a very hard range to defeat as they Romans will typically have a base Combat Value of 8 or 9 as long as their Legions are fully healthy and capable and if they have a good leader as well. This will mean that they have a final Combat Value range of somewhere between 9-15. This makes the use of the Supply Lines card, which will halve the Home Space Defense Value (rounded up) and make a victory here much more attainable with a Barbarian Base Combat Value of 8 and a range of 9-15. This means that this becomes an even fight and the use of this card at the right time is the key to being able to defeat the barbarians and quell their resistance so you can focus on the other marauding tribes.
There are some events that are just too important to your efforts to ever discard to take an action as they provide you with such great benefit and are more efficient than taking individual actions. Don’t get me wrong though the playability of a card is always dependent on when in the course of the game the card is drawn. There are several cards included in the Roman Deck that are simply too good to not play for the printed event when they come up in the deck. About the only time they should be discarded for an action is if that action is going to save the game or has a chance to end the game, such as being discarded to attack an enemy while in their Home Space causing them to Surrender! I call these cards “Bite the Bullet” Cards because when you have to discard them to take another action, you just have to grin and bear it that you have no other choice because the game has been conspiring against you.
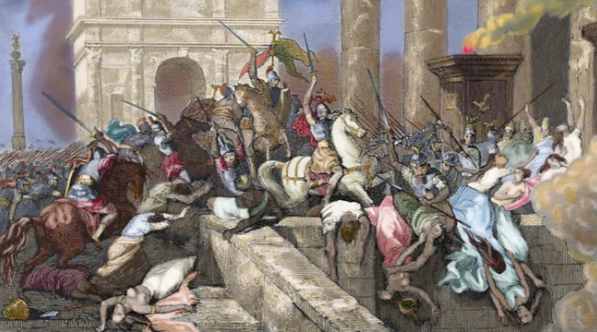
The supply lines of the Roman Empire played a crucial role in its ability to sustain itself and its armies during major invasions and wars on its frontier, particularly of its military and urban centers. However, during the period of barbarian invasions, these supply lines became increasingly vulnerable and disrupted. These barbarian invasions often targeted and disrupted trade routes and trade centers on the frontier, which were vital for the transport of goods, including food and resources, throughout the empire. This disruption led to economic instability, inflation, and shortages of essential goods. Also, as the Roman Empire struggled to repel these invaders and lost control of territories, it lost access to important resources and agricultural land, which were used to feed and supply the troops in the field. These disruptions reduced the overall capacity of the empire to produce or obtain the necessary supplies to keep any army in the field and to keep it effective in combat. Invasions also often resulted in damage or destruction of critical infrastructure like Roman built roads, bridges, and aqueducts on the frontier. This impaired the movement of goods and soldiers, hindering supply efforts and making it harder for the Romans to respond to threats.
The Roman armies had to divert resources and manpower to defend against barbarian incursions in key areas to protect these sources of supply and supply routes thereby putting a significant strain on their existing logistics and supply capabilities. Maintaining a constant military presence along the extensive borders of the north along the Danube required significant resources, further depleting the empire’s ability to maintain its supply lines. In the end, barbarian invasions and the continual period of war and conquest posed a significant threat to the Roman Empire’s supply lines, contributing to economic decline, resource shortages, and ultimately, the weakening of the empire itself.
I truly love the work of Robert DeLeskie on this game, as well as the predecessor Wars of Marcus Aurelius. The system and how it uses cards is really a classic CDG model but the events are so very unique and I have found create some extremely difficult choices for the player. I have played this one about 30 times and always have a great time with it and how it uses cards.
I wrote a series of Action Points on the various aspects of the game and you can read those at the following links:
Action Point 1 – the Mapsheet focusing on the three Fronts down which your enemies advance, but also covering the different spaces and boxes that effect play such as the Olympius Track, Game Turn Track, Army Box, Leader Box and Recovery Box
Action Point 2 – look at the cards that drive the game and examine the makeup of both the Enemy Deck and the Roman Deck.
Action Point 3 – look into the Roman Phase and examine how cards are discarded to take one of nine different actions.
Action Point 4 – look at a few examples of Battles and how they are resolved.
Action Point 5 – look at a few points of strategy that will help you do better in the game.
I shot a playthrough video for the game and you can watch that at the following link:
I also followed that up with a full video review sharing my thoughts:
In the next entry in this series, we will take a look at Populism from 2040: An American Insurgency from Compass Games.
-Grant
