
Last year, I discovered a great solitaire game called The Wars of Marcus Aurelius from Hollandspiele that dealt with the Romans attempting to pacify Barbarian hordes from the north in the Danube provinces during the Marcomannic Wars in 170-180 AD. Now the designer has taken that system and applied it to another period in Roman history when the Goths and Vandals, as well as a pretender named Constantine, were assaulting Rome itself and one man was asked to defend her from her enemies. Flavius Stilicho was a high-ranking general who rose from humble beginnings to become one of the most powerful men in the Western Roman Empire. After many years of victories against a number of enemies, both barbarian and Roman, a series of political and military disasters finally allowed his enemies in the court of Honorius to remove him from power, culminating in his arrest and subsequent execution in 408.
In Stilicho: Last of the Romans the player must survive these attacks from enemies both external and internal and quell all three advancing enemies.
In Action Point 1, we covered the Mapsheet focusing on the three Fronts down which your enemies advance, but also covering the different spaces and boxes that effect play such as the Olympius Track, Game Turn Track, Army Box, Leader Box and Recovery Box. In this Action Point, we will take a look at the cards that drive the game and examine the makeup of both the Enemy Deck and the Roman Deck.
Different Types of Cards
There are two decks of cards used in the game. The Enemy Deck is used
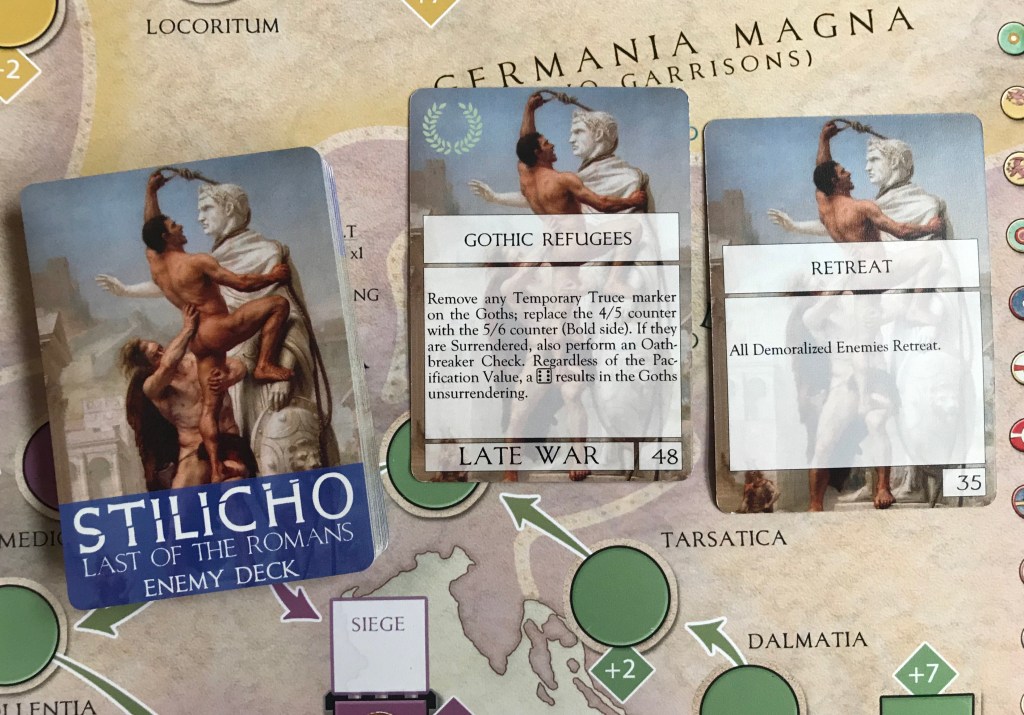
to resolve actions that represent the movement of your enemies, both internal and external, down their Fronts as they advance on Ravenna and Rome. The Roman Deck provides the player with the opportunities and resources that are needed to overcome the threats stacked against them to triumph and bring peace to the Empire. These cards are not all the same and some cards do not start in the deck at the beginning of the game. These are the Late War Cards which will be shuffled into the decks when the Game Turn marker is advanced to Turn 6.
The cards are a form of multi-use cards, as most Card Driven Games are, as they can either be used for the printed events on the cards or simply to be discarded to take one of a number of actions available to the player. It is important to read every aspect of the card thoroughly as some cards have multiple effects, differing effects depending on what the state of the game is or whether one Barbarian has surrendered or may have several prerequisites to that card being allowed to be played.
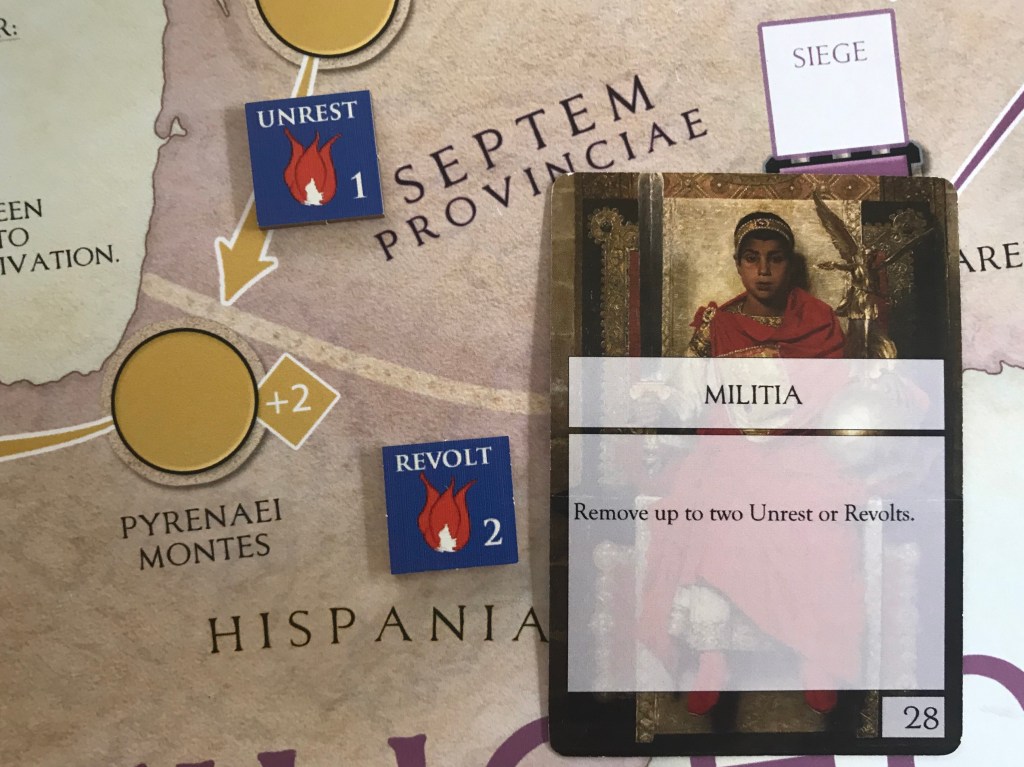
There are some events that are too important to your efforts to ever discard to take an action as they provide you with such great benefit and are more efficient than taking individual actions. Don’t get me wrong though the playability of a card is always dependent on when in the course of the game the card is drawn. An example of what I am talking about is the Militia Roman Card.
Some of the cards in both decks are marked with laurels in the upper left hand corner and these indicate that these are History Cards. When this type of card is used for the printed event and not discarded to take an action it will not be discarded normally but is removed from the game and placed into what is called a History Pile. Unlike in this game’s predecessor The Wars of the Marcus Aurelius, this History Pile is not included in the end game scoring. The History Cards are added to the History Pile so that they are not reshuffled into the deck and keep coming up for the player. These cards typically have a very good benefit and would break the carefully balanced meat grinder that this game is.

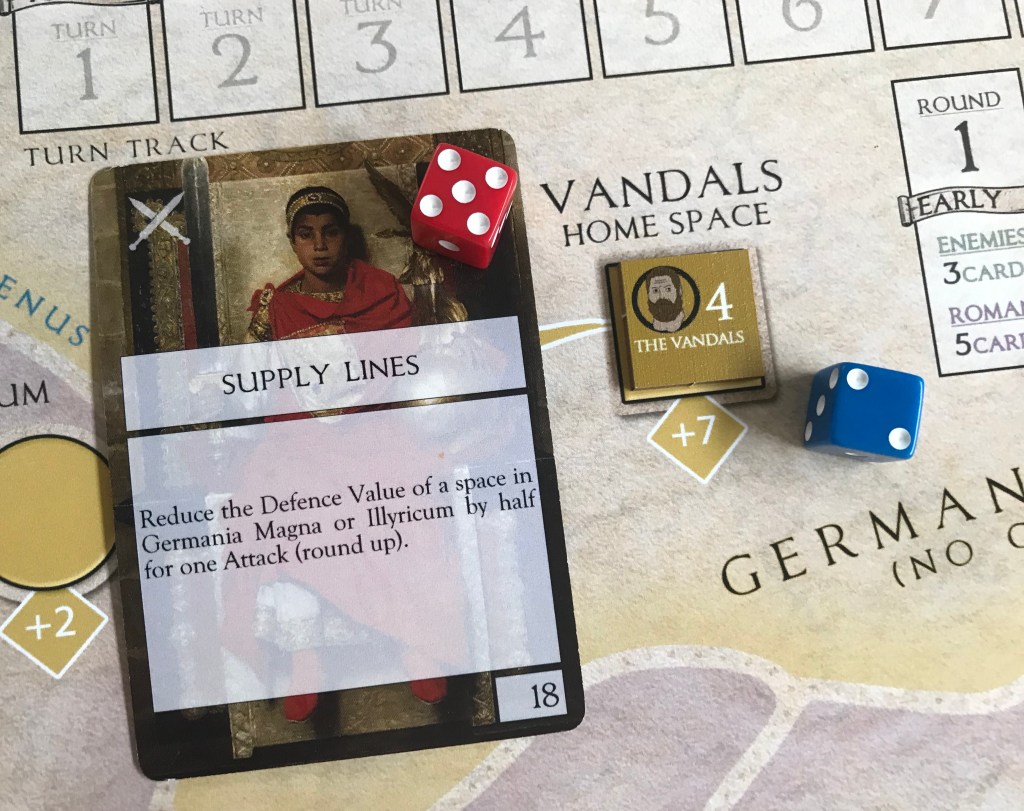
Finally, some cards in the Roman Deck are marked with crossed swords in the upper left hand corner. These are referred to as Battle Cards and indicate that the card’s event is used to modify the results of an Attack made against enemy forces.
Enemy Deck Makeup
During the Enemy Phase of each Round, the player will draw and resolve three Enemy cards one at a time, completely resolving a card before drawing the next. Enemy Cards consist of two different types, including Activations and Events. If the Enemy Deck is ever exhausted during play, meaning that you have drawn the last card, you will simply shuffle the discarded cards to form a new Draw Deck.
The Enemy Deck consists of a total of 50 cards with 10 of those being Late War Cards that are added to the deck during Turn 6. So this means that for a majority of the game you will be cycling through the same 40 Enemy Deck cards. Further breaking the Enemy Deck down shows that there are a total of 9 History Cards, remember that these get removed from the game if played for the printed event, 17 Event Cards and 24 Activation Cards. Here is a look at those numbers and their percentage of the total deck:

Remember that you are drawing three Enemy Cards at the start of each Enemy Phase. While you cannot say that you will draw cards according to the percentages listed above, you can infer several things from a look at the statistics. You will draw Activation Cards most often, which means that your enemies will get to advance on you. More often than not, you will draw at least 2 Activation Cards each round and you must be ready for this by preparing for this the round before. Each round, the player will get to draw a certain amount of cards per round (5 during the Early Campaign, 3 during the Mid Campaign and only 1 card during the Late Campaign). With the odds of drawing 2 Activation Cards per round, you should plan to spend at least 2-3 of your drawn cards on trying to push back the advancing Barbarians. But remember, that you also have Event Cards to deal with that can create additional challenges for you in addition to threats from your external enemies.
One other thing that you must consider is that early on in the game the Enemy Deck only consists of 40 cards that include 4 History Cards, 13 Event Cards and 23 Activation Cards. Most of the Late War Cards that are added are Events so early on your odds of drawing Activation Cards are even greater.
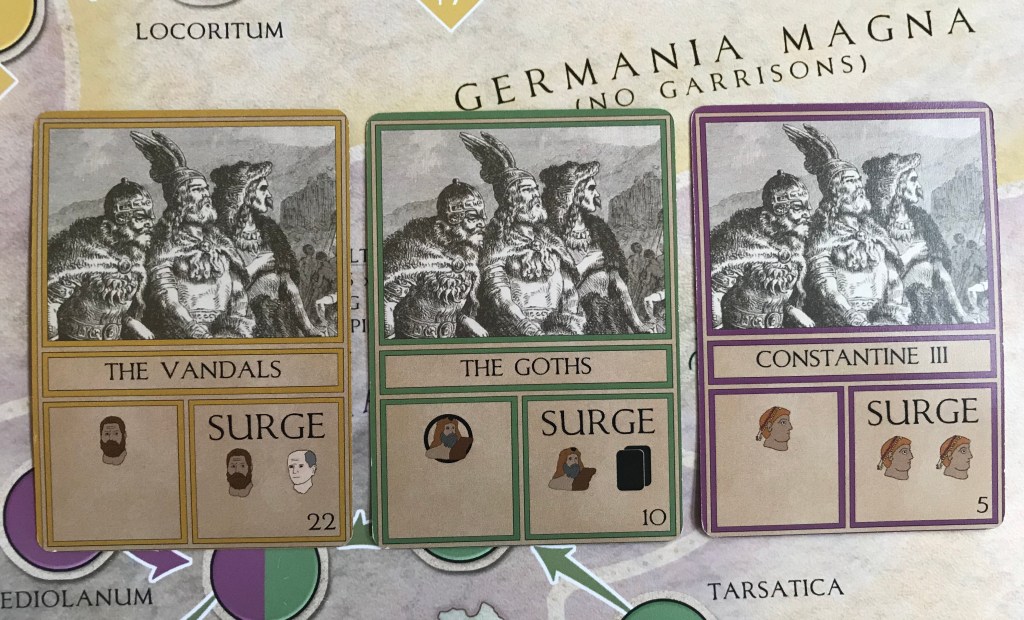
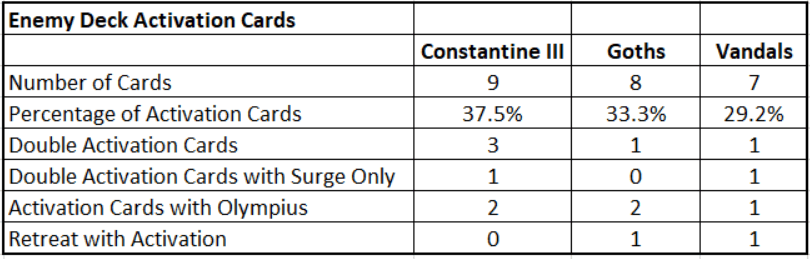
Let’s take a deeper look at these 24 Activation Cards in the Enemy Deck. 9 of the Activation Cards will activate Constantine III (although only 8 of these cards are in the deck at the start as one of the activations is added in the Late War at Turn 6), 8 will activate the Goths and only 7 will activate the Vandals. So Constantine III and the Goths are your greatest threat here as they will be activated most often. Remember that Constantine III is the big threat though as if he reaches the end of his Front he will enter the Capital City of Ravenna, which if sacked leads to an immediate loss of the game.
Here is a look at the breakdown of the Activation Cards by Front:
I wanted to make sure that you understand the symbols that are used on the Enemy Activation Cards. The Enemy Activation Cards are easy to identify as they are color matched with the enemy they represent and they have various icons on the cards which are referred to as Activation Icons. You will notice at the bottom of the Enemy Activation Cards there are two separate boxes, both containing icons. The icons in the lower-left box are used only when the card is first drawn from the Enemy Deck while the icons located in the lower-right box indicate what is referred to as a Surge Effect. This is a nasty little addition to the game added to The Wars of Marcus Aurelius framework that ramps up the difficulty in dealing with these Surges. But enough on that at this point, we are only trying to cover the icons.
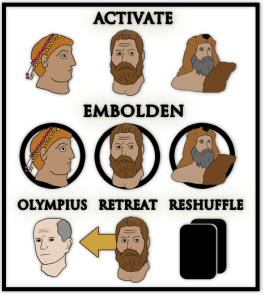
The picture here shows the various icons that are found on the Activation Cards and they are as follows:
Activate: If the enemy is currently Bold, it will advance down its Front one space. If Demoralized, this appearance of this icon will cause it to flip to Bold but will not advance.
Embolden: If the enemy is currently Demoralized, Embolden it and then advance down its Front one space. If the enemy is already Bold, simply advance one space down its Front.
Olympius: If this icon appears on the card the player will move Olympius up one space toward the Stilicho Executed space on the Olympius Track.
Retreat: This one doesn’t appear often but if it does the player will retreat the identified enemy one space back toward their Home Space.
Reshuffle: This one is killer as when it appears you will have to shuffle all of the Enemy Deck cards back together and start the whole process over again. I actually like this addition as it makes card counting useless and continually refreshes the challenge of the game. This reshuffle icon only appears in the lower-right section on the cards which is always associated with a Surge Effect.
Once the player has fully resolved the icons on each card, move the card to
the next available Surge Space on the display. If the third Surge Space is filled, a Surge is activated and the player must pause the game, even in the middle of resolving the three drawn cards, and resolve it immediately.
If an Enemy has surrendered and is located in the Surrendered Box, the player will ignore the activation icons but the card will still be moved into an empty Surge Space.

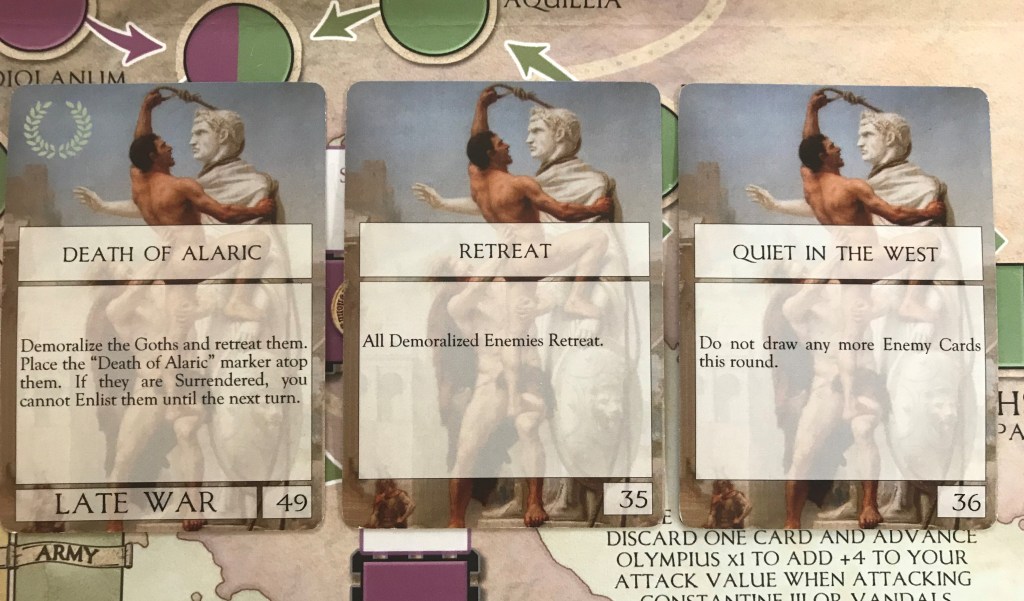
There are a few of the Activation Cards that are beneficial for the player. These three cards are Death of Alaric, Retreat and Quiet in the West. Each of them is a more than welcome breather from the continual onslaught of the Fronts and when drawn the player should be grateful.
There are some other cards that cause trouble for the player and these include various cards that add Unrest Markers in the Provinces or flip existing Unrest to Revolt, cause Olympius to advance on the Olympius Track and even one card that removes the player’s Advocate Symmachus from the Advocate Box. Symmachus provides a +1 bonus to each attempt to Counter Olympius and his plot against Stilicho and his loss, coupled with Olympius advancing up the Olympius Track realizing a penalty to these rolls, can make losing to the scheming of Olympius a very real possibility.

Roman Deck Makeup
As mentioned earlier, at the start of each Roman Phase, the player will draw cards from the Roman Deck depending on the current Round, 5 during the Early Campaign, 3 during the Mid Campaign and only 1 card during the Late Campaign. The designer has said that this decreasing number of cards throughout the the Rounds represents diminishing resources and opportunities for the Romans as the campaign season wears on. You will need to pay attention that certain Enemy Event Cards can reduce the
number of cards that the player will draw, but never below one card,
and certain Roman Events can temporarily increase the number of cards to draw, such as Consulship that allows the player to draw two Roman Cards.

During the Roman Phase portion of a Round, the player can play as many cards as they like. At the end of a Round, the player may hold over a maximum of five cards that can be played in the next Round. At the end of the Game Turn, which consists of 3 Rounds, the player must discard down to a single card with the exception of if the special Event Imperial Wedding was played for its event, the player may hold two cards at the end of a Turn for the rest of the game. If the Roman Deck is exhausted, simply shuffle the
discards to form a new deck.

The Roman Deck also consists of a total of 50 cards with 10 of those being Late War Cards that are added to the deck during Turn 6. This means that you will have access to your cards several times each before the Late War Cards are shuffled in and this is a good thing as some of the early cards are really critical to success. Remember that the player will drawn a total of 9 cards per round, so by the 5th Turn the Roman Deck should have had all cards played at least once and with some of the card drawing cards (such as the previously mentioned Consulship and then Experienced Commander that allows the player to play a card from the discard), you might see some of your best cards again by the time the deck is then added to and reshuffled at the beginning of Turn 6. Further breaking the Roman Deck down shows that there are a total of 3 History Cards, 27 Event Cards and 10 Battle Cards. Here is a look at those numbers and their percentage of the total deck:

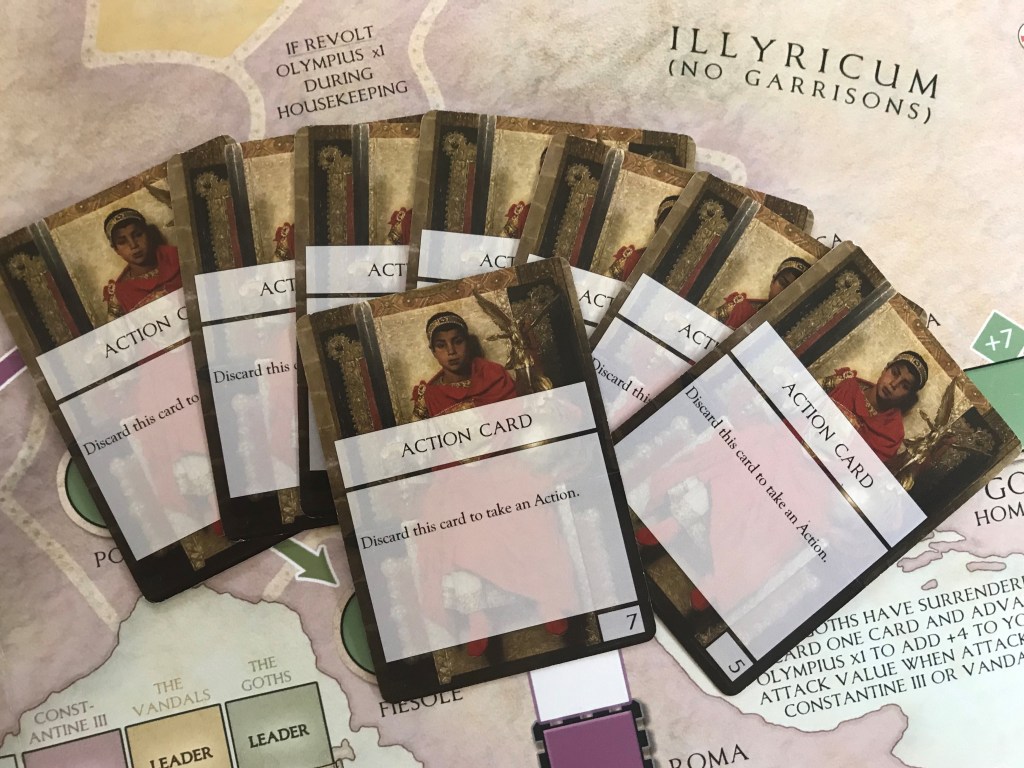
It is also important to know that a total of 8 of the cards in the Roman Deck, all found in the base 40 cards, are simply titled Action Card and can only be used to discard for an action. I understand why the designer did this so as to limit the ability of the player to have access to additional cards that could be used as either Event Cards for their printed events or could be discarded to take an action. These cards are typically fillers and limit options. Most games that use cards have something like this and this was a conscious decision by the designer to do this very thing and make it harder on the player. That or Robert DeLeskie simply couldn’t come up with any more associated events.
There are several cards included in the Roman Deck that are simply too good to not play for the printed event when they come up in the deck. About the only time they should be discarded for an action is if that action is going to save the game or has a chance to end the game, such as being discarded to attack an enemy while in their Home Space causing them to Surrender! I call these cards “Bite the Bullet” Cards because when you use them, you just have to grin and bear it that you have no other choice because the game has been conspiring against you.
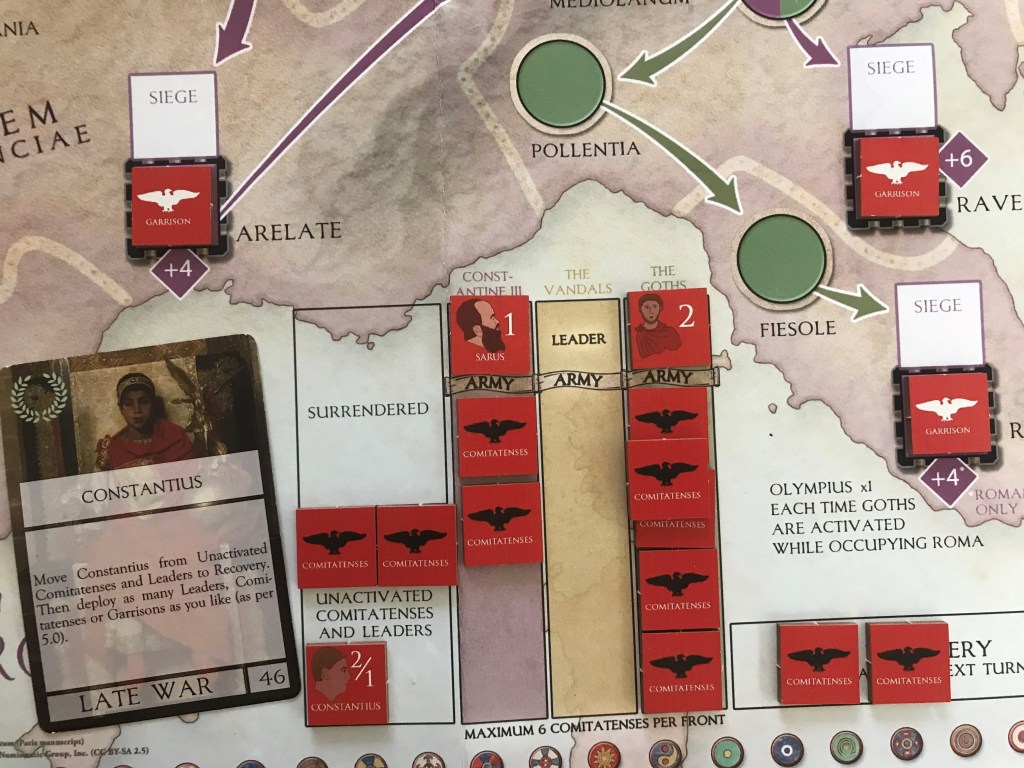
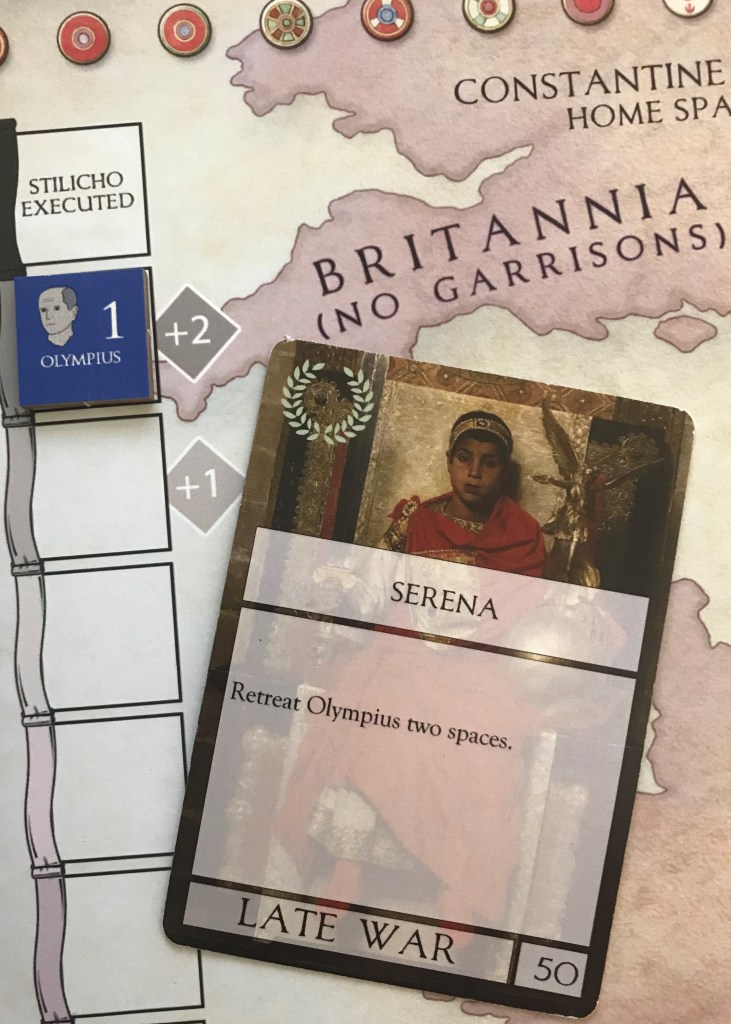
Those cards include 4 different cards that retreat Olympius (Imperial Wedding, Serena, Allies in the Senate and Panegyric), 2 cards that remove Unrest and Revolts (Militia and Agents in Rebus), 3 cards that provide additional Comitatenses and Leaders (Constantius, Battle of Faesulae and Notita Dignitatum) and one card that places a Truce Marker on an Enemy of your choice and allows you to ignore their activations (Temporary Truce). These cards are fairly rare and really are the only way to do certain actions that unless you have no other choice, or if you are fortunate enough to have drawn them early while there is nothing bad happening, then and only then should you consider discarding these for an action.
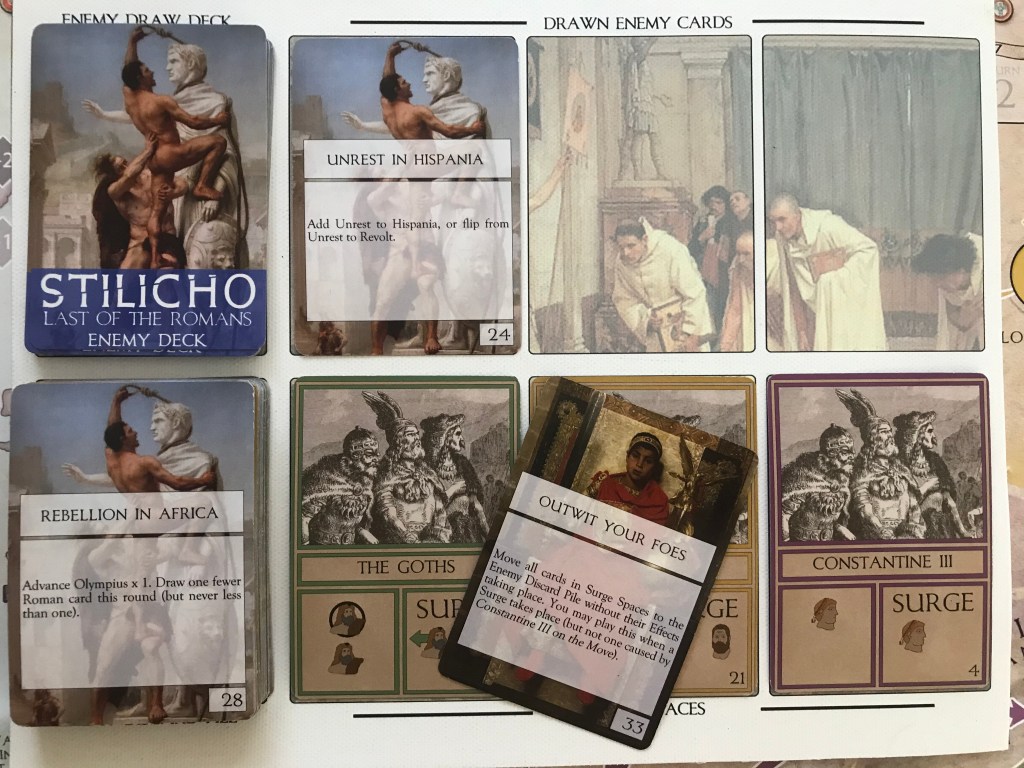
Surges are the newest and most devious addition to the game and they simply make the game that much more difficult but I do enjoy having to figure out how to deal with this new mechanic. Luckily, there are 4 Roman Cards that specifically address the Surge mechanic and provide the player with ways around the nasty effects.
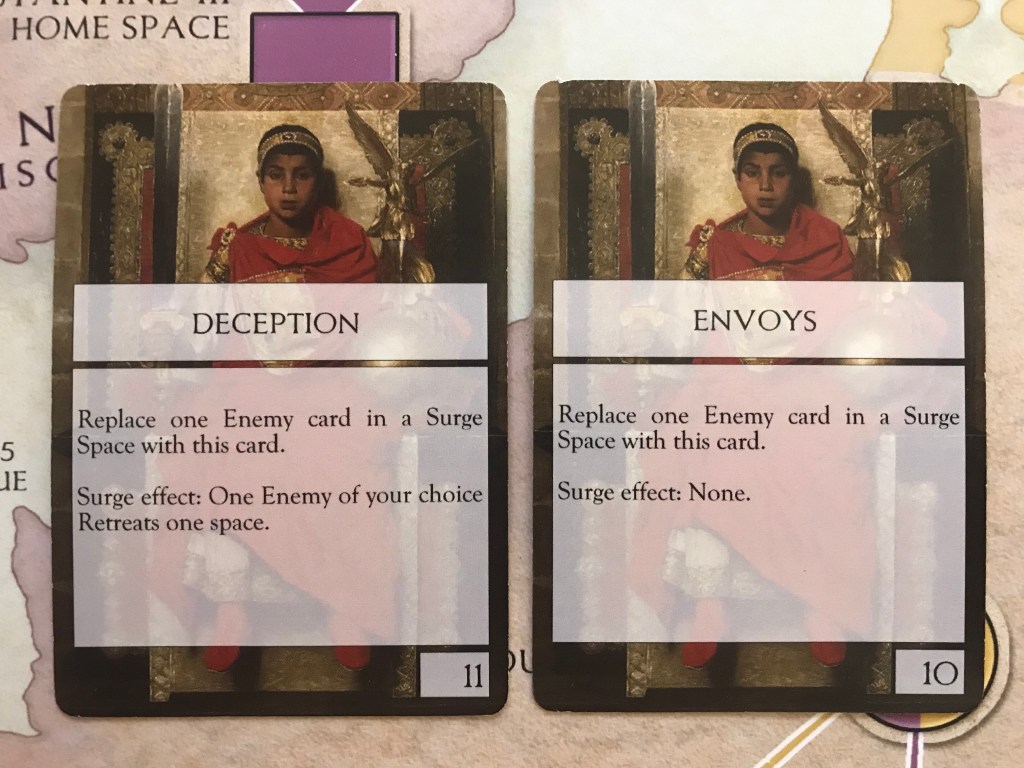
These four cards either replace an Enemy Card located in a Surge Space (Defectors, Envoys and Deception) or they get rid of the cards in the Surge Spaces and allow the Surge effects to be skipped (Outwit Your Foes). The best part about the cards that replace an Enemy Card in a Surge Space is that they not only get rid of the nasty card but they actually provide you with a positive benefit. For example, Deception actually allows you to Retreat an Enemy of your choice one space on their Front, while Defectors allows the player to deploy one Comitatenses from the Recovery Box to an Army Box or to place them on the map as a Garrison. Envoys doesn’t offer a benefit.
The best card of the bunch though is Outwit Your Foes as it simply allows you to move all cards located in Surge Spaces to the discard pile without their nasty effects taking place. This card can also be played when a Surge is triggered by the placement of the third Enemy Card.
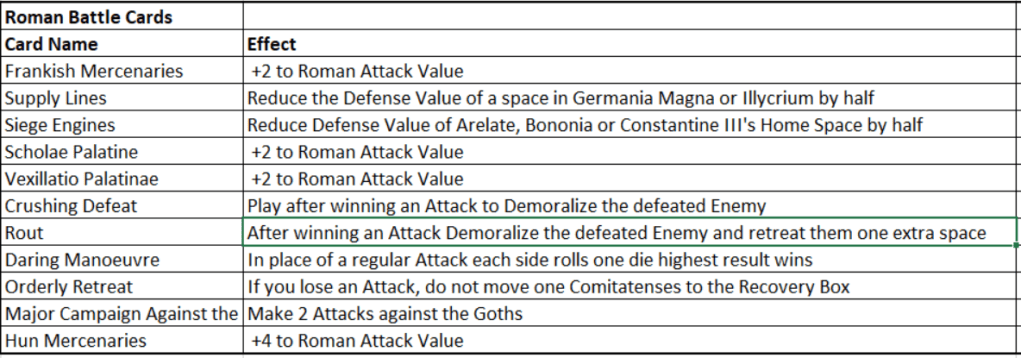
The final thing that I want to take a closer look at in this post is the benefits of the Battle Cards. I feel that this cards are simply indispensable especially when you have chased the Barbarians back to near their Home Space when the Defense Value of spaces increases and it gets tougher and tougher to defeat your enemies in open Battle. Sometimes holding a Battle Event or 2 over from one Round to the next is a key decision that players will have to make as those 2 cards alone might not be enough but if you can draw 1 or 2 more key Battle Cards then you might be able to make a run at one of the Enemies you have pushed all the way back to their Home Space. Here is a quick summary of each of the 10 Battle Cards and their effects:
The cards are at the heart of the game here and make it a very tense and decision filled experience. Having to analyze each card, measuring its utility against the board state and what pressing matters the player must address while also fretting over having to discard a good Event Card that just isn’t useful at this point in time to take an action can be really agonizing. I think that this design works even better than its predecessor and is slowly starting to overtake the affection of my heart.
In Action Point 3, we will take a deeper look into the Roman Phase and examine how cards are discarded to take one of nine different actions.
-Grant

Grant – thanks for such a terrific article and close analysis! The generic “action” cards were a conscious design decision. I found during playtesting on both Stilicho and Marcus Aurelius that it was nice to have a few cards that allowed (and encouraged) the player to focus on the base actions. I also wanted to avoid littering the decision-space with low-stakes events the player would never choose. As an added bonus, they provide a bit of psychological relief from the near-constant pressure of deciding between an action or event. In retrospect, I wish I’d given them a slightly more thematic title — but I regret I couldn’t come up with anything clever in Latin!
LikeLiked by 1 person