
Recently, Worthington Publishing released 3 games in their Great Sieges Series, one 2nd Printing (1759 Siege of Quebec) and two new games (414 BC Siege of Syracuse and 1565 Siege of Malta). Volume 2 in the series 414 BC Siege of Syracuse deals with the Athenian siege of the city of Syracuse in Sicily from 414-413 BC and is a 1-2 player game that is pretty interesting, with simple rules, a very unique order and counter order system that plays in about 30-45 minutes. To date, I have only payed the game solo so this Action Point will really take a look at this mode as opposed to the 2-player version that we have yet to play.
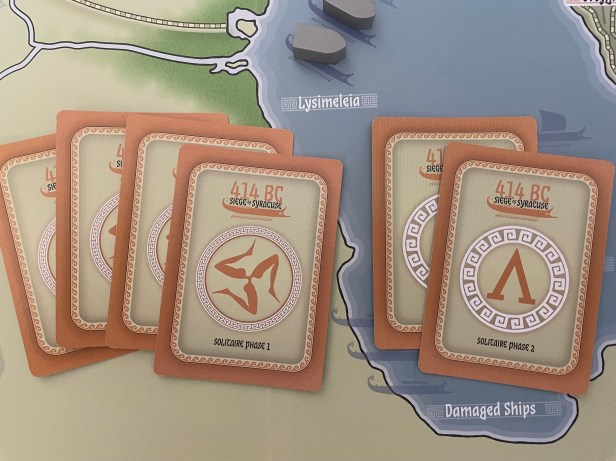
In Action Point 1, we covered the Map examining the different positions where troops and ships are placed and walls and counter walls may be built and their spatial relationship. In Action Point 2, we took a look at the available Orders for the Athenian player and how they are used. In Action Point 3, we examined the Counter Order Deck for the Syracusan defenders and their structure as well as looked at the Athenian Leader cards that are included in the deck. In Action Point 4, we reviewed the victory conditions for the Athenian player. In this Action Point, which is the final in the series, we will take a look at some points of strategy to give you a primer on how to accomplish your task in the solitaire mode.
Strategy Points
First point that I wish to make is that I don’t consider myself an amazing tactician. But I do believe that all games can be a bit more enjoyed if you follow some basics of strategy. There are always things that the players should be focused on and remember as they play that will help guide their decisions and give them a greater chance at victory. These points that I am sharing for 414 BC Siege of Syracuse are such guiding principles.
Start Out on Good Difficulty and Then Adjust
I know that when I play games, I always think that it will be a cakewalk and I will understand all of the rules and get things exactly correct. Well, that is my thought anyway, but very rarely happens. I always like to ease myself into a game so I can better understand how things work and what I should be doing versus racing against the clock making mistake after mistake in my first play. Don’t get me wrong, making mistakes sometimes is the best way to learn but it can be painful. As a reminder, players have the choice of setting their difficulty for this game and it really is pretty easy. There are three distinct difficulty levels including Weak (30 cards), Good (27 cards) and Strong (24 cards). The reason that having 30 cards in the Counter Order Deck is considered Weak is because you have more time to accomplish your tasks while with just 24 cards things will need to happen a bit more expeditiously in order to win.
When you are building the Counter Order Deck at the start of the game you simply take out a certain number of cards in each phase to set your desired difficulty. I would always recommend that players start on the middle rating of Good (27 cards) and try the game out first, learning the mechanics as they make connections on how the game works and how the different Orders advance their efforts. After playing, you can then determine if you want the game to be easier, by adding more cards, so that you taste victory or harder, by taking cards away so you can test yourself against the biggest challenge. Sometimes I think we play on hard mode and don’t learn much of anything because we lose so quickly. This game gives you a chance to ease into it and really learn the system. Take advantage of that option!
Plan Your Attack
With limited actions based on the number of cards you have put in the deck, you will need to make sure you maximize each of your actions. Maximizing your actions means many things to many different people but in Siege of Syracuse, it means not wasting turns on things that are simply not beneficial or you cannot afford to miss your rolls often.
In order to do maximize your efforts, I recommend that your first step should be to set out a plan in your mind and get an idea of what you need to accomplish by what point. Identify what your goals are, as you know in order to win you have to either drive the Syracuse Morale to zero or complete building the circumvallation wall and setup the blockade, and then decide what you are going to do and when. I like to think of things in this game in terms of “by a certain number of cards having been played”. Meaning, by the 7th turn, I need to have moved troops to the Plemmyrion (to gain the advantage when moving ships out to the Blockade position) and have accomplished building the 4 wall segments in the Lowland Wall area of the map. Setting a goal in the form of a number of cards will keep you on target and in line and also give you a clear guide post as to when things are beginning to go awry.

As a part of this plan, you should reassess your progress towards your goal when you are about 20% through the cards in the Counter Order Deck. Depending on what difficulty you chose, this could mean you are reassessing after playing your 6th card (on the Weak setting) or 5th card (on both the Good and Strong settings). This just gives you a target to get through a few cards, see how you are doing on progress toward your goals and then gives you an opportunity to think about either changing your strategy or what comes next. Along these same lines, once you have played your 20th card out of 30 on the Weak setting (or 18th on Good or 16th on Strong), you really cannot switch gears at that point and change your strategy. At that point, you have reached the point of no return and you will have no choice but to stiffen your upper lip and simply try harder to accomplish your goals. You cannot vacillate on your strategy! This game doesn’t allow that.
Wall Building/Blockade Strategy Should Be Your Primary Focus
This wall building element of the game is a major focus early on as you cannot allow yourself as the Athenian player to get behind in wall construction as it simply makes it harder on yourself. You only have a limited number of actions and the more you have to invest into wall building the harder it will be to accomplish your other tasks, such as moving ships into the Blockade location of the Great Harbor. This does not mean that wall building is the only action that you will take early in the game, but you must establish the walls before venturing into other areas of focus.
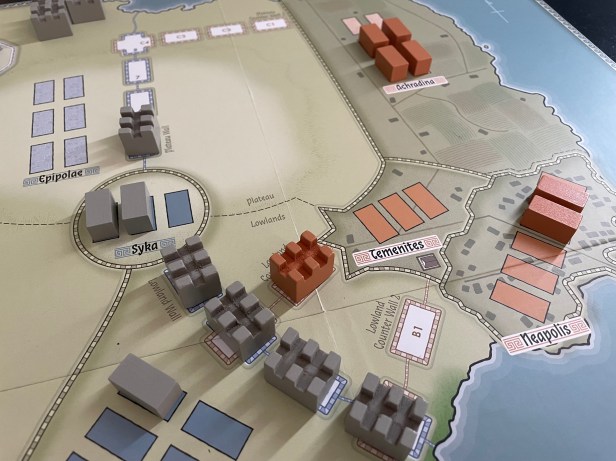
One thing of note is the concept of the Counter Walls that you have to keep in mind. In the Lowland Wall area, the player must construct 4 segments of walls in order to complete the Lowland Wall and then move onto building the Plateau Wall. You will notice that there are just 4 Counter Wall segments on the map for the Lowland Wall for the Syracuse defenders, A1, A2, B1 and B2. Once the Athenian player has been able to complete the wall that intersects with A2’s counter walls, they no longer need to worry about Counter Walls being built there as they now will be built on the B1 and B2 spaces. But this becomes a race as several of the Orders have columns that will allow the Syracuse defenders to construct a Counter Wall when the C designation is shown and the roll matches that row.
I never really like to start attacking the Syracuse troops until the Lowland Wall is nearly complete. Frankly, I am not sure that you ever have to really worry about the Syracuse troops as you really need to just focus on completing the walls and setup the Blockade to win, which can be accomplished without ever having taken the Attack Order. Where Attack will have to be used is when a Counter Wall segment has been built in either A2 or B2 on the Lowland Wall or C4 on the Plateau Wall. The only way to then get rid of those pesky Counter Wall segments so you can continue building your wall is to attack them and roll a D result on one of the rows. This D means that you will be able to destroy a Counter Wall segment allowing you to continue building your own wall segments.
With a Wall Building/Blockade victory strategy, the challenge for the Athenian player is that they have two main competing objectives to accomplish as soon as possible—building the walls versus positioning the fleet and occupying Plemmyrion. As mentioned earlier, any delay in building the wall allows Syracuse to get ahead in the race with counter-walls; slow movement of the ships also opens the player up to adverse results whenever the Supply Convoy, Fire Ships and Reinforced Trireme events occur, which can prevent the movement of ships for that turn or damage ships already in position in the Great Harbor or Blockade Spaces. Players must balance building and naval moves to stay ahead in both areas.

When to Move Ships
The Athenian player will start with 2 ships at the beginning of the game both located at Lysimeleia but eventually must successfully move those ships into the Great Harbor and then into position to blockade the city in the 3 Blockade spaces. This is important to remember that this takes 2 actions and the Athenian player has to have at least one ship in the Blockade location and have completed the circumvallation wall in order to win the game, unless they drop the Syracuse Morale to zero which is very difficult to do.
You must also keep in mind that there are several events in the Counter Orders deck that will damage the Athenian ships or push them back towards Lysimeleia. These are Bad Weather and Fire Ships. Once a ship is damaged, it is moved to the Damaged Ships location and must be repaired at which time they will be relocated back to Lysimeleia to be ordered forth again. This can be devastating if those ships are in the Blockade spaces as your efforts will have been erased and you will have to start the blockade process all over again. You simply cannot wait until the end to try to move these ships into position, but I would also caution you that you shouldn’t do them too early either. As you can see in the picture below, this event called Agatharcus’ Reinforced Triremes Attack, only moves 1 ship to Lysimeleia. If you happen to not have a ship located in the Grand Harbor or the Blockade spaces, you will then be directed to instead roll a die and consult the table located at the bottom of the event instructions. On a roll of 1-3, one of your ships will be damaged and must be then relocated to the Damaged Ships location awaiting repair. That is a 50% chance and the other 3 pips of that die have other outcomes. On a 4-5, the Athenian player will lose 1 Morale and on a 6 Syracuse will lose 1 Morale. So this means that 50% of the time, nothing will happen to your ships. So, my question here is why move them too early when you might run into the various events like this that move back a ship or damage them when you can run your risk and just let the dice decide. This is a risky proposition but also is more efficient with your limited actions.

Manage Your Morale Like a Scarce Resource
If either player is reduced to zero Morale, they will automatically lose the game. Sounds pretty demoralizing to me! Well, so are my bad jokes but Morale is a resource that must be managed and you must always be cognizant of your own Morale but also what level the Morale of the Syracuse defender is at.
Morale losses will come about due to three different reasons. One will come from an Attack or other Order where a Loss result is rolled on the table. Anytime a troop block is removed the player who owns that piece will lose 1 Morale. Morale can also be lost due to Events on the Counter Order Cards that direct the player to lose Morale or through a roll on a table on an event or on the Counter Order chart where a -1 or -2 Morale loss result is noted. Morale is a scarce resource that must be managed. The Athenian player starts with 10 Morale and this should be viewed as a resource that can be sacrificed for the greater good or to gain something in return. For example, sometimes Orders will be cancelled by an Event on a Counter Order Card unless the player voluntarily loses a Morale as a cost of continuing with the action. There are 8 of these “Order Cancellation” cards available in the Counter Order Deck but remember they might not all be included as you will be removing a certain amount of them based upon the difficulty that you have chosen. There are 4 in the Phase I cards and another 4 in the Phase II cards so chances are that you will have to face at least 2-4 of these per game. The concept of sacrificing a Morale to continue with playing an Order that has been cancelled by a Counter Order Deck Card is a bit of a trap though and should be carefully considered after looking at the current situation, including what level your Morale is at at this point, measuring what objectives are remaining to complete and how many Counter Order Cards are left in the deck. It is a lot like having a bunch of money and attempting to manage that money to get the best outcome possible. You can spend it quickly on an immediate return or benefit, without really knowing what is coming in the future that could be purchased, or without knowing what bills will come due or emergencies you will encounter requiring money to take care of.
Morale must be managed and I recommend thinking of the Morale management similarly to the previous discussed card management. To start you have 10 Morale, and should check that Morale against the number of cards you have gone through. I would say you can afford to spend a Morale to stop an Order from being cancelled no more than every 6th card (on the Weak setting) or 5th card (on both the Good and Strong settings). This will mean that you can spend between 5-6 Morale in this way. Believe me there are plenty of ways that you will lose Morale and you have to manage it well in order to have a chance at finishing the deal and completing your objectives. I would also say that each time an opportunity to spend a Morale comes up to cancel an Order from being discarded, you should assess where you are and make that decision based upon the progress you have made thus far. Just be cautious and manage Morale like you would your scarce money and you will do fine.

Understand the Spatial Relationship of Locations
The different Locations on the board have a spatial relationship and the player must understand these to be effective in their actions. As the Athenians, you will lose troops throughout the siege as you roll poorly or the solitaire bot chooses a Counter Order that doesn’t work well for you. It is simply a matter of fact! You also don’t have a glut of available spare troops so losing them is a big deal. But, when you lose them you will have to fill the holes so that you can continue to take the Orders that you need to. Remember, for most Orders you have to have at least 1 troop in certain locations. In order to Build Lowland Wall, you must have at least 1 troop in the Syka or Lysimeleia Camp location. In order to Build Plateau Wall, you must have at least 1 troop in the Epipolae location and you must have completed the Lowland Wall.
What happens if you have no troop in Epipolae? Well, you cannot take the Build Plateau Wall Order then, and you have to instead take the Move Troops Order to move at least 1 troop from another Location to Epipolae. Pretty simple. But managing these troops and making sure you have resources where needed is important and this is the role of Move Troops. Understanding this concept is not difficult but you have to get this down pretty quickly to be able to be effective at the game.
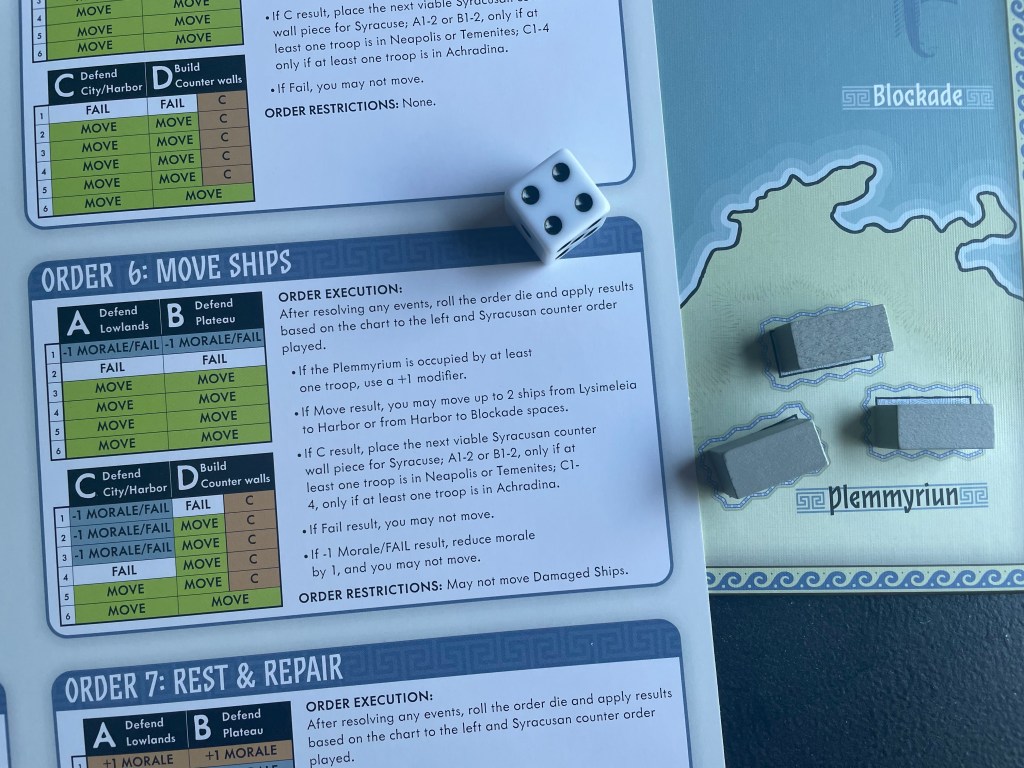
The other really important part of this spatial relationship concept has to do with some bonuses to certain Orders when Locations are occupied by troops. The biggest example of this concept is the Move Ships Order. If the player has troops in the Plemmyriun Location when the Move Ships Order is taken, the player will gain a +1 Die Roll Modifier on the attempt. Now this doesn’t seem like a big deal but remember you are working against the clock and using Orders efficiently and getting results is very important. Anytime you can gain a +1 DRM means you will be more likely to succeed at an Order and will not have to fail and then take it again. The difference between winning and losing sometimes can be one more turn. Make sure you know these spatial relationships and get your troops where you need them to gain the greatest advantage.
Don’t Use the Rest & Refit Order…Unless You Have No Other Choice!
Remember one principle. This game is about running against the clock and you only have so many Orders that you can take before that clock runs out. The Rest & Repair Order is an Order that I never want to have to use because it is frankly a waste. Necessary at times but an empty vessel that doesn’t gain you any ground on meeting your objectives. The Rest & Refit Order has two purposes. One is to regain Morale if the player’s Morale is falling dangerously low. Remember, the Athenian automatically loses if their Morale ever drops to 0 on the Morale Chart. The second purpose is to repair a ship that has been damaged in the Great Harbor to allow it to be moved from the Damaged Ships location and placed back at Lysimeleia to be sallied forth again to attempt to get into position to install the blockade. A necessary evil if needed, but don’t get sucked into a trap of using this often.
I hope you have success in using my points of strategy. I cannot say that I am an expert at the game but if you use these points in your game you will do better than if you don’t. I really have enjoyed playing 414 BC Siege of Syracuse, and frankly all of the Great Sieges Series games, and have come to truly appreciate the design and its simple yet interesting mechanics.
Recently, I posted my video thoughts and review of the game on our YouTube Channel and you can watch that at the following link:
-Grant

Great Action Point/s and useful observations. Loved the video too. Thanks.
LikeLiked by 1 person
I am glad that you found them useful. The game is pretty simple but has a good feel to it and keeps you on your toes. It also plays very quickly and that is a bonus.
LikeLike
Always enjoy these action point articles, and find them helpful. Thanks for taking the time to publish them! Cheers!
LikeLiked by 1 person