
Stalingrad: Inferno on the Volga is a block wargame that recreates one of the most brutal battles of World War II being that of the siege of the City of Stalingrad located on the Volga River by elements of the 6th Army and 4th Panzer Army. The game is designed as a solitaire game where the player controls the attacking Germans and the game’s AI controls the defending Soviets.
In Action Point 1 we looked at the basics of the two types of Movement and the two types of Attack. In Action Point 2, we examined the Combat Sequence and its various steps, including the dreaded Rubble Roll, and showed a few examples. In Action Point 3, we looked at the map, and the process by which it was created, and also looked at some of the other chrome including the great card play system. In this Action Point we will examine the Call for Reinforcements action.
Call for Reinforcements
To this point in the series, we have covered all of the various actions available to the German player except for one…the Call for Reinforcements. This action is simple and will be used less frequently than both Movement and Attacks but I think it is a pretty interesting mechanic that adds some flavor to the game. The process is pretty simple and always begins with the German player drawing a Support Card from the German deck followed by rolling six dice. Remember in the last Action Point, I talked about this being one of the two ways that you can gain additional Support Cards.
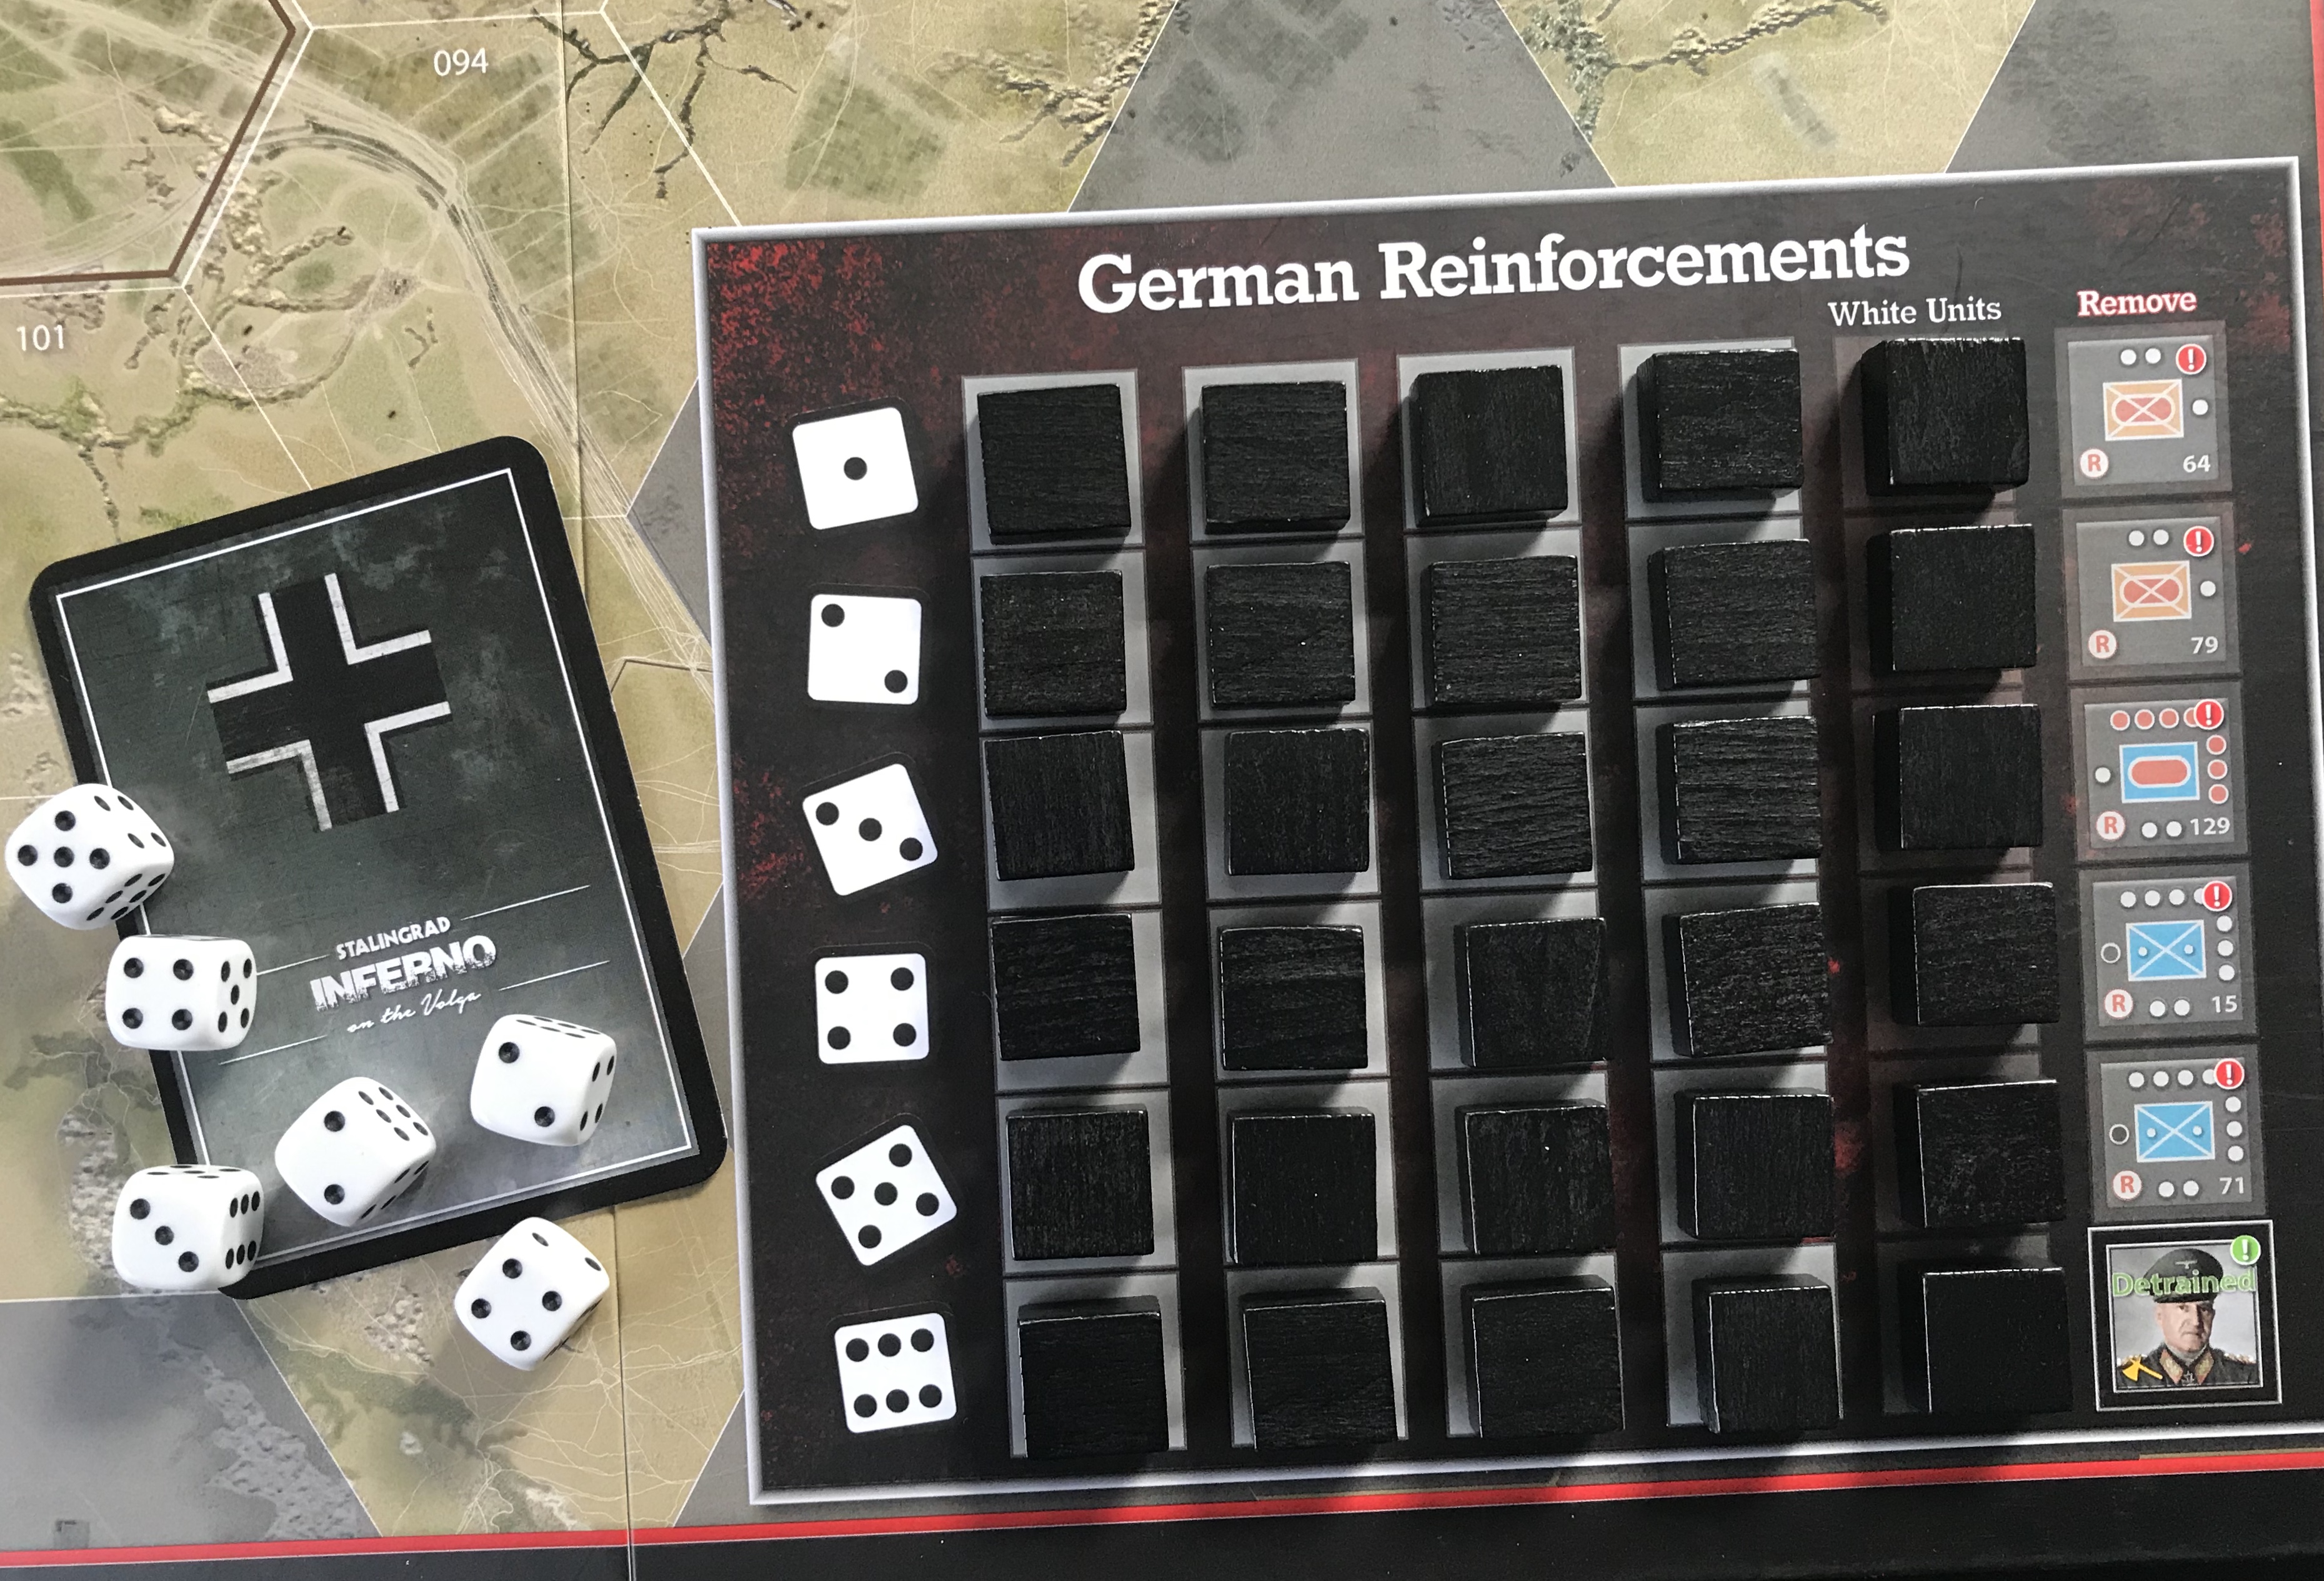
Then each die rolled is deployed on the leftmost available face down Unit in the row of the German Reinforcements Chart matching the die roll. The really interesting part about this setup is that you never know what Units you will be receiving as reinforcements. There are only 4 types of Units, including White Units, Yellow Units and Blue Units. This is important because each of these Units have to be placed in specific spawn areas. We will cover this more in a bit but the thing to remember is that you never really know what you are getting when you make the call. It could be the exact Units you need to execute your plans or it could be units that must be placed in a sector you are not focused on and really have no intention of pushing at the moment. This keeps the tension high when you are performing this action and I think is very well done.

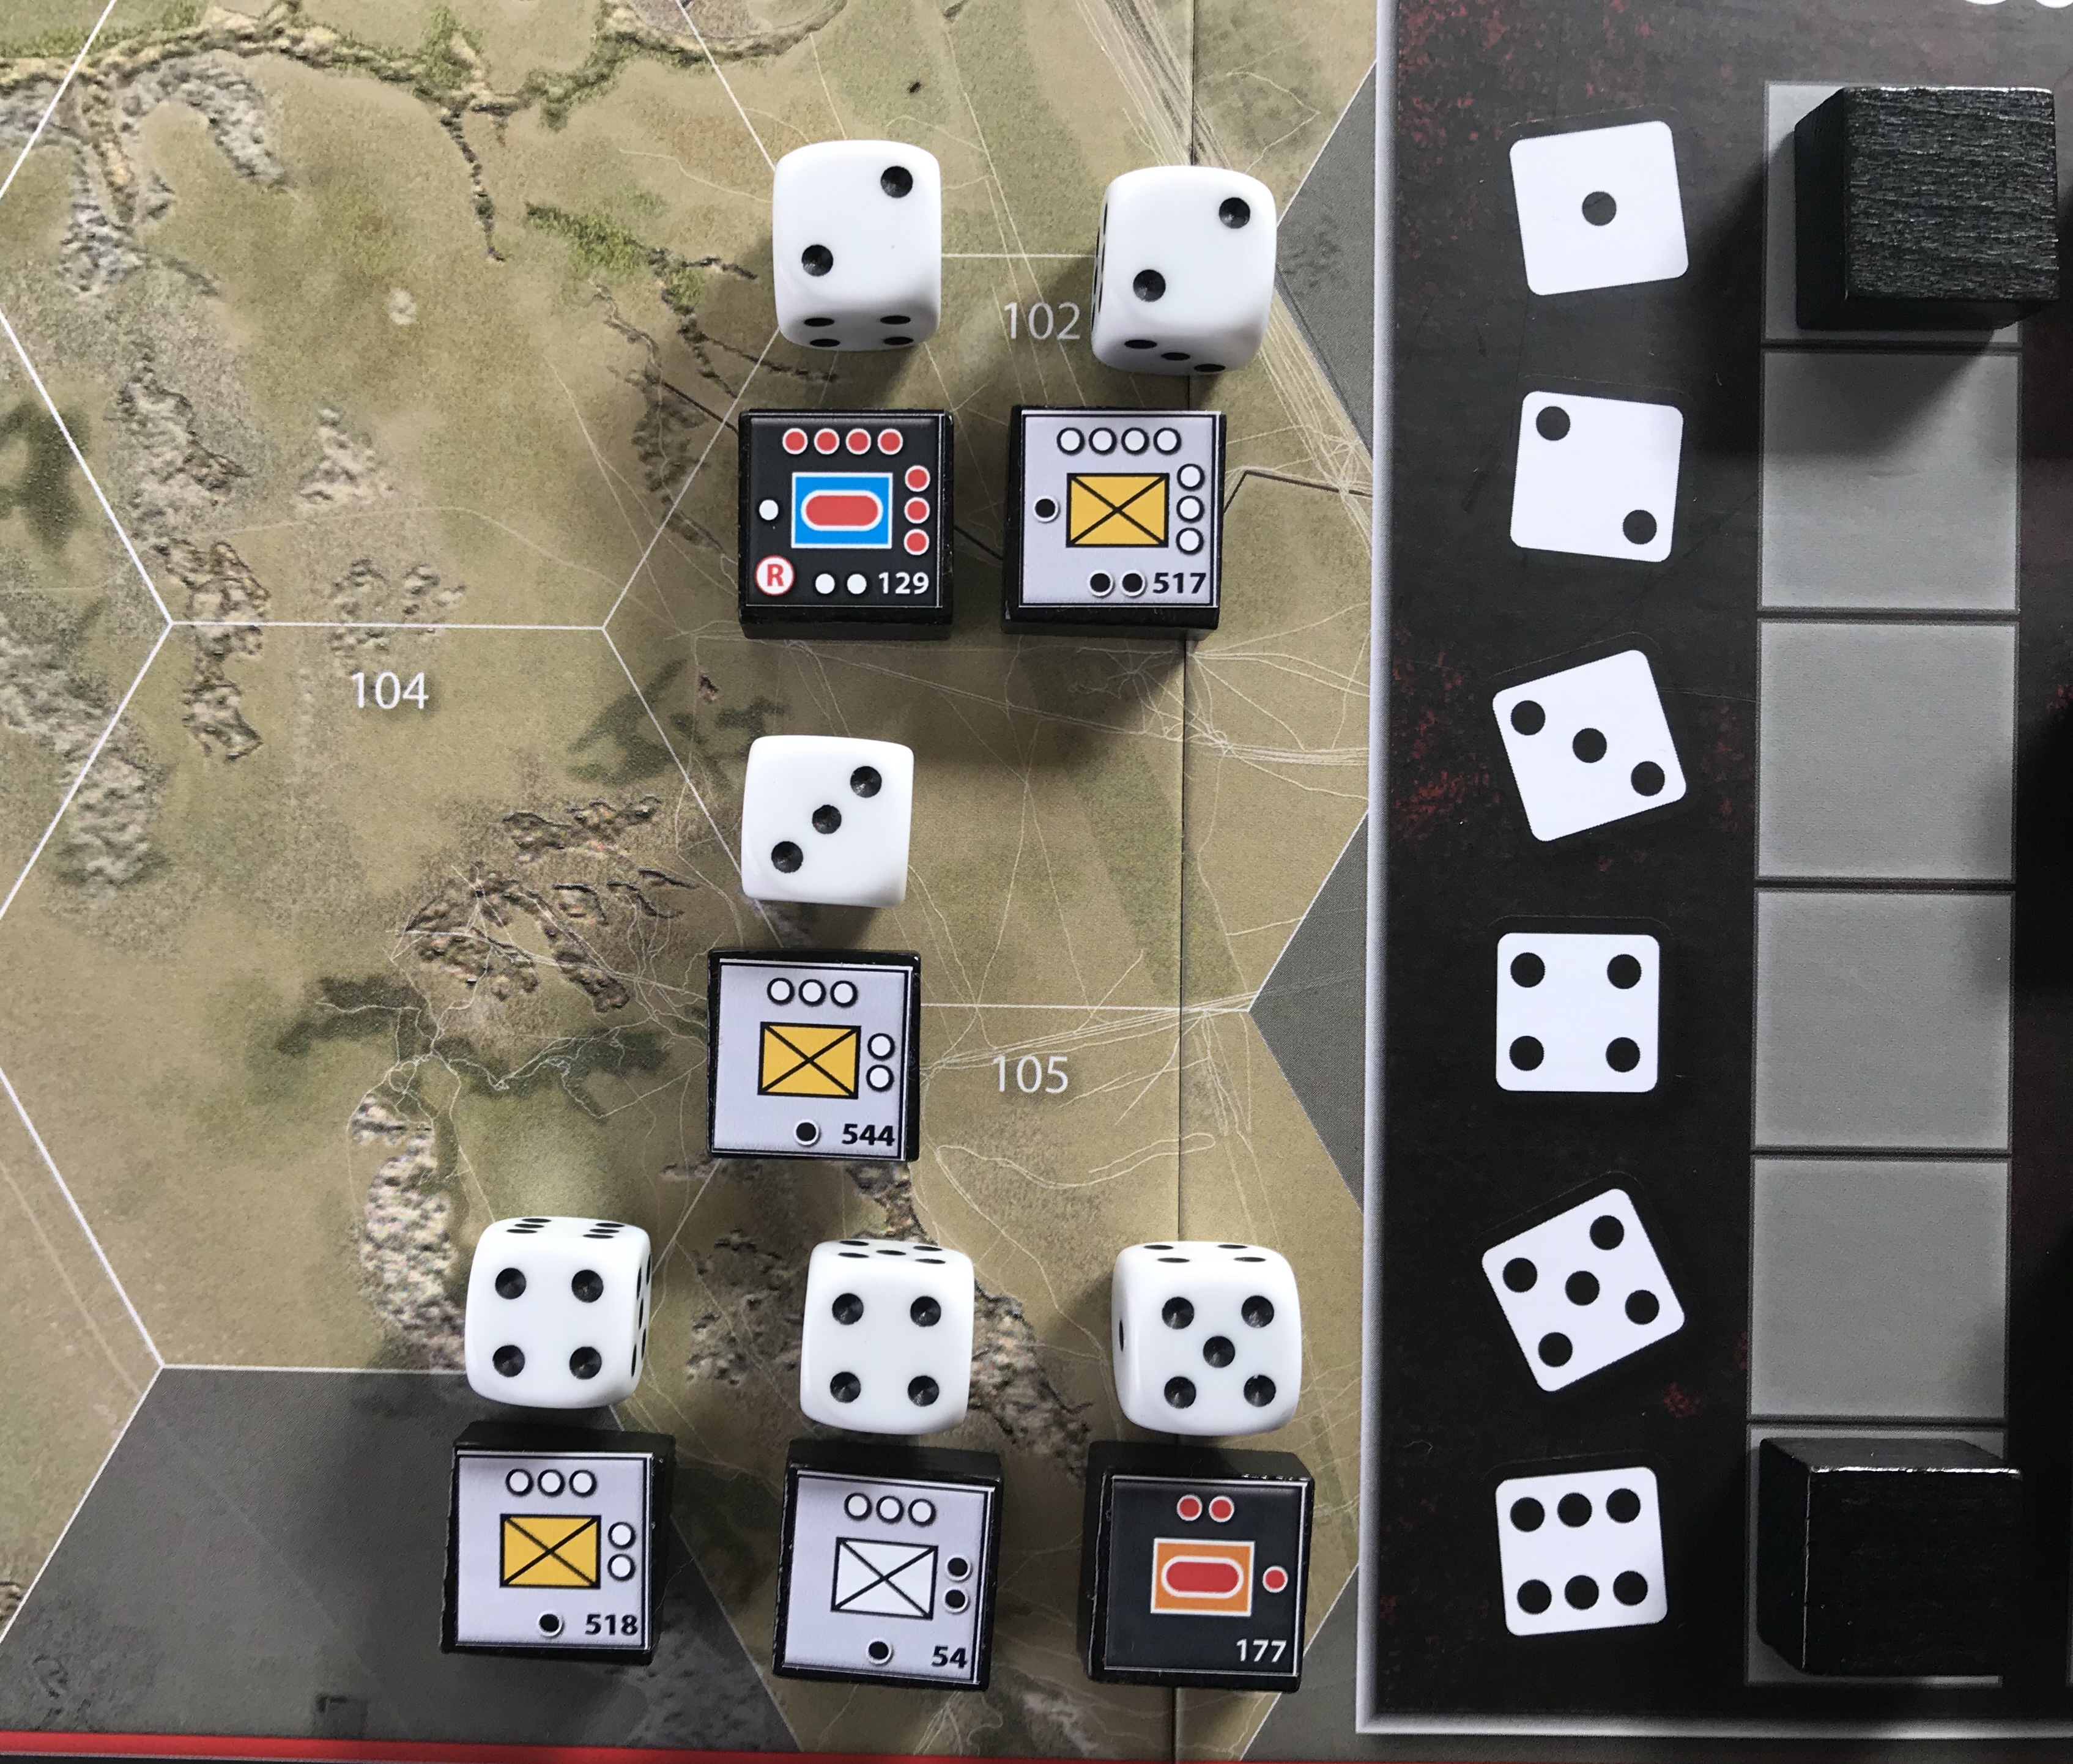
The German player then picks up all the face down Units with a die on them. In the picture below you will see that there are 4 Yellow Units (the 517th Infantry with 4 Strength, the 544th Infantry with 3 Strength, the 518th Infantry with 3 Strength and the 177th Panzer with 2 Strength), 1 Blue Unit (the 129th Panzer with 4 Strength) and 1 White Unit (the 54th Infantry with 3 Strength).
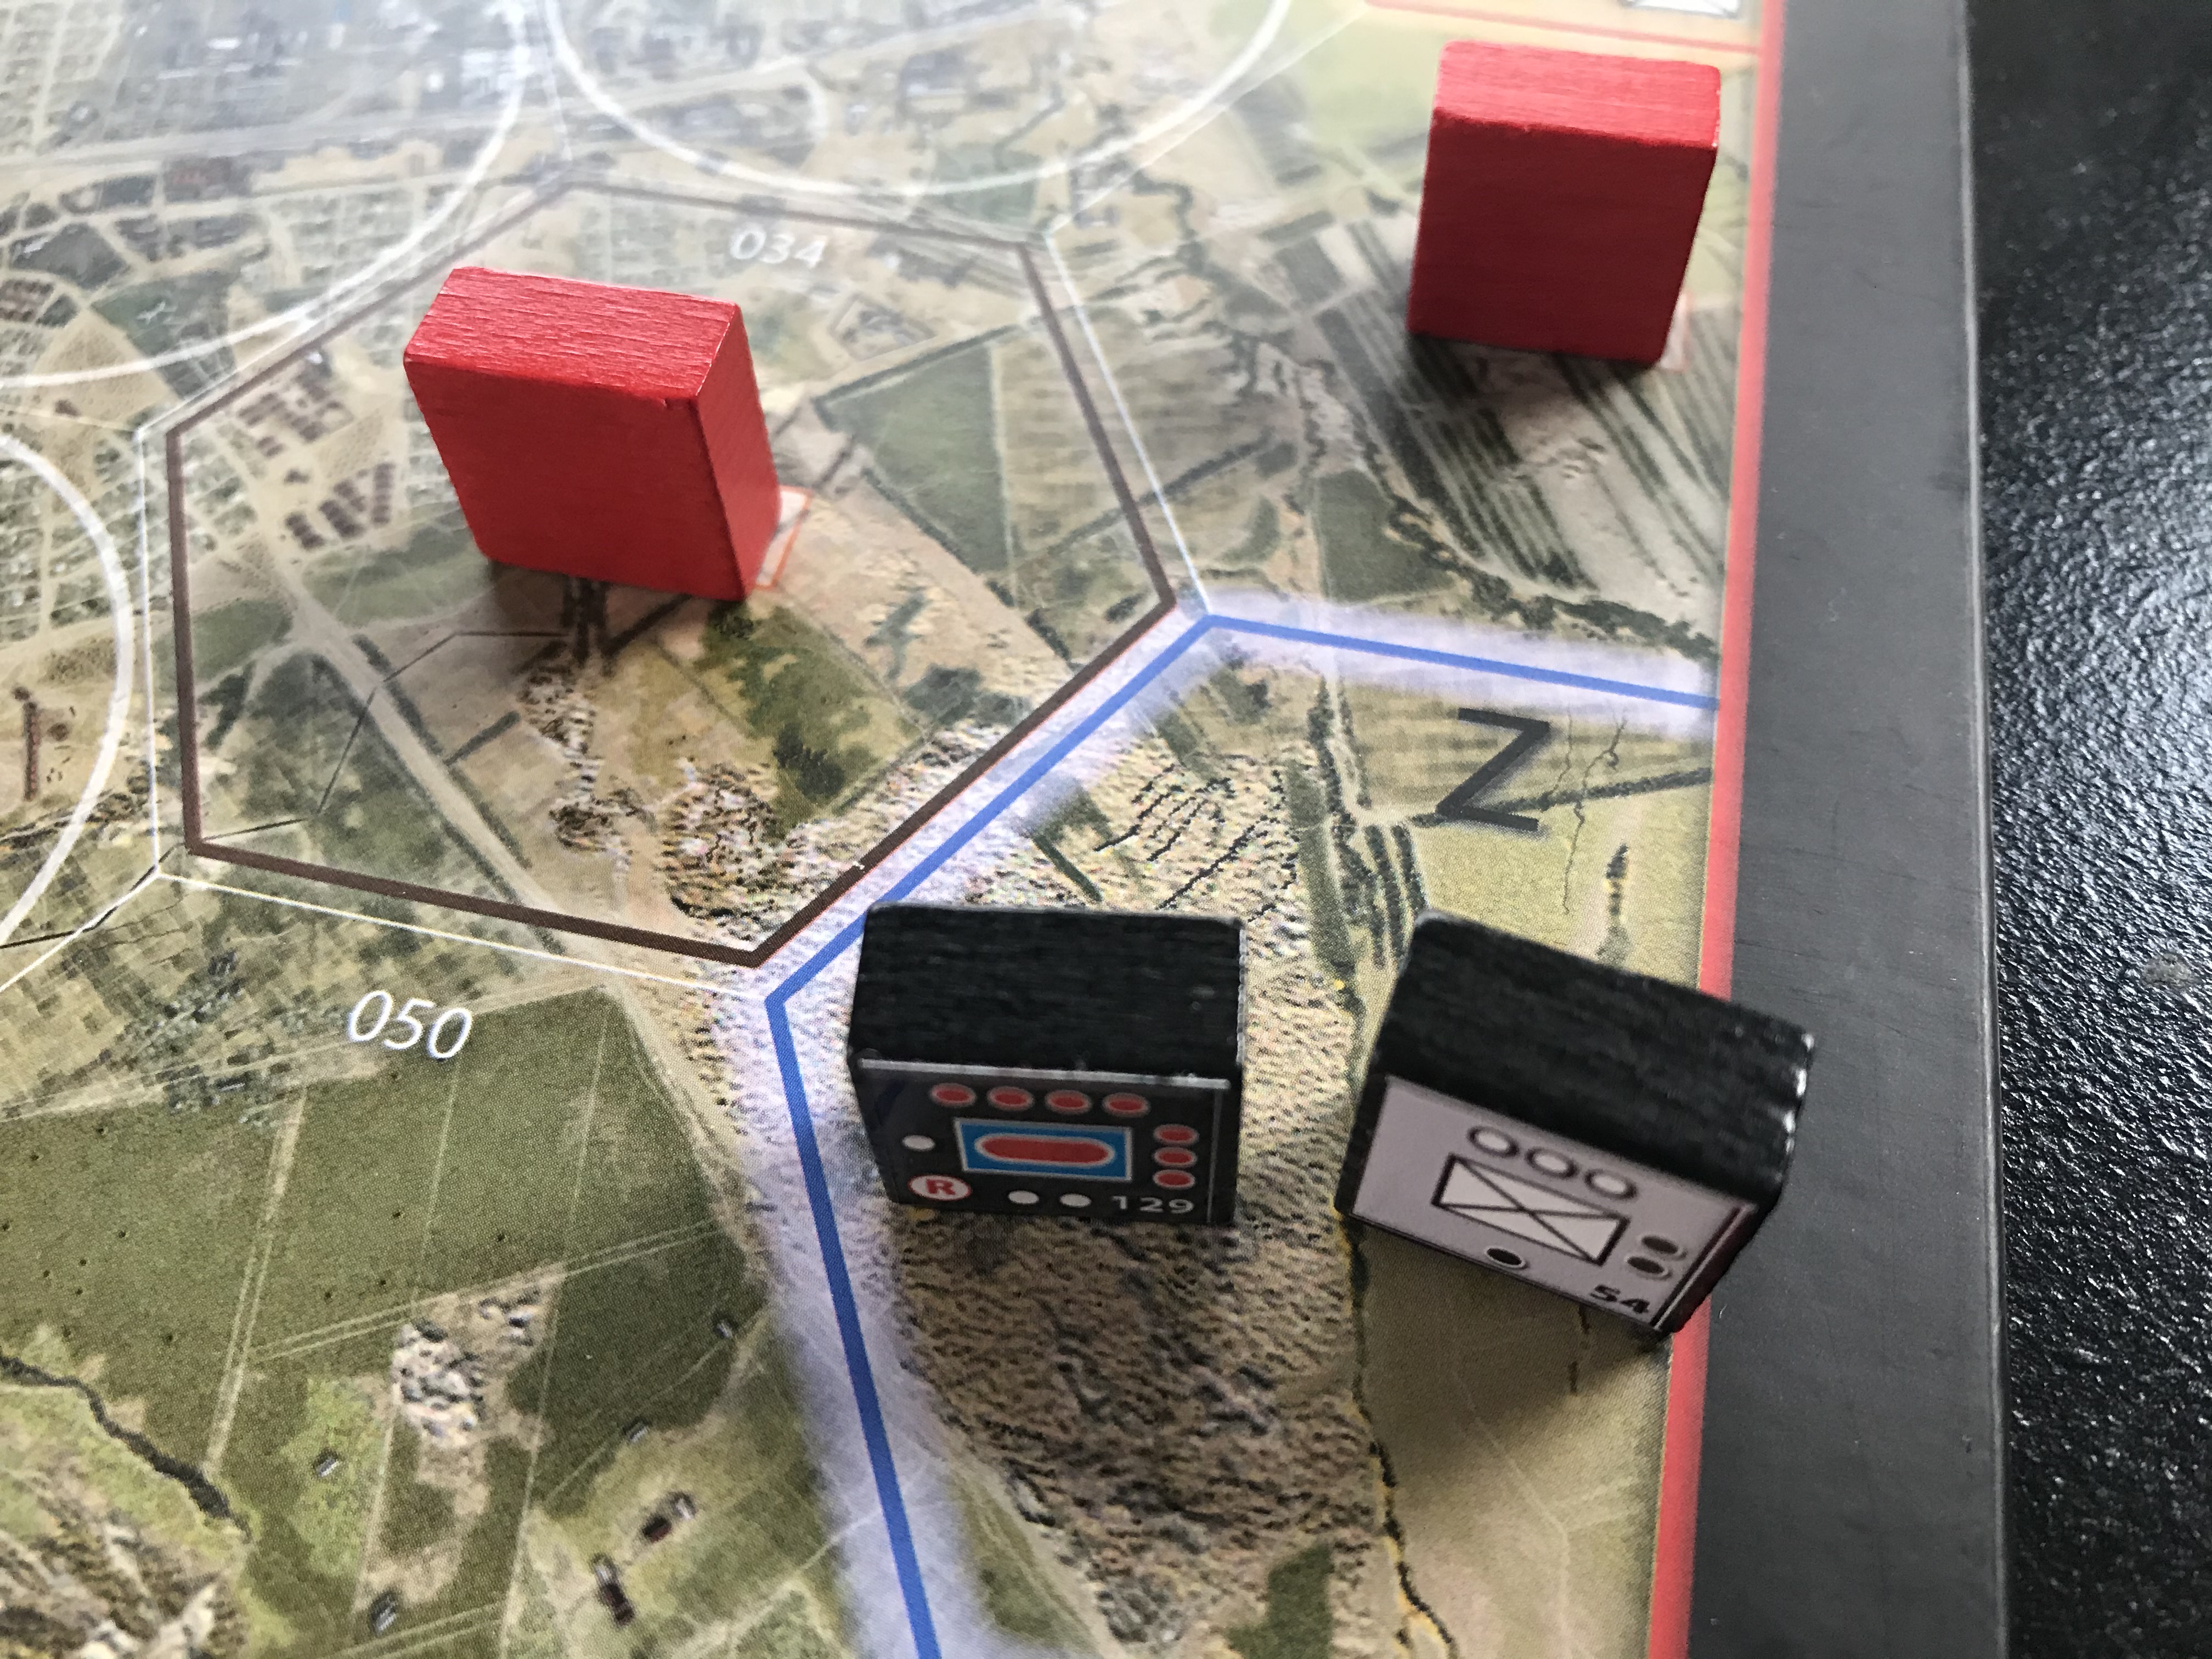
The German player deploys all the Blue Units in the Blue Hex (Z), and all the Yellow Units in the two Yellow Hexes (X or Y in any combination). White Units may be deployed in any combination of hexes X, Y or Z but it is important to remember that Units may not overstack. The Stacking maximum is four Units per hex and if you are unlucky and draw units that you cannot place, either because you already have four Units in a German Spawn Hex or the Hex is controlled by the Soviets, they will simply be returned to boxes facedown on the German Reinforcements Chart, starting from the row that has the fewest Units left, or the one with the lowest row number (1-6) if two or more have the same number of Units left.

A couple of comments on the Spawn Hex locations. The most important hex is Z as you must quickly get units there and begin advancing on the two Soviet Spawn hexes in the area before they can get rolling and bring out too many forces to deal with. These hexes can also be a source of a loss as the furthest east Spawn Hex leads off-board and in the placement rules this leads to a card draw more often than not as they have only have a few legal spots to bring on their reinforcements. When all of the Soviet Support Cards are drawn the game is over and if all 6 Soviet Spawn Hexes are not held will end in a German loss.
So what happens if you have obtained and placed all of the reinforcements in any of the rows and you roll that number? If a die is placed in an empty box due to a lack of facedown Units, the German player must remove the affected Unit shown on the far right of each row, even if it has been just picked up in this phase. If the Unit cannot be removed for any reason, either because it has not been revealed in a Call for Reinforcements action or it has already been placed and destroyed, then this has no effect. After a Unit has been Removed in this way, it cannot be placed on the map again and further rolls in its row have no effect.

I have thought long and hard about this rule and the reasoning behind it and all I can really think it points to is that the identified Unit, which is typically a good Unit with either superior strength (number of dots) or firepower (color of dots and what number they will be successful with an Attack action) has lost its various support echelons and can no longer fully operate on its own in the field. Other than that, this rule is really to make the Call for Reinforcements action a bit risky as the game wears on. You must simply think twice about taking this action if you have a good majority of the identified Units in the Remove column on the board. You might gain a new and fresh Unit, but at the cost of losing one of these better Units. Conversely, if you have lost several of the identified Units, or they are in terrible condition and near destruction, you really have nothing to lose other than the fact that you will have to spend several actions to move the Units up the board to where the Soviets Units are located.
In Action Point 5, which is the final entry in this series, we will explain how the Soviet AI works and also take a look at some of it’s decision points.
We also published an interview with the designer Emanuele Santandrea and it gives a lot of great insight into the design: https://theplayersaid.com/2017/12/14/interview-with-emanuele-santandrea-designer-of-stalingrad-inferno-on-the-volga-from-ventonuovo-games/
-Grant

Explanation of the AI in this game.
“You roll a 6 sided die … and the AI unit will go in that 1 of 6 possible directions”.
Never mind it will throw itself half of the time into a river hex … because when that happens you simply discard a card from your deck… ending the game one turn sooner…”
Combine this with the COMPLETE RANDOM set up and combat…
Worst game I played in my 42 years of (war)gaming.
An insult to historical simulation gamers.
LikeLike
Thank you to inform us something different, I prefer your all posts and blogs.
I always await your new post to extend my knowledge and
update me about daily current affairs
Hey, I might wish to share a few games which can take your readers to childhood also because the more skilled you’re the more you’ll earn
Ludoskill may be a game that will change your daily routine and may change your financial status.
To download – https://www.ludoskill.com/How_to_Play.php
LikeLike