Freeman’s Farm 1777 is a new card driven introductory level wargame from Worthington Publishing that is kicking off their new Battle Formations Game Series. The object of the game is to break three of the formations of the opposing side by the time all 15 of each side’s Activation Cards are played. Players will activate their formations and choose the best actions for it to undertake given the state of the battlefield. These actions include attacking, moving into various positions, reinforcing other formations and activating artillery.
In Action Point 1, we looked at the very interesting board that represents the locations and roles of both sides’ formations as well as their relative positions on the battlefield. In Action Point 2, we examined the Formation Cards and how the Activation Cards are used to command each as well as how Morale Tests work and effect the game. In Action Point 3, we looked at the economy of the Momentum Cubes and how they are used to purchase the all important Tactics Cards. In Action Point 4, which is the final entry in the series, we will take a look at several examples of combat and discuss the way the dice are used.
Combat
The Commands listed on each Formation card tell when formations can engage in combat and with what opposing formations based on locations and their relationship to each other. Players will activate a formation and choose a combat Command to play.
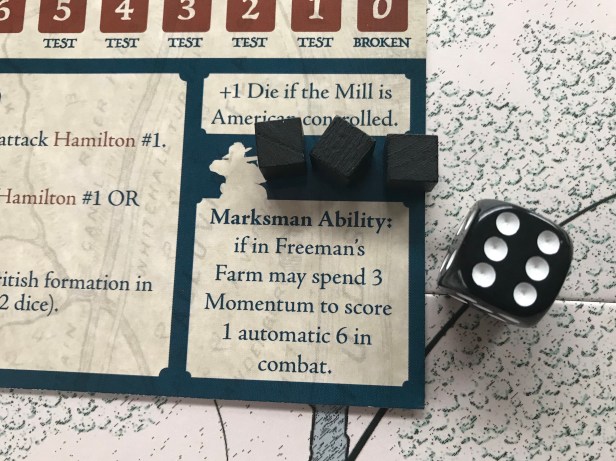
But before we go further into combat I want to explain the dice system which is pretty unique. The number of dice each formation rolls during combat is determined by their base dice plus any bonus dice as stated on their Formation Cards. For a simple example using Poor’s Formation if The Mill is controlled by the Americans Poor will roll +1 Die. There are also negative modifiers sometime based on where your opponent’s formations are located.
For example, both Nixon and Paterson will have a -1 Die penalty on their attacks if the Philips formation is positioned at it’s #2 position. This aspect is a very cool design element that takes into account many elements of combat including morale, willingness to fight and the effects of weapon types on men’s psyches.
After the number of dice are determined players will roll their dice and are looking for doubles in order to inflict hits or morale hits on their opponents or even on their own attacking formations.
Attacker Die Roll Results Table
Below is a picture of the Attacker Die Roll Results table that is printed on the board itself for easy reference. It also shows the die roll results for the solo mode as well but it is important to remember that the solo opponent rolls dice and doesn’t need doubles.

Double 1’s mean that the attacker will remove one of their own formation’s blocks. Double 2’s will result in the attacker reducing the morale of their formation by one. This is the end of the bad results for the attacker. A single 3 means that the attacker will gain a single Momentum Cuber per 3 result. You cannot use these Momentum Cubes to re-roll dice as they are not collected until dice rolling is complete. Double 4’s and 5’s mean that your opponent will reduce the Defender formation by one. And finally double 6’s mean that the Defender formation will lose 1 of their blocks in the formation.
Pretty simple mechanic but man can it be challenging to get what you need when you need it. Typically a formation is rolling from 2-6 dice. The more dice you roll the easier it is it to get multiple sets of doubles. When you are only rolling 2-3 dice it is a crap shoot and you are not going to be very effective unless you have a stockpile of Momentum Cubes to purchase re-rolls (pay 3 Momentum Cubes to re-roll any number of your previously rolled dice.)
Combat Examples
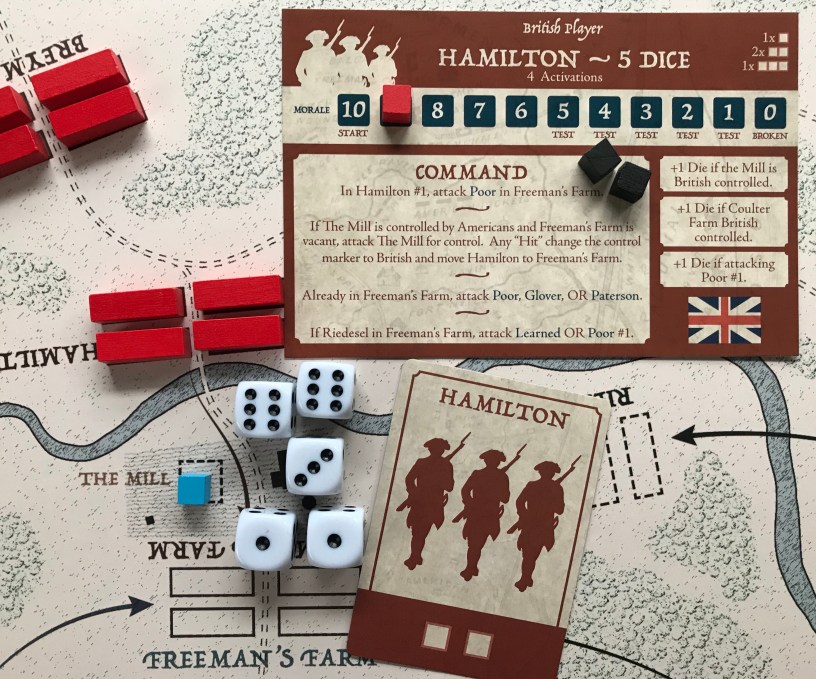
Let’s now take a look at a few examples of attacks. First let’s look at an attack by Hamilton on the American Skirmishers cube located at The Mill near Freeman’s Farm. In order for Hamilton to be able to move into the Freeman’s Farm position this Skirmishers cube must be eliminated. It only requires one hit to eliminate the cube.
First you must activate the Hamilton Formation by playing an Activation Card and then either reducing the Morale level or removing a single formation marker. In this example we play an Activation Card that will earn two Momentum Cubes and we will choose to reduce the Morale track by one from 10 to 9. We then move to the Commands list on the Formation Card.

Hamilton will attack the American Skirmishers cube located at The Mill as the Freeman’s Farm location is vacant and if they can remove the Skirmishers they will gain +1 Die on their attacks.
Hamilton will roll 5 dice as there are no bonus dice noted on the Formation Card.

The 5 dice are rolled and the results are two 6’s, one 3 and unfortunately two 1’s. At this stage of the game, there is no need to roll again as they have accomplished what they were out to do. The two 6’s are a hit and the lone 3 will provide one Momentum Cube. The only negative are the two 1’s which will lead to one Formation Block being removed. If they had three Momentum Cubes they could re-roll some or all of the dice hoping for different results but short of the price to pay in cubes they could reduce the Formation’s Morale or remove a Formation Block but that doesn’t make sense in this situation. With a hit, the Skirmishers cube is removed and replaced with a British Skirmishers cube and now the Hamilton Formation moves into Freeman’s Farm to denote control.
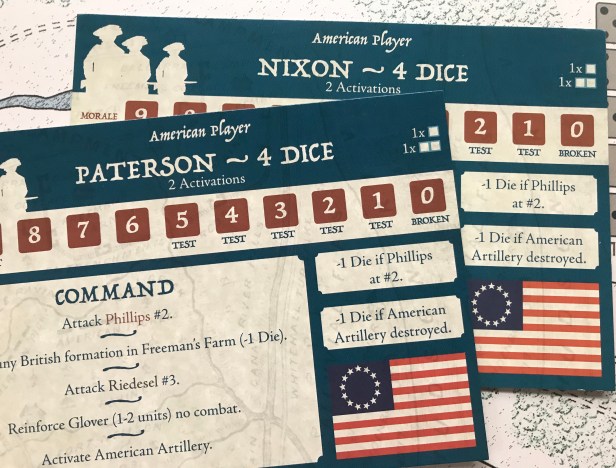
Let’s now take a look at an attack by the Phillips Formation on the American Artillery. Phillips is activated with an Activation Card that will earn one Momentum Cube and we will choose to reduce the Morale track by one from 10 to 9. This activation the Command chosen is to move the Phillips Formation from Phillips #1 to Phillips #2. Phillips can now attack the American Artillery. The formation will roll 5 dice and you will notice that during an attack on American Artillery double 1’s rolled actually will be counted as hits on the American Artillery and not on the attacking formation as usual.
The 5 dice are rolled and result in double 1’s, a 2, 5 and 6. Not a great roll at all but due to the ability of the formation they will score one hit on the American Artillery.

At this point of the game there really isn’t a need to re-roll any dice and the British player will save his Morale and Formation Blocks, that could be discarded or lowered to re-roll any number of dice, and accept the results. The big advantage to this attack was not necessarily in the results of the attack but in the fact that being located in Phillips #2 will now impose a -1 Die on attacks by Nixon and Paterson.

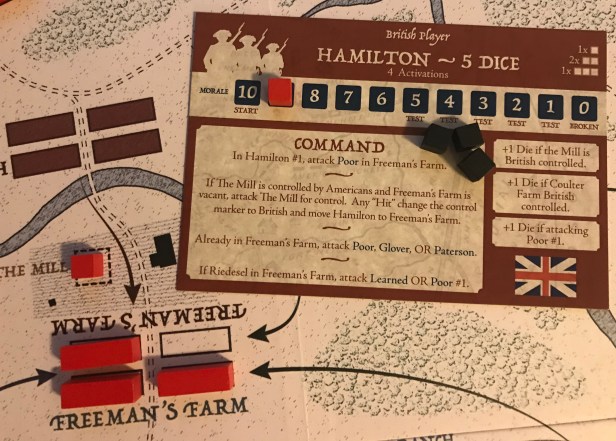
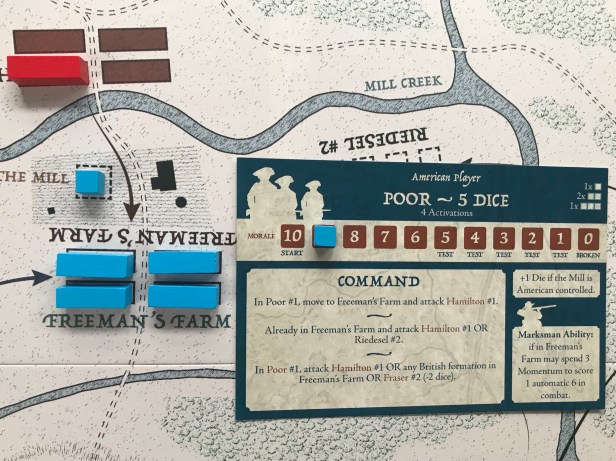
In our final example we will look at an attack by the Poor Formation from Freeman’s Farm on Hamilton.
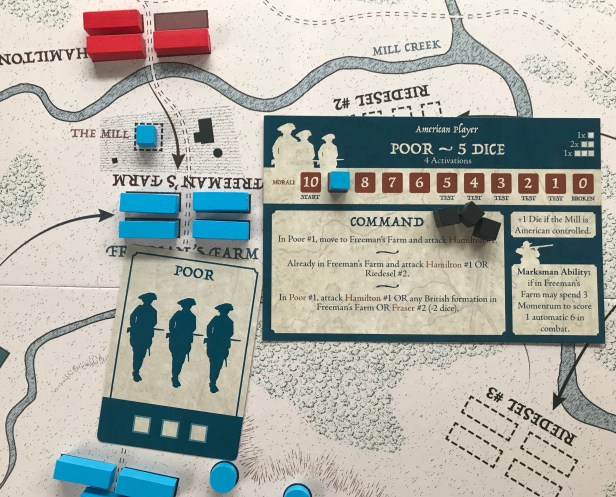
Poor will attack Hamilton after being activated with an Activation Card that will earn three Momentum Cubes and we will choose to reduce the Morale track by one from 10 to 9. While the Americans control The Mill with a Skirmisher cube Poor will get +1 Die to attack. With that the formation will roll 6 dice.
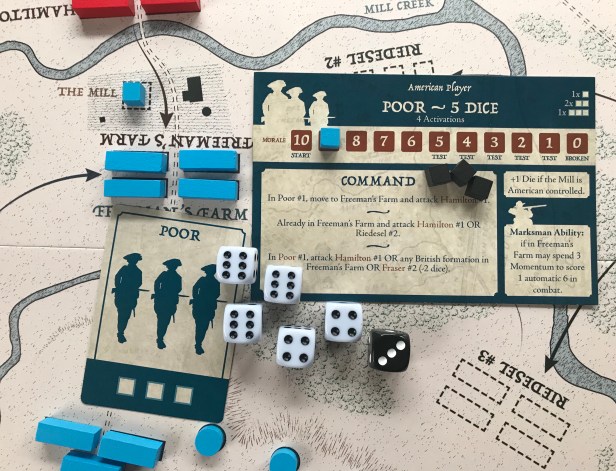
The dice are rolled and results are 3 6’s, two 4’s and a 3. With those results Poor will use their special ability by paying three Momentum Cubes and will end up generating a 6 to add to the already rolled three 6’s. This attack will result in Hamilton losing two Formation Blocks and will have their Morale reduced by one.
This is a very productive attack by Poor and the Hamilton Formation only has one remaining Formation Block and will be eliminated by the next hit. The British player will most likely attempt to reinforce Hamilton on the next activation from the Breymann Formation.
That is a look at the Combat Sequence and how the interesting dice system works. While I didn’t show you any examples using Tactics Cards there are many useful ways to utilize these cards to manipulate the outcome of combat. Either by rolling more dice, re-rolling your dice or even forcing your opponent to re-roll any one of their dice.
Players must also consider when they re-roll their dice and how often they do so by paying Momentum Cubes or taking Morale reductions or losing Formation Blocks. Lots of choices with the combat system and players must be aggressive but also prudent with their choices.
I hope that you have gained a greater understanding of how Freeman’s Farm 1777 plays. While this game is an introductory wargame, it takes a look at some very interesting elements of the type of fighting that typified the American Revolution and has created multiple decision points for players with the management of Morale, the mini-economy of Momentum Cubes, understanding the advantages of holding various locations and their effects on attacks and the acquisition and use of Tactics Cards.
-Grant

Excellent series on this game. I have just decided to purchase it based on these articles.
LikeLiked by 1 person
You’ll enjoy it. It also plays solo and can be very challenging.
LikeLike