
If you happened to read my New Year’s Gaming Resolutions for 2024 post, you saw that one of our newest plans involves our Shelves of Shame! As they are creaking and moaning from the weight of many great games we have yet to play, we decided that this year we are going to pick one of these older games per month and play them. We are calling this effort the Shelf of Shame Dust-Off and there are 12 fantastic wargames that we are planning to play. In these Progress Report posts, I don’t plan on giving a huge recap of the games as I have done in our First Impressions posts or even go into great detail like I do with the Action Point series, but I will give an overall summary of the game and our general thoughts on how the experience went. We also will of course do a video review that you will be able to watch later.
First up for January was Ardennes ‘44: The Battle of the Bulge from GMT Games and we played with the 3rd Printing copy that was released in 2018 or so.
Bulge games. There are a ton of them. They all try to cover this titanic last gasp struggle of the dying Wehrmacht and Nazi war machine. Some do it well. Some not as much. But, what I found with Ardennes ’44 was that it did the Bulge well. I am probably feeling this way because I am familiar with the ’40X Series designed by Mark Simonitch after playing several of the games in the series including Holland ’44, Salerno ’43, Stalingrad ’42 and most recently North Africa ’41. There is just something to be said for the very cool ZOC Bond system as well as Mark’s efforts to inject battle specific chrome and processes into each of these games.
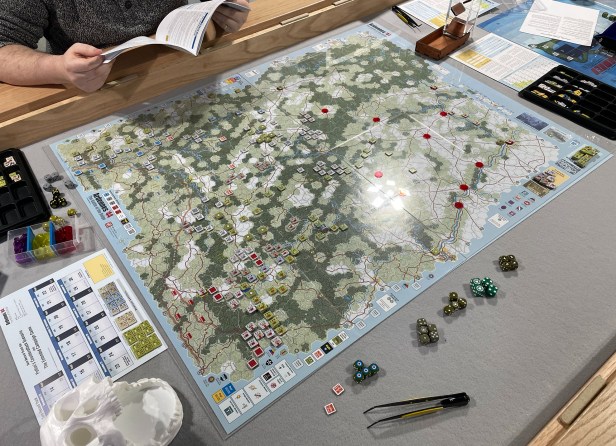
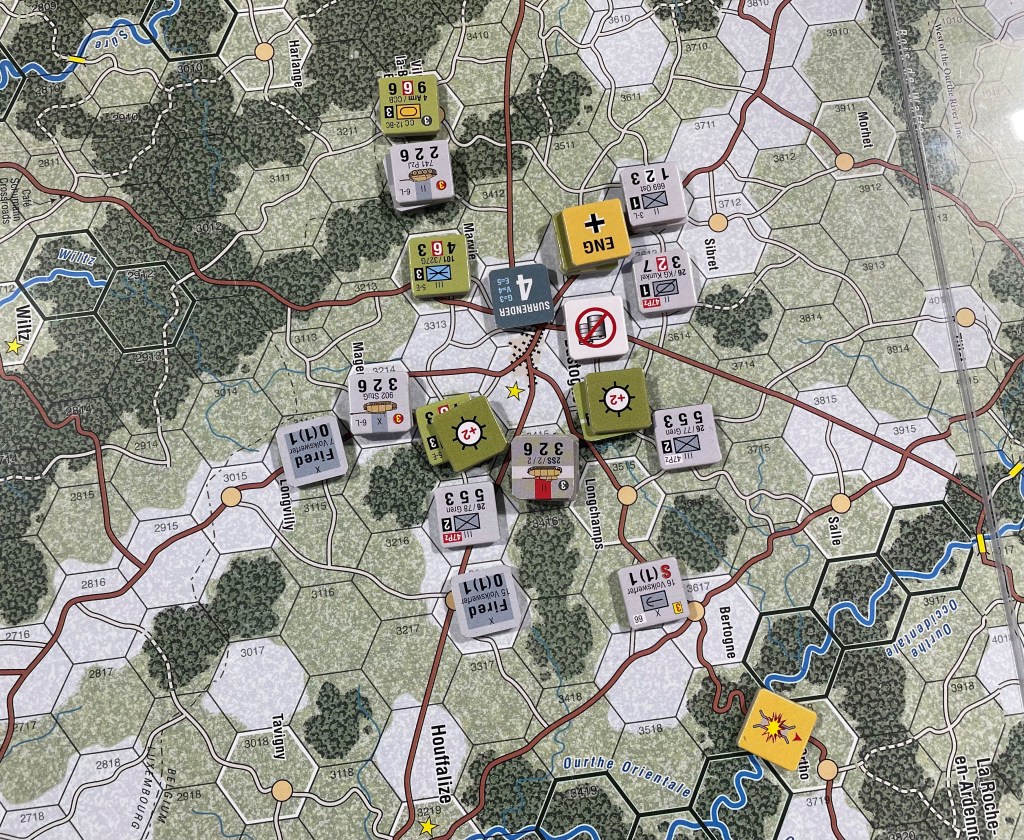
We decided to play the Patton’s Counter Attack Scenario, which is a 10 turn scenario covering the action on December 22nd. The game starts in Turn 13 and goes through Turn 23. We were able to get in just 4 turns in about 6 hours but had a great time with the system.

As is our custom, we placed see through red tiddlywinks on the Victory Point Hexes around the board to remind us of what the German player’s (Alexander) victory conditions were. This really helps us to visualize the game and formulate our strategy from the get go. I know lots of wargamers do this with tiddlywinks, cubes or some other small pieces and I wholeheartedly recommend this tactic as it just makes the game that much simpler to visualize. And with this one, you have enough to worry about and keep track of just with the numerous counters you will have on the board.
One of things that I really enjoyed about the situation was that the Germans have to roll on the Fuel Shortage Table at the beginning of each of their turns. They roll 2d6 and each of the dice link separately to either Table 1 or Table 2. This table identifies the formations that will be out of supply in the coming round. Being out of supply has several effects, including Attack Strength being halved, only being able to use Tactical Movement that is basically 2 hexes, Artillery Units may not flip to their Ready side and will be unable to provide artillery support in attack or defense, units are eliminated if they are forced to retreat 3 or more hexes as a result of combat, don’t gain the Road Bonus when moving and cannot receive Replacements. It was pretty funny in our game that he rolled the 2nd Panzer and Panzer Lehr divisions on 3 of the 4 rolls and they really were never able to mount any serious offensive move against the center of the board which allowed the Allied units to get in great defensive positions in some of the more heavily wooded areas around St. Hubert, Rochefort and Marche-en-Famenee.

I also really liked the Traffic Markers that are provided to each player to simulate the difficulty with moving so many men and machines down 1 lane country roads through heavily wooded terrain. Each side has these markers and may place those that are available to them on roads in an attempt to slow down the movement of enemy units. But, in the rules it stated that these Traffic Markers are not just representative of the roads and their tightness but also roving German commando teams, SNAFUs, psychological disruption and air interdiction after the weather clears up in Turn 14. The Allied player has Traffic Markers while the German player has Greif Markers. These Traffic Markers act to increase the entry cost of the hex by +2 MP’s for all units. These markers do not however effect units that are performing Tactical Movement or that are retreating due to combat. Also the player’s own placed Traffic Markers have no effect on their units.
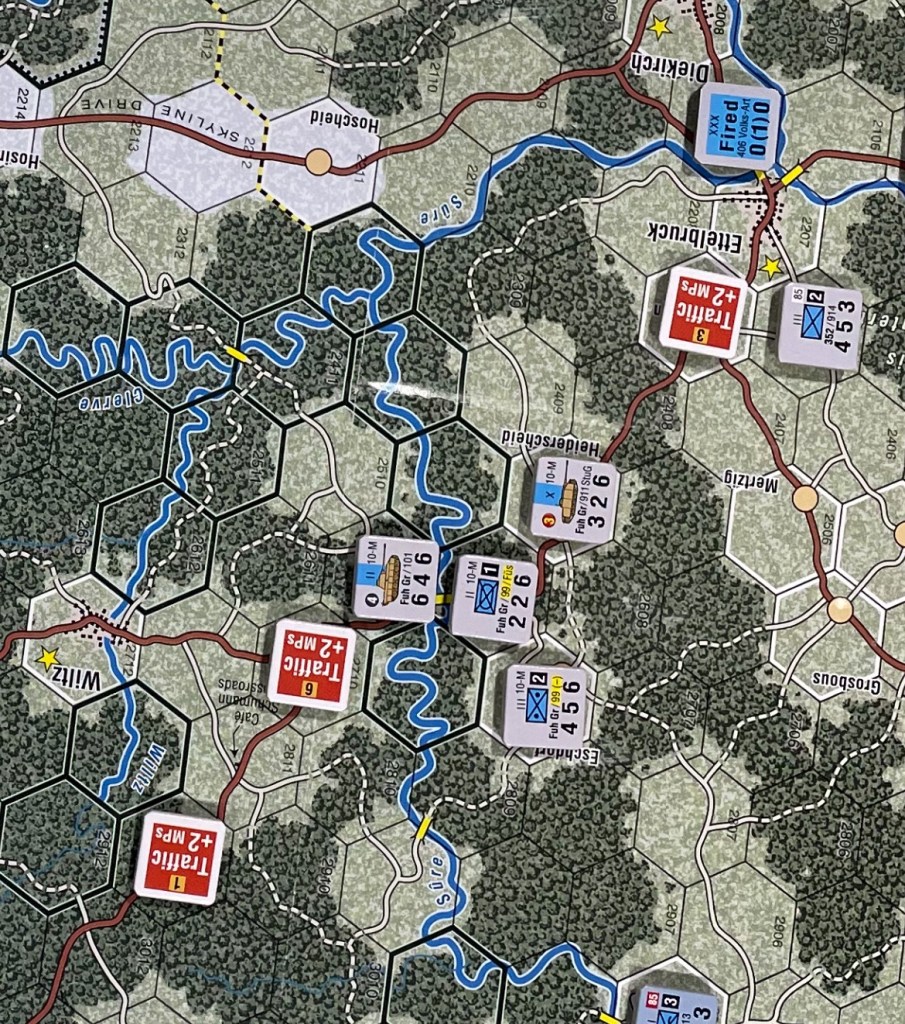
Each turn, each player will roll 2d6 and each of the numbers generated will refer to one of their numbered markers 1-6. When the marker number is rolled, they will have to remove that Traffic Marker from the board and keep it off map until the next Traffic Marker placement. This was pretty cool as you never quite knew what markers would last and which would be removed. If you are lucky and roll doubles, only that number is removed and will leave you with 5 other Traffic Markers on the board. Several times, these markers made it so one of us couldn’t quite make it to a hex that we wanted to attack or get to in order to reinforce or defend. I also found that at first, I was unsure about where to put them but as the game wore on, we learned and it became more evident where they would make the most difference. You cannot place them in adjacent hexes so they have to be separate by at least one hex but you can really make moving hard with some well placed Traffic Markers.
As expected, Bastogne is a big focus of the game. Located in the center of the western map, Bastogne started this scenario completely surrounded by elements of the 47th Panzer Army supported by multiple Stugs. The defending 101st Airborne are in a bad way but have been able to construct makeshift Improved Positions (IP), which gives them a +2 Defensive Combat Bonus to their Defense Factors turning these infantry into 6 Strength units. Not a huge difference, but in this situation each of those Defense factors help keep them alive. It is important to remember though that the +2 DCB is used in place of the terrain DCB as the two elements are not cumulative. Therefore, constructing an IP in a Village, Town or City hex will have no effect since those hexes already have a DCB value of 2 or greater.
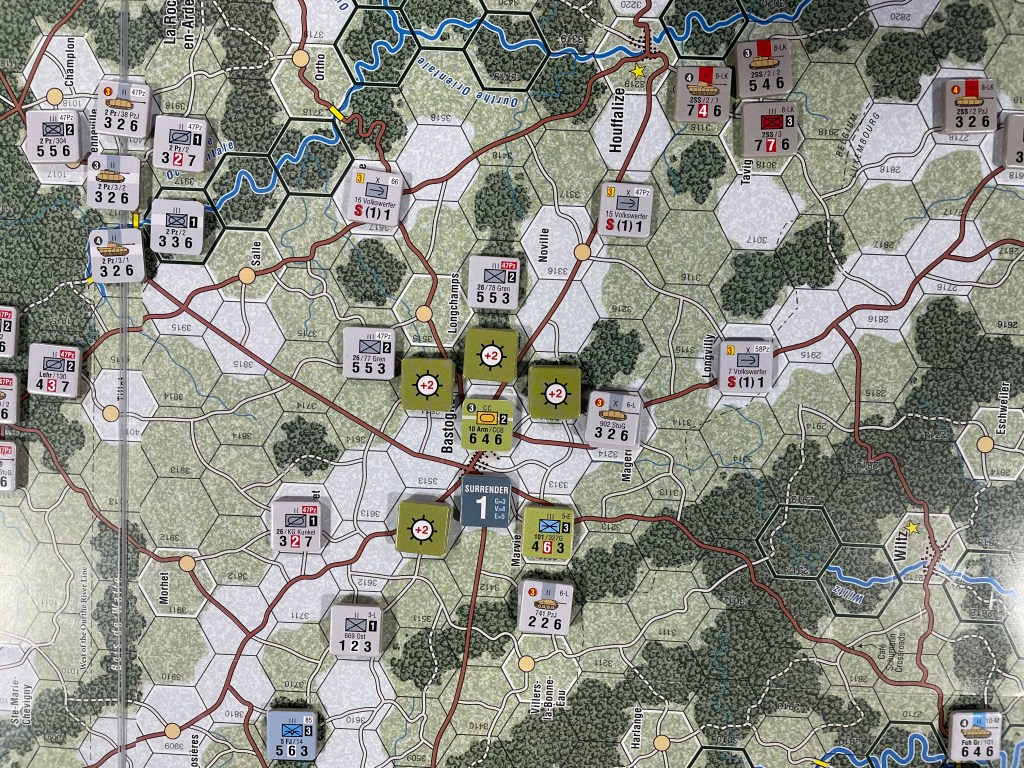
You might have noticed the large Surrender 1 marker located right in the middle of Bastogne. This represents an Isolated formation as they are unable to trace the 4 hex range to a road to gain Supply due to being surrounded by enemy ZOC’s and units preventing them from tracing to roads. This marker represents the level at which the Isolated Group of units will surrender. At the end of each round, the player surrounded will roll a D6 and consult the Surrender Table. The result is the number of Surrender Points that the Isolated Group will accumulate that round. Sometimes, if the roll is very low, they will actually gain resolve and reduce their Surrender Points due to having received an Air Drop). An Isolated Group will surrender when the Surrender Threshold for the unit types is reached through this process and those Surrendered Units will be immediately removed from play and cannot be replaced. The Surrender Thresholds are as follows: Green Unit Threshold: 3 Surrender Points, Normal Unit Threshold: 4 Surrender Points and Elite Unit Threshold: 5 Surrender Points. If the player can somehow make it until the weather clears in Turn 15 this roll will gain a –2 DRM for the Allied player only.
In the game, my units in Bastogne are Elite Units and therefore have a 5 Surrender Point threshold but at the end of Turn 15, after rolling very poorly, were sitting at a 4, just one point away from surrendering. This is really bad for the Allied player as this will then free up those German units to press the attack into the eastern map and bring added firepower to push the Allies back. I was able to break a few scattered Allied units through the line along the Attert River and get up to attempt to break the siege but the Germans were pretty tough there and it was going to take a few turns to do anything that would dislodge them.
Combat was also great and that CRT is tough at low odds, particularly at 1-1. There are some very interesting results as well including Engage (the defending unit being unable to move away from the fight on their impulse), FF (Firefight), which is a version of Desperate Defense but for the offensive to be able to break through and keep moving. This would be used when you absolutely have to get through to either open up supply or force the enemy to retreat out of supply. There also is the very cool and unexpected Engage+, which is mostly the same as Engage except the attacking units will be given an Attacker’s Advantage marker. This marker stays on that stack of units until the next time they attack at which time they will gain a column shift.
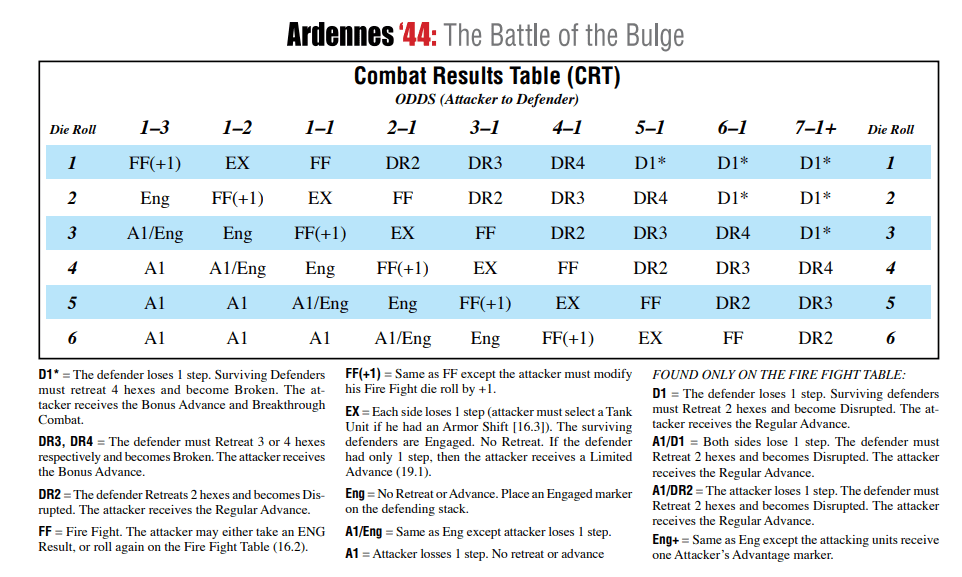
Rolling low on the CRT is the key and frankly having to roll low always causes me issues as I just always seem to roll 4-6 in most other games. That is one of the reasons that I don’t play ASL! Hahahahahahaha. Just kidding, there are other reasons. But combat is clean and reminiscent of the other ’40X Series games.
The final comment I will have is that the game is just sexy! All of those colors, with a majority of them being differing shades of browns and greens, just look great and that counters really seem to pop off the board even though most of their colors are also in the browns, greens and grays scale of the color spectrum. Just a great looking game that was really fun to play and experience!

We really enjoyed Ardennes ’44! In fact, I think that this is an understatement and I think it might be moving up the scale on my list of Bulge games but also is amongst my favorites in the ’40X Series. We have left the game setup under our table and are planning to getting back to it later this month. I hesitate to say it felt fresh, as this is one of the first few games in the series, but it definitely had some different elements than the other games in the series we have played. That also really excites me about the future of this event as we are planning to play Normandy ’44 in the series in July.
The next game we are planning to play in February is BCS Baptism by Fire: The Battle of Kasserine, February 1943 from Multi-Man Publishing.
-Grant
