
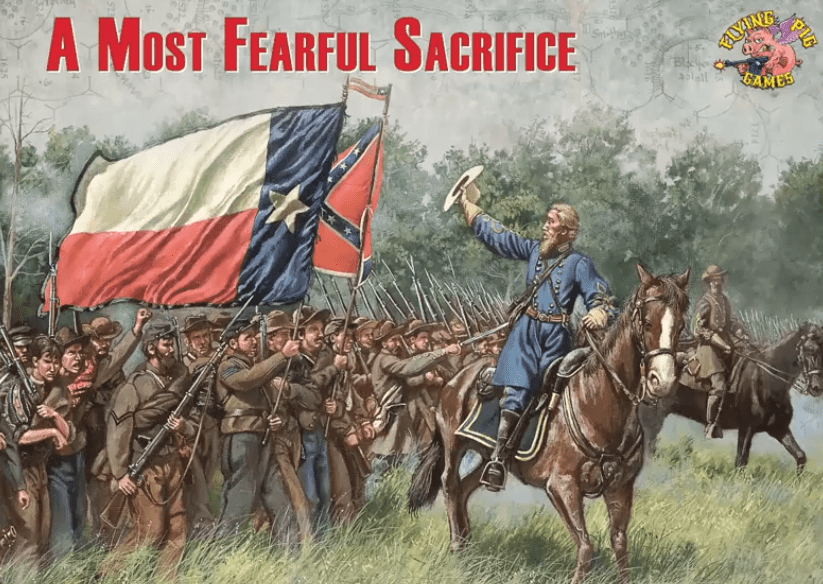
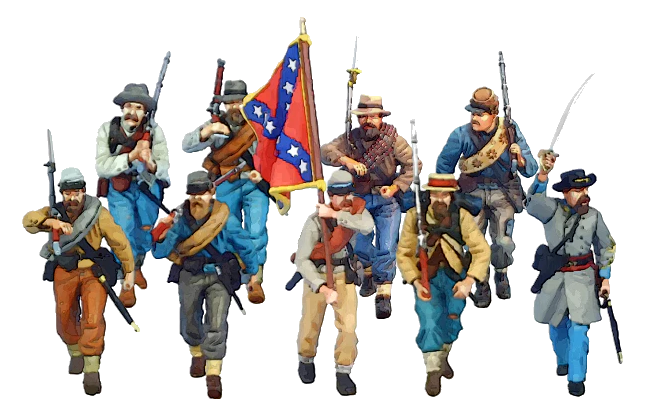
Hermann Luttmann is a very prolific designer and frankly has designed a few of my most favorite games including In Magnificent Style: Pickett’s Charge, Dawn of the Zeds and At Any Cost: Metz 1870 among others. He is back at it again with another American Civil War game with Flying Pig Games called A Most Fearful Sacrifice: The Three Days of Gettysburg. We reached out to Hermann and he was more than willing to provide us an inside look at the design and the new Black Swan System.
If you are interested in A Most Fearful Sacrifice: The Three Days of Gettysburg, you can check out the Kickstarter page at the following link: https://www.kickstarter.com/projects/markhwalker/435798807?ref=4scqjr&token=52d2952d
Grant: Welcome back Hermann. You have been a busy boy recently with several games including In Magnificent Style Deluxe Edition from Worthington Publishing. How do you keep an appropriate work/life balance with your hobby?
Hermann: And thanks for having me back! It’s always great talking to you (well, typing with you) and I really appreciate all that The Players’ Aid does for the hobby. Your videos are terrific. I am indeed involved in a ton of projects right now – I’ve broken my rule of just working on two designs at a time…and I’ve broken it badly. Luckily, I retired from “real” work in the autumn of 2019 and then immediately moved to Tennessee. So I find myself with a lot of extra time when we’re not walking through downtown Knoxville or strolling in the Smoky Mountains. But oddly enough, I feel like I’m busier now than when I worked for a living!
Grant: Your upcoming project is another game set in the American Civil War. What draws you to games on this conflict?
Hermann: I think it’s because this war is just so engrained in American culture – the history is all around us in those iconic battlefields and their dramatic stories are known to almost everyone. Here in Tennessee, there are battlefields everywhere and even in Knoxville I can visit Union fortresses that were deployed on the Tennessee River. In addition to that, I’m partial to pre-modern military history. I just love studying the horse and musket era of warfare, basically from the Seven Years War through early World War I. Part of the fascination with the ACW also stems from my early love of miniatures wargaming and my first armies were based on the Battle of Antietam. I did a lot of ACW miniatures gaming in the 1990’s, along with Napoleonic minis as well.
Grant: How do you continue to find new and interesting ideas and ways to translate these battles to the realm of cardboard?
Hermann: Well, part of that is because these battles are so intriguing to begin with and provide so much fuel for a game design engine. The generals are unique and colorful personalities with so much nuance, as are the armies they command. Plus the narrative is rich and that feeds directly into how I like to design. In addition, my design philosophy from the very beginning has been “do something different” and the ACW (as well as other eras) provides me with the vehicle to try various game design approaches.
Grant: What does your upcoming game A Most Fearful Sacrifice focus on?
Hermann: This game was designed because gamers were asking for a follow up to The Devil’s To Pay covering the second and third days of the battle. After doing some initial research, it became abundantly clear that doing that would lead to an expansion that was actually larger than the original game! Not only were far more units needed, but overnight rules had to be added and then there was the inevitable issue of making sure that components matched exactly and all sorts of similar production issues. In the end, I just asked Mark Walker if we could simply go ahead and do a separate, deluxe game on the entire battle in one cohesive package. Basically, let’s try and put out the ultimate Gettysburg game. One that is playable, comprehensive and looks awesome.
Grant: What did you want the name to reflect from the Battle of Gettysburg?
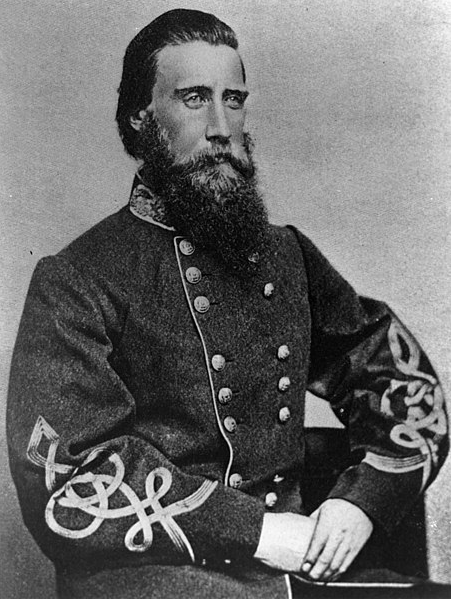
Hermann: I always like to use parts of quotes, poems (for example, that’s where “Blind Swords” comes from), book titles (or even chapter titles), etc. Something evocative and dramatic, if possible. This title comes from a quote that Mark Walker found from John Bell Hood … “I knew that if the feat was accomplished it must be at a most fearful sacrifice of as brave and gallant soldiers as ever engaged in battle.” Well, I immediately focused in on that middle part and it just sprung out at me. It perfectly sums up what the soldiers from both sides of this battle gave to their causes.
Grant: Honestly, do we need another Gettysburg game?
Hermann: Yes! The thing about Gettsyburg, and this is why I have so many designs on just parts of the battle, is that it is ripe with dramatic moments at iconic places – the Wheatfield, Blocher’s Knoll, the Railroad Cut, the Peach Orchard, Little Round Top, Culp’s Hill, Devil’s Den, Pickett’s Charge, etc. Each of these engagements are by themselves immensely interesting to study in a game. The other thing about Gettysburg is that it was such an important battle for the war and American history in general and provides a wonderful array of “what if” possibilities that wargamers particularly find so attractive to explore in a game design.
Grant: What about this game is different from the myriad of other Gettysburg games?
Hermann: My main goal with this game design is to give players the full “crunchy”, historical-chaos feeling that they get from any of the Blind Swords games but do so in a much more accessible way than you would get from doing so at the regimental-scale. So in that light, I wanted to make this game as rich in historical details as any other of the “monster game” designs on the battle but yet play as smoothly and quickly as the smaller-footprint game designs on Gettysburg. I hope that we accomplished that goal and that this will set the game apart from the others.
Grant: The game uses a new ACW game system called the Black Swan System. What does this system emphasize that makes it a good fit for Gettysburg and how does the system compare to your Blind Swords System?
Hermann: The Black Swan System is a direct offshoot of the Blind Swords System. It was created specifically to handle larger battles, like Gettysburg, Antietam, etc. The regimental scale of the standard Blind Swords Series games published by Revolution Games have a practical size limit. Longstreet Attacks is about as broad a game as you would want for the scale of the system – anything larger would just become too cumbersome. The Black Swan System was designed so that we could take Blind Swords (yes, they both have the “BS” initials) into the realm of the grandiose battles of the war but still keep the games playable. The first experiment with that philosophy was The Devil’s To Pay and most players liked the way the system was implemented. So now we are kicking it up another notch and doing the entire Battle of Gettysburg, which we felt was to right next step for the system.
Grant: How are cards used in the design versus the normal Chit-Pull to activate units?
Hermann: Basically, they simply replace the chits. The necessary Corps Activation, Event and Fog of War cards are seeded into a common pile and shuffled. Players will draw them just like they pulled chits before. The two keys to this change are that cards take less time to draw off of a pile than it takes to draw chits from a cup and I can put important game information right on the cards. This saves a lot of time not having to look up information in the rules or on the tables.
Grant: I know you emphasize the 3 FOW’s of war. How does this system do that?
Hermann: The system is built to create historically-based chaos throughout and challenge the players to deal with changing circumstances and “black swan” events and turns of fortune (both good and bad). So the Fog of War is represented most predominantly with a card that will generate various situations on the map that players must deal with. It is also reflected in both players not knowing ahead of time when or even if certain formations will activate due to the card-draw activation system. The Fortunes of War are brought about through the variable results that can be achieved on the CRT and Cohesion Test Tables, with players not being guaranteed of any result. It is also built into the “Fortunes of War” marker, which can be used to re-roll any dice roll. Finally, the Friction of War is simulated with the difficulty in units being able to rebuild their strength in the middle of battle and with the “Friction of War” card, which is introduced as the battle wears on (literally). This card will cancel the next card drawn and thus shows the overall fatigue and chaos that results from extended combat.
Grant: What from the history of this engagement did you need to model in the design?
Hermann: Well, obviously all the basic elements of any Civil War battle are there and the system is already built to accommodate those overall historical characteristics. Specifically to Gettysburg, there were a few things that needed to be highlighted. Buford’s troopers are well represented and we had to make sure that they were able to do what they did historically as far as delaying the Confederate advance. Also, leader casualties are a huge factor in this battle, especially regarding Reynolds and Hood, so that aspect is a very important element but also is not “scripted”. Other interesting factors are the unique natural features of Devil’s Den, the Railroad Cut and Gettysburg itself, all of which have special consideration in the design. Finally, the evolution of the battle with its varying stages and acts is key to studying how things happened as they did and why. Therefore, reinforcement schedules and formation availability are key design features so that players will be presented with the same strategic and tactical situations as the real commanders.
Grant: What is the scale of the design and what different types of units make up each sides Order of Battle?
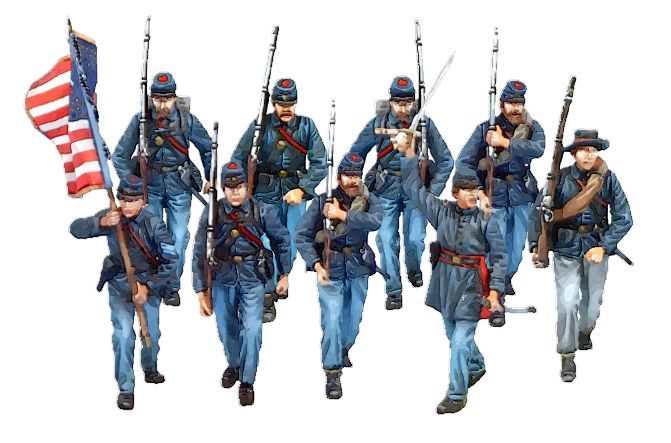
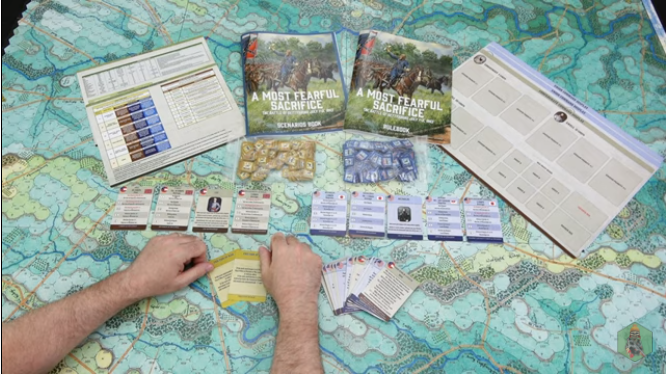
Hermann: These units are the same scale as used in The Devil’s To Pay … so they are each made up of from one to four regiments each, depending on how they were deployed at the battle. For example, the Iron Brigade has three counters – one is made up of the 24th Michigan and 19th Indiana regiments, the second is the 2nd and 7th Wisconsin and the third unit is the lone 6th Wisconsin regiment, because it was detached on the first day’s battles and fought alongside Cutler’s Brigade. So the game has the necessary flexibility of deployment in order that players can, if they wish, replicate the movements of the actual units at the battle. Or they can do something entirely different. As far as types of units, there are the standard units for any ACW game – infantry, artillery and Union cavalry. However, there are multiple variations to the graphics on the unit counters, including Zouaves, the Irish Brigade, the US Sharpshooters, etc. The counter art is very immersive.
Grant: What sources did you consult on the battle? What one source is your must read recommendation?
Hermann: My goodness – there are a ton of great books written on the battle! My “go-to” books for this game and others in the ACW series are:
Battle in the Civil War by Paddy Griffith
Any of the Harry Pfanz books
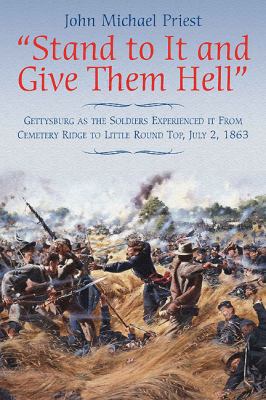
Stand To It and Give Them Hell by John Priest
Brigades of Gettysburg by Bradley Gottfried
Maps of Gettysburg by Bradley Gottfried
Osprey’s Order of Battle Gettysburg series
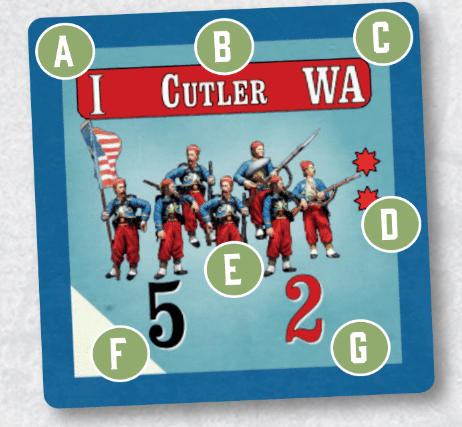
Grant: What is the anatomy of the counters?
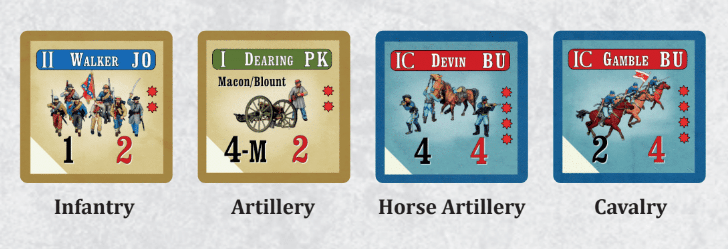
Hermann: The counters in this game are displayed in the same manner as in the other Blind Swords Series games and in The Devil’s To Pay. At the top is the information needed to identify the unit (its Brigade name) and where it fits in the army’s organization (Division and Corps affiliation). On the right side of the counter is a number of asterisks and this tells the player how many separate counters make up that unit. There are two numbers at the bottom – the first is the Strength Points (SP) of the unit (1 SP per 100 men or 1 SP per artillery piece) and the second is the Cohesion Rating (CR) of the unit (which is an abstract grading of its experience, morale and/or training).
Grant: What is the purpose of a unit’s Cohesion Rating? How does this value fluctuate throughout the battle and how does the Cohesion Rating relate a unit being forced to roll on the Break Test Table? What is the makeup of this table and what did you feel this should reflect?
Hermann: Without getting too far into the weeds, the Cohesion Rating (CR) of a unit is essentially a catch-all for its morale, training and experience … what the unit’s intangible fighting qualities are, other than just sheer number of men. It is probably the most important aspect of the game engine as it is the key element that will determine how well a unit will fight – and survive – during the battle. It is used throughout the game to measure a unit’s ability to fight and endure on the battlefield. The CR will fluctuate during the entire game and it will do so often. Units that are Shaken, Battleworn or do not have Unit Support will have their CR suffer. Units can also raise their CR temporarily through the use of various events, such as “Rebel Yell!” and “Take Those Colors!”. A low CR makes units more vulnerable and increases their risk during a Break Test, which if they fail will cause them to leave the game (but perhaps not permanently). The Break Test itself is conducted whenever a unit suffers a Depleted result (which causes the unit to lose a step) and is already Battleworn. This is the unit’s final test – do they break and flee from the accumulated casualties? Note that when a unit takes such a result, it is not automatically eliminated! A unit can only be eliminated by failing a Break test, so there is no “wiping out” a unit to the last man – its existence is dependent on the morale fiber of the unit and the will of the troops to maintain their “elan” in combat despite the losses.
Grant: What different type of cards are used in the game? Can you give us an example of each type and tell us how they are used?
Hermann: There are a number of cards used in the game and each has a unique function:
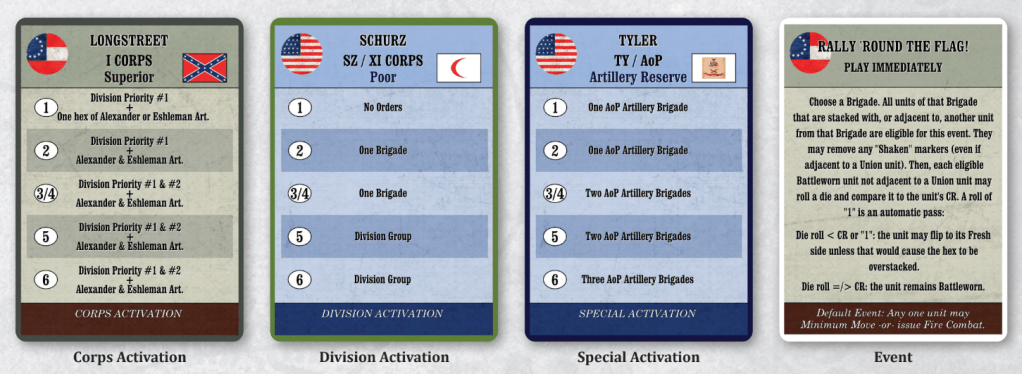
- Corps Activation Cards: these are the main drivers in the game. They get seeded into the main card pile and when drawn, they tell you which Corps can be activated. You then roll on the Command Table on the card (each Corps is different) to see which of your divisions can be activated.
- Division Activation Cards: these cards do not go in the draw deck. Instead, these are placed on their respective Command Displays in priority order within the Corps to which they belong. The first Division Card (Division Priority #1) is the most likely to be activated when the Corps card is drawn. The second Division Activation card is less likely, but still possible with a good Corps commander or a lucky roll. The third Division will rarely activate through the normal activation process … you need some other things to happen to get those units into the action.
- Event Cards: as in all Blind Swords games, Events Cards are the central narrative element to the design and proper use of them can make or break your efforts. Players can normally choose two events to seed into the deck – the rest of the Event Cards are random. The cool thing about this game is that the Event rules are written right on the card – no looking them up on a separate table.
- Fog of War: this card will generate even more oddities, including possible leader casualties.
- Friction of War: the steady deterioration of the battlefield and of the fighting soldiers is reflected with up to two of these cards being added to the draw deck. They will cancel or modify the next card drawn.
- Commander-in-Chief Cards: the commanding officers in each army are represented by this card. Actually, in the Union army, there are a few of these cards as various generals stepped up and took battlefield command at key moments of the battle. This card allows the players more flexibility in commanding units or manipulating the card draws.
Grant: How do players use the Command Displays? What information is tracked on the display?
Hermann: The Command Displays are where the players will maintain their Corps tracks and thus this is where they will place their corresponding Division Activation Cards in priority order. In addition to that, there are organization boxes if players want to Group unit counters in a hex (if they become too cumbersome) along with the Broken and Crushed Unit boxes where units in those conditions are placed. The displays are also the place where you can see how cool each of your generals’ beards look!
Grant: What are the three different colors of dice used for?
Hermann: The black and the white dice are used together for most of the table results and are read as a “base 6” number, so from 11-66 with the black die first. The red die is used only when rolling on the CRT and is the Cohesion die … it is added to the target unit’s Cohesion Rating to get the actual result of the combat. So results are an interesting combination of the general effect of the fire and the specific application effect of the fire.
Grant: What occurs in the Command Decision Phase? Why is this so key to the game? What type of strategy and decisions go into this phase?
Hermann: Some of the most important decisions are made during this phase of the game. First of all, the players each need to decide on their Division Priority for every Corps that is active in the game. After that, they must determine if they are willing to sacrifice some of their Event Cards to get extra Preliminary Bombardment. In this version of the system, both sides can conduct artillery fire before the turn begins with just one brigade of artillery. However, you can expend one random Event Card to add one extra Brigade of Artillery to this Preliminary Bombardment. Then players may each choose two Key Event Cards, these being specific Event Cards that they wish to see be drawn during the upcoming Game Turn. Obviously this is a decisive part of the game as players can set up the possibility of certain events appearing and thus being exploited by them during gameplay. Finally, a number of random Event Cards – minus the number of cards that you “spent” for Preliminary Bombardment – are added to the draw pile for the turn. As you can see, this is a very important phase of the game as both players are determining which divisions need to activate this turn, the makeup of the Event Cards in the draw pile and of how much preliminary bombardment they’d like to throw at the enemy (paying that price by giving up some events).
Grant: What are the different orders players can issue during the Order Step?
Hermann: There are only three basic Orders that a player can issue to his active units: Attack, Defend and Maneuver. Each has its own unique abilities and restrictions regarding how far units can move and what they are allowed to do during their activation. So players must think about what it is they are trying to accomplish with the currently activated units as they will not be able to do everything. The one big difference with this version of the series is that artillery units now activate along with the infantry and cavalry units. In previous versions of the system, all artillery activated in a special artillery phase at the start of the turn. That has now become a separate Preliminary Bombardment Phase in which only one brigade of artillery can fire (unless you opt to spend Event Cards to get more artillery brigades to fire, as described above). Instead, the Command Table die roll on the Corps Activation Card will tell you how much artillery you can activate with the infantry/cavalry units and this artillery can move, fire or rally (regardless of the issued Order).
Grant: How does Fire Combat work?
Hermann: Fire Combat works the exact same way it has in all the other iterations of the Blind Swords system. It is a “firepower” based system, meaning that the number of troops or guns firing determines the strength/volume of the fire being issued. This is modified through the use of column shifts – there are no die roll modifiers used in the system, it’s always column shifts – and then black and white dice are rolled to achieve a Cohesion Test level. This test is then taken by the target unit by adding a red die roll to the target unit’s CR and getting an effect. The effects are in the form of Shaken and/or Skeddadle results, along with the more severe Depleted results. I did add another element to the mix in this design called Combat Events, which are unusual events that may occur when you roll “doubles” on the black/white dice roll.
Grant: How do Combat Events come into the equation? What are some examples these events?
Hermann: As mentioned above, when you roll “doubles” you go to the Combat Events chart and cross reference the actual double-number rolled with the situation you are resolving (that’s right – you don’t have to make another die roll!). This will give you an event that may or may not occur, depending on circumstances. For example, if I am firing at a unit and roll a “22”, I would apply the rolled result normally. Then on top of that, I check the Combat Events chart and cross reference “22” with “Firing Unit Roll”. This tells me that someone in my firing unit has demonstrated Inspirational Leadership or performed a Heroic Action and that causes an additional “Shaken” result to be applied to the targeted unit. The players are encouraged to create their own narrative to justify this event – the more colorful, the better! Combat Events can also occur in Assault Combat.

Grant: How does Assault Combat work differently?
Hermann: Again, same as the previous games in all respects. Assault Combat is resolved basically the same way as Fire Combat, except that an attacker can bring in support units to assist and combat results are normally more dynamic. The other major difference is that both sides will roll on the CRT and the two Cohesion Test results achieved are cross-referenced with one another to get a net effect for the combat. This will result in one side or the other having to apply the usual array of results to their units. If doubles are rolled by either or even both sides, then the Combat Event procedure is enacted as described above. If both sides happen to roll the same Cohesion Test result, then this is a Close Fight and players must refer to the Close Fight Resolution Table. Both players roll a die and the dice are added together. This sum is cross-referenced on the table and it will tell the players what the result of the combat is. This table is also narratively built so that a story emerges regarding what exactly happened during this combat. Finally, Assault Combat allows a winning attacker to conduct an Attacker Breakthrough, which will allow those units to possible exploit their success and even conduct another Assault Combat.
Grant: Is there anything interesting or unique about the Combat Results Table? How did you formulate it to get the results typical of the fighting in the ACW?
Hermann: Well, the CRT is built to be pretty easy to implement and concentrates on combat power vs. cohesion (or morale). It all boils down to that. It’s also designed to reduce math work. I despise games with laundry lists of modifiers to dice rolls and/or unit strengths. I prefer keeping the value of the dice you roll consistent and just changing the column you will be rolling on – it’s much easier to remember. As far as ACW fighting “feel”, I wanted to make true assaults rather infrequent. Most of the fighting was done through standing, close-range firefights and the system encourages players to do just that. The assaults are only done when the enemy is particularly vulnerable and/or you need to take the ground the defender occupies. Also, units are very hard to eliminate in the game. Most of the time, you will cause retreats and defeated units will be running away, looking for a place to rally. Even when units break and leave the game, they can return through rallying. It’s only when units get “Crushed” are they truly eliminated. Units in the ACW were rarely wiped out but rather they were made combat ineffective and that’s how this system tries to handle this aspect of combat.
Grant: I find the Skedaddling result interesting. What is this result and why did you choose that jargon? Is this a Tennessee thing?
Hermann: Ha! I came up with this game term all the way back with Stonewall’s Sword … long before I moved to Tennessee. It is simply a unit retreating, but I wanted to use a term that is more immersive and period-specific and skedaddle is used in many of the history books I’ve read. It’s all about the atmosphere!
Grant: How is victory determined?
Hermann: Each scenario has its own victory conditions. These usually involve one or more of the following:
- Victory Hexes: these are pre-designated hexes that one side or the other needs to control at the end of the game.
- Enemy Casualties: enemy units that are either Broken or Crushed earn you victory points. In the larger scenarios, you can also get points for overall damage inflicted to enemy Brigades and Divisions.
- Exiting Units: in some cases, due to the circumstances surrounding a given scenario, a player can get Victory Points for exiting units from a certain area. This is to reflect their potential effect on other events at another sector of the battlefield which are occurring simultaneously with this scenario.
- Enemy LOC Hexes: one scenario has an automatic victory condition of controlling the enemy’s Line of Communications, which is represented by one key hex.
Grant: What scenarios are included?
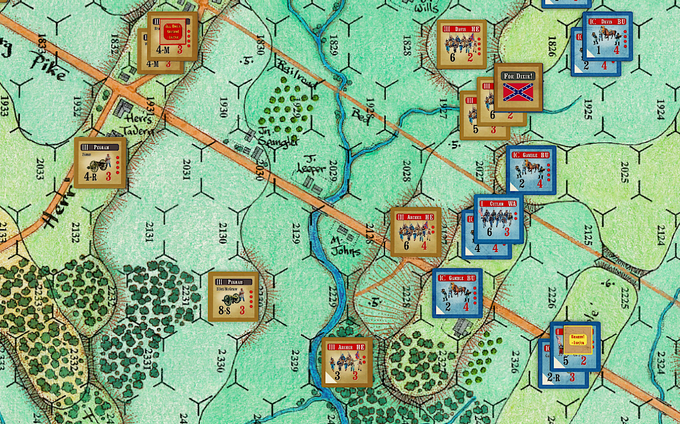
Hermann: There are 13 total scenarios – 9 one-mappers and 4 that use both maps. Each scenario covers a different aspect of the battle and uses various “lenses” depending on what the players want to simulate and how much time they have to play. So we have small scenarios where you just play the fight at Little Round Top, Culp’s Hill, Pickett’s Charge or the fight at and around the Wheatfield on the second day. For medium scenarios, there is Ewell’s approach to the battlefield on the first day or Longstreet’s entire attack on the second day. Then you can up the ante and go for a medium/large scenario that covers the entire first day of the battle or another on the entire second day. Finally, there are two scenarios where you can play all three days – including overnight turns – one being based only on historical reinforcement schedules and leader casualties and the other is a “what if” style scenario completely in the players’ control. So there is plenty of variety for different playing times, table space and player skills.
Grant: What are you most pleased with about the design?
Hermann: Oh, my goodness…just about everything. Mark Walker and Flying Pig Games went all out with their support of this project, basically letting me do just about anything with this design. The developers and testers were magnificent and provided vital feedback. The game looks great and comprehensively covers every aspect of the Battle of Gettysburg and yet, it is relatively easy to play and moves along at a pretty good clip. So our goal was to make the best Gettysburg wargame possible and whatever the outcome, I know that we all gave it our best shot. And I couldn’t ask for anything more than that.
Grant: How has your development and playtest team contributed to this effort?
Hermann: The team of developers and testers are Claude Whalen, Steve Poitinger, Zeke Conover and Fred Manzo. Their contributions to this design were priceless. These guys played every scenario over and over again – it was remarkable. And if they felt something wasn’t right, they told me right away and we worked on a solution together. Every designer should be blessed with a team like this and I am so grateful to all of them for helping make this design what it is. I truly could not have designed this game the way it is without their assistance and support.
Grant: What other battles or even different conflicts could you see this system used in?
Hermann: I would love to do Antietam using this system one day. That battle is the one that I based my 15mm miniatures army on way back in the 1990’s when my gaming group was doing ACW miniatures campaigns. So I have a special place in my heart for that battle. Otherwise, I could see revisiting the Franco-Prussian War and early World War I as well. Actually, the Battle of Inkerman during the Crimean War would be the perfect battle to do with this system. That battle was pure confusion and chaos and I think this system is one of the few that could do that battle justice.
Thanks so much again for letting me do this interview and talk about A Most Fearful Sacrifice. It’s been a real pleasure and your program is one of the best out there! Good gaming.
As always it was a pleasure speaking with you Hermann. I am very excited about this one as it sounds very interesting and a playable game on one of the greatest battles of the American Civil War is always welcome.
If you are interested in A Most Fearful Sacrifice: The Three Days of Gettysburg, you can check out the Kickstarter page at the following link: https://www.kickstarter.com/projects/markhwalker/435798807?ref=4scqjr&token=52d2952d
The Kickstarter is set to start as of Tuesday, April 6th at 12:00noon EST.
-Grant

This is an insta buy for me. Oh please YES do Antietam and Inkerman!!!
LikeLiked by 2 people
Hey Grant,
One of your BEST interviews yet! Like you, I asked the same question… ANOTHER GETTYSBURG game? God knows, I have a few. As I read through the interview, I became pretty impressed about how Herman not only created the “fog of war”, but the “friction of war” as well. As a war gamer, especially a tactical gamer, I’ve become really interested in how soldiers hold together and fight effectively. The human psyche is NOT built to “stand tall” when you are afraid, and everyone is dying around you. The fact that we ARE human and don’t want to die, plays into this as well… not EVERYBODY is an Audie Murphy, when the bullets begin to fly. I LIKE the three dice system, and having to make so many important commands, as the battles progress. The scenarios hold up well. The counters are well established, and I’m liking the number of units in each Brigade/division. I’m “assuming” that this is a Rick Barber map… it looks like one, at any rate. I’m really liking his ideas, and how he breaks down the battle, WHILE it’s going forward.*** I’m also REALLY liking his ideas about INKERMAN and the Crimean War… such a forgotten subject! BECAUSE of your interview, I’m going to take a serious second look at this game and put it on my BUY list. JUST one question, though… and I can understand why you didn’t ask it… what are the size of the units… 5/8ths, or one inch? I know that the units in Armageddon Wars are about one inch in size… just curious. ALSO, how far is the range of the artillery? Grant, you hit the HOME RUN with this interview…thanks again.
LikeLiked by 2 people
I think the counters are all 1”. Flying Pig Games doesn’t do small counters at all. I don’t know about the artillery range but there is a link to the rule book in the interview that you can check out. Thanks Jim.
LikeLiked by 1 person
I love Hermann’s designs.
The “what if” reinforcement schedule scenario sounds particularly interesting – I’m a little tired of the historical rut.
LikeLiked by 2 people
Thanks Grant… I’ll do that… KS ed the game, so I’m happy to get it…
LikeLiked by 1 person