Castle Itter is a solitaire design with 2-player competitive or cooperative options that sees the SS units activated by cards and then advance on the Defender’s positions inside the castle along various tracks. The defender must simply last till the deck expires and move units around the board to various positions and eliminate units before they enter the castle.
In Action Point 1, we looked at the game board focusing on the locations, combat positions and assault tracks for the SS. In this Action Point we will examine the SS Card Deck and how the cards drive the assault and work against the player.
SS Card Deck
The game is focused on the effects of the SS Card Deck each round after the player takes their 5 actions moving their units around the board from combat position to combat position 3 SS Cards are pulled and their effects are carried out one card at a time without looking at the cards prior to one being turned over. The cards will be the ultimate reason the Defender fails at his goal of defending the castle as these cards will call up soldiers in the form of SS Counters to move along the assault tracks, attack the defenses of the castle and disrupt the Defender’s forces.
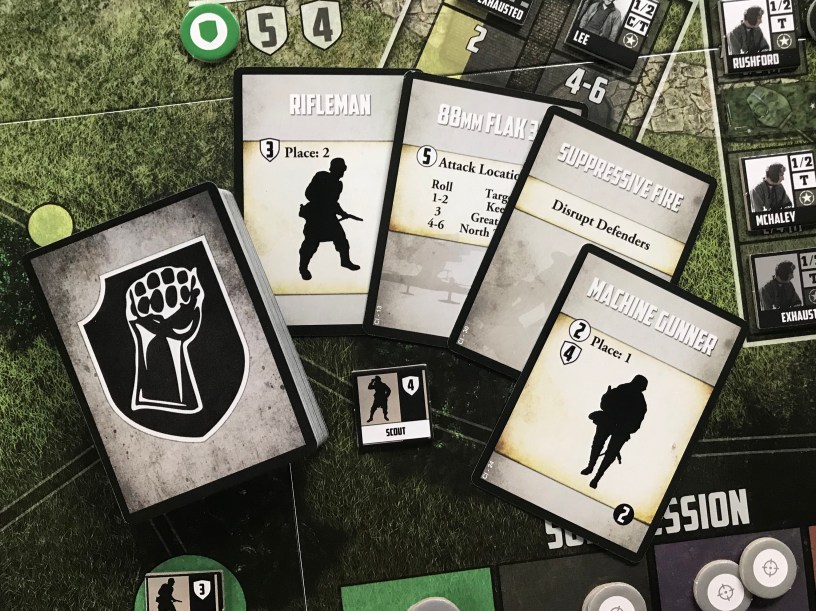
There are 4 different categories of SS Cards in the deck as follows:
Attack Defender
Attack Location
Disrupt Defenders
Place SS Counters
Let’s take a look at each of the types of cards and show you how they work.
Attack Defender
There is only one card in the SS Deck that has the Attack Defender effect. This lone card type is the Sniper and there are only two copies of this card in the deck. When the Sniper card is revealed you will first roll a d6 to determine which location the attack will target. Listed on the card are five colored categories each assigned a number. Gray positions are 1-2, Green is a 3, Yellow is a 4, Red is 5 and Purple is 6. You roll and consult the card to see what colored position the card will target. Once the position is determined you will next roll a d6 again to determine what specific combat position will be targeted. If the roll is a combat position that is empty you will instead refer to the next higher number and if that is unoccupied you will refer to the next lower number.
Once you have identified a target in a combat position you will roll 4d6 and compare the result against the current Defense Value of the location. If at least one of the rolled dice is equal to or greater than the Defense Value the Defender in this position becomes a casualty and is removed from the game.
In the below picture, a d6 is rolled and results in a 2 which means the Sniper will attack the Gray locations in the Gate House.

Next a d6 is rolled to determine which combat position is targeted. The result is a 4 and the target will be the 4-6 combat position occupied by Tanker McHaley.

Now you will roll 4d6 for the attack and will compare those numbers to the current Defense Value of the Gate House which is a 5. You can tell the Defense Value by referring to the track with the green shield marker just below the name of the location. In the below picture you will see the results of the 4d6 rolls were a 5, 4, 2 and 1. The 5 die is equal to or greater than the Defense Value of 5 and means that the Sniper has scored a hit and Tanker McHaley will be removed from the board as a casualty.

Attack Location
There are three different types of SS Cards with the Attack Location effect. These cards are titled 75MM Pak 40 (7 cards in the deck), 88MM Flak 37 (4 cards in the deck) and Panzerfaust (4 cards in the deck).

The 75MM Pak 40 and the 88MM Flak 37 resolve in the same manner while the Panzerfaust is a bit different. When a 75MM Pak 40 or 88MM Flak 37 card is revealed you simply roll one d6 to determine what location the card is attacking. There are choices on the cards that correspond to the die roll.
Once the location is determined, then you will roll a number of d6 as identified on the card, which is usually 4 for the Pak 40 and 5d6 for the Flak 37. If at least one of the numbers rolled equals or exceeds the current Defense Value of the location this is considered a hit and the Defense Value will be reduced by one. If the Defense Value was already at 4 and at least one of the dice rolled is equal to or higher than 4, every defender in the location will be disrupted and have a disruption token placed on top of their counter.

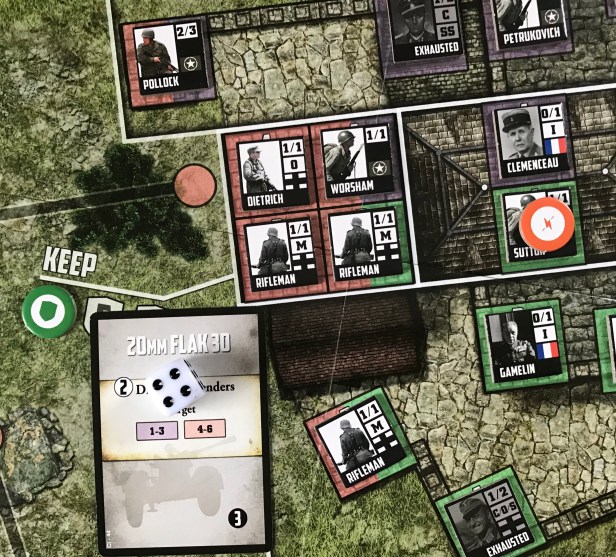
In the picture above an 88MM Flak 37 card is revealed. First, a d6 is rolled resulting in a 6 which means the attack will target the North Terrace. The card instructs the player to roll 5d6 and compare those numbers to the current Defense Value of 6.

The 5d6 are rolled and result in a 4, 3, 2, 2 and 1. None of these numbers are equal to or greater than the current Defense Value of 6 so the attack is a miss. If a hit was scored, the current Defense Value of 6 would be lowered to 5.

The operation is a bit different when a Panzerfaust card is revealed. The Panzerfaust card always targets the Besotten Jenny so there is no roll needed to determine the target.

The player simply rolls 4d6 as instructed on the card and compares the results to the current Defense Value. If one die roll equals or exceeds the current Defense Value a hit is scored and the Defense Value will be lowered from a 4 to a zero.
When the Besotten Jenny reaches a Defense Value of zero it is considered destroyed. Any Defender Counters located in combat positions become casualties and are removed from play. If the Besotten Jenny is the target of a future card after being destroyed the attack has no effect. Once destroyed no Defender Counters can be moved into the Besotten Jenny.
Disrupt Defenders
There are two different types of SS Cards with the Disrupt Defenders effect including 20MM Flak 30 (3 cards in the deck) and Suppressive Fire (4 cards in the deck).

When the Flak 30 is revealed you will roll one die and compare the result to the card to determine what color of combat positions are the target of the attack. In the below picture we roll a 4 and refer to the card which means that red combat positions will be targeted.
We will now roll two dice to attempt to disrupt each Defender in the combat positions of the determined color. If at least one of the two dice are equal to or greater than the combat position’s current Defense Value a Disruption Token is placed on top of the Defender Counter. If the Defender already had a Disruption Token it will be removed from the board as a casualty.

In the picture above we see only two of the six combat positions with dice assigned. After we do these two we would move to the remaining four to follow the same procedure. You will see that combat position 6 with Pollock occupying the position is being suppressed and two dice result in a 4 and 2 being rolled which is less than the current Defense Value of the North Terrace (because this combat position is located in the North Terrace location) and is a miss. Next we see that in combat position 1 in the Keep is attacked and the dice rolled result in a 6 and 1 with the current Defense Value being a 6 which means that Dietrich is disrupted and will have a Disruption Token placed on his counter. Pretty simple but these Disrupt Defender cards can be devastating if the Defense Value is a 4 as it is pretty easy to roll a 4+ on a d6 (50/50 chance). We will now take a look at an equally devastating card in the Suppressive Fire card.

Suppressive Fire cards can be managed by keeping the Machine Gunner and Mortar Counters off the board by suppressing them when they are placed or attacking them during your action phase. But remember they don’t move up the assault tracks (see more on this below) so they might not be as pressing of a concern as the Rifleman Counters that are next to the walls of the castle.
When revealed, you will work through each Machine Gunner and Mortar Counter on the board. You start with the Machine Gunner or Mortar Counter in the lowest numbered SS Counter placement area. They are numbered 2 through 12. Roll a single die to identify the combat position that is targeted in the same color that the Machine Gunner and Mortar Counter are located. Then roll a number of dice equal to the Disrupt Value for the Machine Gunner (2) or Mortar Counter (3) and compare this to the current Defense Value of the location. If at least one of the dice are equal to or greater than the combat position’s current Defense Value a Disruption Token is placed on top of the Defender Counter. Sound familiar? That’s it. Repeat this process for each Machine Gunner and Mortar Counters on the board.
Now we will take a look at the majority action of the SS Card Deck.
Place SS Counters
There are 5 different types of SS Cards in the deck with the Place Counters effect including Machine Gunner, Mortar, Rifleman, Scout and Sturm. Placing SS Counters on the assault tracks to advance toward Castle Itter is the main focus of the deck. The process is very simply but does include three separate steps as follows:
Roll to determine the SS Counter Placement area on the various tracks.
Decide whether to attempt to suppress the SS Counter
Advance any SS Counters if the circumstances call for it.
When an SS Card that places SS Counters is revealed, you will first look at the number of units that will be placed by the card. The number to place is next to the number located in the shield to the left of the unit silhouette. Typically at the beginning of the game until the deck gets out of the 1 and 2 cards the Rifleman and Scouts will place 2 SS Counters of that type while the Sturm will place only one. Once the 3 cards are revealed typically the Rifleman cards will place 3 SS Counters while the Sturm card will place 2.
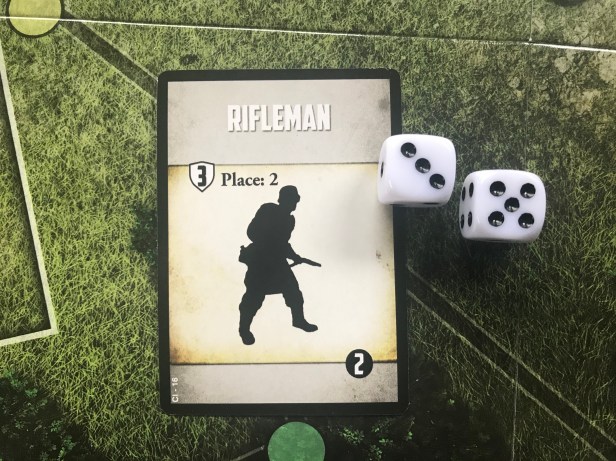
In the picture above you will see that a Rifleman card has been revealed which instructs you to attempt to place 2 Rifleman Counters. For the first counter placement, you will roll two dice and add the resulting numbers together. In our example, we roll a 3 and 5 for a total value of 8.
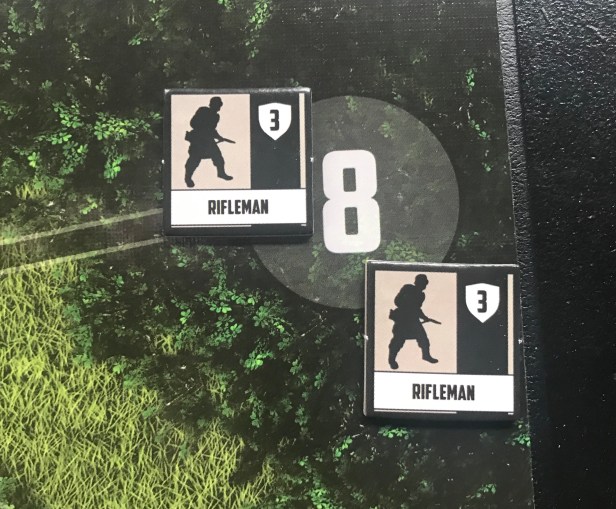
At this point you will decide to either attempt to suppress the unit by using suppression tokens (we will cover this in our final post) or allow it to be placed in the large 8 circle. If there is an already existing SS Counter there you will place the new counter and then the existing counter will simply advance on the track closer to Castle Itter.

You will notice that sometimes circles come together onto the same assault track. For example, the 7 and 8 circles both converge and come together into one track. The design does this with the numbers in order to create more pressure on the player and make a greater challenge.
You then continue the process of satisfying the card by doing the same process for the next Rifleman counter by rolling two dice, adding the two numbers together and then placing the counter in the appropriate circle after deciding to suppress or not.
The process is very different when a Machine Gunner or Mortar card gets revealed though.

When a Machine Gunner or Mortar card is revealed you roll two dice as usual adding the values together to place the counter in the appropriate circle. In the picture above, you will see we rolled a 6 for the Machine Gunner and a 5 for the Mortar card.

As we go to place the Machine Gunner Counters in the 6 circle we notice that a Rifleman Counters is already occupying this space. One important difference to remember here is that neither Machine Gunner Counters nor Mortar Counters ever advance up the tracks and therefore do not displace existing counters. There is also no limit to the number of these counters that can be placed in circles on the tracks.
When placing the Machine Gunner and Mortar Counters will roll 1d6 to determine which combat position in the color they were placed they will attempt to Disrupt. Then roll a number of dice equal to the Disrupt Value for the Machine Gunner (2) or Mortar (3). If at least one of the dice rolled is equal to or greater than the location’s current Defense Value you will place a Disruption Token on the Defender. If by chance the Defender already has a Disruption Token and receives another they will become a casualty and will be removed from the board.
I know that this post was very long but we covered a lot of ground on the central aspect of the design. The SS Deck is how the action is driven against the player and is very important to understand. Each round the three cards revealed will decide your fate and can be very unkind. I have played the game over 10 times now and more often than not I feel like things are going well until suddenly it sneaks up on you and after a few bad dice rolls they are not going well. Keep in mind that things will snowball and be efficient with your actions against the counters on the tracks by taking the appropriate actions and by using the advantages and abilities of your Defenders to fight the good fight.
In Action Point 3, we will take a look at the various Defender units and their Special Actions.
-Grant

The game is finally available in Poland so I think I will purchase it. I read fantastic book about that encounter (https://www.amazon.com/Last-Battle-German-Soldiers-Joined/dp/0306822962) and really would like to get that game.
LikeLiked by 1 person