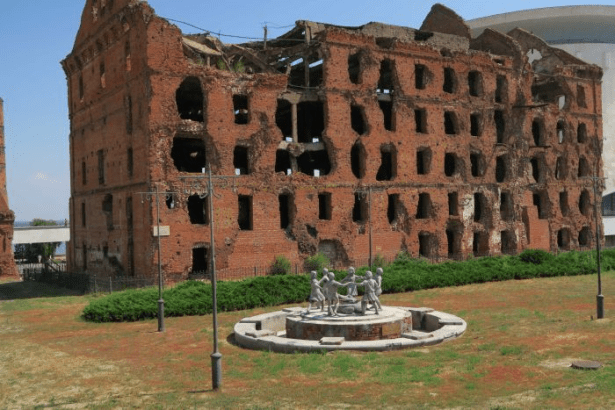
Pavlov’s House: The Battle of Stalingrad is a very interesting game that focuses on the defense of the fortified apartment building that was nicknamed “Pavlov’s House” by the Soviet 62nd Army after they withstood two months of attempts at storming from the German Wehrmacht during the Battle of Stalingrad in World War II. The name came from one of the building’s heroic defenders named Yakov Pavlov and was a huge psychological victory for the Soviets during that difficult period.
In this series of Action Points, I want to examine the game’s unique and very interesting board, which is split into three separate parts that represent different aspects of the conflict that all ultimately effect the outcome of the game. Over the next week, I will do one Action Point discussing each part of the board and then will do a few more looking at different elements of the mechanics and cards involved.

The Game Board
The game board depicts three different views of the Stalingrad battlefield that all play a key role in the success or failure of the defenders in Pavlov’s House.
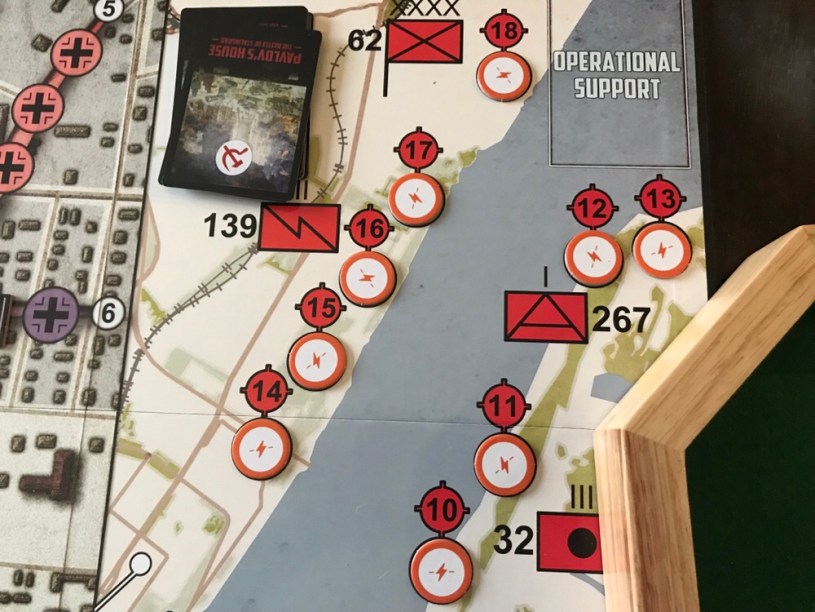
On the left side is a view of the inside of Pavlov’s House and covers the tactical-level movement and actions of the Soviet defenders in the form of counters. In the middle of the board is a view of the area immediately surrounding Pavlov’s House which mainly consists of the area called 9 January Square. This area shows the location of various colored tracks that are assault lanes for the German Wehrmacht counters and also provides for locations where the Soviet defender can place special Sapper units that act as a last line of defense. As German counters are drawn, they are placed on one of these 6 tracks via a die roll and as there are other units placed on each track the units advance toward Pavlov’s House. On the far right side of the board is the Volga River and the operational-level of the Soviet 62nd Army. This is the area of the board that we will focus our attention on for this Action Point.
The Soviet Card Phase
The Soviet Card Phase is the first part of every turn and provides the actions that the Soviet player will use to prepare his defenses, move supplies to the beleaguered defenders, establish communications to gain extra actions and also call in artillery strikes on Wehrmacht attackers and to defend against the air raids of the deadly Stuka dive bombers.

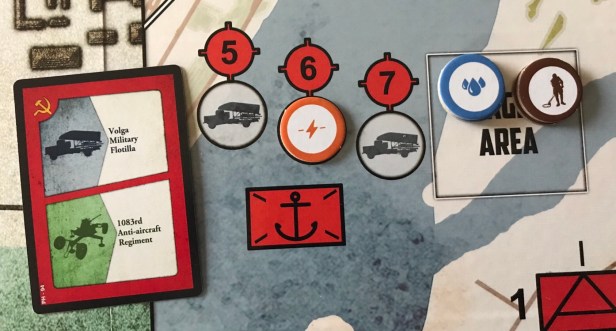
At the beginning of this phase, the Soviet player will draw four cards and will be able to use one of the two actions printed on 3 of the cards. These actions can include placing a marker, such as an anti-aircraft marker on certain locations tied to air defense (such as the 267th Separate Anti-aircraft Battalion or the 1083rd Anti-aircraft Regiment), removing a disrupted marker from a location that has sustained a hit from the Junkers Ju 87 cards or placing a 139th Signal Battalion market in order to increase wire communications and gain an additional action for use in defending Pavlov’s House.
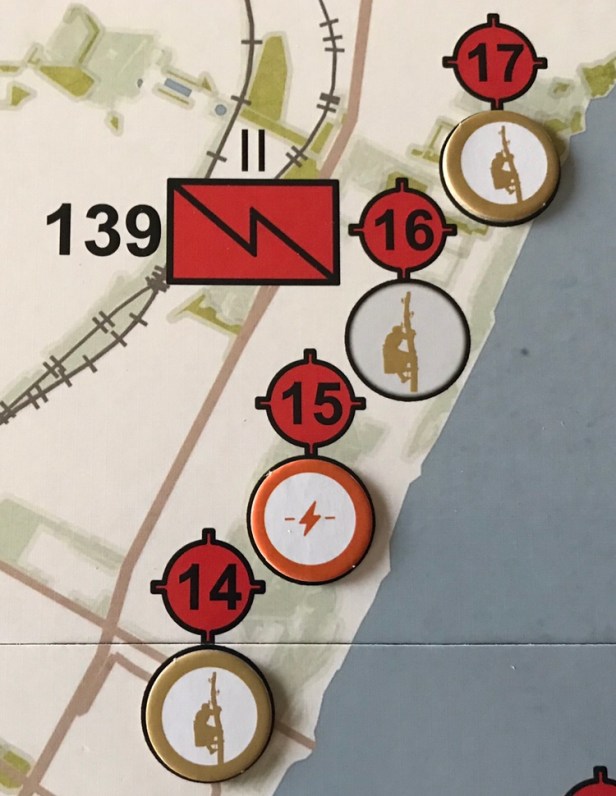
Standing in your way of drawing playable cards to take needed actions in assisting the defenders are the annoying Fog of War cards. At the start of the game, the Soviet player will shuffle in 3 of the 7 available Fog of War cards. When they are drawn, they have no specific effect other than to act as a dead card in your hand, if you have drawn multiples of the Fog of War cards it is possible that you will be able to take less than three actions during the Soviet Cards Phase. The way that more of the Fog of War cards are introduced into your deck is if the 139th Signal Battalion areas (numbered 14, 15, 16 and 17) are hit by the Junkers dive bombers. When a dive bomber card is drawn they will each get to roll 3d6 and the total will equate to a numbered spot from 3-18 on the board. As you can see, when you roll 3d6 your chances of rolling a number between 12-15 is pretty high and will mean that these areas will be hit often, either removing markers you have placed or causing a disrupted marker to be placed and a Fog of War Card to be added to your deck increasing the chances of clogging up your hand and handicapping you to less than 3 actions at multiple critical parts of the game.
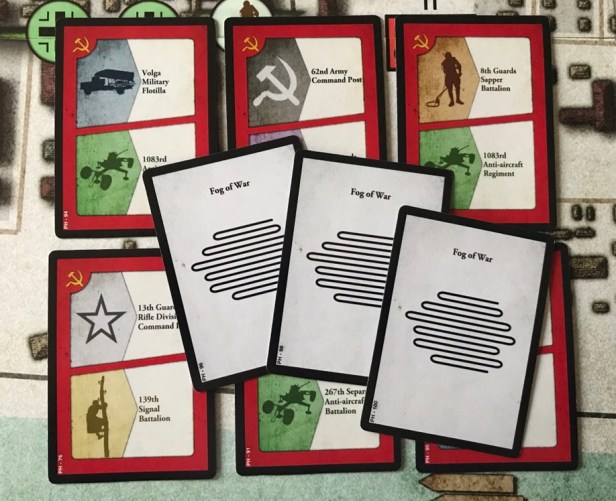
Another key area of this part of the board is the Staging Area and the Volga Military Flotilla as they will be the means of delivering needed food, water, ammunition, Sappers and medicine to meet the resupply demands of various German cards and the optional Operational Support Cards variant. If you cannot properly manage to keep your troops fed during resupply checks, you will have to inflict casualties on your defenders removing needed troops to defend Pavlov’s House. The resupply cards require 1 food token (blue water symbol) per five counters present in the House, including weapons counters.
A Case of Resource Management and Protecting Critical Elements
One of the elements that I really like about the game is the resource management element and trying to make sure your are properly utilizing your Soviet Cards. Because you can only play three of the possible 8 actions shown on your drawn cards, you must think carefully about how to most efficiently utilize your actions. Is a resupply card nearing being played and do I have the right amount of food counters in the house to feed my troops? Are the walls of Pavlov’s House nearing collapse and do I need to focus on bringing Sappers across the Volga to make needed repairs? Are the Wehrmacht counters nearing entering the house and should I call in an artillery barrage from the 32nd Guards Artillery Regiment? Or do I push to build my wire communications by placing my last of the four 139th Signal Battalion counters to gain an extra action? All great quandaries that will keep you engaged in the gameplay and requires meaningful decisions throughout.

I hope you have enjoyed this look at the Volga River and operational-level part of the game board in Pavlov’s House: The Battle of Stalingrad from Dan Verssen Games. In our next Action Point, we will take a look at the 9 January Square area of the board and the assaulting German Wehrmacht counters as they attempt to breach the walls of Pavlov’s House.
-Grant

DVG continues to release solid designs with innovative mechanics. I really appreciate the effort that goes into their games and like the tight focus of this title. Curious to see how well solo, co-op, and competitive modes work within a single design. Looking forward to your future “action points” about it!
LikeLike