Hi, and welcome to another assembly and painting guide for the new plastic Puma kit which can be found in the Panzer Kampfgruppe from Battlefront. This is part of their new all plastics line of late war 15 mm miniatures. I already put together a guide for the Panzer IV’s contained in this box, and you can read that here. Some of the techniques and steps will be similar, but this is my first armoured car at this scale, which presents a few different nuances.

So, building these kits is actually not bad. Each sprue comes with at least three variants, but I was all in for the Puma. I always liked the Puma and was jealous that my brother James had one back when we did 1/72 scale modelling and wargaming. Finally I have my own. The road wheels are mounted two on an axle and sit evenly, and sturdily. I was worried about tilting or misalignment but had no such issues.

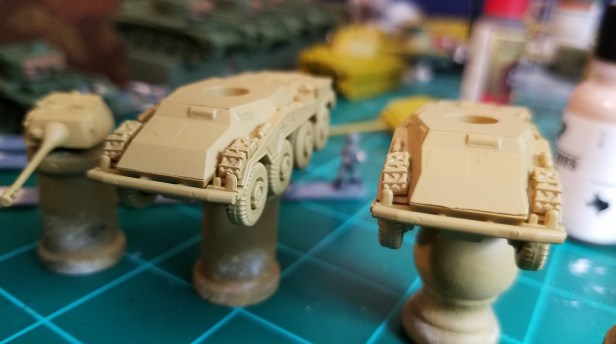
This was, however, the first kit from Battlefront that had some gaps that were rather unseemly. The top piece of armoured car, that includes the turret mount, had sprue gates on the back of the panel. The plastic there is tapered so it locks with the main hull piece and as such is very thin. Maybe I was a little heavy handed when putting it together, but I feel like I wasn’t but there were some pretty unsightly gaps there.


The front of the model was a different story. The front of the model was a mixture of not being well cast (misaligned) and had more flash than I cared for. You’ll need to use filler to get this right. I chose not to because I’m lazy and don’t care that much. Plus I figured the paint job would distract and cover up the gaps.
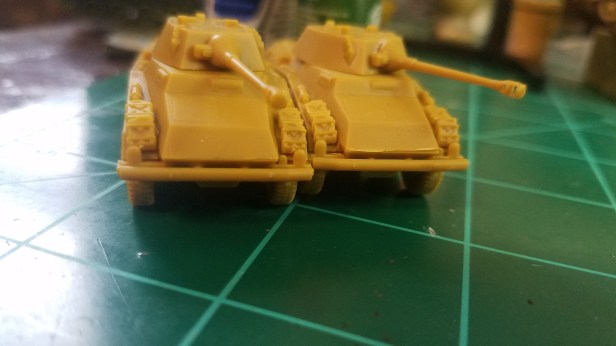
I then sprayed them with my traditional Italian Armour, which I was hoping might mask the gaps a tiny bit, but I was fooling myself. Again, I suppose at 15 mm scale it’s not the end of the world as I’m not trying to win any competitions.
I used Army Painter’s Soft Tone to do a pin wash on all the crevices and recesses on the models to give shadow and definition to the model. The Pumas have a good mix between flat surfaces that will show the camo well, and hatch/vent detail on the back, so even after the pin wash the models really started to take shape.

Using ‘Pavement’ Grey (from Walmart) I based the tires and the gun muzzle and the tools. I was presented with a challenge in painting armoured cars for the first time in the form of those huge tires. I had to decide how to make those look good. I wanted to do a more subtle weathering, instead of the caked on mud that is a staple of my tanks. But more on that later.

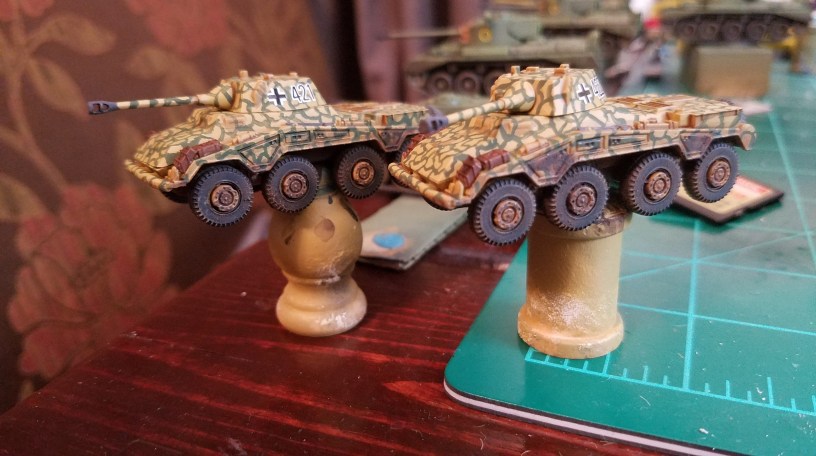
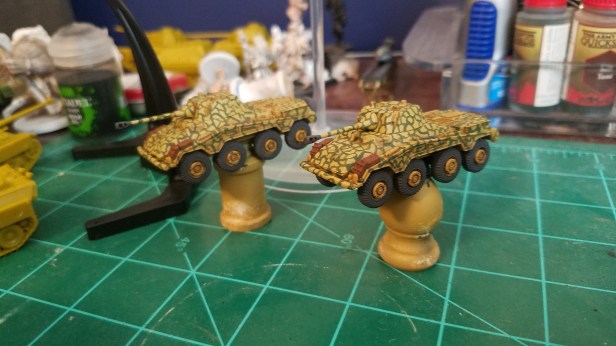
Next came the camouflage scheme. Holy hell! I know I keep saying that I’m a lazy painter, but I’ve always wanted to do this kind of camo. It’s so distinctive and looks great on a table top (I remember my dad had a 1/72 scale Panzer III in this scheme from Airfix back in the day so I was always enamoured with it). The colour is called Dark Olive from MSP, I believe.

My technique was to paint a single wiggly meandering line, typically about 1 cm long. Stemming from this I would paint a few short branches 2-3 mm. Then I would spend time joining everything together creating odd shaped loops (almost like painting dragons scales, but far more irregularly). Each of these Pumas probably took about 45 minutes to do just the green camo on them. I usually stick on an episode of World At War and listen to Lawrence Olivier whilst I paint to make the work more bearable.
I could not have been happier though with the end results. It was grueling at times, and I’m not sure I’ll ever attempt the scheme again, but they look so good finished.

So, back to the wheels. I did a layer of Nuln Oil wash from Citadel. This darkened the road wheels nicely. Don’t worry about the stark contrast here between the tires and the chassis, because after weathering, it’ll be much more subtle.

Speaking of which, here’s what the mud looks like. I used a small amount of Citadel’s Technical Paint called Typhus Corrosion. I tried to get into the wheel arches and the axles underneath to help create more depth in the shadows there as well. I also tried to be less heavy handed in this effect than I was with my Panzers because armoured cars use roads a lot more, and frankly, I didn’t want to waste my nice paint job.

The water slide decals went on nicely. I use normal tap water and let them soak for a minute or two. I used to use hot water as a kid, but frankly it makes little difference and the cold water burns me less.

To finish up the road wheels, I used a light, sandy brown/yellow. I forgot the name of the colour, but it’s from MSP and I bought it for my Late War British infantry that I haven’t purchased yet…I obviously have a problem. Again, I wanted less to be more in this situation, almost like a highlight on the wheels. I just quickly dry brushed this on with barely any paint on the brush. I also used some Soft Tone wash from Army Painter on the Jerry Cans in order to give them some definition.

The last thing I did was use some Nuln Oil on the vents on the back of the chassis. This helps to break up the base coat colour scheme and give some much needed shadows.
I could not be happier with how these turned out. My only real complaint is that the peg-and-hole system to keep the turret on is kind of a joke. The peg isn’t nearly long enough. This is a byproduct of having four different variants available on each sprue, but I’ll eventually revisit these and magnetize the turret, etc.
Thanks for reading, and watch out for more of these in the future!
-Alexander
