
Welcome to another miniatures painting post where I’m slogging through my Open Fire! box set for Flames of War. Open Fire! is a simplified version of the Flames of War rules intended to help newbies, like me, ease into the game. It came with everything you need to field two decently sized armies and the necessary tokens and even some cardboard terrain pieces.
You can see my Sherman’s and Stug III’s guide from this set by following those links, you can also use the search tool up top to see some other pieces that I’ve started to collect outside of the Open Fire! set.

I started by mounting all the figures on lollipop sticks, there was around 73. Again, I’m the world’s laziest painter so I’m just setting up an assembly line and going for passable table quality without the colossal time investment.
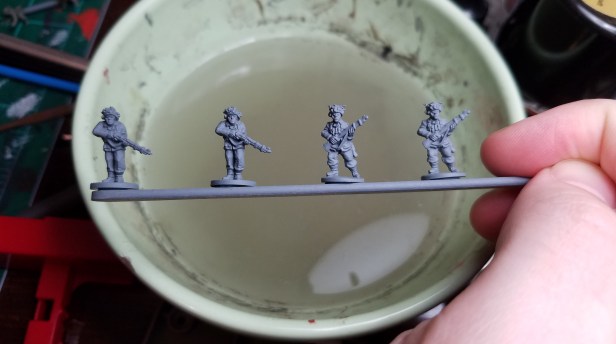
I base coated them in a dark grey generic spray can from Walmart. I’ve looked at plenty of figures at this scale before but in priming them it really showed the detail and I was kind of blown away a little at how good the sculpts are for being so small.

I then used Army Painter’s ‘German Field grey’ to paint the base colour of the uniform. I basically used a 15 mm wide cheap brush from Walmart and basted them like a Thanksgiving Turkey, no need to be that neat at this stage. I would always recommend getting that German Field Grey colour, because, well.. I mean look at it. It’s perfect!

Now taking a bit more care I used a medium brown for the gun stocks. I chose a medium brown because I planned to use a brown shade that would darken the tone to a richer look later in the painting process.
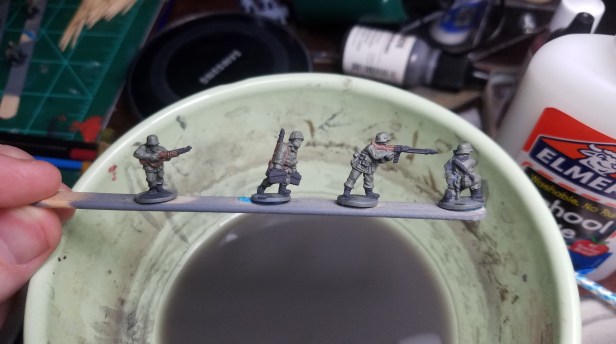
Next came my trusty Walmart 99 cent Pavement colour. Any flat dark grey will do. I did this for the gun metal, boots, ammo crates, webbing, panzerfausts, grenades and radios. This step took a little more time because of the detail work, but I used a sizable brush and tried to go as quickly as possible. I did all 73 in two batches of about an hour each because I didn’t want to go insane.

The next stage was painting the skin, at 15 mm everyone in the German army has the same skin tone, so I just picked ‘09047 Fair Skin’ from the Reaper MSP line. I chose that simply because I had it on hand (it came free with some minis I purchased! Reaper is an amazing company.) and the MSP paint line is extremely good. This was another stage that took a while because you want to be careful not to mess up your work, and some of the faces in shooting positions have small gaps to access with the paint brush. Take your time on this step. You’ll thank yourself later.
The last thing I chose to do was add some Testor’s brass enamel paint to the machine gun bullet belts for some flash and details. There weren’t many figures that had this, but I did it for the Pak 40 shell loaders as well.

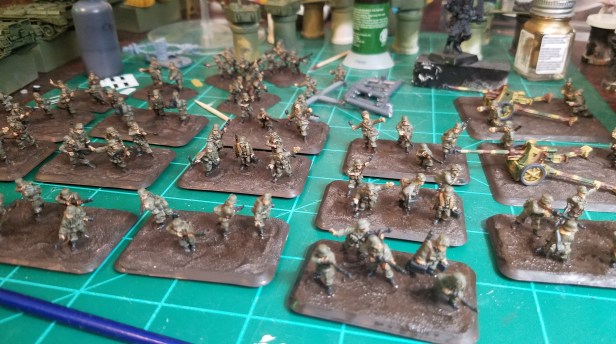
Phew, that’s a lot of dudes. Basing them is as simple as super gluing them into the bases provided that have drilled circles for the men to stand in and be flush with the floor.
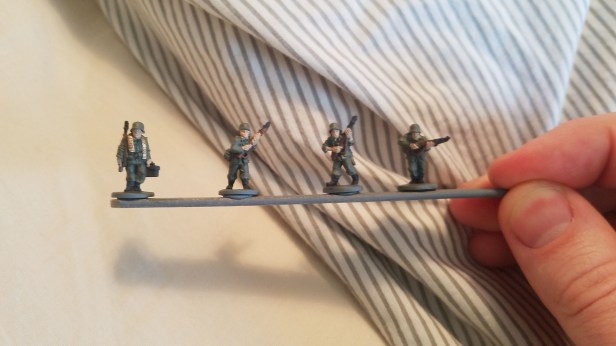
The final stage on the minis themselves was to apply a wash of Army Painter ‘Soft Tone’ brown. This stage I was back to the massive brush and just basted the minis row by row. You can be fairly liberal with the soft tone wash, because as scary as it looks putting it on, as it dries it becomes much, much lighter and I think gives fantastic results. I might never use Agrax Earthshade again, which can be very hard at times.

Not winning any competitions, but they look great for their scale.

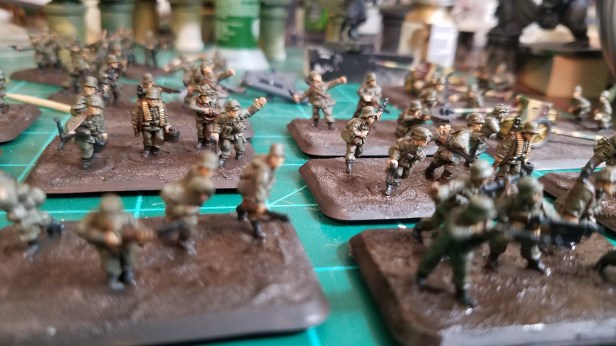
The front view of this platoon shows off the depth added by the soft tone wash without looking like a comic book drawing with really strong contrast. Because these are late war Germans there’s some special SS guys mixed in that would have the camo jackets etc, but I opted to not paint those any different because, you guessed it, I’m lazy. Again, at this scale no one’s inspecting the troops for attire between games.


I based the small base three man command teams prior to painting them because applying the basing is kind of messy and I didn’t want to ruin a nice paint job with basing material. It made the paint a bit more fiddly at times, but was worth it. I used Vallejo Ground texture grey sand. It’s a PVA glue thickness sand paste that fills in gaps and creates an excellent rugged ground terrain look. I 10/10 recommend this stuff, but unlike myself would recommend getting the stuff that is already brown. I only discovered the brown stuff after having bought the grey colour, just my luck

If you want to see how I painted the PaK 40’s, I did them in the same way as my Zvezda Ferdinand (look it up in the search bar).

I then used ‘Charred’ brown colour from MSP to paint the bases. It’s a thinner paint, although has a verse dense pigment, so it creates a two-tone effect as the light grey grit underneath showed through. It was a pleasant surprise I meant that I forwent doing a highlight of light brown.
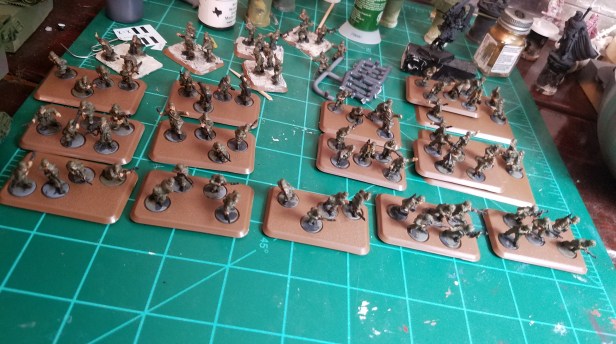
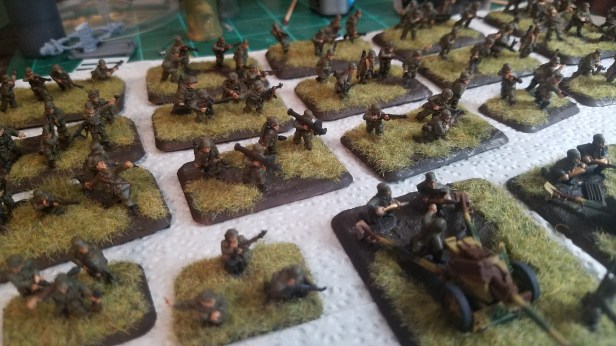
Here’s a close up of all the men, so you can see the shading, texture, detail, etc. As a group, they look formidable, even though some details I just left out.
I used Gale Force 9’s ‘dead grass’ static grass, to put over the dirt bases. I used simple generic brand school glue (white PVA) and squeezed it on the bases in blobs. I used a trashy brush to spread it around in patterns and patches and then pressed the dead grass into it and set it aside.
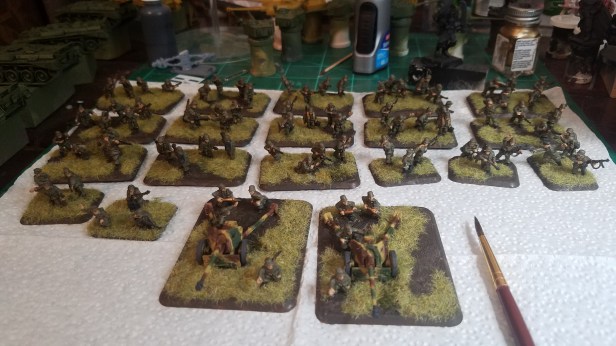
And here they are. All in all, I’m very, very happy with how they turned out. They’ll look great on the table and the sense of pride and accomplishment was worth the time investment.
I really like the sculpts, and the finished infantry bases are really cool. I’m excited to get these onto the table to complement the assault gun platoon for the Open Fire! missions. Will I take a break from painting infantry for a long time? Yes. Painting those was kind of a chore. Mostly the brown grey and flesh tones, those just took a long time. With that being said, I did find myself perusing more infantry though (Plastic Soldier Company’s British Paras look very tasty).
I hope you like these, and find an easy method of painting these to an ‘acceptable’ table level.
-Alexander
