
This week we played Falling Sky: The Gallic Revolt Against Caesar on War Game Wednesday so we had to get together on Friday to do a scenario of Combat Commander. I wanted to be the Germans and Alexander controlled the Russians. He always tries to be the Germans and I had to flex my muscles to get to play them…my good German muscles!
From the scenario we read the following:
Bessarabia, April, 1944 – By mid April of 1944, the southern front in Russia had seen Soviet troops on the offensive for four consecutive months. Zhukov’s plan to attack beyond the Dneister River as far as Chernovtsy was approved by Stavka, with Russian troops finally reaching the Carpathian Mountains and cutting off German forces in Poland from the Axis armies in southern Russia that were now backing up into Romania.
As constant harassment by partisan bands threatened both supply and communications to the forward German echelons, more and more rear-area troops were needed to quell these upstarts.
I didn’t know much about the issues that the German’s experienced in Bessarabia as a part of the retreat from a failed Operation Barbarossa, but after doing some research on the internet it became obvious why the scenario set up the Russian units the way that it did. There were many partisan units made up of local villagers who had been conscripted into the army to help push back the Socialists. If you didn’t know, the Bolsheviks hated the Socialists! So the scenario called for the Russians to set up their troops randomly around the map. They had to draw a card and place a single unit in the shown hex. This led to their units being all over the board with only a few areas where more than one unit was adjacent to others. Also, I really like to come up with a title for these AAR’s using something that happened in during the scenario but this week all I could think of was fly fishing. A Railway Runs Through It is a reference to one of my favorite movies from the 1990’s “A River Runs Through It” with Brad Pitt. In that movie, the writer spins a tale explaining how the Blackfoot River in Missoula, Montana flows through their lives binding them together with a sense of purpose and family that never will leave them (or some such existential nonsense!). I thought the rail, which bisects the map diagonally would be a focal point of the battle that would join our forces together in a life and death struggle for control…but turns out I never moved my Germans more than 5 or 6 hexes from their initial positions and never came within 2 hexes of the rail line. The Russians were the Defender in the scenario, which means they only have 4 cards in their hand while the Germans were on Recon and would have 5 cards. The Surrender was set at 14 for the Russians (they always have numbers) and only 8 for the Germans (this represented all of their units). So, right off the bat I knew that I couldn’t really win by trying to kill enough units to force Surrender and had to play a smart and tactical game to amass enough VP to win when the Time Marker hit 5.
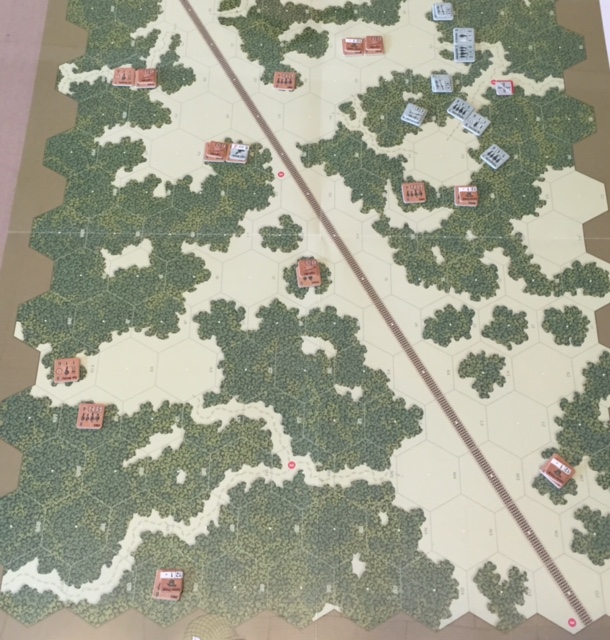
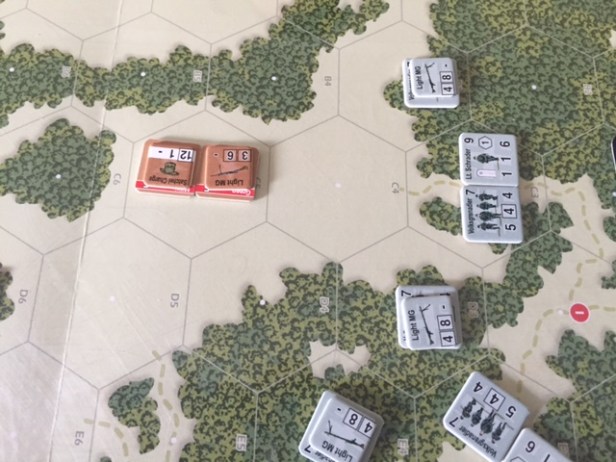
The Russians were to set up first and in doing the random set up as required by the scenario, were spread all over the map. I was then to setup the Germans and had the restriction that I had to set them all up in connecting hexes to create a continuous Axis controlled line of units. This led to me setting all of my units up in the following configuration in the top corner of the map in the woods with a good firing position on the 2 units stacked to the top of the pic and the 2 units in the tree line to the south of my position. One note, at the beginning of the scenario, each of us drew a Secret Objective that would be revealed at the end to come up with a final VP total. I drew Objective P which would give me 4 VP for controlling Objective #5 at game’s end.

I only had 8 total units including 6 Volksgrenadier (Morale 7, FP 5, Range (boxed) 4 and Movement 4) with 3 Light MG’s. I tried to set them up such that I could begin firing on the Russian units to begin whittling them down and this strategy worked well for me early on but then worked against me as it became difficult for me to move and get into a good firing position as the Russians began amassing their forces at the rail.
My first few turns were spent in firing on the 2 units that were randomly set up out in the open (this was fortunate for me but decidedly unfortunate for the Russians). I was able to bring good fire with a base FP 10 to bear on them breaking both units in the 1st round and then killing one the next round with the final unit moving to the west into the tree line and out of my range. He would later recover that unit and move him further to the west to take Objective #4.

The next round, the Russians decided to fire their captured German Light Mortar (the scenario gave the Light Mortar to the Russians in the setup) into my positions in the woods as he would get a +2 bonus due to the trees splintering as the rounds burst in the air. He fired and pulled “snake eyes”, which is the condition to break the mortar. As it is a captured German piece, the Russians cannot fix it so it was eliminated. This was a good break for me! That is one of the elements that I truly love about Combat Commander. I thought that I wouldn’t like this type of random event, but it adds spice and flavor to the game and definitely makes each scenario unique, no matter the set up.

Over the next few next few rounds, the Russians began to assemble their troops around the center of the map to the west of the rail line and also were able to take each of the 4 remaining objectives. I thought this was odd as he had made no real effort to advance on my positions. I was slow on the uptake and what he was trying to do evaded me. I just couldn’t see it until it was too late! We then spent several rounds discarding cards, both of us trying to assemble a serviceable hand that could be used to amass some good fire attacks. We did scuffle in the woods to the south of Objective #1 in hand to hand combat a few times, with the Alexander winning his first melee combat! I had been the king of the hand to hand move having won at least 7 or 8 previous engagements.

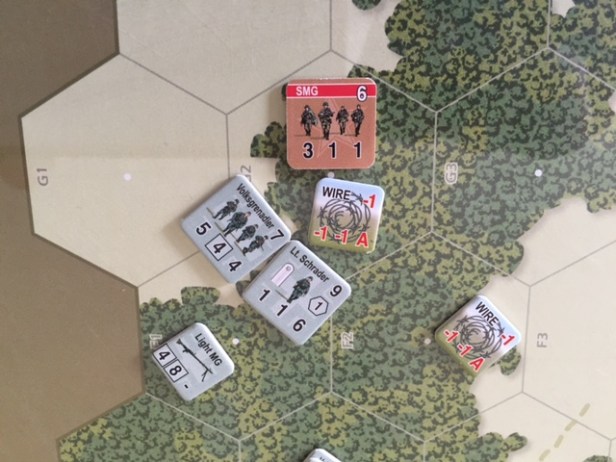
I followed up his victory over me with a victory of my own in hand to hand led by Lt. Schrader along with a Volksgrenadier unit. This victory brought my total VP To 1 as we drew near the Time Marker 5 space and our 1st Sudden Death roll.
We continued to exchange meaningless fire attacks as we were both trying to run out our decks causing a Time check. Finally, the 5th Time check was reached and the Sudden Death roll ended the game, I felt pretty good that I had won the game as I had the Initiative Card (giving me a +1 VP at game’s end). This gave me a lead of 2VP’s. As we turned over our Secret Objectives, his actions which had seemed so confusing to me throughout the game, became very clear!
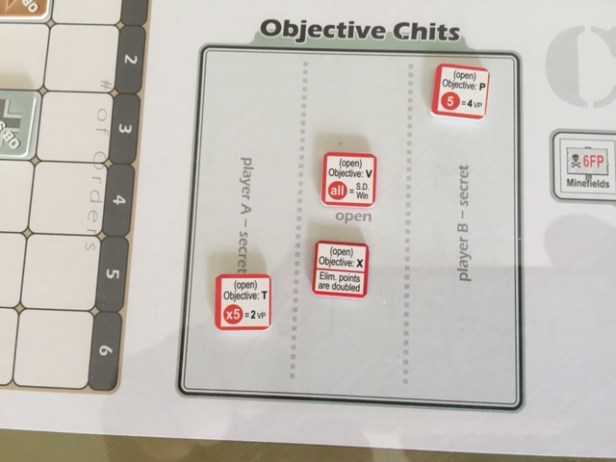
He had drawn Objective “T” at the beginning of the game which would give him an additional 1VP for each of the Objectives that he held at game’s end. He held 4 of the 5 so scored an additional 4 VP and won with a final score of 2VP. While that was definitely a maddening way to lose the game for me, it is simply another look at how complex and amazing of a game that Combat Commander is. There are so many unknown elements, such as the Secret Objectives, and the ownership of the Initiative Card that must be taken into consideration. I love this game! I love this game! I love this game! I could have been a little more aggressive at the end of the game trying to eliminate at least one more of his units but I rested on my laurels and ended up losing the game! I now have lost 2 in a row to Alexander but still hold a commanding 5-2 edge through the 1st 7 scenarios. We look forward to our next play.
-Grant

This was a great read, thanks for sharing. (I was a bit confused about the Objective T since the chit shows 2 VPs x5, but its been ages since I played so maybe I missed something in how they’re used)
LikeLike