A few years ago, I came across this interesting looking wargame from a new company Cadet Games called They Were Soldiers: Battle of the Ia Drang Valley that was heading to Kickstarter at the time. The game was a 2-player turn-based operational level design based on the battle for LZ X-Ray during the larger Battle of the Ia Drang Valley in Vietnam, 1965. Since that successful campaign, Cadet has designed and completed several other successful campaigns including Nguyen Hue ’72: The 1972 Easter Offensive in Vietnam, Linebacker II: The Historic B-52 Strikes Against North Vietnam, Armies & Alliances: Arnhem ‘44 – Operation Market Garden and Armies & Alliances: Blitzkrieg ’40 – The Battle for France.
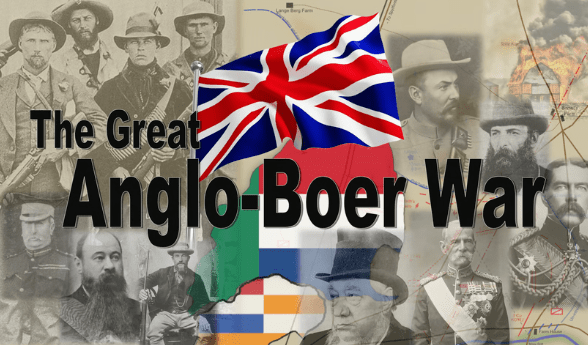
They recently announced their next Kickstarter project that would take their system to the Anglo-Boer War called The Great Anglo-Boer War: The Battle for South Africa 1899-1902. The game is currently on Kickstarter and I reached out to my contact there Kevin Talley who acts as one of the Developers on the team for his input into the design to give us a better picture of how this new game plays.
If you are interested in The Great Anglo-Boer War: The Battle for South Africa 1899-1902 you can back the project on the Kickstarter page at the following link: https://www.kickstarter.com/projects/647106057/the-great-anglo-boer-war
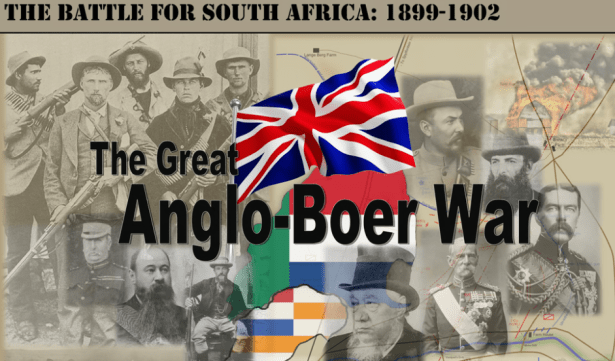
Grant: What is the focus of your new upcoming game called The Great Anglo-Boer War?
Kevin: The Great Anglo-Boer War is a grand-strategic level game of the war between the British Empire and the Boer Republics in South Africa from 1899 to 1902.
Grant: Who is the designer and what is their goal with the game?
Kevin: As with all of our designs, R.J. Mills is the designer. He has always been fascinated with the Boer War and the goal was to make a really good hex-and-counter wargame to cover the whole conflict.
Grant: What is important to model from the history of the Anglo-Boer War?
Kevin: Well, the Boer War was very unique. It began as an asymmetric conventional contest in 1899 between the relatively small citizen militia forces of the two Boer Republics (they had no standing professional armies) and nearly the entire army of the British Empire! Then, once the Empire had captured both Boer capitals in 1900, the Boers refused to surrender and instead decided to fight a guerrilla war (and that went on for 2 more years). So, given the dynamics of this truly unique conflict, making a realistic game presented some serious design challenges. The design had to accurately simulate the conventional period, where the fractional Boer forces soundly defeated the British in several key battles during the early months, and it also had to credibly represent the guerrilla phase of the war, where very small numbers of Boers roamed (often unseen) and raided (always with surprise) throughout a vast area nearly twice the size of Texas. For this phase, the Empire forces had 250,000 troops deployed unsuccessfully trying to defeat 20,000 guerrillas! It all ended (finally) 31 May, 1902, with the Treaty of Vereeniging.
Grant: What other games inspired this design?
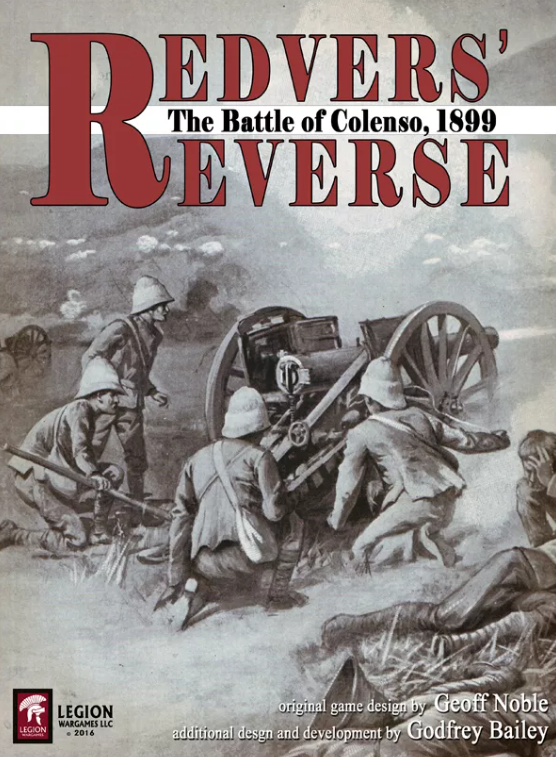
Kevin: We had not intended to make a Boer War game here at Cadet until after we started seeking a good grand-strategic/operational game about the Boer War to play. We got the “Boer War bug” playing Geoff Noble’s Redver’s Reverse: The Battle of Colenso, 1899 from Legion Games and decided we wanted to play a game of the whole war. We had pledged the KS Campaign for Joseph Miranda’s The Boer War from Canvas Temple Publishing and were hopeful, but it wasn’t what we’d hoped for in the end. Then we tried all the other Boer War games out there, or at least those we knew about, but there just wasn’t a good, realistic, strategic level/operational game of the whole war – especially not with the kind of depth we were looking for. We wanted something more like Nick Karp’s Vietnam: 1965-1975 from Victory Games – but for the Boer War – something with that kind of simulative value, historical chrome and especially guerrilla war operational mechanics. The closest thing we found was the old 3W game from 1991 (Eric Faust and Lew Fisher) called The Boer War. It had a lot of what we were looking for, but it was under-developed, errata-riddled and had too many issues to list. Still, that game had some brilliant design ideas, so we decided to start with that framework and make our own game. We were surprised that this topic didn’t have more published games already.
Grant: How did warfare change during the Victorian Age? How did you capture these changes?
Kevin: The British Army was fighting in drill book formations all the way through the 19th century. Consider that, just a year before in 1898 at Omdurman, the infantry stood in close order (just like in the movie Zulu), easily repelling the 50,000-strong army of the Khalifa with Lee-Metford volleys, Maxims and quick-firing breech loading artillery. This all worked very well when the enemy had swords, spears or primitive firearms. But the Boers had Mausers. And Krupps. And Maxims! Tactics had to evolve to meet this new level of lethality and the British Army was not initially prepared to face an enemy that was equipped with the same weapons as they. And an enemy that chose trenches and concealment – inflicting severe losses on British troops in drill formations. The combat system in the game realistically models the advantages of entrenchments, terrain, unit formation posture, night marches and even artillery effects. The Boers on defense can be very tough. A typical attack will be costly. Best to use open order and artillery to great effect – even better to use maneuver and avoid the prepared defense altogether. It took the British some time to learn their lessons.
Grant: What sources were consulted for the historical details?
Kevin: The bibliography for the game is included in section 26 of the rulebook. We used 20+ books on the topic to get the information for the design, and of course those include all the most important works published about the war: Rayne Kruger, Pakenham, Farwell, Arthur Conan Doyle (who was there), Barthorp, Reitz (a famous Boer Journal of the war), Maurice’s official history, Amery (Times history) and more. Someone who has researched the war and knows the historiography will truly appreciate this game.
Grant: What is the scale of the game? Force structure of units?
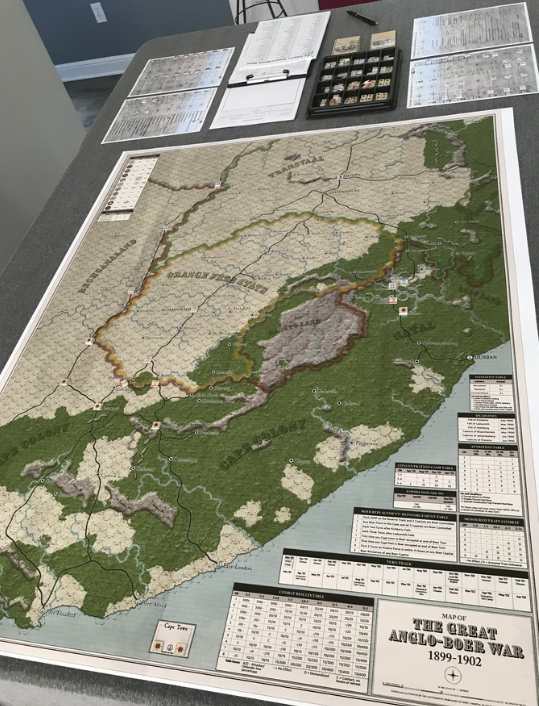
Kevin: The map scale is 9 miles to a hex. The map is huge. 34″ x 44″ on the table. The unit scale can be as little as a half battalion on the Empire side (500 men) and a single commando element of as few as 333 for the Boers. But the system is so flexible that a single leader’s counter in a hex on the map could represent as many as 30,000 Empire soldiers (with supporting artillery) and up to 13,320 Boers with several batteries of their guns as well. The game scale works for both large conventional battles (early war) and small guerrilla actions (later war).
Grant: What is the layout and anatomy of the counters?
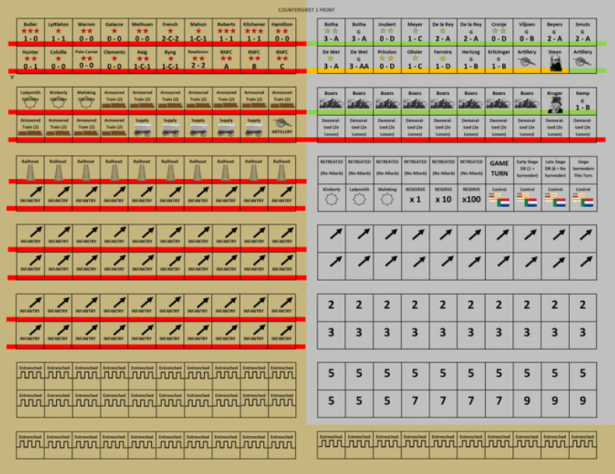
Kevin: The counters are the typical ½” variety, printed on both sides. There are Entrenchment markers that, when flipped, double as “Scorched Earth” markers; Rail markers (early war) that also double as Blockhouse Line markers (guerrilla phase); Boer Control markers that can also be used as Strength Point counters; Number markers that flip to various increments; dozens of Empire Detachment markers which flip to show either Infantry or Cavalry or Artillery Strength Points (and the rotated position of these markers indicates the detachment strength in the hex); Armoured Train unit counters; Supply Wagon unit counters; Unit Status markers for multiple conditions like Retreated, Disordered, Demoralized, Invasion VP’s and more; and of course the Empire and Boer Leader counters, which are the basic units of maneuver in the game.
Grant: What different types of units are available to both sides?
Kevin: A Leader counter on the map typically indicates a ‘Force’ (which is a leader and the Strength Points of soldiers and artillery in their command) for both sides. These Forces are the maneuver units that move around on the map. There are also Detachments, which are Strength Points of soldiers and artillery without a leader (these secure and patrol an area, with a ZOC but without the counter moving). The Empire Strength Points can be Infantry, Cavalry or Artillery, with each point equating to 500 soldiers or a battery of field guns. The Boers are basically all mounted infantry militia, with each Strength Point representing 333 Boers or one battery of their artillery. The Empire also has Armoured Train units (we kept the English spelling), which function as ‘line of communication’ forces that police Empire-controlled rail lines. The Boers also have their Republic Presidents (Steyn and Kruger) and their small government staffs, which serve to score Victory Points by avoiding capture and maintaining their presence as head of state, either in their capitals or out on the veldt.
Grant: What is the off-map Arrow/Wheel used for?
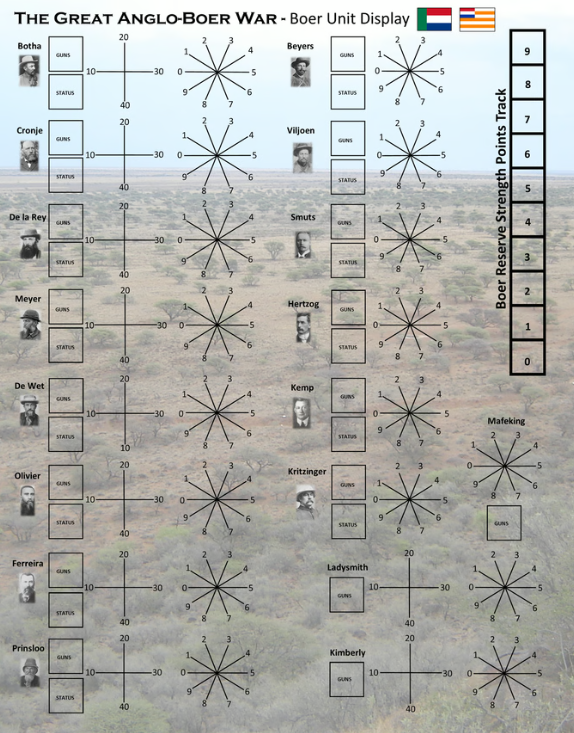
Kevin: There are “Unit Displays” for both sides. These typically show a small picture of the Leader next to a pair of Strength Point numbered ‘wheels’. The players use counters with little arrows on them to indicate on the ‘wheels’ how many SP’s of soldiers are in a Leader’s Force, with any artillery batteries indicated by using a number marker. This keeps the counter-density on the map low, since the battalions, regiments, batteries or commandos are indicated using these off-map strength displays, and only the Leader’s counter moves on the map.
Grant: What was the inspiration for this mechanism?
Kevin: This came from the 3W game. Some players dislike this method for managing unit strength, and it took some getting used to, but we eventually decided it was the best mechanic we had seen in any design for this aspect of the game. Now we love it. Especially because of the flexibility it allows once the war changes from conventional to guerrilla. Historically the forces changed from divisions and brigades fighting large Boer commandos to much smaller columns of Empire troops chasing small Boer units of a few hundred all over the map.
Grant: How does it show the importance of Leaders in the game?
Kevin: I think this whole method of organizing the armies of both sides by each “Leader’s Force” really works perfectly to simulate the Boer War. It matches the real history. Everything a Force does boils down to the influence and command capabilities of the Leader. And forces of widely varying strength and unit composition were assigned to different leaders on both sides at different times throughout the conflict.
Grant: What is the Leader specific initiative rating system? How does it aid in your telling of the Anglo-Boer War?
Kevin: A Leader has to ‘roll for initiative’ to do most actions. Each Leader has an initiative rating which either helps or hurts their odds of a successful die roll, and the ratings are based on the historical performance of that Leader. This represents more than simply a Leader’s tendency to act decisively or not, but also his relative command influence for scarcity of resources, typical Victorian-era officer rivalries, orders and communications variables, bad intelligence and other typical “frictions” of war. The history of the war is full of instances where orders didn’t get communicated, sometimes weren’t given at all, or were ignored. Battles were lost many times because this leader or that failed to act on their own initiative or had some other priority override their commander’s intent. There are some Leaders whose rating is so good, they can nearly always do anything the player wants (and those are almost exclusively Boers). Other Leaders are reliably ineffective, and special care must be taken by the players to choose the right missions for these people. The realism of the design is greatly enhanced by this aspect – a player might have a great plan, but there is no guarantee that their Leaders will enact it. As Lord Roberts said after the battle at Poplar Grove, “In war you can’t expect everything to come out right.”
Grant: What is the layout of the game board?
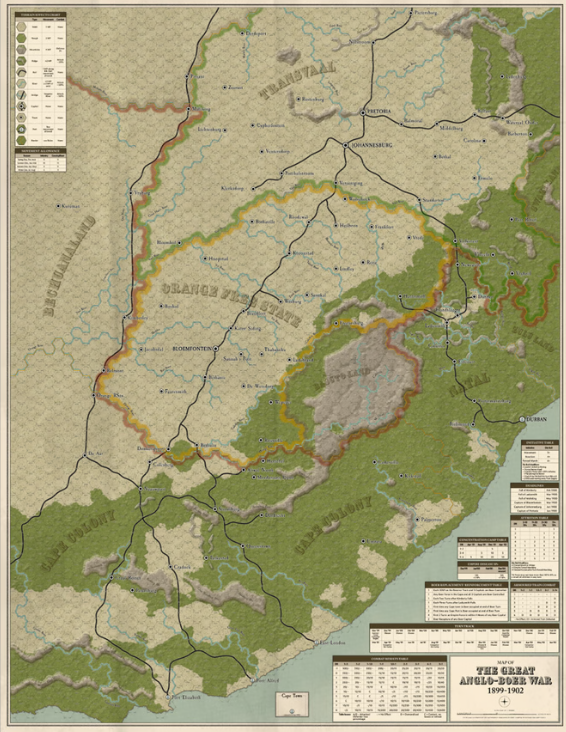
Kevin: The Game Map contains almost all of the area of the war, from the eastern Transvaal and much of Swaziland and Zululand all the way to the Kalahari desert in the west; from 150 miles west of Port Elizabeth on the coast all the way up past Durban in Natal – and all of the mountains, ridges, rough and veldt of South Africa contained therein. It is a very large area and the map scale is 9 miles per hex. Using .625 hexes (for standard ½” counters), the map is 34″ x 44″ on the table.
Grant: What key terrain features are included and how do they affect maneuver and tactics?
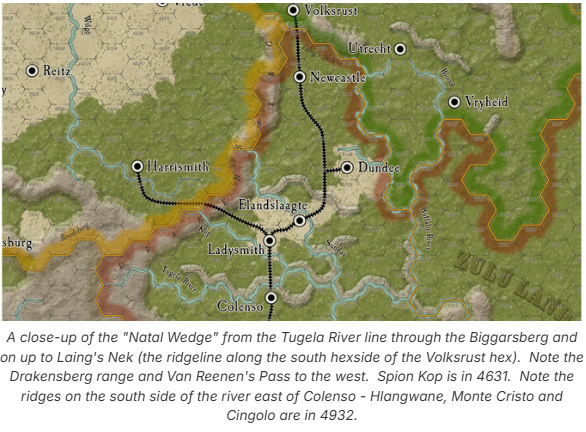
Kevin: The terrain types for hexes include mountain, rough and veldt. Special hexside types can be ridge or river, bridge or rail. The mountain ranges are all there, as are the ridgelines and heights, rivers and rail, towns, ports and capitals. Even the passes and “neks” are indicated. The actual escarpment of the Drakensberg are all mountain hexes, but the Biggarsberg north of Ladysmith, as an example, is treated as ridge-type hexsides with rough terrain hexes. There is a real distinction between mountains and typical rough country/hills. The geography of South Africa was a serious factor in the conduct of the war and the terrain effects for both movement and combat are significant in the game.
A Force attacking across a river hexside is reduced by 50%; a Force attacking across a ridge or into mountains is reduced by 25%; a Force defending in mountain terrain is doubled; a Cavalry Force crossing a river pays 2 extra movement points to do so, while an Infantry Force pays 3; a veldt hex costs 1 point to enter, a rough hex 2, a mountain hex 4, and crossing a ridge hexside adds 2 points. Geography is key. Often, the only way to effectively dislodge an enemy Force from a position is to maneuver them out of it, because the odds for a successful attack are slim based on the terrain. The Tugela River line in Natal is a famous example of a natural fortress, and so it is with the game. To get past a competent Boer defense there, it will take an Empire player who understands the map and the combat system (plus some good dice and a card or two).
Grant: What type of cards are included? Can you share a few examples.
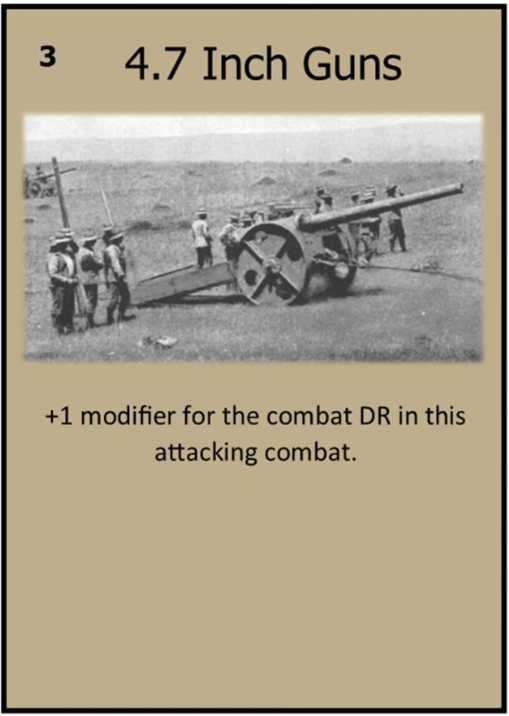
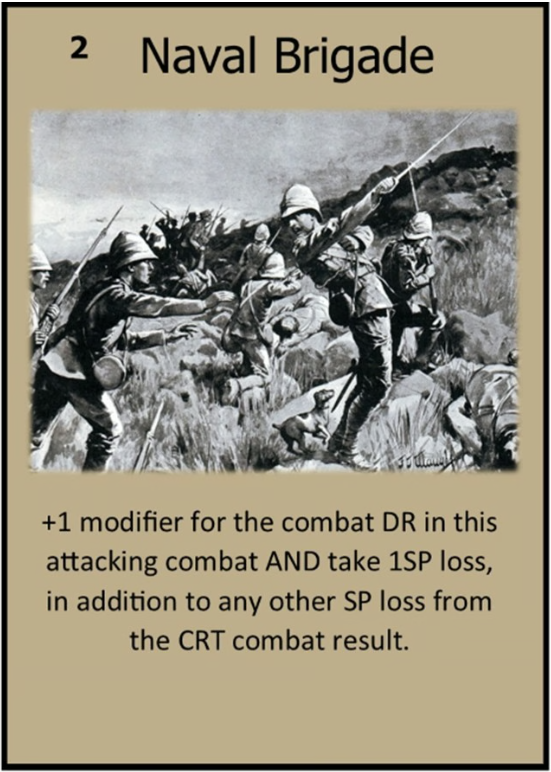
Kevin: The cards are great. Mostly they modify the combat odds or DR’s by providing for an odds-column shift or a DR mod for one of the many on the Battle Board (the Empire Attack Scouting Effect, the Artillery Effect or the actual combat DR). But there are also many cards that influence very specific game actions – like evasions or recruiting, siege surrender extensions or supply situations, armoured trains or movement or initiative effects. Some cards influence the unit formation or entrenchment posture during a battle, while some may determine the outcome of night marches. Some are related to intelligence and reveal hidden enemy units or prevent unknown strength in a combat event. Others influence scouting and observation, signals and orders, escapes and ambushes…I could go on.
All the cards were created based on actual events that happened during the war. Here is an excerpt from the Campaign language and the “design notes” section of the rulebook: “The game cards are designed to build historic realism into the game, especially for the combat system. As in all wars, small instances of chance – moments of decisive leadership (or not) – a thunderstorm – an oil-less signals lamp – a wire fence – a flooded drift – a poorly drawn map – a mistaken guide – an enemy surprise…all these historic events and elements of chance are represented in our design by game cards for both sides. We think this adds to the design immensely, since these can account for odds column shifts and DR mods that the players cannot anticipate. Like their historical counterparts, the players cannot know exactly what their odds are until the battle is joined and the card(s) are revealed!”
Grant: How does combat work?
Kevin: The combat system uses an odds-based CRT and a combat die roll to determine battle results, so it is fairly typical of a hex-and-counter wargame. What gives the system the right depth is that combat can happen during the movement as well as the combat phases. Combat can also be initiated by the non-phasing player using a reaction mechanism – so it isn’t nearly as simple or predictable as “I go / You go”. Based on the history, we felt the combat system (even at this scale) needed to incorporate strength ratios, unit tactical formations, weather, visibility, unknown Boer strength, artillery strength and effects for both sides, leadership, scouting and intelligence, terrain, night march outcomes, unit morale, “dummy” defensive positions, entrenchments and more.
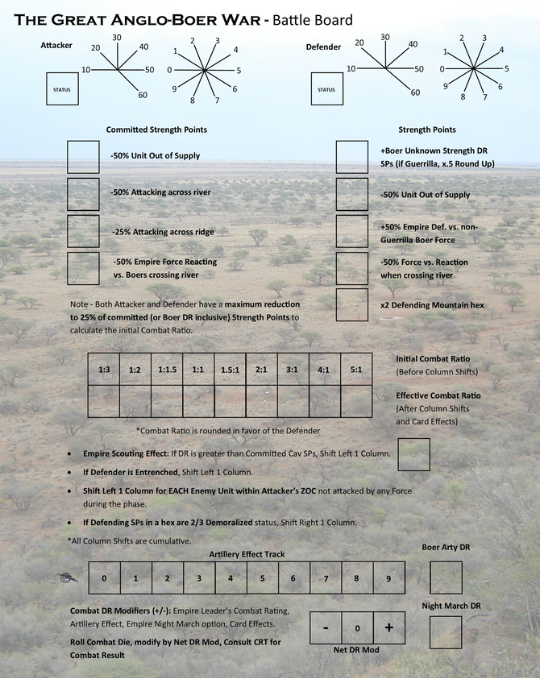
Grant: How does the Battle Board work?
Kevin: There are so many effects and modifiers that contribute to the combat system that we decided the only way to keep everything straight was to have a Battle Board. For example, an Empire attack vs. a defending Boer Force would look like this: First, the Force attacking commits their desired number of Strength Points to the battle using the Attacker’s SP display, then the defending Boer unit’s SPs are indicated on their display. Any unit status particulars (Disordered, Demoralized, Retreated) are also indicated. The next step is to see how many unknown Boer SPs there are, so a die is rolled and that number goes on the Board (usually the Empire player cannot know their exact combat odds until after they commit their SPs to the attack because of this “unknown SP” die roll). Then any terrain or supply state modifiers are applied (there are markers for these) for both sides to establish the initial combat odds, and a counter for that ratio is placed in the appropriate box on the odds track (always rounded in favor of the defender). Next, any factors that modify the combat odds are noted and applied (entrenchments, the Empire Attack Scouting Effect DR, any other enemy units in the attacker’s ZOC, a Demoralized defender, any cards – attacker first). Now a marker is placed for the final combat odds on the final odds track. The last bit is to calculate what modifier (if any) is going to apply to the combat DR. The Artillery Effect is determined with a DR, if the Empire is using a night march there is another DR, the Empire Force’s Leader combat rating is applied, if the attack is made from a rail-move ZOC it matters, and finally any cards that modify the DR – attacker first. Once the Battle Board has been completely and correctly configured, the combat die is rolled and the CRT consulted to determine the result. The Battle Board is really essential to keep track of all of it.
Grant: What role does scouting and intelligence play in the game?
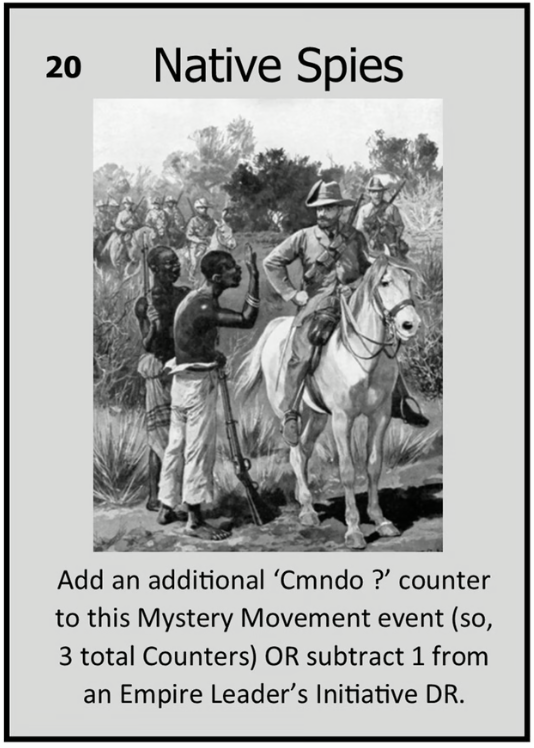
Kevin: The British generals were famously ignorant of the Boer dispositions in the early battles, for they had almost no intelligence organization in their army corps and they were especially short on mounted troops for effective scouting. The Empire Attack Scouting Effect is built into the combat system to reflect this. If the “E.A.S.E.” DR is greater than the number of Cavalry SP’s in the attacking Force, there is an odds-column shift to the left for the combat on the CRT. Later in the guerrilla phase, there is a “mystery movement” dynamic which keeps the Empire player guessing about which Boer commando markers are real units and which are only decoys. Some of the game cards confer valuable intelligence by allowing the Empire player to reveal a “mystery” commando of their choice (and native spies can help both sides).
Grant: How is artillery used?
Kevin: There is an Artillery Effect Track on the Battle Board which compares the arty strength of the two sides in a battle – whomever wins this comparison gets a modifier that applies to the combat DR. The Boers get a DR to add to their battery count, so even an Empire Force with 8 batteries of guns might not win the Arty Effect Bonus if there are 3 Boer batteries (if they roll a 6, they have 9). This “Boer Arty Effect” DR does not necessarily represent additional unknown batteries/guns, but more simulates the Boer tendency to use superior artillery tactics, multiple prepared positions, gun re-positioning during a battle, indirect fires and hidden gun positions with range and target fire preparation. In addition, the British firepower was often wasted against cunningly prepared “dummy” trenches and positions such that seemingly impressive preparatory fires were completely ineffective. The Boer Arty DR serves to simulate both aspects. The Empire has far greater potential weight of fire, but qualitatively the Boer Arty is superior (as with the historical truth). There are cards for both sides that impact the Artillery Effect for a battle.
Grant; What is the role of Scorched Earth?
Kevin: As the Boers turned more towards guerrilla tactics, the Empire forces began burning farms and killing or confiscating livestock (and especially horses) as reprisals for Boer attacks and to destroy potential shelter and supply sources for the guerrillas. This often resulted in the re-settlement of the Boer women and children in concentration camps, where thousands perished from disease and hunger. There are several game mechanics during the guerrilla phase that simulate this aspect of the war, and one is the “Scorched Earth” program. If the Empire player chooses, they may assign Forces during a game turn to “Scorch” one or more district areas in the Boer Republics. A marker is placed, and Boer movement point costs in that district are doubled, while guerrilla recruiting is halved. Once “Scorched”, a district can no longer provide Boer VP’s during the District Control segment of the VP interphase. But there is a potential cost to this kind of “scorched earth” policy: every turn this is done the Boer rolls a die – if the result is equal to or less than the number of newly “scorched” districts for the turn, the Boers get 5 VP for each. These VP’s reflect negative public opinion, parliamentary outrage and press coverage back in England, as well as increased Boer resentment and dedication to fight to the bitter end to avenge the destruction of their homes and families. The Empire player must balance the military benefits against the possible consequences of the policy (and be careful).
Grant: How does the Attrition Phase work?
Kevin: There is a lot going on during the Attrition and VP interphase. Hundreds of the Boers in just about every Force will simply leave to go home (they are all volunteer militia, not regulars); The Empire may have thousands of losses to typhoid (it was a big deal during the war); Boer family deaths in the concentration camps may cause desertions in the commandos (and uproar back in Britain); Besieged Empire garrisons may suffer losses or surrender; Railheads may advance or be pushed back: Forces might entrench; Unit statuses (like Demoralized units) get updated; VP’s for the game turn are tallied and losses counted, and the totals for the war (or scenario) are arrived at. It gets even busier if a Boer capital has been captured during the turn, as this can drastically increase the number of Boers who choose to “take leave” and go home (low morale). At the end of the phase, the players advance the game turn marker and start the next month of the war.
Grant: How is victory determined?
Kevin: Victory Points are awarded to both sides for all kinds of events. Mostly major or minor battle victories, but also for siege outcomes (relief or surrender), Boer invasions of Empire territory, capture of Leaders and capitals, control of districts, consequences from the scorched earth policy and concentration camps, and even penalties for over-stacking. There is a VP table on the back of the rulebook so the players can double-check during the VP interphase, and there are handy player-turn and interphase record sheets to use as well. Whoever has the most VP’s at the end of the scenario wins, unless an automatic victory for either side ends the contest early.
Grant: What different scenarios are included in the design?
Kevin: There are three scenarios – the Conventional War, the Guerrilla War, and the Grand Campaign Game. Here’s an excerpt from the Campaign language: “The full campaign is the ultimate Boer War experience – from the first desperate siege defenses of 1899 to the treaty of Vereeniging (or maybe not?) – and everything tactical and otherwise in between: Battles, blockhouses, farm-burnings, evasions, escapes, raids, concentration camps, sieges, drives, armoured trains, 1-pdr automatic “pom-poms”, surrenders, entrenchments, typhoid, barbed-wire, native spies, night marches, supply wagons and more. If it was part of the real Boer war – it is in the game.”
Grant: What does the game do well in modeling the Anglo-Boer War?
Kevin: We feel the game succeeds in modeling just about every aspect of the war, but there are a few particulars. Again, from the Campaign language: “For our design, we wanted a more granular scale of both movement and combat than any other strategic-level Boer War game yet published. Rayne Kruger, in chapter 23 of his “Good-Bye Dolly Gray” pointed out that, perhaps more than any other Boer advantage, the Empire was fighting “a war against space.” We ended up having two 22″ x 34″ map sections at 9 miles/hex to pull this off. A very large game on the table – but very typically “Cadet.” As it goes here, bigger is better. More hexes = more realism.”
Also, the Empire forces during the war were especially dependent on the rail lines for supply, while the Boer forces were far less dependent on any supply system to keep their forces in the field. The supply rules in the game really do justice to history, as everything the Empire player wants to do will be substantially constrained by their proximity to a rail line. In fact, some remote districts simply cannot be effectively garrisoned by Empire forces or detachments, because those units will be out of supply. Moreover, the scarcity of draft animals (oxen and mules) during the war meant only a handful of supply wagon units were available to extend an Empire LOS away from any rail line, and so it is with the game. These few substantial wagon convoys are also prime targets for the marauding Boers (as with countless examples from the war).
Grant: What has been the experience of playtesters?
Kevin: The game plays very well, indeed, but there were a few unexpected outcomes from the initial design, especially the combat system. In our first run of the conventional war scenario, we discovered that the “Boer unknown SP DR” mechanic needed a change. The Boers simply fought too well. Every time the Empire committed SP’s to an attack, the Boers would essentially be ‘reinforced’, owing to their unknown SP die roll. It always added SP’s to the Boer Force, since it wasn’t designed to subtract them. True, this kept the Empire player uncertain as to the combat odds until the forces were joined, but it had the effect of representing the Boers as ahistorically disciplined regular troops – prepared to fight to the death and hold their ground even when attacked by 15, 20, or even 30,000 British with 50+ field guns. The Boers just didn’t do that. There are far more examples of the Boer volunteers fleeing in droves from large Empire forces (in spite of exhortations and even threats by their leaders and even presidents) than examples where they stood their ground. In many ways this tendency served to preserve their forces and denied the Empire the showdown battles they hoped for during the second phase of the conventional war. A small rearguard of hardcore Burghers (farmers) would usually hold off the exponentially larger Empire forces, allowing their thousands of fleeing comrades to make their escape. They traded ground for time and blood, almost always avoiding any decisive loss.
So, we amended the rule so the DR can go either way, depending on the size of the attacking Empire force and on another DR modified by the Boer Leader rating of the defending force. This solution made a huge difference and resulted in the historical outcomes we wanted. If you attack Botha with a large Empire Force, he will likely motivate several hundred more Burghers to join the defense. Attack Prinsloo, though, and he’s likely to have several hundred of them (or more) run away before the battle is joined. There is a card in the Empire deck that prevents the unknown SP DR altogether, and now freshly retreated or Demoralized defenders don’t roll either.
Grant: When can we expect the game to be fulfilled?
Kevin: We are optimistic that the community will support our Campaign for this one (gotta get successfully funded first), and we will start the production sample and the rest of the process immediately afterward. Our anticipated timeline is to have the games shipping to the backers by August of next year.
Grant: What projects are in the near future for Cadet Games?
Kevin: We would really like to get our Hamburger Hill game produced. The design is 100% done and it is a really detailed sim of that famous battle. We ran it on Gamefound back in 2025 but it didn’t hit the goal. So, we will likely run that one again to see if we can’t get that produced here sometime soon. We have a ton of other projects in the works, one of which is a solo design covering the Mayaguez incident and the battle for Koh Tang Island from May, 1975. We have been really immersed in the Boer War since the middle of last year, so this one has had almost all of our attention (and still does for now, since we are playing through multiple rounds of the guerrilla phase and all of its intricacies)! We also have Barbarossa ’41 on deck for our Armies & Alliances Series of WWII ‘miniatures and monster map’ designs. Thanks again for helping us get the word out about our passion for military history and wargames!
Thank you for your time in answering our questions Kevin and for the great care you guys are taking with these games to tell a fun and interesting part of history.
If you are interested in The Great Anglo-Boer War: The Battle for South Africa 1899-1902 you can back the project on the Kickstarter page at the following link: https://www.kickstarter.com/projects/647106057/the-great-anglo-boer-war
-Grant


The game sounds very interesting.
It also sounds involved and I’d like to see a youtube review/playthrough. Its meaty enough that even with Grants detailed questions and responses I want to see what it looks like.
The map is nice looking too.
LikeLiked by 1 person
The game sounds interesting.
I like the sound of the various sub-systems.
Even with Grants detailed questions and responses I would need to see a playthrough on youtube to really get a sense of the design.
The components are very nice
LikeLiked by 1 person
I think this one will be a deep game but approachable. They do a good job with their rules, player aids and other components.
LikeLike
Great interview! Looks like a thoughtful game on an undergamed topic – with the special challenge of modelling the two distinct phases of the war!
LikeLiked by 1 person