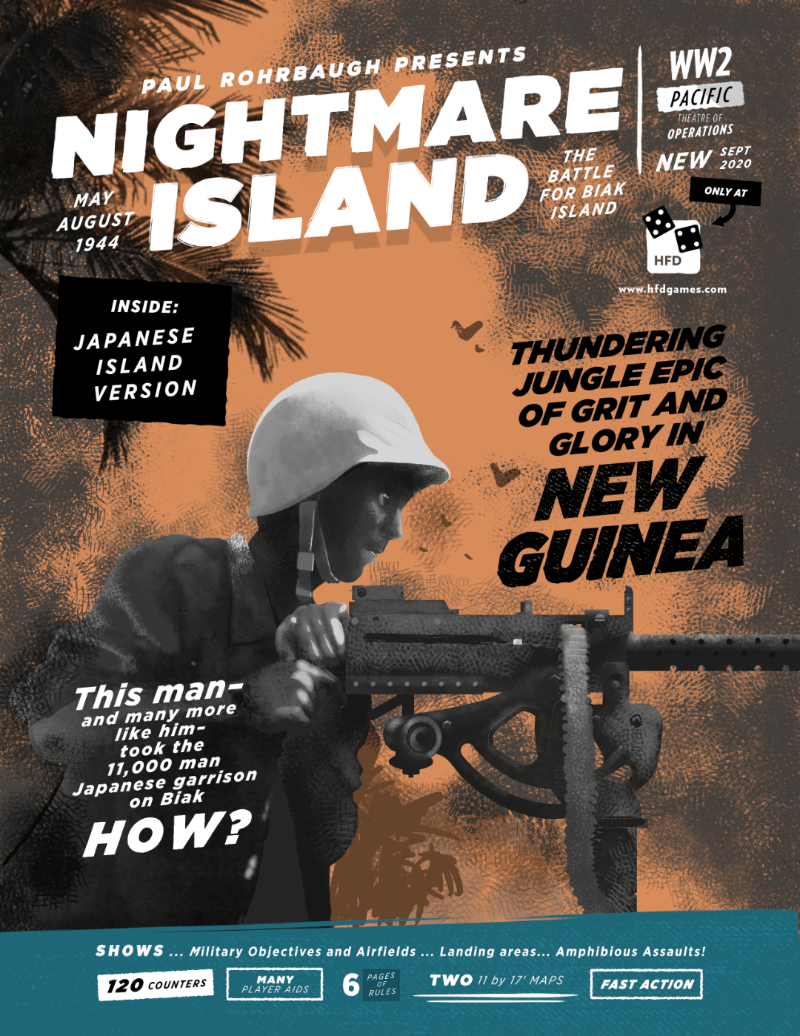
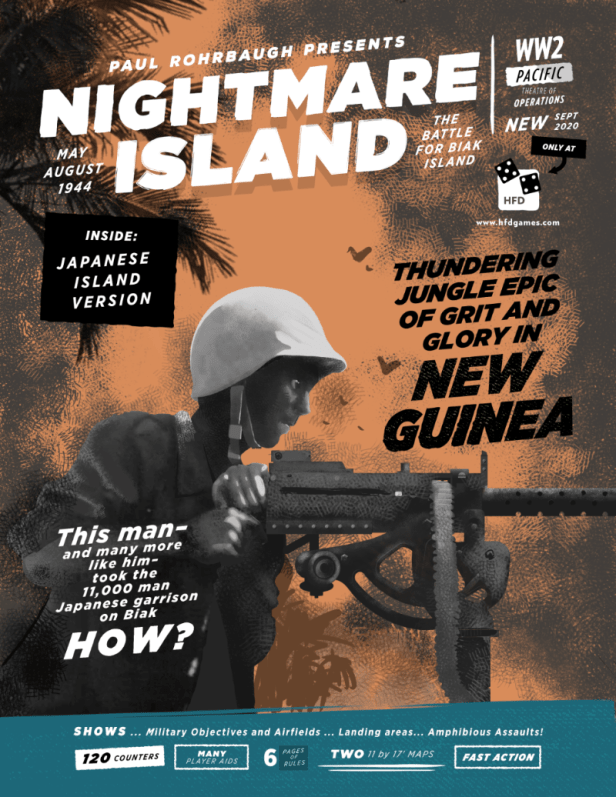
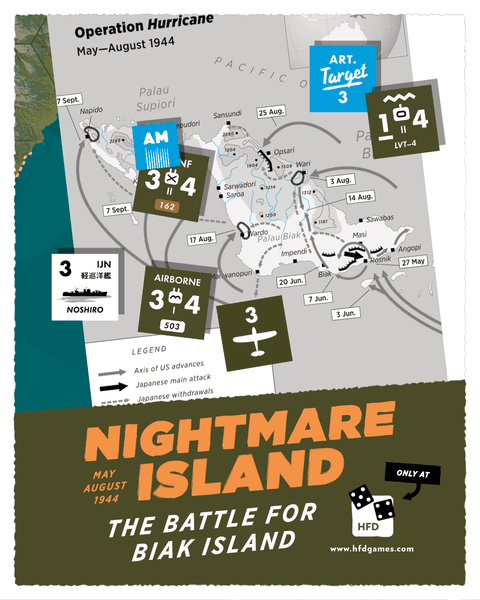
Recently, I came across another interesting looking small format wargame from High Flying Dice Games called Nightmare Island: The Battle for Biak Island. The game covers the invasion of Biak Island in New Guinea during World War II. What really caught my eye about the game was that the art looks really fantastic. I looked into it and found out the artist was Nils Johannson whose art style is very striking and interesting. I reached out to the designer Paul Rohrbaugh and he was more than willing to discuss the game.
Grant: What is the historical background for your new game Nightmare Island?
Paul: The invasion of Biak Island was the culmination of Douglas MacArthur’s island hopping campaign in the Bismarck Islands and New Guinea during 1944. The Navy was concurrently carrying out its invasion of the Marianas that would bring about the climatic battle of the Philippine Sea (Marianas “Turkey Shoot”). MacArthur was increasingly worried his role in the Pacific War would be taking a back seat and saw the invasion as a way to keep his forces in the limelight, as well as setting the stage for his return to the Philippines, something which the Navy was very much opposed to at the time.
Grant: What did you feel was most important to model from MacArthur’s Island hopping campaign of 1944?
Paul: The invasion was focused on taking the island’s airfields and neutralizing what was supposed to be a relatively small garrison force. MacArthur confidently predicted a “cake walk” that would need little to no support from the US Navy (that was reluctant to provide anything anyways); providing further evidence that a return to the Philippines was not only promised, but could be done without any “distractions” from the main effort against Japan. Thus there is less naval barrage support.
Grant: What was your reasoning for the title of the game? What did you want this title to convey to the players?
Paul: The invasion did not go at all as anticipated by MacArthur; with a far larger and more resourceful enemy force that was determined to exact a very high toll from the invaders. To his dying day MacArthur refused to allow anyone to even mention the Battle for Biak, and his memoirs barely even mention it. Together with Bataan and Corregidor, Biak Island was another of his nightmares of the war that he did not want to remember.
Grant: What sources did you consult on the battle? What is one source you would recommend for a one volume read on the battle?
Paul: Bernstein’s Hurricane on Biak is excellent, and I also recommend David Alan Johnson’s article:

There are a number of other good sources listed in the game’s bibliography that provide even more context and information.
Grant: What is the scale of the game?
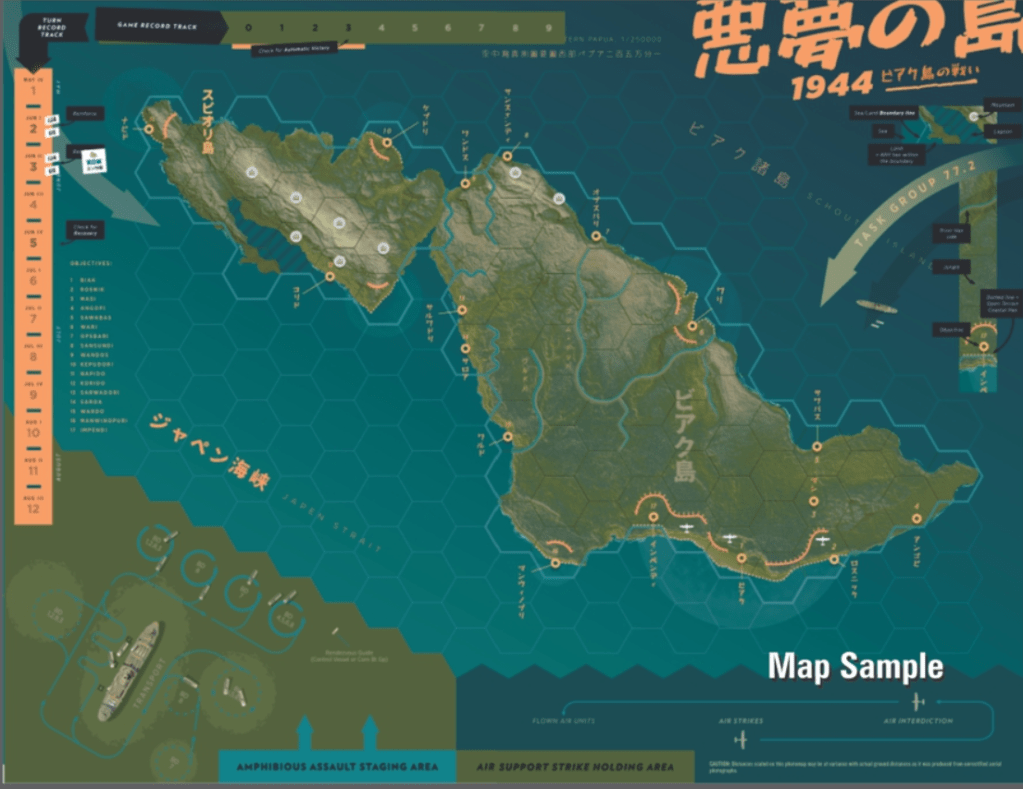
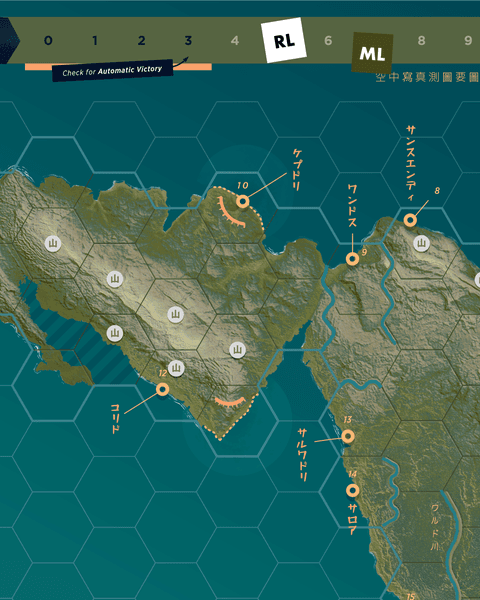
Paul: Units are mostly battalions with some tank platoons. A turn represents a week of time and a hex on the map is about 4 miles across.
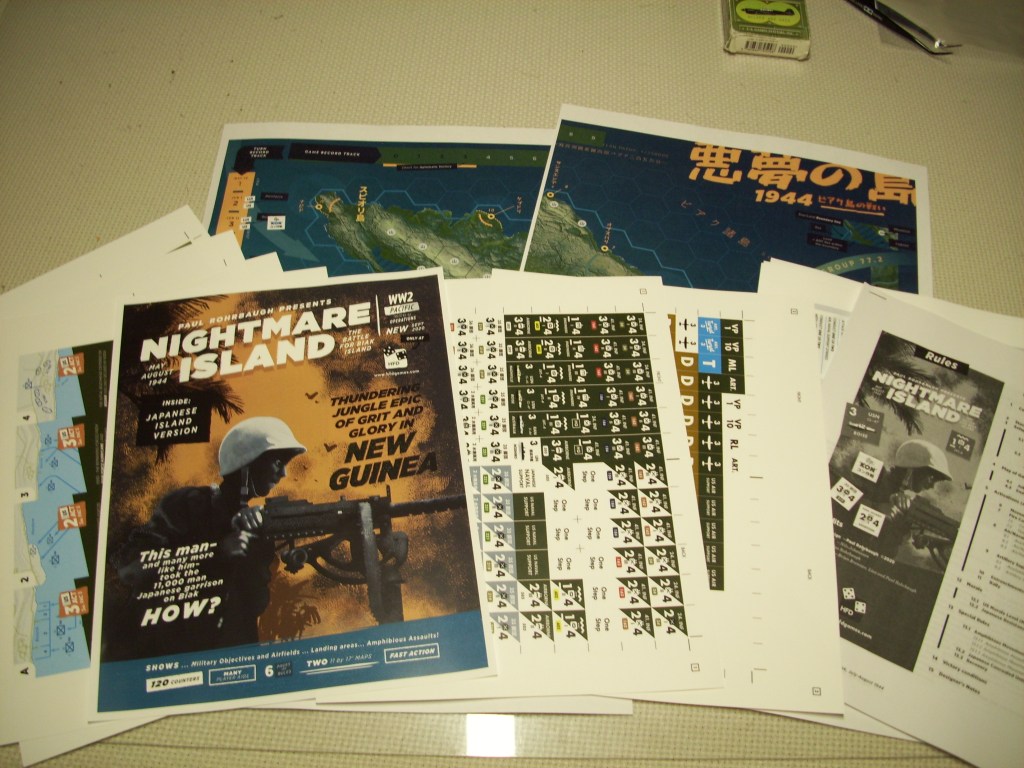
Grant: I notice that the game comes with two 11” x 17” maps. Why is there a need for the two maps?
Paul: There are two map sheets to accommodate the map of Biak island as well as the various game tracks and holding areas.
Grant: I see the Japanese have tanks. What challenges does this pose for the invading American player?
Paul: The Battle of Biak Island featured one of the largest Japanese tank attacks of the war (only one on Saipan about the same time was larger). These were not at all expected by the US forces and the Japanese attack actually caused the American forces they attacked to retreat in some disarray.
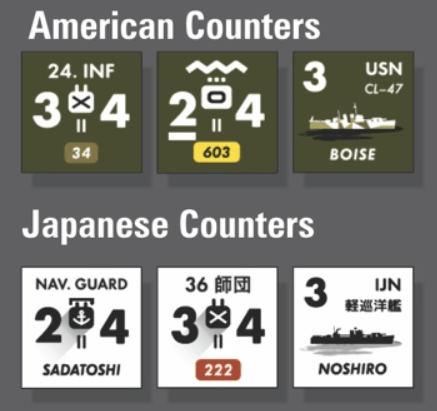
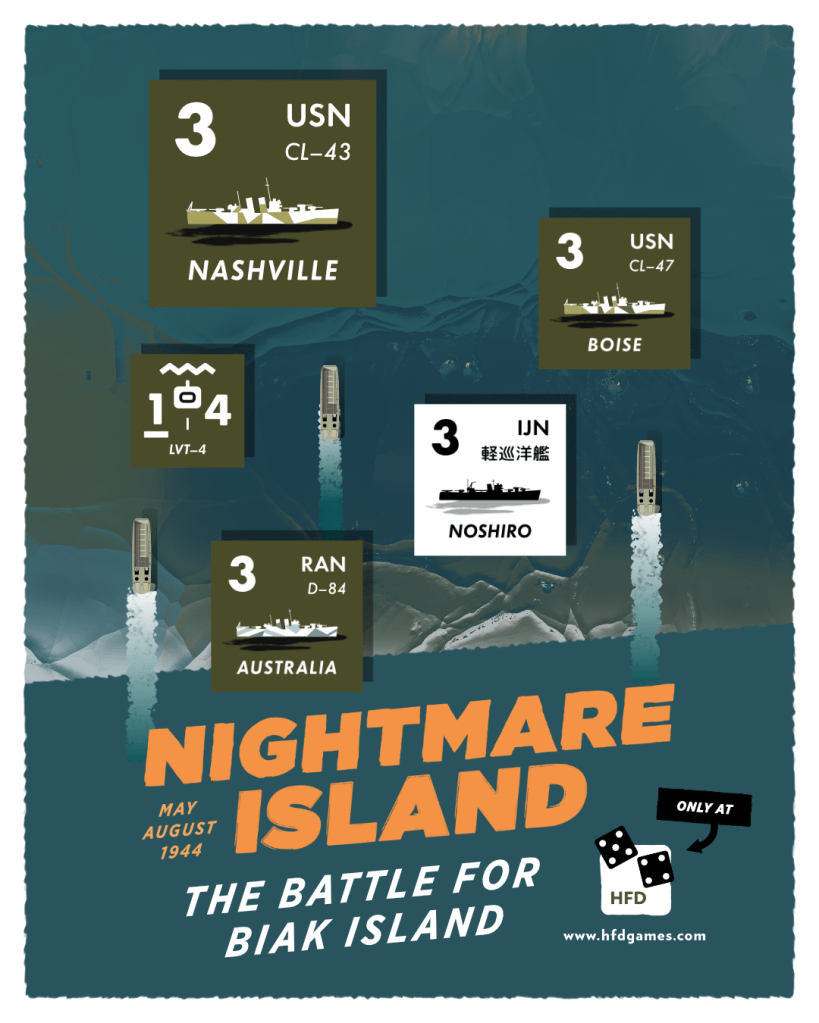
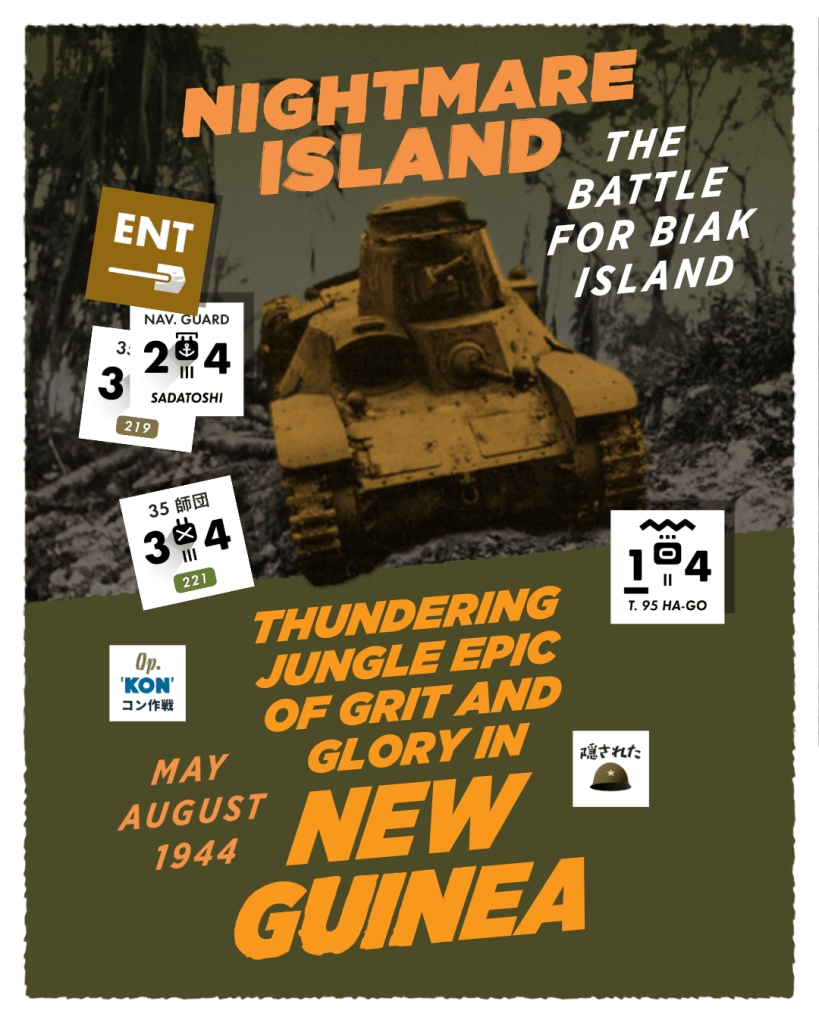
Grant: What is the anatomy of the counters? Can we see a few examples?
Paul: The unit’s Combat Factor is on the left and its Movement Factor is on the right. Units have stylized NATO icons for type. Naval and Air Support units have generic silhouettes.
Grant: I see that the Japanese player can declare the implementation of Operation Kon by placing the Operation Kon Marker on the Turn Record track. What does this represent and what advantage does it provide?
Paul: The Japanese planned on launching a massive naval and air counter attack to bring reinforcements to Biak during the first half of June. Dubbed Operation Kon, the offensive and reinforcements could have been the US’ worst nightmare. However, due to the losses sustained in the Marianas, the navy scaled back the effort fearing US aircraft carriers would be available for defending Biak (they weren’t). Operation Kon was also handicapped by a profound lack of transport ships and barges by which to bring the ground troops to the island. Three times the Japanese sent out smaller reinforcement convoys, between June 3rd and 9th. The first convoy and its escort turned back when a false report of a US aircraft carrier was in the area was received. The second and third convoys were spotted by Australian coast watchers and patrol aircraft. US submarines and aircraft based at Hollandia sank several of the Japanese ships, resulting in only about a thousand troops reaching the island. Launching Operation Kon has the potential of bringing significant Japanese reinforcements to Biak Island. However, their arrival will be problematic as all have to pass a DR check to determine if a unit arrives full strength, reduced, or not at all. Not launching Operation Kon is an option, but exercising that option has a detrimental effect on the Japanese Resistance Level.
Grant: How do the activations work in the design? What actions can players take with these activations?
Paul: Players use a standard deck of playing cards, or the custom card set that is available. Red cards numbered 1-10 and one Joker are used by the Japanese player while the US player uses the black cards (and also one Joker). Both players draw a card from the deck and the player with the highest card wins the round for activating units. Two units can be activated with a winning even numbered card; three with an odd. The first time the Joker card is drawn the player gains no activations and the player that drew it rolls a die to determine what Random Event is put into play. Whenever the second Joker card is drawn the turn is over. An activated unit can move, attack, attempt to rally, entrench, or conduct 1 or 2 Air, Naval or Artillery Support strikes.
Grant: How does the card activation duel off best reflect the fighting and style of warfare of the period? Is it too random?
Paul: The card draw activation design captures well the chaos of battle without a lot of scripted rules, is easy to learn/teach, and is very interactive. It is no more random than games that use a chit-pull design. True, there can be times when one player enjoys a string of winning card draws, but this evens out over the course of several turns and the game.
Grant: Who is the artist for the map and counters? Those counters are absolute works of art.
Paul: Nils Johansson is the graphic artist, and indeed, he has a very unique and stunning portfolio of work with us. His “day job” is a fashion design consultant in Paris. He used to be in charge of Prada’s Asian Division when he started with High Flying Dice Games, but had to resign and move from Hong Kong when things there became too dangerous for he and his family to live and work. I am very fortunate to be able to work with so many talented people!
Grant: How do you think the art style sets the mood and theme for the game?
Paul: I leave it entirely up to the graphic artist of any game to set the mood for the artwork. For Nightmare Island, Nils is channeling some of the wartime movies made by Hollywood for the war effort. I think they all do a wonderful job and Nils has always been one to “push the envelope” in terms of game graphics. IMHO he’s got another “box office smash” effort with Nightmare Island!
Grant: What is the Turn Sequence?
Paul: First there is a prep phase in which players shuffle their decks of cards, determine their levels of air, artillery and naval support, place any reinforcements due on the map (victory point port hexes for the Japanese, the Amphibious Assault Staging Area for most US units or specific free hexes if US paratroopers are in play). Next is the Operations Phase when players draw cards to activate units. The End Phase is performed in which Morale/Resistance Levels are adjusted and determination if a Sudden Death Victory is made. If not then Victory Points are tallied and play proceeds to the next turn.
Grant: How does Amphibious Movement work? Can the moving units be fired upon from the shore?
Paul: US units normally enter play from the Amphibious Holding Area to an unoccupied map coastal hex. If the hex is adjacent to an un-disrupted Japanese unit it can be subjected to Opportunity fire from the unit or any available Japanese artillery or air support. After a US unit is landed it is marked with an Amphibious Movement marker that confers an adverse DR modifier upon it in combat. The marker is not removed until the unit is activated again, making it vulnerable to Japanese attacks while so marked.
Grant: How does Fire Combat work?
Paul: All ground combat involves an activated unit attacking an adjacent enemy unit. The attacking player rolls a D6 die and modifies it for terrain, if the target is marked as concealed (Japanese), had performed Amphibious Movement (US), is entrenched, or if the target had moved and it is an opportunity fire attack. If the DR result is less than or equal to the attacking unit’s combat factor then the target is marked as Disrupted. If the target is already Disrupted it is then Reduced (or eliminated if already Reduced or only has one step). If the DR result is greater than the unit’s Combat Factor then the attack was ineffective and the target unit is unaffected.
Grant: What benefit does Combined Arms give? Which side benefits from this rule more?
Paul: An activated unit that is stacked with a friendly armor unit receives a beneficial DR modifier equal to the armor unit’s Combat Factor. This favors the US as the US armor units are more powerful. However, early in the game this tends to favor the Japanese as that player has more, albeit weaker, armor units already available “on the ground” (no Amphibious Assault Staging Area for the Japanese player to contend with!) and often concealed making it harder for them to be taken out.
Grant: What type of prepared defenses do the Japanese have and what benefit do they offer?
Paul: All Japanese units at start can be marked as Concealed. These confer a beneficial DR modifier if attacked, and is only removed if the unit is activated. Japanese units also may become “re-concealed” during the course of the game if not adjacent to a US unit, by not moving, attacking or attempting to rally. The Japanese player designates the unit to become concealed and rolls a die. Add 1 to the DR if the Japanese RL is 3 or less. If the DR is 4 or less mark the unit as concealed; if 5 or more the attempt failed and the unit remains unconcealed.
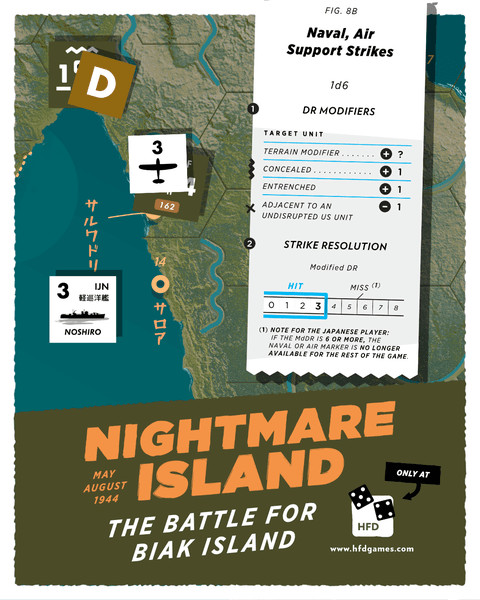
Grant: How is Air Naval support handled? How does the effect the Japanese reinforcements?
Paul: Normally the US player only receives air support units, and this is determined by a DR modified by how many of the Biak Island airfields are under the control of the US player. The Japanese player only receives air support during turns in which Operation Kon is running (turn 3 onwards). The US player has the option to allocate Air Support units to interdiction missions instead of Direct Air Support. The interdiction mission air units confer adverse DR modifiers against Japanese reinforcement DR checks (increasing the odds that a reinforcement unit arrives reduced or not at all).
Grant: How important is Morale in the design? How is Morale affected?
Paul: Morale is very important in the game. As map objectives are taken or recaptured, units lost (particularly valuable HQ units) or if Operation Kon (for the Japanese player) is canceled a player’s Morale (US) or Resistance (Japanese) level will rise or fall. Once the Japanese player’s morale/resistance level falls to 3 a D10 check is made during the End Phase of the turn. If the DR result is greater than the Japanese player’s RL play continues normally to the next turn. If the DR is less than or equal to the RL then organized resistance is assumed to have collapsed and the US player wins an automatic victory. For both players, as their morale declines it will be harder to rally units or have them pass various DR checks throughout a turn. This of course will make it harder for that player to win the game and earn VP even if an automatic victory isn’t achieved.
Grant: What is Japanese Resistance Level and what role does it play in the design?
Paul: The Japanese RL represents the ability of the Japanese island commanders to carry out an organized and in-depth defense of the island, a very hard mission to accomplish against a well-armed and determined enemy. If this collapses then ritual suicide by the leaders (which occurred) leaves the weakened and reduced garrison to essentially fend for themselves in a futile fight to the death. Keeping the RL at 4 or higher is key for the Japanese player so as to continue to wreak casualties on the US forces and wrack up VP (and take them from the invaders).
Grant: What are the victory conditions?
Paul: Victory Points are awarded for reducing or eliminating enemy units (particularly HQ and armor), taking or holding objective hexes, and for the US player, making sure any paratroopers entered into play earn more VP than they cost (1 VP is earned by the US for each of these units NOT entered into the game) as well as entering into play engineer units and having them occupy air field hexes (and surviving until the end of the game). The Japanese player does receive VP for not entering Operation Kon units into play (these are the theater reserves that could be used elsewhere), but doing so does entail a RL cost already mentioned above. For both players there are decisions with many implications to make and then lived with, but then that is the privilege of command…
Grant: What optional rules or variants are included in the design and why are they appropriate?
Paul: There is only one at this point. Instead of using air, artillery or naval support as described in the rules to attack an enemy unit or for the US to interdict Japanese reinforcements, these assets can be used to provide “close support” for attack (any form of support) or defense (artillery) in the form of beneficial or adverse DR modifiers in combat. This rule was suggested very late after play testing was finished but I felt it had merit so I’ve put it out there as a variant rule. I’ve asked those who have the game to give me feedback while we play test it a bit further. I can’t say it is “official” at this point, and will let gamers help me make that final determination. It is just another example of how games can always be “tinkered with” and that I’m always open to suggestions to make any of our game even better.
Grant: What Special Rules are included and what do they mimic from history?
Paul: Special rules and units include Amphibious Movement, Concealed Japanese units, Entrenchments, Combined Arms and Operation Kon. All these were key aspects of the history of the battle for the island and needed to be conveyed in the game.
Grant: What are the basic strategies in the game?
Paul: How best to make use of one’s winning card draw activations is key. For the US when and where to land your forces, when and if to bring in the paratroopers are key. Complicating this when to bring in the Engineer units, and how much risk to expose them to (mostly to Japanese air and naval support attacks when Operation Kon is launched) so they can start earning VP. For the Japanese player, when and for how long any counter attacks are to be launched vs. switching over to an in-depth defense. The Japanese player will likely have less opportunity or reason to move units, so when to attack vs. rallying and concealing units are often the calls. However, a totally passive defense is not an option as it is primarily by reducing and eliminating units that VP can be earned, and that will take multiple activations to do so. Neither player can afford to waste time/activations in this game, and switching strategies/plans in mid game is often a sure way to losing, not winning.
Grant: Who has the advantage during the game?
Paul: I’d say the Japanese early on, with the US player eventually gaining the initiative as more forces are brought to bear. However, if Operation Kon has even a limited success in getting those reinforcements and support into the game, then this will be a toss-up as to who comes out on top. The game shows very well indeed how much of a “nightmare” this battle was for MacArthur, and how Biak may have indeed been “an island too far”.
Grant: What role did General MacArthur play in the battle both positive and negative? What were his thoughts after the battle?
Paul: MacArthur did not arrive on Biak, and then only briefly, until after the battle was resolved. As I mentioned above, this was not anywhere close to one of his “shining hours” and he forbade any mention of the battle in his presence for the rest of his life. In many ways it was something he never came to terms with.
Grant: What was the end result of the battle? Was it a strategic victory or just a sideshow?
Paul: The Americans eventually took the island, at great cost of nearly 5,000 killed or captured and an undetermined number wounded (probably more than double) for what ended up being a sideshow that few today know about or remember. Taking and holding Biak Island ironically had to be discounted or ignored by MacArthur in his meetings and arguments to persuade President Roosevelt to invade the Philippines instead of Formosa. That decision ultimately was based more upon politics than military considerations, so in that regard the battle for Biak Island was likely pointless and a waste of time, resources and lives on both sides. Such is a great deal of war in any age, and as such, a lesson and example we all need to learn more about and remember.
Thanks for your great answers to our questions Paul and for another interesting looking treatment of a little known or gamed battle from teh Pacific Theater of World War II.
If you are interested in Nightmare Island: The Battle for Biak Island you can order a copy for $17.95 from the High Flying Dice Games website at the following link: http://www.hfdgames.com/nmi.html
-Grant

https://www.dkagaming.site/ come here please!!
LikeLike