Nubia: Egypt’s Black Heirs is a solitaire game where the player controls the Black African civilization made up of three Christian kingdoms in the Nile Valley including Nobadia, Makuria, and Alodia. The culture of these kingdoms goes back to Ancient Egypt and the legendary Kingdom of Kush but is now far removed from those days of glory and survival is now the focus. The game is set in 1172 AD and Nubia is currently under siege from various other tribes and kingdoms. The game covers a period of nearly 400 years, and will see the player attempt to defend the Nubian civilization against the pagans of the Funj, and a jihad of marauding Arabs who have designs to acquire your land.
The game is a States of Siege design where enemies will advance down five different Path towards the capital city of Soba. The player will have to manage their affairs, dealing with the abilities of new Kings, staying in communication with the Coptic Church through various skill levels of Cosmopolitans (Priests) and seeking the aid of other Christian Kingdoms such as Portugal. The player will gain a number of Efforts each turn that will be used to take various actions on the Paths and in the management of their kingdom.
In Action Point 1, we covered the Game Map, examining its various Paths, Tracks, Boxes and the Royal Assets that the player must manage to fend off their enemies. In Action Point 2, we looked at the makeup of the Event Card Deck and how the cards drive the action by confronting the player with social, political, military and economic challenges. In this Action Point, we will examine the various options that the player has in the assets held in Downtown Soba, including land sales, arranged marriages and throwing your daughters to the wolves in the name of forging alliances. We will also take a look at how your future King called the Crown Prince can be used to aid in attacks against the Meks and how they might die.
Downtown Soba Box Assets
The name of the game in Nubia is the efficient use of your limited Efforts. Use them wisely, and get a bit of luck in your rolls by modifying them with various assets, and you will do well. Manage them poorly and miss more rolls than you make and you will die. Simple. This game actually replicates the difficulties that were experienced by the regimes of Nubia during this tumultuous time in their history with ongoing wars, external pressure from other kingdoms and tribes and internal strife including famine, disease and lack of food. Shortages were a part of life in this time period and the game causes that same pain to the player as they will never quite have enough Efforts to do what they need to do from turn to turn. But there is hope. The player has access to various tricks and assets that must be used wisely.
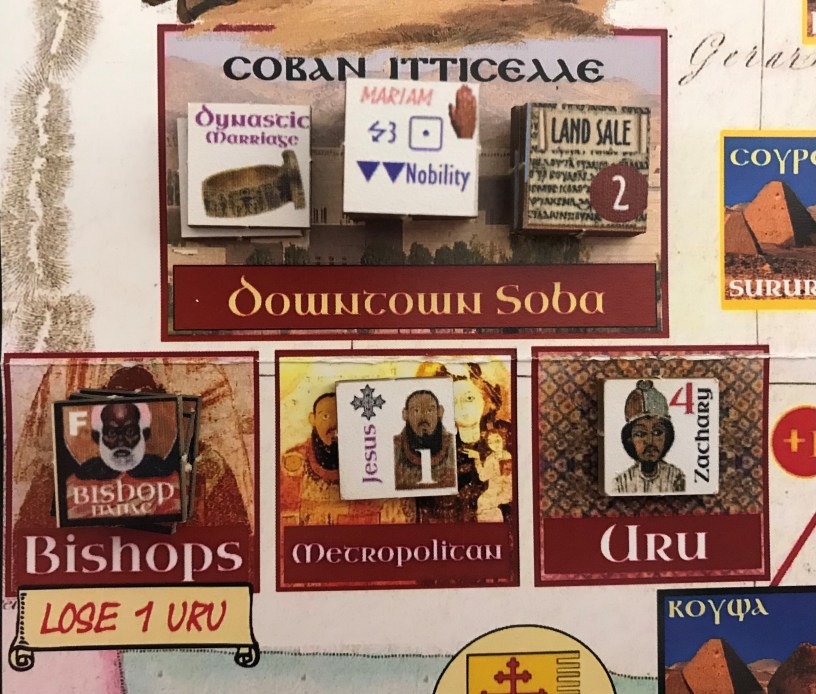
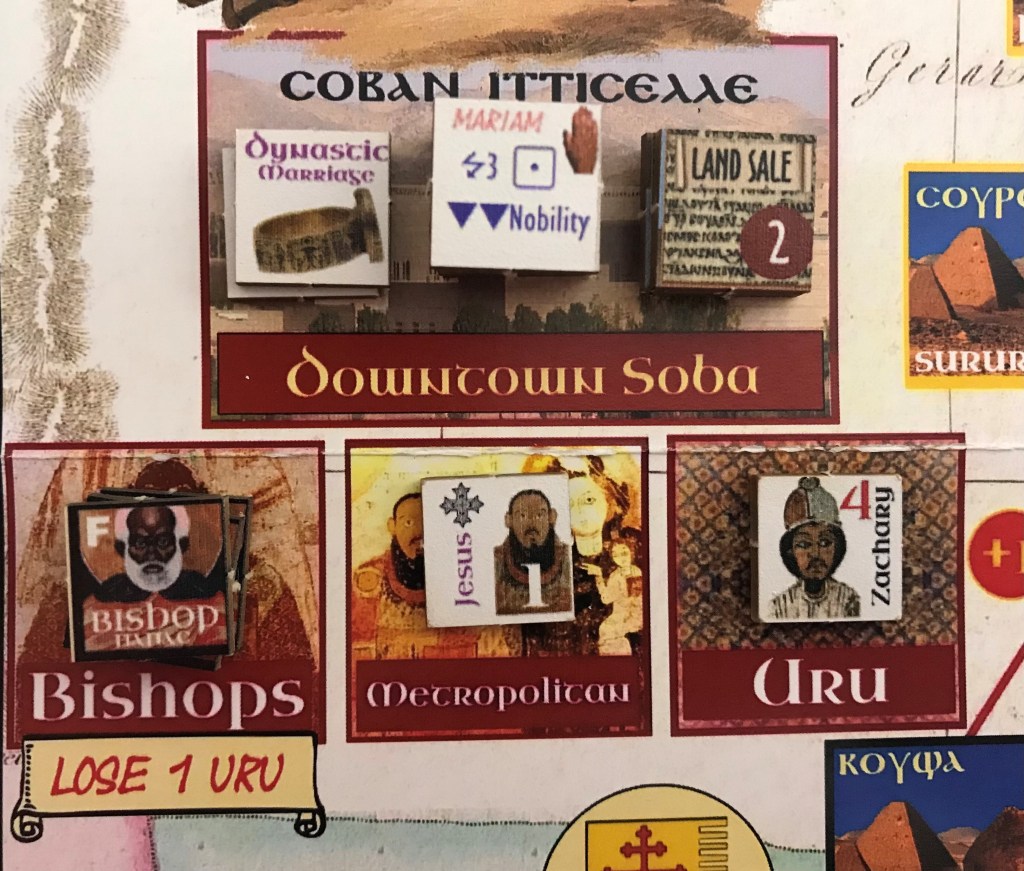
As you look to the left of the orange Soba Collapse Box, you will notice 4 boxes that are used by the player as holding boxes for their various drawn pieces as well as available assets that can be used throughout the game. These boxes include the Uru Box, Metropolitan Box, Bishops Box and Downtown Soba Box.
In the Downtown Soba Box, the player will place the various assets that they are given at the beginning of the game which include the 4 Land Sale Tiles, the 2 Dynastic Marriage Tiles and the 6 Princess Tiles. The basic function of all of these Tiles is to gain additional Efforts throughout the game when needed and can really make a difference in a pinch.
Sale of Land Tiles
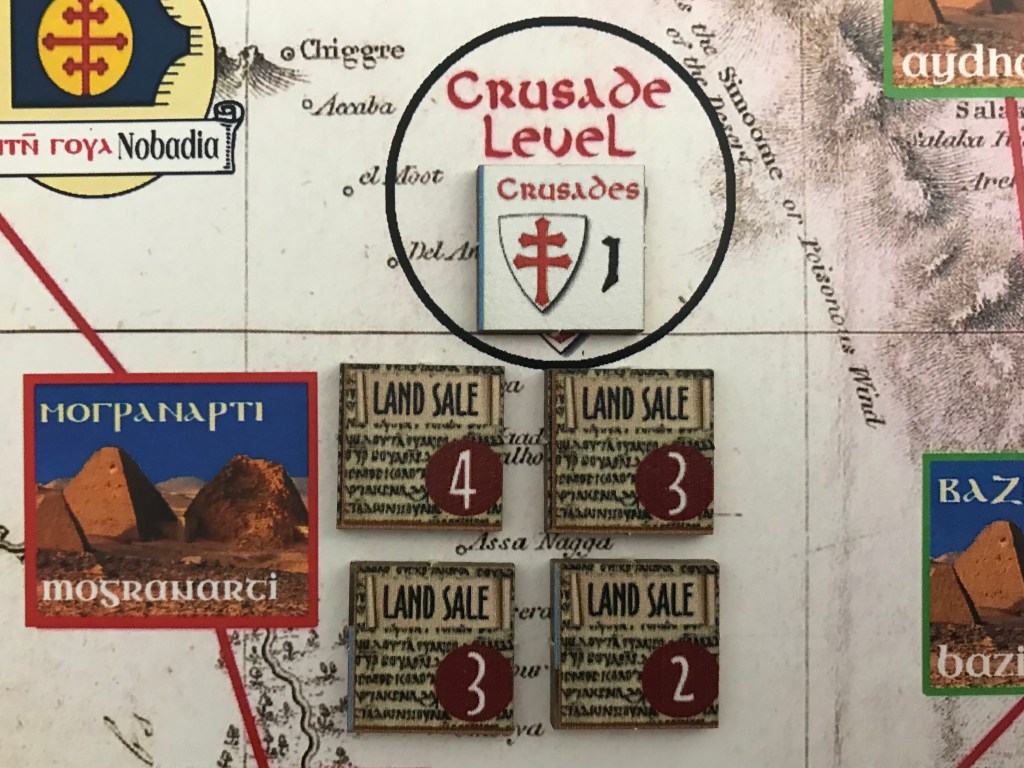
We covered this briefly in Action Point 1, but located between Path B and C is positioned the Crusade Level Round Box that will change throughout the game and is connected to the Land Sale Tiles in the Downtown Soba Boxes. There are a few Event Cards that direct the player to roll a D6 to determine the Crusade Level. This Crusade Level is representative of how the Crusades are going in the Holy Land and how it is effecting things in Nubia. The Crusade Level has 3 different levels; 0, 1 and 2. The higher the number, the poorer that the Crusades are going for the Christians and the Muslims are diverting their attention toward other goals, namely spreading into Africa and buying up valuable land along the Nile. When the player decides to sell land to gain additional Efforts by selling a Land Tile they will have to reduce the final number of Efforts earned by the Crusade Level. So, for example, if they sell a 4 Effort Land Tile while the Crusade Level is at 1, they will only net 3 additional Efforts as they have to reduce the number by the Crusade Level. This Crusade Level is hard to control or manipulate so don’t fret over this but simply be ready to sell when the Crusade Level is in your favor as it may change.
There is a penalty to Sell Land though as you will have to reduce your Army Asset on the Royal Assets Track by the current Crusade Level when you sell. So beware! This can hurt you more than it is worth as you have to keep those Royal Assets high and if they get low you can force Defections and Collapse Checks. This is an interesting thematic choice by the designer as your efforts to sell land are modified because the Crusades are either going poorly for Christians or well and this reduction of your Army Asset means you are probably having to send more troops to hold back the marauding Muslims in this ongoing war.
Dynastic Marriage Tiles
In Ancient times, Kings used their daughters and sons to forge connections to potential allies or to placate an aggressive country through arranged marriages. This was considered a strategic form of diplomacy and was quite successful throughout history. In Nubia, the Uru would also practice this diplomacy to forge relationships with other competing kinglets and allies up and down the Nile River basin.
In the game, the player has a total of 6 Princess Tiles that can be used by discarding one of the 2 Dynastic Marriage Tiles to gain additional Efforts for that turn. The process is random though and can be very beneficial or just helpful.
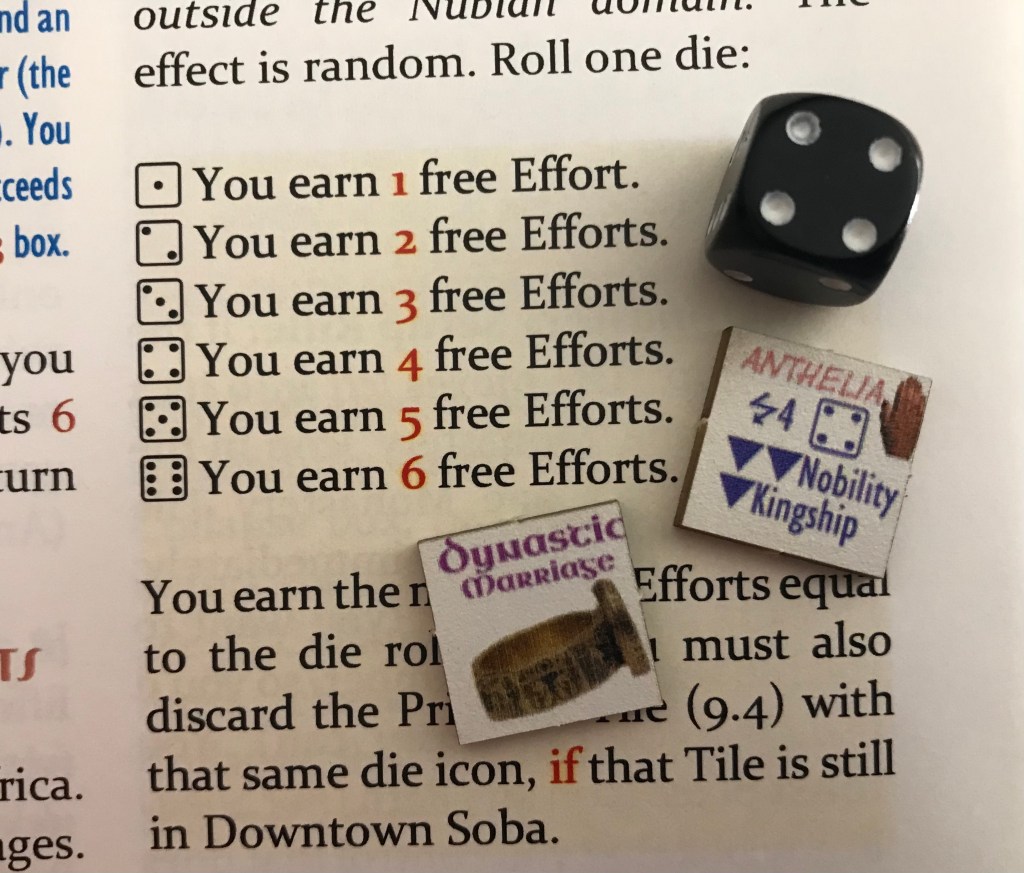
The player will discard one of their Dynastic Marriage Tiles to then roll a D6. The result of this roll is unmodified and the number rolled is the number of free Efforts that the player will gain this turn. The rolled number will also coincide with one of the 6 Princess Tiles and this Princess Tile must be discarded if it is still located in the Downtown Soba Box at the time of the roll. If not, the player still receives the Efforts but will not have to discard a Princess Tile.
The real benefit of the Dynastic Marriage process is that the player will gain additional Efforts but will not have to incur the negative results that are reflected on that Princess Tile as they would if they were simply Throwing Their Daughters to the Wolves. If you look at the Princess Tile in the picture above, you will notice that two of the Royal Assets are listed at the bottom of the Tile and has the down arrow symbol next to them which means that these must be moved down on the Royal Assets Track.
Throw Princesses to the Wolves
As mentioned in the previous paragraph, the player has a total of 6 Princess Tiles that start the game in the Downtown Soba Box and can be used during their turn to gain Efforts. As you can see below, each of the Princess Tiles have a name listed at the top, followed by a die face next to a zigzag line and a number that coincides with the die face. Then at the bottom of the Tile are listed 1-2 Royal Assets (either Nobility, Kingship or Army) with a number of down arrows. These represent the Royal Assets that will be effected by using that Tile for the Throwing Princesses to the Wolves action.

This action must be carefully considered for several reasons. One, there is a pretty hefty penalty for doing this as you will lose steps on the listed Royal Assets and remember if that track reaches the Defections Box marked with an [X] then you will lose a random Uru at the end of the turn during the BXF Phase. This can lead to a failed future Collapse Check and should be considered before committing to its use.
Second, each of the Tiles that remain in the Downtown Soba Box at the end of the game will be worth 1 VP to the player. So, using them will be costly. But, if you never make it to the end of the game because of bad luck you will kick yourself for not using these assets to get more Efforts to do more things to stop the advancing Meks. This is a really tough decision and is something that you should consider very carefully as it can make a difference in surviving to the end of the Event Deck or succumbing to the continual pressure from your enemies, and therefore will be wasted if you don’t survive.
Crown Prince in Attacks
Once per turn, the player may commit the Crown Prince to fight in one battle, or in other words attempt to Effort a Mek on a Path to move it back from Downtown Soba. The player will choose their targeted Mek, and then draw one random Uru from the draw cup. This drawn Uru is the Crown Prince. The Crown Prince can then be placed onto a Path that the player wishes to spend and Effort on to attempt to attack the Mek and move it backward.

The Crown Prince will modify the die roll by their value listed on the Uru Tile. There are no negative value Uru but there are several that have a zero value. But there is a risk in doing this action as if the modified roll doesn’t equal or exceed the Mek’s Strength then the battle is lost and the Crown Prince will be killed in battle and must then be placed into the Mosque Box.

If the battle is won, then the Crown Prince will be placed in the Uru Box on the map underneath the current Uru. The Crown Prince will then act as your next Uru when the Uru is forced to be changed by an Event Card. There is no need to draw an Uru that turn as you simply return the present Uru to the draw cup, revealing the Crown Prince beneath, and watch as he ascends to the throne and takes up his father’s mantle in leading the Kingdom of Nubia forward.
The use of the Crown Prince can be risky as when you draw a 0 or 1 value Uru, your chances of winning the battle are not necessarily increased and if lost you will lose that Uru to the Mosque Box. But, there is a silver lining here though in that instance. A 0 or 1 value Uru that is killed in battle will be removed from the Uru draw cup increasing your odds in drawing your better value Uru, which leads to more overall Efforts each round and ultimately a better result than if you draw poor value Uru.

Portugal Tiles
The last asset we will discuss is the Portugal Tiles that are tied to the Portuguese Event. This Event represents Portugal discovering East Africa and signifies an alliance with Nubia. When it occurs, the player will place all 4 Portuguese units into the Downtown Soba Box for use. These units can be discarded to reroll any die for any reason. If these are remaining in the Downtown Soba Box at the end of the 27th Event Card, they will earn the player 1 VP each. These are a very valuable asset that comes during the last 5-10 cards but can be exactly what the player needs to survive the final onslaught.
These assets are key to the player winning the game and should be used wisely. Use them to survive and gain advantage but use them as sparingly as possible as having 8-10 tiles remaining at the end of the game can make a difference between a Shaky Future result (20-29 VP) or a Minor Victory (30-39 VP).
In Action Point 4, we will cover the various ways that the player can attack the Meks on the Paths and how they should prioritize which Path is most important to keep clear of enemies.
-Grant
