
High Flying Dice Games churns out a lot of great small format wargames on very interesting and somewhat obscure conflicts. Every month it seems that they have a new one in the pipeline. So was the case in late February when I started to put together my Wargame Watch post for March, I noticed this great looking post WWI game getting ready for print called White Turns Red: The Battle of Orel, 1919, which focuses on the end of the Russian Civil War. I first reached out to the designer Perry Moore, but due to scheduling conflicts, asked the developer and publisher Paul Rohrbaugh to tell us about the inner workings of the design.
Grant: What was the interest in designing a game around the Battle of Orel? What about the fighting during this era was important to model in the design?
Paul: Perry has created a number of games on the major battles of the Russian Civil War over the years. One on the Allied offensives out of Murmansk was published years ago in Strategy and Tactics, and the others self-published via Fire Fight Games. I’ve long enjoyed the FFG titles, but they did needed more development, which is precisely what we’re doing with the new and revised editions published by High Flying Dice Games (Breakout From the Crimea and White Turns Red currently).
Grant: What is the scale of the game and what is the force structures used?
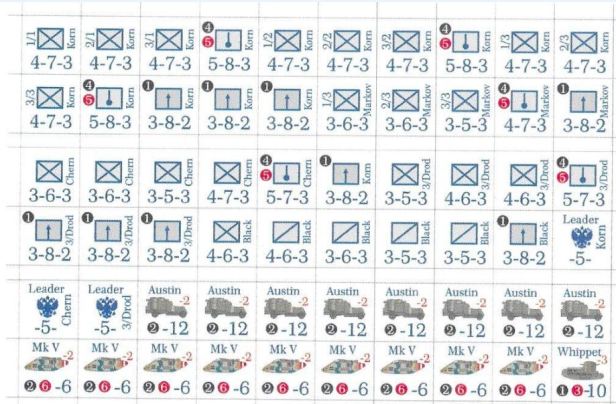
Paul: Most units are battalion size, artillery batteries are 10 to 12 guns, and tanks, armored cars and armored trains represent individual vehicles.
Grant: Why was the choice made to only allow one move of units out of a hex? What historical basis is there for this limitation?
Paul: Command control was an issue. This rule is part of the game’s design that captures that aspect of the history without a lot of scripted rules that otherwise tie up a player. Given the game’s relatively small “footprint”, this is not something player’s will have much problem in managing.
Grant: I also noticed that all units are considered to always be in supply. Why did you choose not to consider the need to worry about supply?
Paul: At this scale and time period covered supply rules were really not needed. In the big picture view, the battle was squarely focused on controlling Orel. Neither side had the forces or ability to outflank/bypass the city and lay siege. Units that get surrounded will not last long if they can’t retreat, so tracing supply was something that in game terms really didn’t matter.
Grant: How do the Unit Activation Markers work to decide Impulse phases? Why did you feel this should be used as the basis for Activation? What challenges does it create?
Paul: As stated above, command control was an issue. Also, the chit pull design approach is a good way to portray the chaos and confusion of battle without scripted rules that limit players and make play less fun/interactive. The DR check that follows the player’s drawing of the activation marker also makes it somewhat “problematic” about how many units will receive/follow orders. In the game, as in the actual battle, the player that makes the most of the opportunities will have the better chance of winning.
Grant: Units can either move or fight during an Activation but not both. Why is this limitation included in the design? What strategies does this force upon players?
Paul: Again, this models the issues that were experienced with command control. Officers were in short supply (both sides were rather preoccupied with establishing political reliability over leadership in combat among other things). Getting forces to move and attack was challenging. This places a premium on maneuver and planning. Given that both players will activate twice in a turn, a player will need to use historical cover and fire tactics to bring an opponent to battle. Of course, Orel is the focus, so both players will have to stand and fight, and that is where things get interesting…

Grant: How does combat work? Why are Infantry allowed to combine their attack factors while tanks have to fire singly? What is the real world combat basis for this being included in the design?
Paul: Fire combat involves totaling the attacking unit(s) combat factors and rolling a ten-sided die. The DR is modified by terrain, target type and size (if target unit is a vehicle) and then cross referencing on the Combat Results Table to get a result. Coordination with tanks was problematic as these weapons were quite new here, crews were still being trained, and even friendly infantry were wary. These also have multiple weapons (cannon and machine guns) so even attacking on their own they are still a significant threat.
Grant: What is the CRT like?
Paul: Combat results are step losses, Suppression and outright elimination. A unit that has already sustained a step loss is eliminated. Suppressed units have a movement penalty and adverse DR modifier for combat.
Grant: What is a unit’s Blast number and how does this effect combat?
Paul: This is simply a fancy way to refer to the combat factor for cannon/artillery units. It represents the increased fire and hitting power over small arms. It uses the same CRT. However, if the target is an enemy vehicle it can cause it to become Stunned (cannot move or attack). If the target was infantry or other “soft” target, it can cause the target to Panic, which is similar to a vehicle becoming Stunned (if caused by a Tank).
Grant: How does combat change for tanks and armored cars?
Paul: These units have to spot/acquire a target to attack at all, or without adverse conditions. Tanks and armored cars can be “buttoned up” that cause them to be invulnerable to infantry/small arms attacks, but that makes it harder for them to spot/acquire targets. Decisions, decisions…
Grant: How do Leaders effect the game and how do they exert control on units? Why are there differences between the Red and White Leaders?
Paul: Leaders can help with spotting for artillery and air, as well as vehicles, allow units within their command range (4 hexes for Red, 3 for White) to activate normally, and keep their morale at normal levels (reduced by 1 if not within command range). A variant rule also allows a player to activate units in command range a second time in a turn, which can be a powerful 1-2 punch, but this comes at a cost of double the activation cost (representing the leader’s commandeering of resources/air waves, and intervention on the battlefield). Another example of a simple yet elegant means of portraying the history in the game.

Grant: What is the melee combat procedure? Why is it so brutal and does this reflect the historical outcome of such combat?
Paul: The attacking player can move up to 4 units into an enemy occupied hex and then rolls a D10. The DR is modified by the number of enemy units vs. attacking units, terrain and the presence of armored units in the combat. Melee combat is all or nothing. One side will win and the other loses everything. This was very intense and bloody combat, with neither side asking nor giving quarter. Such are civil wars…
Grant: There are several special attacks like artillery. What is the difference between off map and on map artillery?
Paul: Off map artillery is much deadlier (heavier caliber guns that have access to large stocks of ammo for intense shelling), but it is much more prone to scatter, that can cause “friendly fire” if it scatters to a nearby friendly occupied hex. Having leaders around when this is available can be crucial.
Grant: How do Armored Trains work and how are the best used? Do both sides have access to them?
Paul: The White player has two armored trains, the Red none. These can only move along the rail lines, and as such are vulnerable if the line is cut and the train is compelled to retreat. An armored train, however, is quite powerful with cannons and machine guns. It is invulnerable to small arms fire and has a much easier time in spotting/acquiring a target than tanks and armored cars. Used properly, they can be valuable assets for the White offensive. However, they will be high priority targets for the Red defenders, and life around them will not be easy…
Grant: Why does only the White Player have air units? How are they used in the design?
Paul: The Whites enjoyed air supremacy here, but that said, there are only 4 of these units in the game, and only a 16% chance all will be in play for a turn. These are not going to decide the course of the game but can be helpful when they show up and hit the target(s). An air unit’s attack is resolved in a similar fashion to off-map artillery; the target has to be spotted first and can scatter. Further, after the air attack is resolved, the air unit has to undergo a DR check to see if it can remain in the game. Support and repair facilities were not that extensive here, so any accident or break down will cause the White’s “air force” to become diminished.
Grant: I notice you have several rules regarding tank doctrine. Why was this important to include in the design?
Paul: Perry has a big interest in this era of history and the development of tank warfare. Again, crew training was significant, and these rules help players understand the roles and limitations of these weapons in this battle and war. Given the game’s relatively simple mechanics, having this level of detail adds to the game’s history and enjoyment.
Grant: How does a Lead Tank effect movement and firing for other tanks in the group?
Paul: Tanks are deployed at-start in groups of 2-4 units, with one marked as a “Lead Tank”. Those in proximity to a Lead Tank must move/follow the lead tank when/however possible, and end movement within 2 hexes of the Lead Tank.The individual tank units can fire/attack as desired as the rule only affects movement.
Grant: Why is an infantry support check needed when tanks approach trench lines?
Paul: Tank crews were limited in their visibility and required assistance/guidance from accompanying infantry, as well as identifying/acquiring targets. This was especially so around trenches and a shell scarred battlefield. Whenever a tank unit moves adjacent to or into a trench hex it must first pass a DR check to determine if it can move. Having an infantry unit there will make it more likely the tank can indeed proceed.

Grant: How is victory determined? Who appears to have the advantage and is this true to the historical conflict?
Paul: This is an all or nothing battle for Orel. The White player immediately wins the game by taking six of the seven Orel city hexes. If the Red player can prevent that, then the Communists win. This was a very nasty and prolonged fight for the city, with both sides pouring in men and material into the city. In the end, the Reds emerged victorious and the Whites exhausted and in retreat. In many ways this was the “high water mark” of the White’s attempt to overthrow the Bolsheviks.
Grant: What are you most pleased with regarding the design?
Paul: I am very impressed with how well the game captures the history in a “classic” hex and counter wargame design. It is relatively easy to learn and straight forward in its play. It conveys the historical challenges both sides faced, and still leaves players with historically valid decisions to make to play the game.
Grant: What has changed through the playtest process?
Paul: Most changes involved rearranging rules sections so they “flowed” better when learning them, and referencing during play. The second activation via a leader was added, as well as a few new DR modifiers for vehicles and leaders for both fire and melee combat (and I believe some were discarded as well).
Grant: What has been playtester’s response to the game?
Paul: Playtesters really liked the game, but I haven’t had any feedback yet from those who purchased the High Flying Dice Games edition. Hopefully we’ll hear from some soon!
Grant: What is the schedule for the games release?
Paul: The game was released March 1st, 2018. It is available now, and you can learn more about it here on its High Flying Dice Games web page: http://www.hfdgames.com/orel.html

Thanks for the information on the game Paul. I must say that this game looks to be a very thoughtful and detailed design of the Russian Civil War and the elements that made it a unique struggle and I am very interested in it. Thanks for the great service that you provide the wargaming community with these great games.
-Grant
