
A few months ago I acquired a copy of Bomber Command The Night Raids 1943-1945 designed by Lee Brimmicombe-Wood and released in 2012. Since, we have played twice and I have written and posted a quick review on the game.
Last week, Alexander and I had the desire to give it another try so we got together to play. I once again took the side of the RAF and Alexander chose the Luftwaffe. We chose to play the Berlin scenario again, which covers raiding from the 1943 Hamburg firestorm to the great Battle of Berlin and the RAF’s defeat over Nuremburg in March 1944.
Setup & Picking Targets – Always a Little Stressful!
The setup and target selection is always a little stressful. You wouldn’t think that it would be but this game, like many of the other well designed World War II games by GMT Games, does cause you to immerse yourself in the moment and actually causes anxiety. I have enough anxiety and stress in my real life but this is different, this is good anxiety and stress as it allows me to get away from my life for a few hours! I then reached my hand into the bag, shuffled around the target chits and then drew a target out, and I was surprised but excited by the target I drew: Berlin!

After the setup, which includes determining the weather in each of the five Jagddivisions by a random die roll, I had to begin the process of plotting out the courses of my Main raid and up to three Mosquito or Gardening raids. This is one of my favorite parts of the game as it requires a lot of thought about the tactics that are to be used to try and reach your objective and successfully drop bombs on the predetermined target. The tactics include crossing paths of raids, delaying or staggering the take offs of different groups, the use of decoy raids, choosing bombing approaches and exits, etc. This part of the game is about deception, leading the German player to continually guess about the location of and target of the main raid. But the German player must also be cognizant of the other smaller raids as they can also gain good VP and consume valuable resources in the form of scarce fighters and their fuel supply.
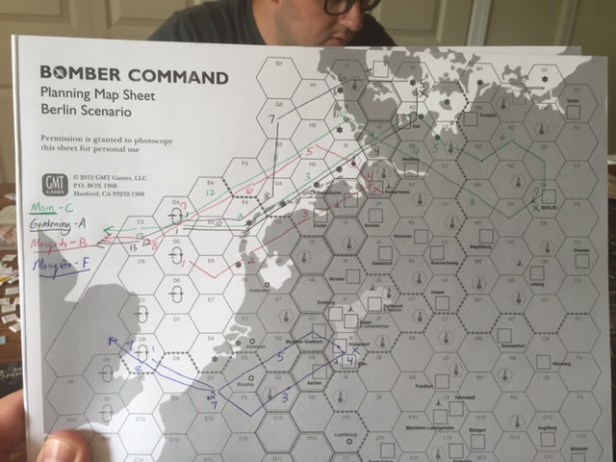

In the next photo, you can see my approach vector to Berlin was designed to cause him to believe I was going to points north, when in reality I used this only as a feint, but then immediately turned back south toward the main target to start my bombing run. As you can see from the numbers I marked on the map, this feint didn’t delay me in reaching my target as that was part of my plan.
The Approach – A Long & Perilous Journey
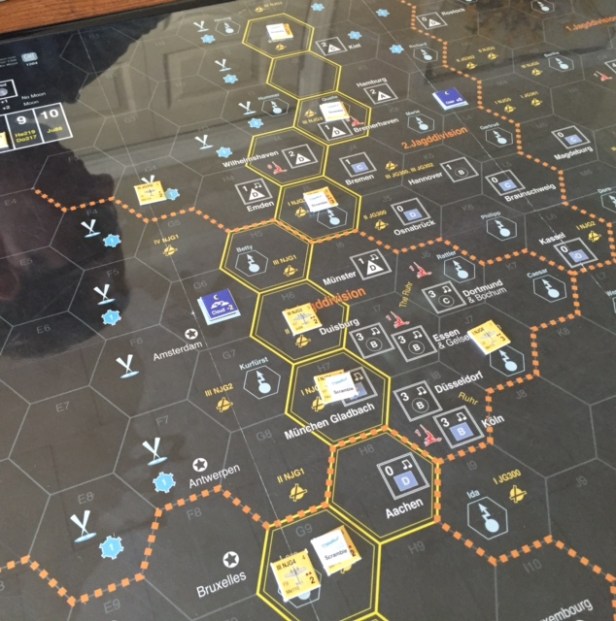
Now that setup was completed, we were ready to start. I decided to start all 4 of my raids on the first turn hoping that it would cause the Germans to have to focus on too much to be able to mount a consistent and effective resistance. I have always tried to spread my raid starts out a little so that there is always a need for him to commit resources and not allow him to be able to swarm my main raid after it is trying to return. As my target Berlin was a long journey, I wanted 3 of my raids to follow the same/similar track to get there up the northwest coast of Germany. I used my raid to Düsseldorf to force him to hold some units away from the northern routes. From the picture below you can see that he scrambled planes in 3 Jagddivisions in the first turn in order to conserve fuel and units until he was able to discern better my intentions and targets.
In my 2nd turn, my devised ruse began to play out as three of my four raids were grouped together. You may notice that I have 2 raid tokens in the same hex and this is in fact incorrect. The raids can be located together in the same hex if one of the raids is a Mosquito raid, but you only show one of the markers. Chalk that up to inexperience. This mistake actually hurt me as the Germans knew I had 2 raids there. This could have been an even better deception as he would have had to ask himself ‘If one of my raids was yet to take off?’, or ‘Which of my 3 showing raids had a 4th raid concealed within it?’
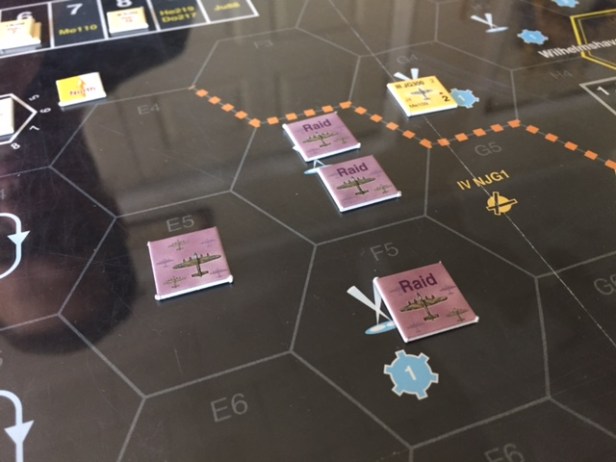
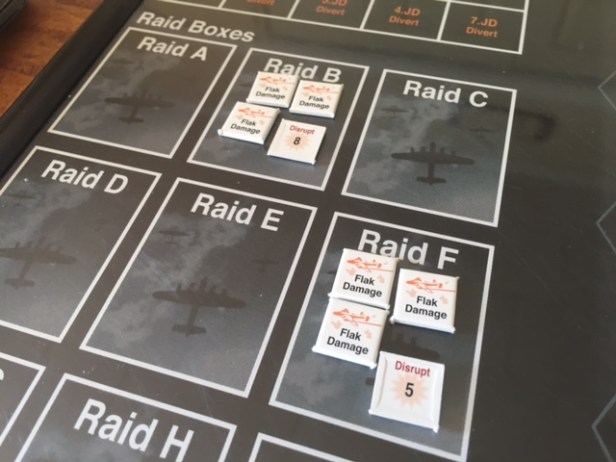
As I began to near Jaggdivision 2, the fireworks really started. I had planned to make sure that my raids flew over at least one flak defense area as I had a great card in my hand to deal with that (Carpet) and also had a card in my hand to deal with flak damage (Lucky Crews). So, my Mosquito raid targeting Bremerhaven (Raid F) did fly over the flak and I had to play Carpet but he rolled too well and was able to hit me for considerable damage of 3 disruptions and 2 flak damage. He also was able to successfully infiltrate my 2 Mosquito raids doing good damage as well but I always seemed to have a card that made it more difficult and reduced the damage or his rolls to successfully attack. He also was able to damage my other Mosquito raid (Raid B) as well as you can see below. But, to my great surprise to this point, my Gardening raid (Raid A) and Main raid (Raid C) were as yet unscathed!


One card that I would like to talk a little about, as it affected our game considerably, is the Fuel Famine event. I played this card as he was trying to scramble a fighter in the same Jaggdivision as my target, Berlin. The card reads as follows: “When a nightfighter unit scrambles, play this card. Remove the unit from the game – it has been grounded by fuel shortage.” This card was well timed for me as I was nearing the target and wanted to make sure I had as little resistance as possible to slow me down. Playing this card and removing that unit was HUGE for me as it reduced his available units in that Jaggdivision and made it so I only had to deal with 2 nightfighters rather than 3 on the approach and 2 fighters for Wild Boar tactics over Berlin.
The Bomb Drop – A Firestorm is Coming!
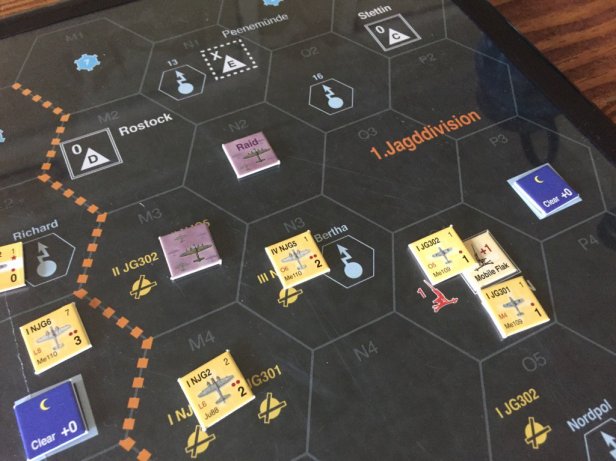
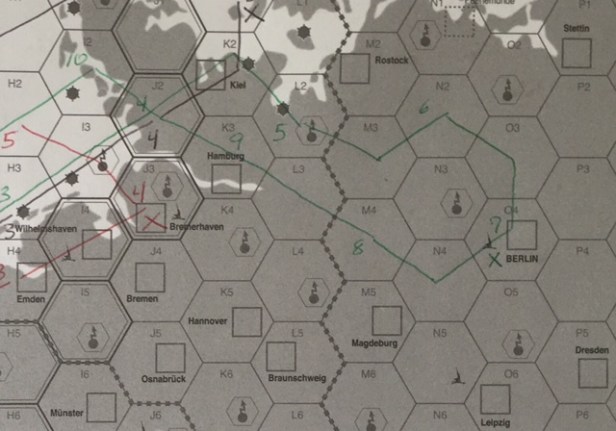
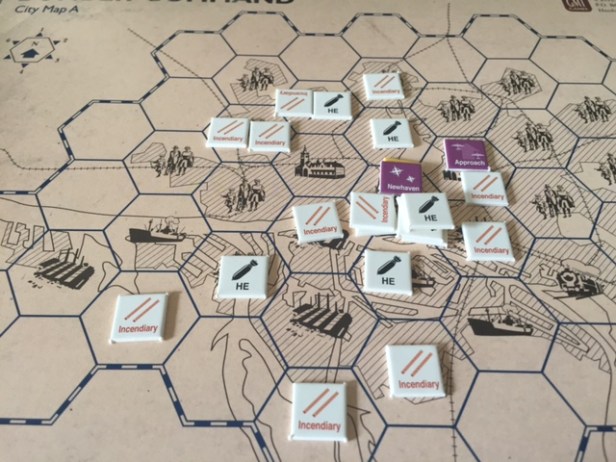
After about 2 hours of struggling to reach my final target, and after 2 successful Mosquito raids on Bremerhaven and Düsseldorf (gaining me 2VP) and a successful Gardening raid on hex K-1 (gaining me 5VP), Berlin was finally in my sights. I had only taken 3 disruptions and 2 flak damage counters to my Main raid (which I had removed using the card Lucky Crews so as to not affect my bomb targeting and drops), so I was in really good shape as I made my final approach. As mentioned earlier, you can see that my approach vector had me make a feint to hex N-2, followed by a move toward the main target on the next round. The picture doesn’t necessarily show this but he did move most of his nightfighters to the north thinking that my main target was headed to targets in that area. He was able to obtain the Mobile Flak counter and moved it into Berlin to add to their defense, which was a concern for me. With that, I was ready to drop my payload on Berlin. I was then required to place my Bomb Drop marker on Berlin. As you can see from the picture below, he had 2 single engine fighters that would attempt Wild Boar infiltration and attacks and he would have a major Flak combat as well with a +1 bonus from the Mobile Flak marker which is hidden below the Me109 chit. His total Flak attack bonus would be +3 which would make it very hard for him to not hit me. I was extremely lucky though as he only rolled a 3 for a total of a 6, which would inflict only 1 disruption and 1 flak damage. With even an average roll of 6 and his +3 bonus he would have done 2 flak losses, 2 flak damage and 2 disruptions, or with a great roll of 9+ could have done 3 flak losses, 2 flak damage and 3 disruptions. I was very fortunate that his rolls were as low as they were! We then moved to the Wild Boar attacks and once again I was able to reduce his attack roll and damage and I only incurred 2 disruptions and 2 losses. It was now time to do the bomb drop so we grabbed City Map A and began the process of marking targets.


We then moved to the Dropping Bombs step where I was able to choose my load of 20 bombs with a mix of High Explosive or HE and Incendiaries. I chose 8 HE and 12 Incendiaries to drop. I then mixed them up in a cup and drew them out randomly and due to the weather being clear was able to place a concentration of 9 bombs on the target Aimpoint. I pulled out 4 HE and 5 Incendiaries for the center concentration and then starting in a ring around the City randomly pulled chits filling in the circles up to 2 rows away from the target. As you can see, this resulted in all 20 bombs being placed on a target. I was very pleased with this spread and felt that with my lack of major damage and disruptions to my bombers, would only see a few bombs be moved off of the City map to hit in the countryside.
We then moved to bombing accuracy, and while visibility was good and my disruptions were low, the German player would only be able to relocate 2 bombs due to error. He moved 2 of my bombs into the countryside or onto river hexes where they would do no damage and I was able to use my accuracy score to move several of my bombs into adjacent squares to increase the VP gained by causing major fires.


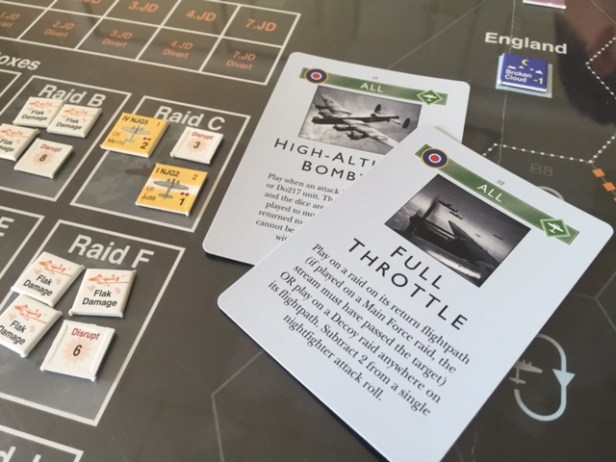
Now that the bomb drop (the best part of the game by the way) was over, I had to make it back to my base with my Main raid as my other raids had already exited the map. On my return journey, I was again fortunate and was able to shrug off his infiltration attempts and reduce the damage that he caused with his attacks and infiltrations with some pretty timely event cards including High Altitude Bombers and Full Throttle. All in all, I would only take a total of 22 bomber losses due to his nightfighters!
Conclusion
After the return journey was over, and after 3 1/2 hours of play, my final VP total was 37VP which is considered a British Major Victory! I love this game and we enjoyed the play as much as we had in the past. We still are making small errors (such as my booboo with 2 markers in the same hex) but overall the gameplay is excellent! During play we posted some photos on Twitter and it generated considerable conversation about the quality or perceived lack of quality for the City maps. People were concerned with their drab plain text and color scheme. I can tell you that I am usually a huge critic of components as I feel they can either make or break a game. But, in the case of Bomber Command, I feel that the overall map is great and that the City maps are well done as well as they are trying to convey to the players the feelings and emotions of the game. There is nothing happy about the maps, they have bland colors and are not overly decorated with symbols or other unnecessary writing. They convey the starkness of the scene and the difficulty that I am sure the pilots and bombardiers had with knowing their bombs were going to kill and maim people. With the Allied bombing campaign, it was an all out assault on Germany, its industry, its infrastructure and its ability to make war. But it also was a weapon of terror used against the German people in order to effectuate change in their government. The thought was that through fire bombing city centers, that workers would have no place to live, feel unsafe and only be concerned about the bombings and not be productive in creating bombs, bullets and tanks and would sue their government to surrender. To some extent, this was the case but overall the German people were resilient and continued to provide the needed weapons to continue the war for nearly an additional 2 years after the bombings started.
I found this quote on the bombing campaigns and thought that I would wrap up my AAR with it:
“The Nazis entered this war under the rather childish delusion that they were going to bomb everyone else, and nobody was going to bomb them. At Rotterdam, London, Warsaw, and half a hundred other places, they put their rather naive theory into operation. They sowed the wind, and now they are going to reap the whirlwind.” – Arthur Travers Harris, Marshall of the Royal Airfore
-Grant
