As you know, I love the COIN Series and anything associated with it. This new Irregular Conflicts Series is considered COIN adjacent and shares some of the same elements. The 2nd volume called A Gest of Robin Hood is a 2-player game that is set in the world of literature but based on actual events of the time as it covers the bandit known as Robin Hood as he patrolled the Sherwood Forest around Nottingham and attempted to relieve the evil Prince John of the money that he stole from the peasants and give it back to them. The game is very much asymmetric as each of the sides has different goals and objectives but also have different actions, called Plots & Deeds, that can be used to great effect to change the landscape of Nottinghamshire and plant the seeds of insurrection or pacify the locals and keep them paying those juicy taxes. We have played the game a few times now and have really enjoyed what is it that we are seeing and experiencing. The game is a great entry point into the world of asymmetric gaming and also teaches some of the basic principles of the COIN Series mainly focusing on the Sequence of Play, card assisted framework and diverging player sides with vastly different focus. The game is very approachable but also has a lot of meat to it and is really an interesting experience.
In Action Point 1, we took a look at the Game Board, which is absolutely stunningly beautiful yet very functional, and discussed the different areas including Prison, the Justice/Order Track and various other spaces. In Action Point 2, we investigated the 2-player Initiative (Sequence of Play) Box to understand what makes this process unique. In this Action Point, we will take a look at the menu of Plots & Deeds for the Sheriff.
Goal of the Sheriff
Before we go into the individual Plots & Deeds, I want to give an overview of the goal of the Sheriff. The Sheriff is trying to keep the Royal Favour Track, which is broken up into both Justice and Order, in their favor be keeping it on the Order part of the track, which is the lower half. Ultimately he is trying to cause an auto victory by increasing Order to the 5 or 6 space. In order to do this, the Sheriff will have to regularly place Carriages on the board and get them to Nottingham to move the Order Track. They also are trying desperately to find and uncover the hidden Merry Men on the board and then to capture them sending them to prison. Keeping them off the board impedes the Robin Hood player from doing what they need to do to win the game. But, this is easier said than done!
Plots
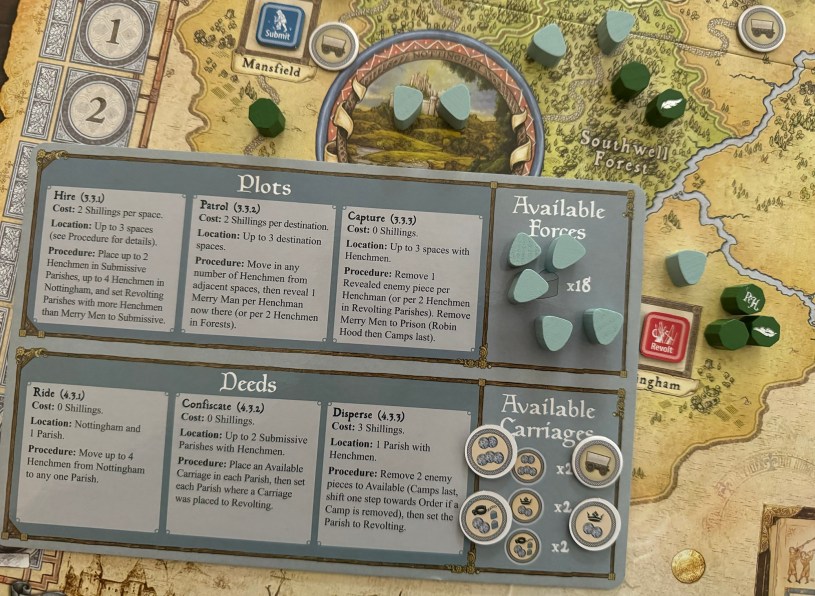
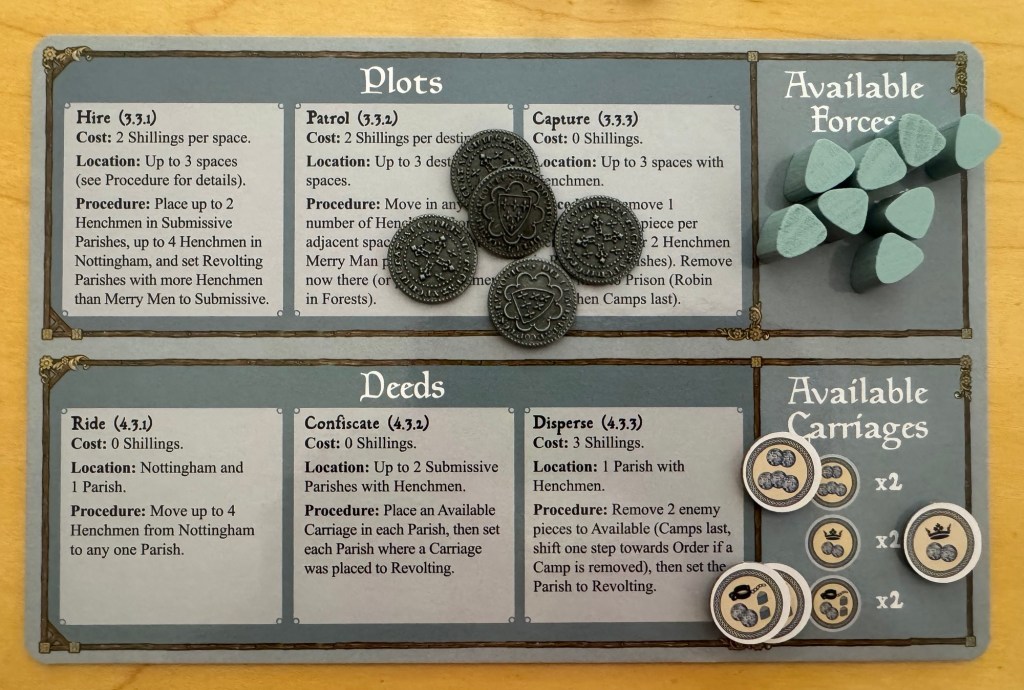
The Sheriff player chooses from Hire, Patrol, and Capture Plots. Let’s start off taking a look at how the Sheriff deploys his minions onto the board and attempts to restore submissiveness in the Parishes.

Hire Plot
The Hire Plot will place Henchmen pieces out onto the board and can also be used to set Revolting Parishes to Submissive. When the player takes the Hire Plot, they may select up to 3 spaces to perform the Hire Plot in that are either currently Submissive Parishes, Revolting Parishes that have more Henchmen pieces than Merry Men or in the Sheriff’s home base of Nottingham.
The Plot will cost 2 Shillings per selected space to place 4 Henchmen in Nottingham, 2 Henchmen in Submissive Parishes and then to set selected Revolting Parishes to Submissive. The changing of the status of Parishes part of the Plot must have met this requirement prior to the new Henchmen pieces being placed.
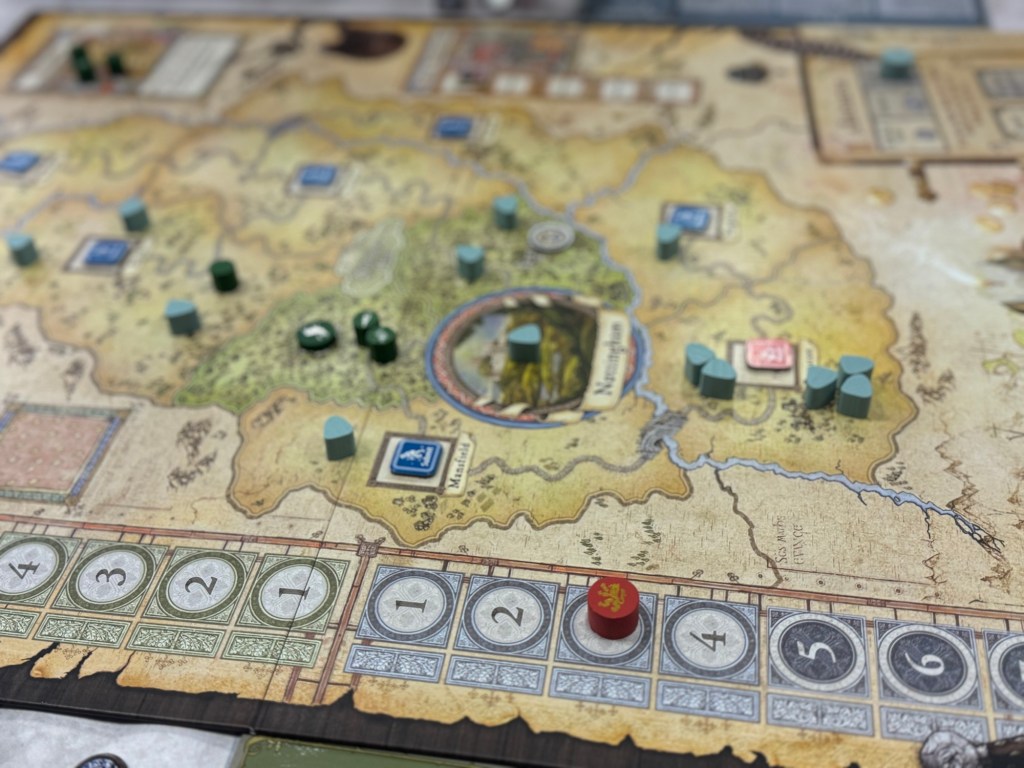
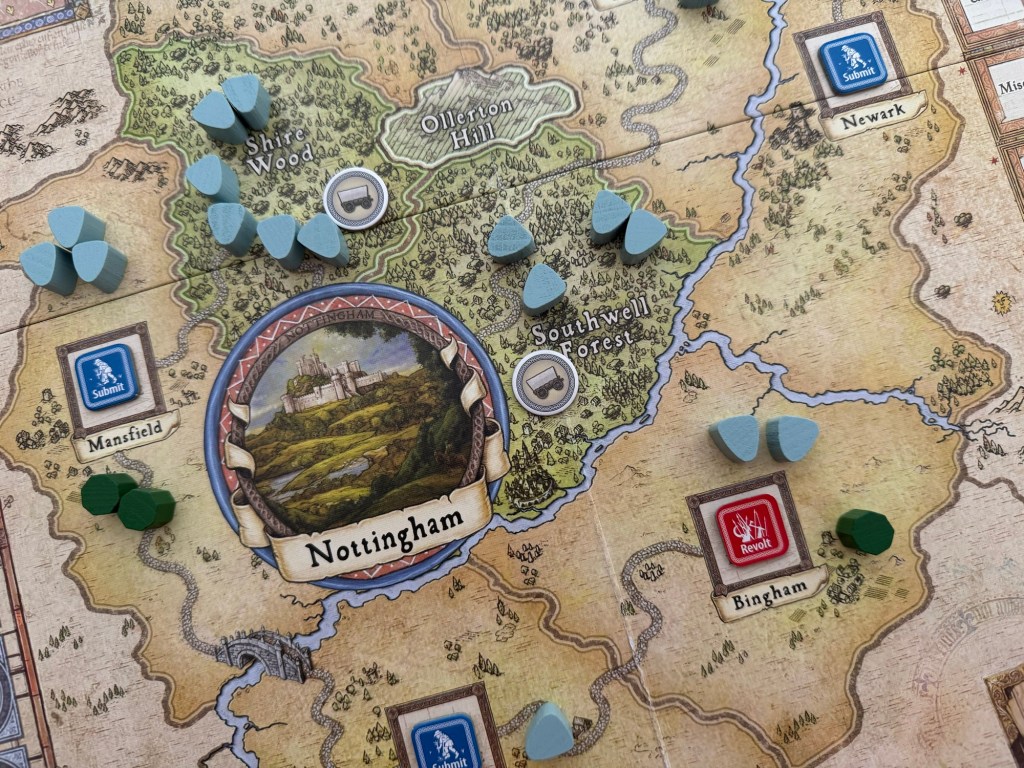
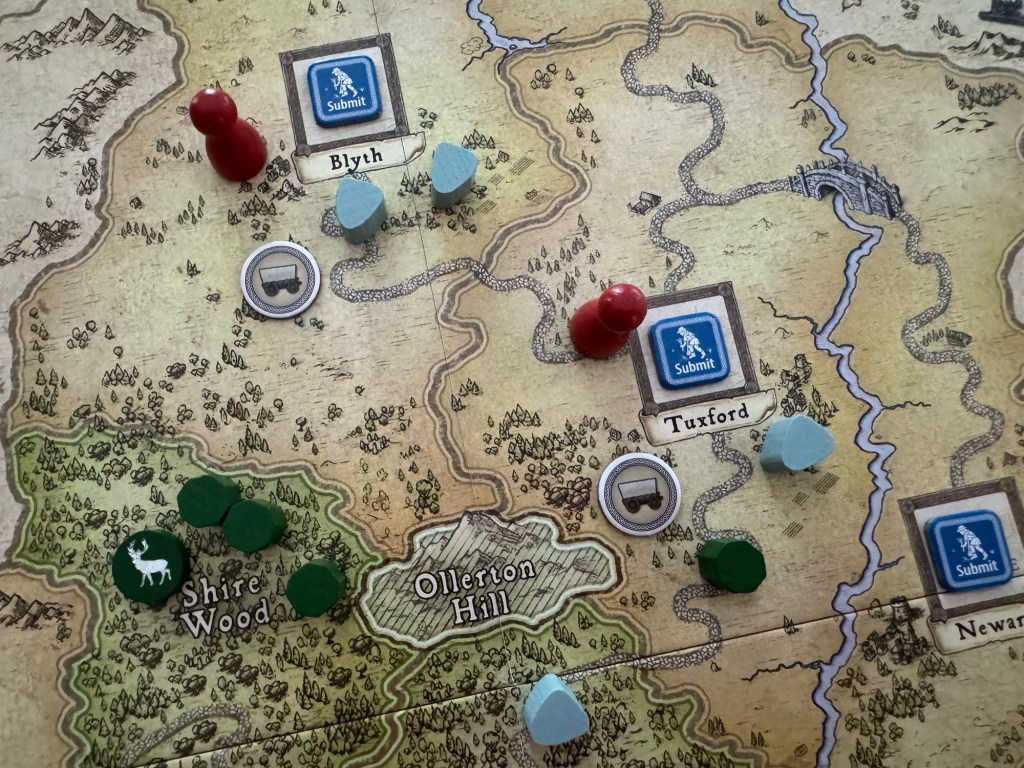
In the picture below, the Sheriff decides to take the Hire Plot and places out a red token into each of the Parishes that he wishes to Hire in. He chooses Tuxford, which is currently set to Submissive and Manfsield that is currently Revolting but has 3 total Henchmen pieces as compared to just 2 Merry Men pieces allowing this Parish to accept new Henchmen. 2 Shillings must be paid for each space into which the Sheriff wishes to Hire so these 2 selected Parishes will cost a total of 4 Shillings. Notice that the Sheriff decided not to select a 3rd Parish to perform Hire in as he already feels that he has a good presence on the board.

Below is a look at the situation after the Hire Plot is taken as Tuxford now has a total of 2 Henchmen in it and Tuxford now has a total of 5 Henchmen.
Now let’s continue with the 2nd part of the Hire Plot and change the status of Tuxford. Remember, that when the Hire Plot was chosen, the Sheriff had 3 Henchmen located in the Parish as compared to just 2 Merry Men pieces. This means that the Parish can be changed to Submissive by simply turning over the counter to its Submit side. This Parish is now locked down and the rowdy locals have been set in order.

The Sheriff has a total of 18 available Henchmen and at the start of a game will have only 5 Henchmen deployed on the board (2 in Nottingham, 1 in Blyth, 1 in Mansfield and 1 in Bingham). Getting out new Henchmen is important to protect Carriages as they make their way to Nottingham and also to uncover hidden Merry Men and arrest them removing them from the board.
Patrol Plot
The Patrol Plot provides the Sheriff the opportunity to move Henchmen to adjacent spaces and reveal Merry Men. The process is pretty simple and the Sheriff may select up to 3 destination spaces to move Henchmen into. The Sheriff will pay 2 Shillings per chosen destination space and will then move in any number of Henchmen from adjacent spaces while simultaneously revealing 1 Merry Man per Henchman now in the space. If the Patrol Plot is taken in a Forest, then 1 Merry Man per two Henchmen will be revealed. Each Henchman piece can only move once during a Patrol Plot so no chaining movement from one adjacent space then onto another adjacent space.
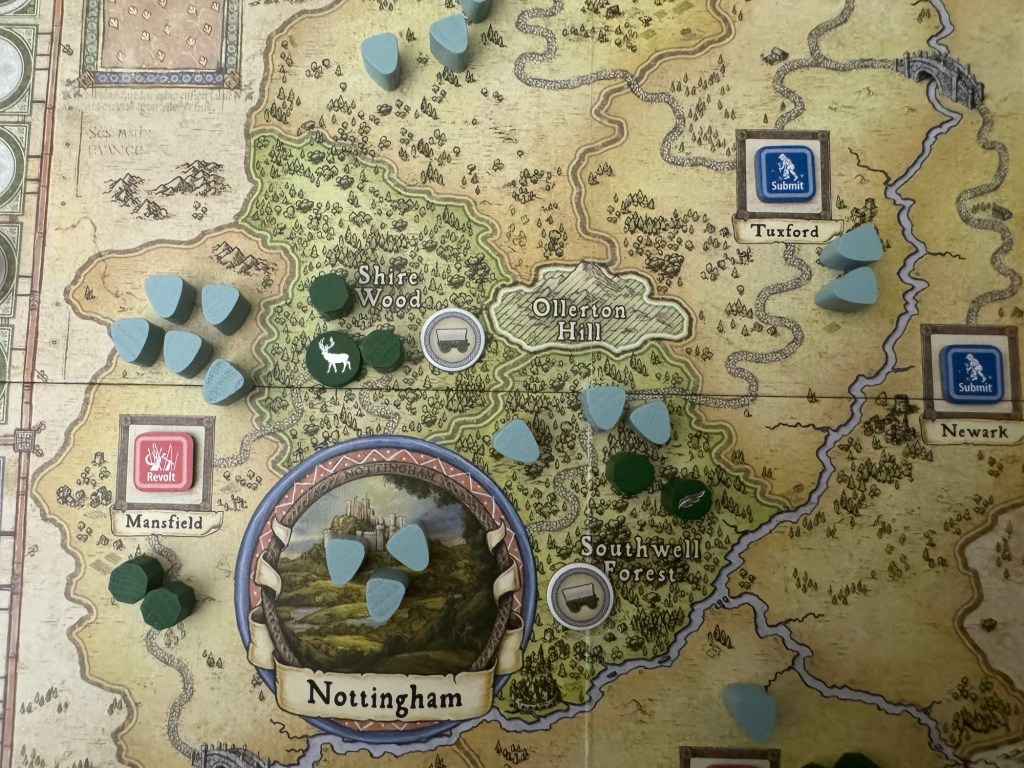
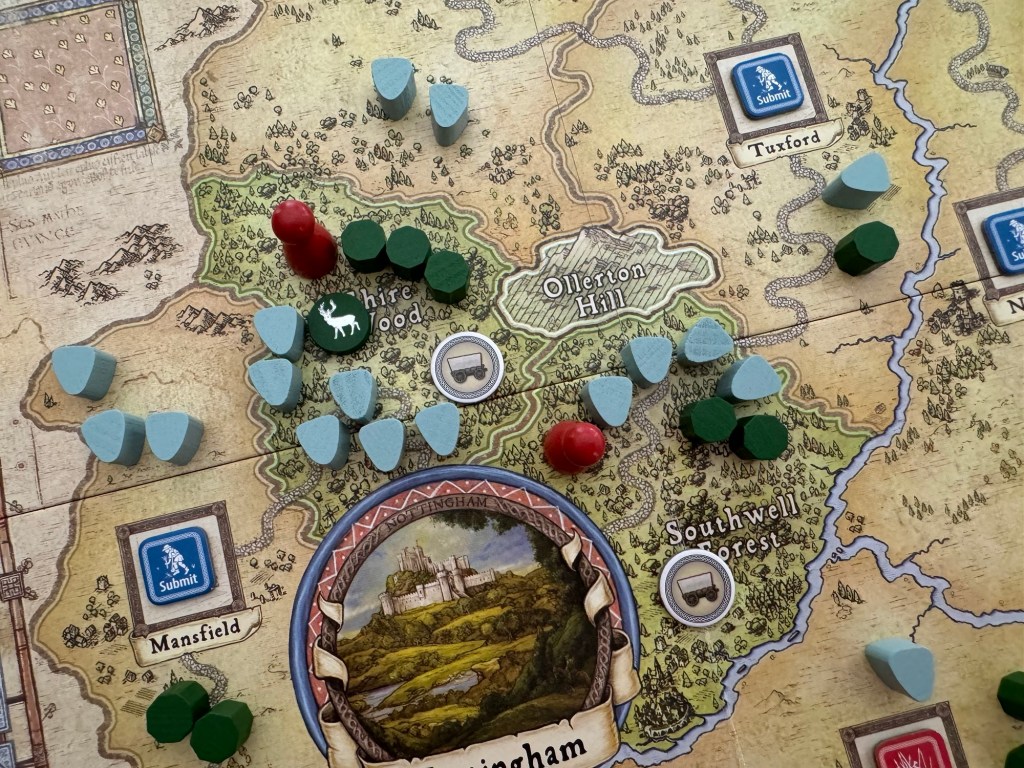
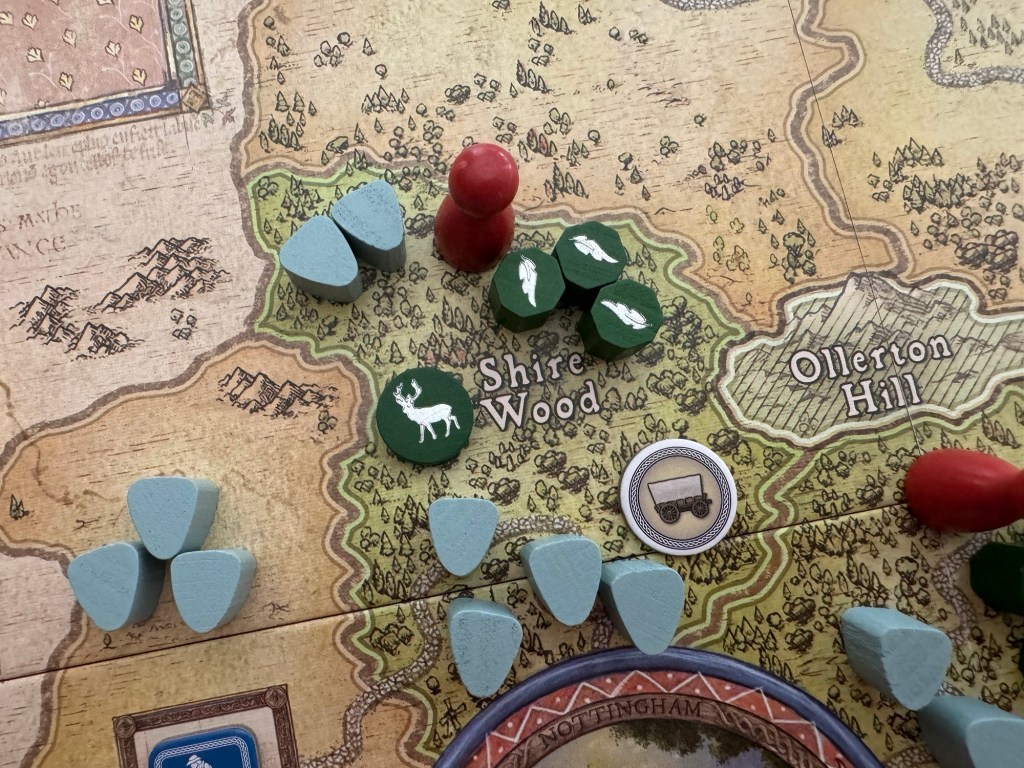
In the picture below, the Sheriff decides to take the Patrol Plot and chooses just 2 of the 3 possible spaces in the Shire Wood and Southwell Forest. Here the Merry Men have begun building up in order to harass and ultimately rob the the Royal Carriages as they carry tribute to Nottingham to fill the Sheriff’s coffers. For each destination space chosen, the Sheriff will pay 2 Shillings.
The Plot allows the Sheriff player to move adjacent Henchman into the chosen spots. In this case, let’s first take a look at the Shire Wood and how many Henchmen will be moved into this space. Remember, the ultimate goal of this Plot is to get your Henchmen pieces into spaces and Parishes where there is trouble brewing in order to reveal hidden Merry Men for a later Arrest attempt.
In this space, the Sheriff decides to move a total of 6 Henchmen into the Shire Wood. Remember that the 2nd part of this Plot is revealing Merry Men and in the case of a Forest space, it will take 2 Henchmen to reveal 1 Merry Men. In other non-Forest spaces, revealing only requires 1 Henchman for 1 Merry Man.
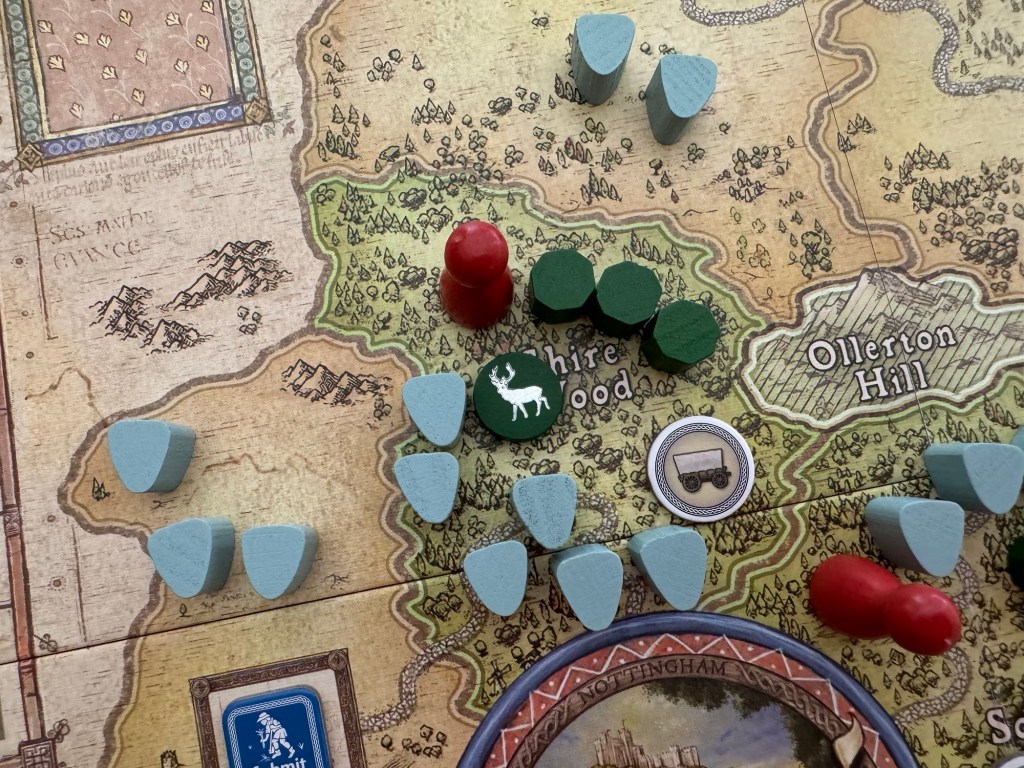
4 Henchmen move from adjacent Nottingham into the Shire Wood while an additional 2 Henchmen come in from adjacent Mansfield. This will give the Sheriff a total of 6 Henchmen in this space after the Plot is concluded.
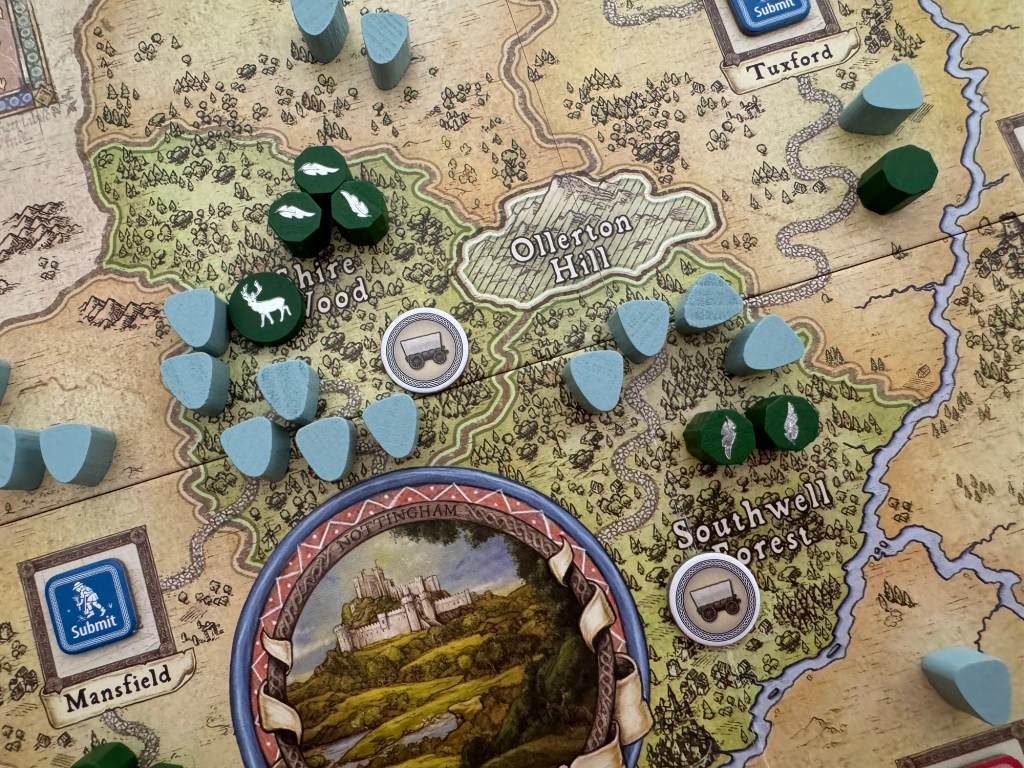
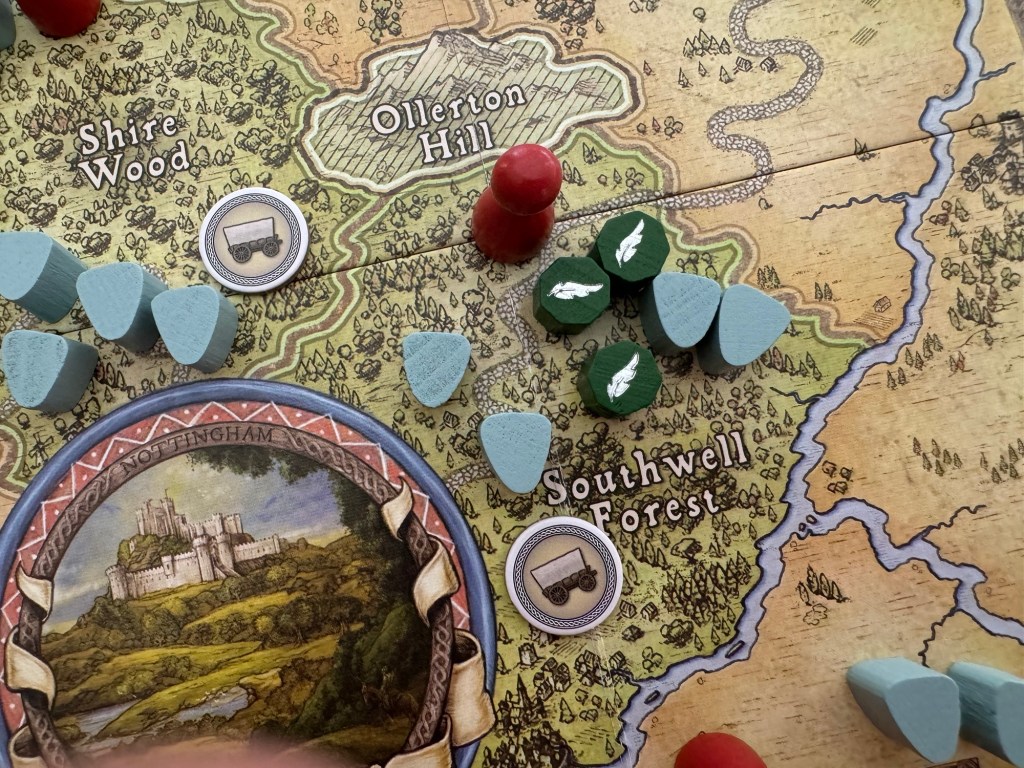
Meanwhile, in the other chosen space for the Patrol Plot Southwell Forest, the Sheriff is hoping to move in enough Henchmen to reveal both of the hidden Merry Men. This will require a total of 2 Henchmen to move in to join the already there 2 and they both come from adjacent Tuxford Parish.

With the required amount of Henchmen in each space, the Sheriff reveals all of the Merry Men in the Shire Wood and all of the Merry Men in Southwell Forest.

Now the Sheriff is set up nicely to perform a Capture Plot in the next turn. As we discussed in the previous post on the Sequence of Play, sometimes taking a Plot can set you up nicely for a future devastating action and you have to know how to play that aspect of the game to be effective.
Capture Plot
The Capture Plot allows the Sheriff to use Henchmen to remove revealed Merry Men to Prison but also to remove Camps to Available Forces. When the Merry Men are out in the open and have been revealed, the Sheriff will need to take fast action to follow-up on this with a Capture attempt. Simply allowing the Robin Hood player to hide their Merry Men will undo all of your hard work.
The process is pretty straight forward as the Sheriff may select up to 3 spaces with Henchmen and revealed Merry Men or Camps. The player will then simply remove 1 revealed enemy piece per Henchman piece there or if located in a Parish which is Revolting it will require 2 Henchmen to remove 1 Merry Men piece. When this happens, all of the Merry Men pieces removed, including Robin Hood if the Sheriff was that lucky, are relocated to the Prison Space. Robin Hood may only be removed after all other revealed Merry Men pieces in the same space are removed and Camps may only be removed once there are no Merry Men remaining in the same space. In the event that a Camp is removed, the Sheriff will shift the Royal Favour marker 1 step towards Order for each Camp removed to Available Forces and if Robin Hood is removed to Prison.
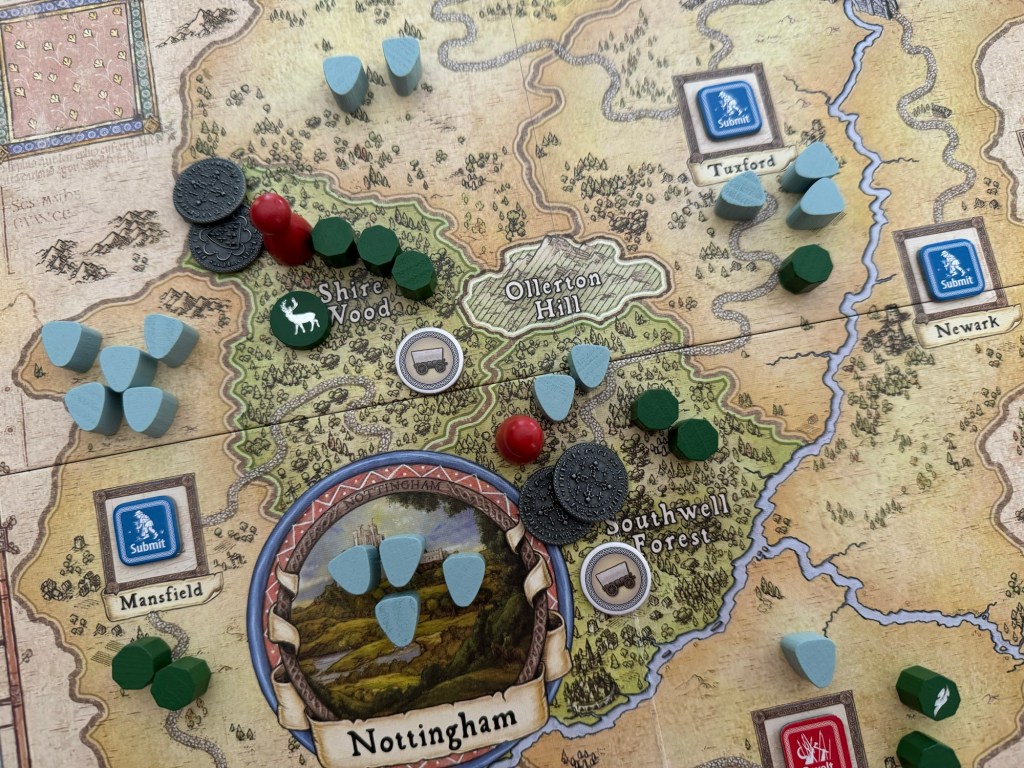
In the picture below, the Sheriff chooses 3 total spaces to take the Capture Plot in including the Shire Wood, Southwell Forest and Bingham. The Capture Plot doesn’t cost any Shillings to take, which is nice.
Remember that in Forest Spaces, revealing Merry Men during a Patrol Plot required 2 Henchmen to reveal just 1 Merry Man piece. But in the case of Capture, this not a requirement and you can remove 1 for 1 in any space. With 6 Henchmen in the Shire Wood, the Sheriff can Capture all 3 of the revealed Merry Men and also remove the Camp once the Merry Men are gone. This would feel pretty sweet and would truly throw a massive wrench into the schemes of the Robin Hood player.
Now you can see that the Shire Wood is free of those pesky Merry Men and the Carriage is now safe from being Robbed. At least for now!

Moving to Southwell Forest, we have 3 revealed Merry Men and there are 4 Henchmen so they can Capture all of the vagrants! These 3 Merry Men pieces are removed to the Prison Box and will be unavailable to the Robin Hood player until later.
Once again another cleared space is created for the Carriages to travel freely to Nottingham.

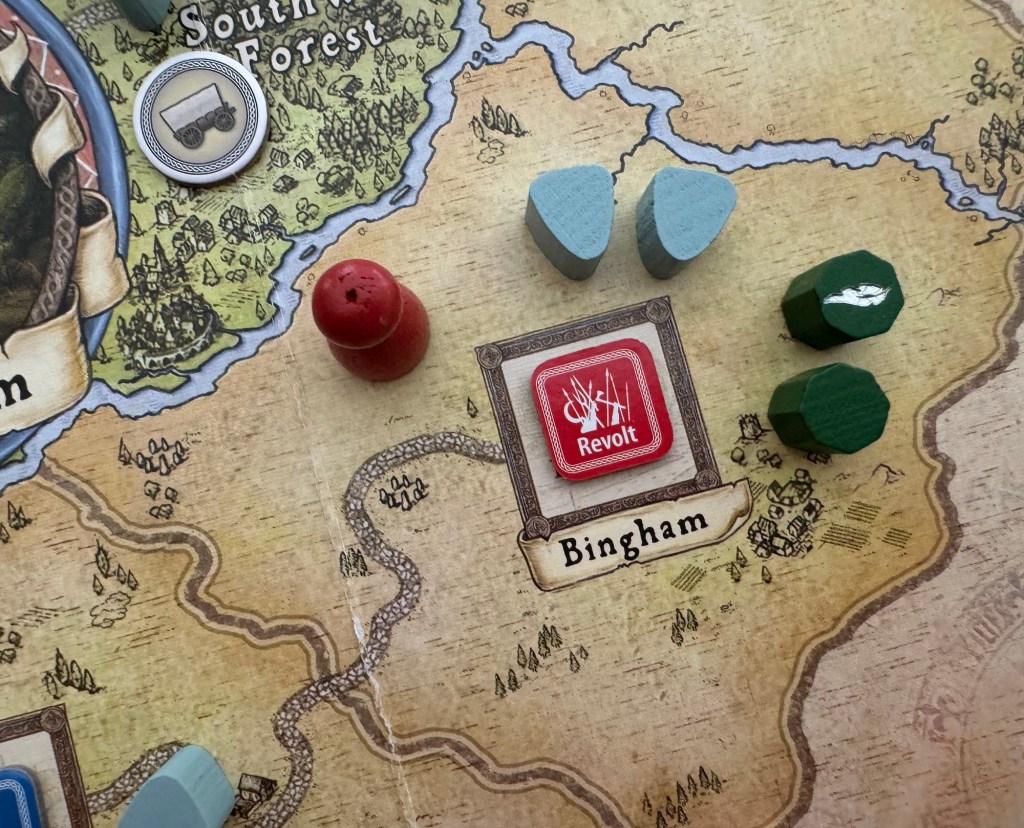
In the final space, we have a bit of a conundrum. The space is currently Revolting and there is just 1 revealed Merry Man piece. With 2 Henchmen though, the Revolting is not a problem as Merry Men can be removed 2 for 1 in such as space. Because the Sheriff has planned ahead, they have the required 2 Henchmen there and can Capture the one revealed Merry Man and cart him away to the Prison Box. The other important point here is that the space will now have more Henchmen than Merry Men and on a future Hire Plot can be changed to Submissive. I wanted to illustrate that point as the game requires a bit of planning ahead and thinkin about your future moves. Efficiency of movement and actions is very important in this one and you have to be on your toes to be successful!
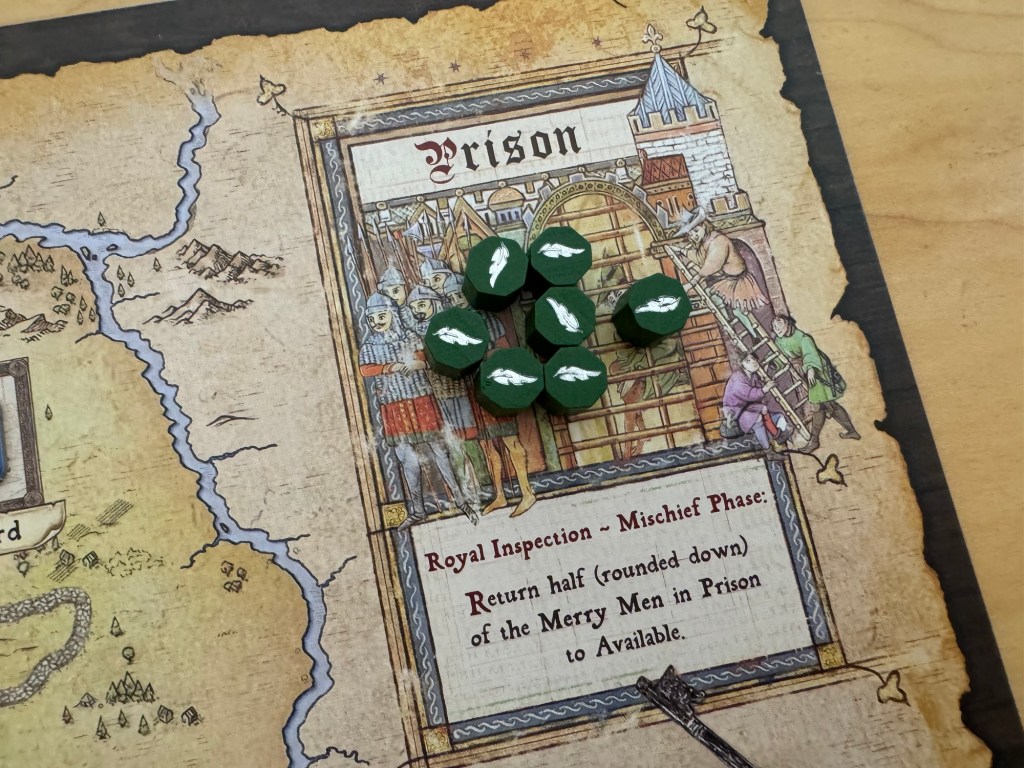
The Prison Box is now overflowing with Merry Men as there are a total of 7 languishing behind bars. Better here in the dank depths of the castle than out in the Parishes rabble rousing and inciting rioting and resistance to the iron hand of the Sheriff!
Finally, we get a look at the new circumstances in the areas surrounding Nottingham. What was previously a bit of a mess, has been cleaned up nicely and the threat of Robin Hood and his Merry Men has been quelled for the moment! But, all it will take is Robin to gain some new coin from robbing the carriages to then recruit additional Merry Men to take their places and establish Camps in the wilds of the forests.
Now that we have taken a detailed look at the various Plots available to the Sheriff, let’s get a good look into the accompanying Deeds.
Deeds
When a player selects the Plots & Deeds option during their turn on the Sequence of Play, they then may additionally perform a Deed after they have completed their chosen Plot in all selected spaces. Some Deeds have additional Shilling costs that must be paid before executing the Deed. It is important to remember that for any chosen Deed, each of the spaces on the board may only be targeted once by the same Deed during one turn but one space could be targeted by both a Plot and a Deed in the same turn.
The Sheriff player may choose from the Ride, Confiscate, and Disperse Deeds. All Deeds may accompany any Plot.
Ride Deed
The Ride Deed allows the Sheriff to deploy their Henchmen who are located on the board across the Parishes of Nottinghamshire. This is a very important Deed as it extends the distance that Henchmen can move Remember, that a Patrol Plot only allows moves from a space to an adjacent space.
The Ride Deed is a way to get accumulated Henchmen from the Nottingham space out to spaces that are being threatened. The Deed allows the movement of up to 4 Henchmen from Nottingham to any one Parish. Remember, that the destination spade does not need to be adjacent to Nottingham. This Deed also costs no Shillings.
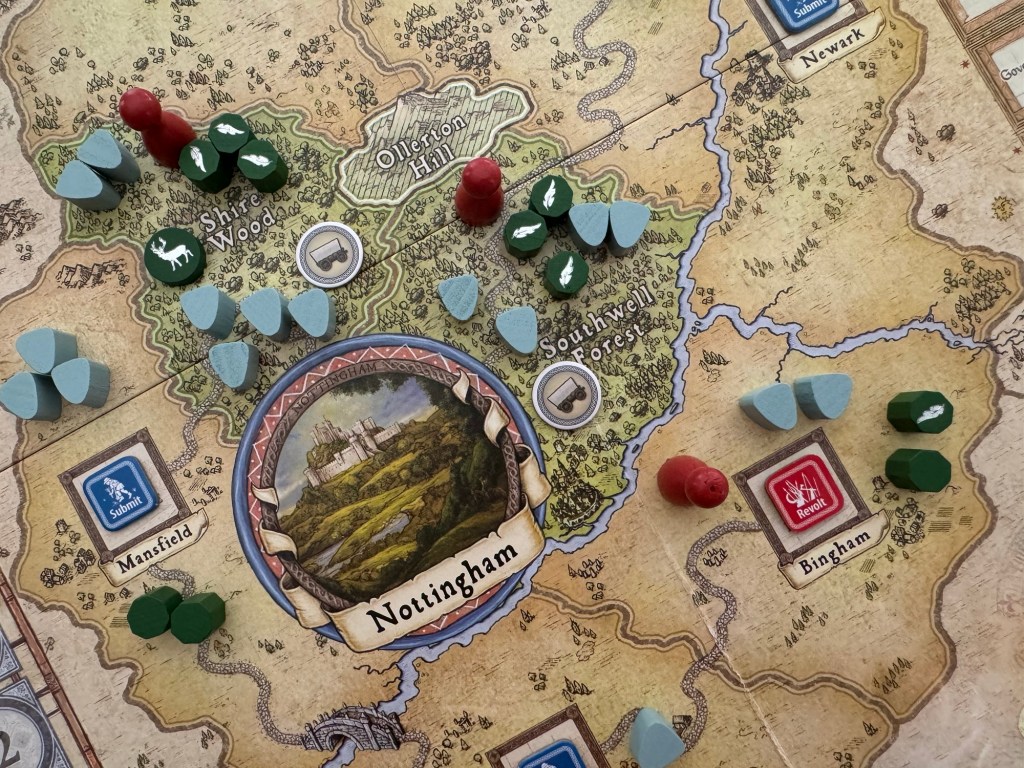
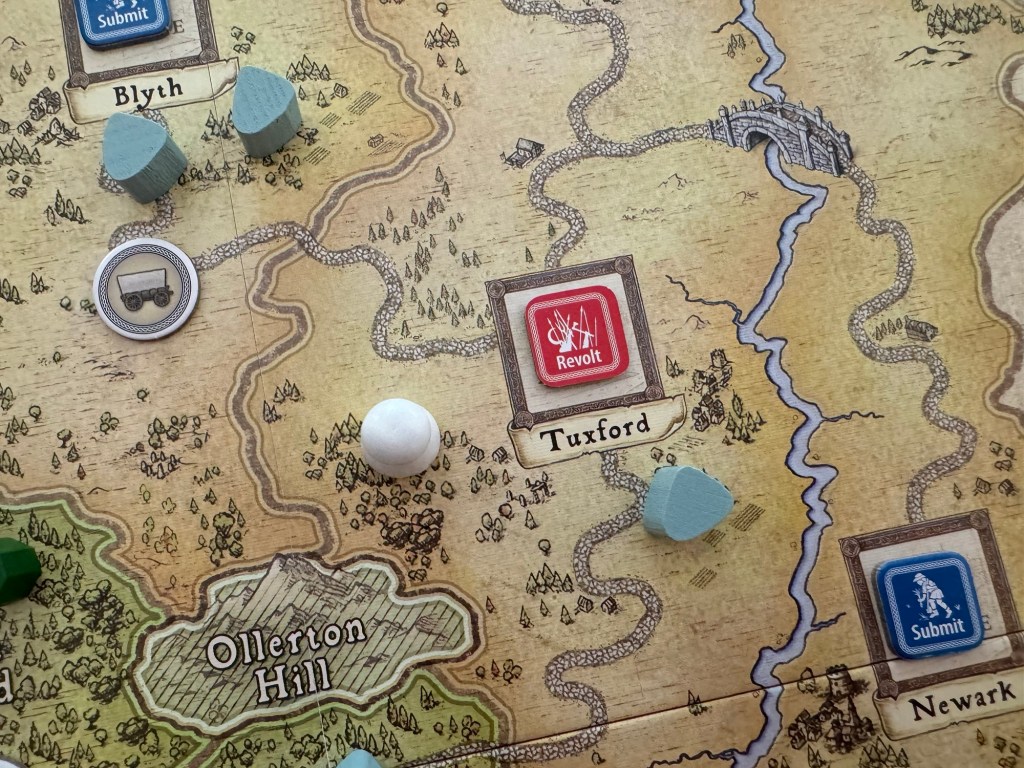
In the example below, the Merry Men are getting out of control in the Northern Parishes of Retford, Blyth and Tuxford and have caused all of these Parishes to Revolt. They have also built a nice Camp in Retford and it is a bit of a juicy target as it only has 1 Merry Men piece with it.
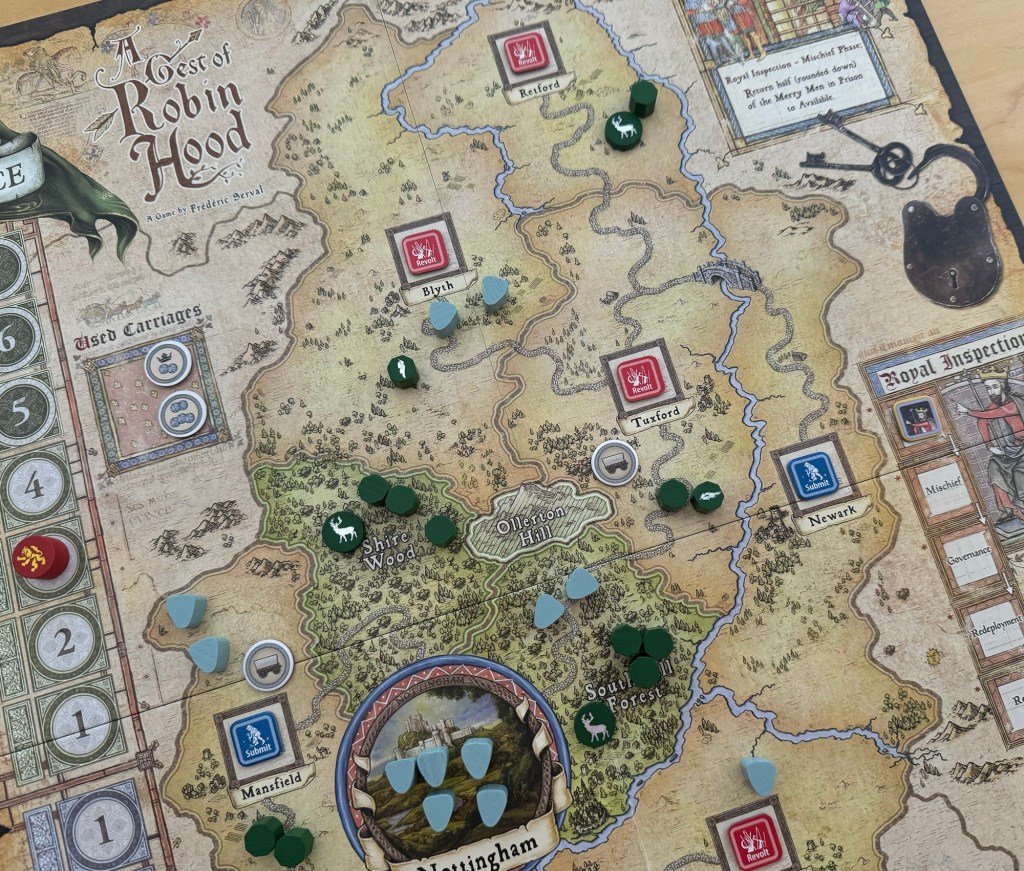
The Ride Deed can be used to move up to 4 of the 5 Henchmen in Nottingham to any single space on the board. Because Retford is so far away, a total of 3 spaces from Nottingham, that will be the target of our Ride and we place out a white token to denote where we are going.
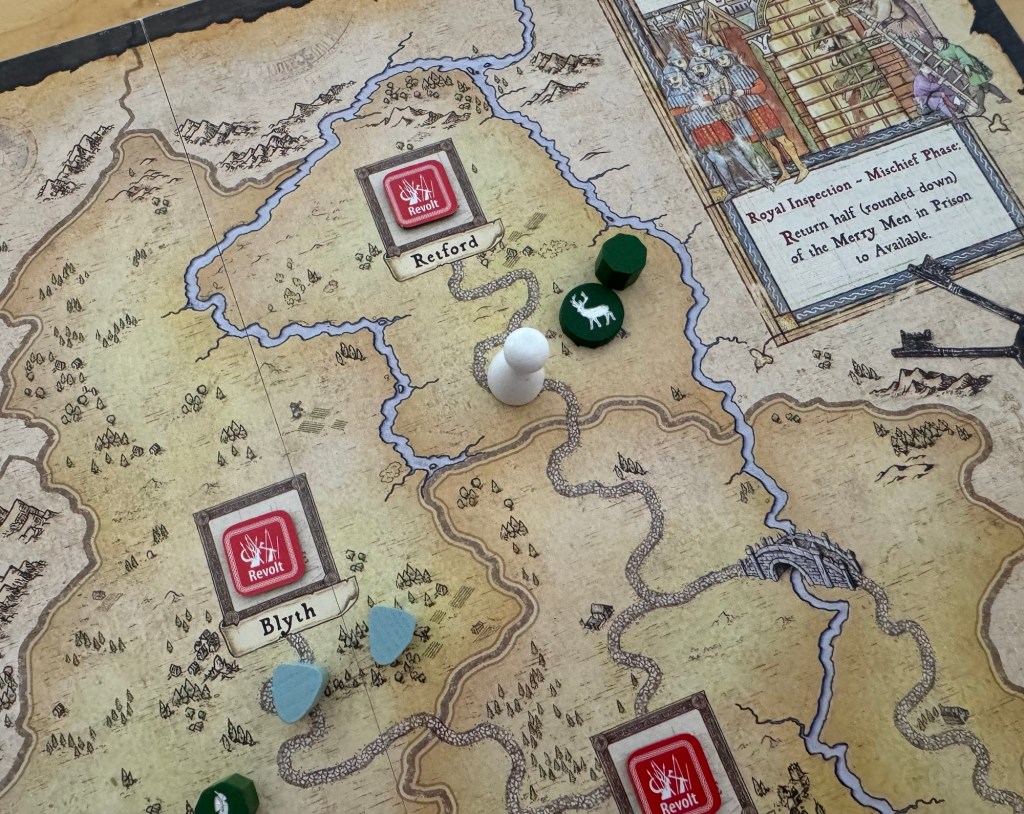
The player then picks up to 4 of the 5 Henchmen in Nottingham and moves 4 of them across the board and places them directly into the Retford space. This Deed will not however reveal the hidden Merry Men piece in Retford as would have been the case with a Patrol Plot. However, it gets the Sheriff in a position to take a future Patrol Plot to uncover them and then a subsequent Capture Plot in a later turn.

Confiscate Deed
The Confiscate Deed is a very important one for the Sheriff player and it allows the Sheriff to steal goods from Submissive Parishes by placing Carriages out. It also brings the added benefit of increasing the Royal Favour marker towards Order.
The process simply is for the Sheriff to choose 2 of their Available Carriage markers and then place them in up to 2 Submissive Parishes where any Henchmen are located, then setting each Parish where a Carriage is placed to Revolting. This action really sets off the locals as you are stealing from the poor to give to the rich! The Sheriff player may choose which type of Carriage to place in each Parish and will place them face-down to keep their choice hidden from the Robin Hood player.
There are 3 different types of Carriages:
Tallage Carriages are worth 5 Shillings to the Sheriff if they reach Nottingham, and then shift Royal Favour one step towards Order. If a Tallage Carriage is successfully Robbed, it is worth 5 Shillings to Robin Hood. According to the designer notes, Tallage was a form of arbitrary taxation on land imposed by Norman and Plantagenet kings in England and France. In England it was very unpopular and was abolished in the 14th century.
Tribute Carriages are worth 2 Shillings to the Sheriff if they reach Nottingham, and then shift Royal Favour two steps towards Order. If a Tribute Carriage is successfully Robbed, it is worth 2 Shillings to Robin Hood, then shift one step towards Justice.
Trap Carriages are worth 2 Shillings to the Sheriff if they reach Nottingham, and then shift Royal Favour one step towards Order. They also have an additional Defense Value of 2 when Robbed, and automatically Capture all participating Merry Men if the Rob fails. If a Trap Carriage is successfully Robbed, it is worth 2 Shillings to Robin Hood.
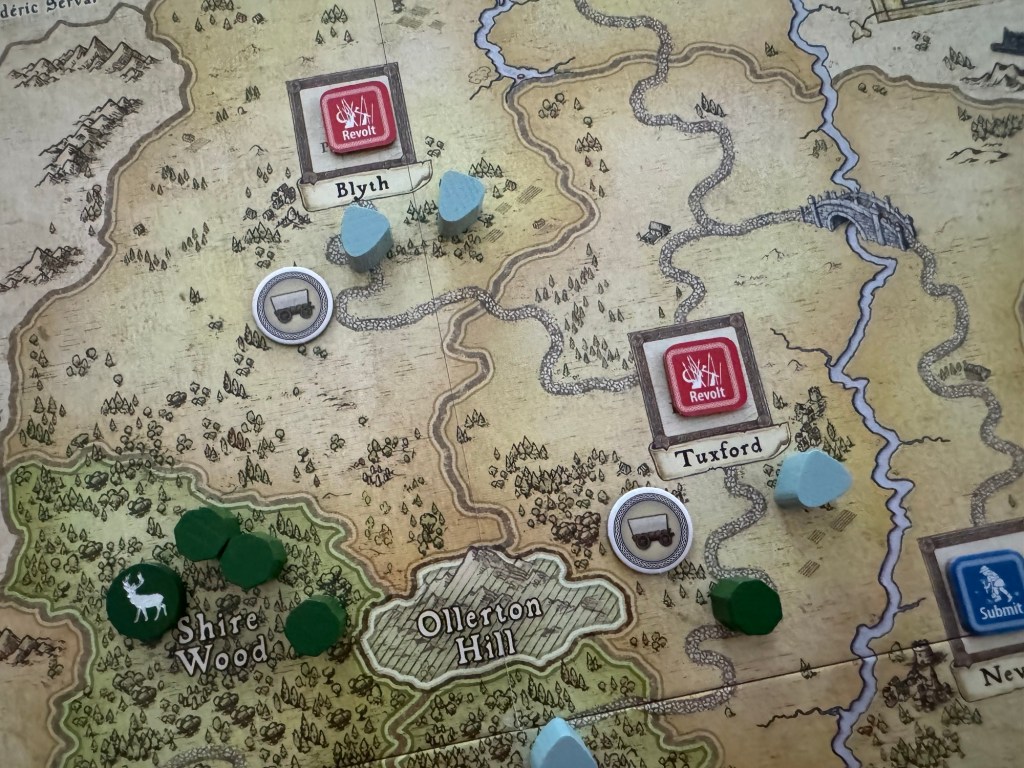
In this example, the Sheriff chooses a Trap Carriage to place into Tuxford and a Tribute Carriage to place into Blyth. After placing each of the Carriages, the Province is then changed from Submissive to Revolting as a condition of the placement.
The real downside to this Deed is that the Sheriff loses control over the Parishes for a period of time. Really until he can then get back there and perform a Hire Plot. Don’t worry too much about this aspect and the cost of doing this Deed. It is vitally important to the Sheriff and his attempt to win the game.
One other aspect about these Carriages. They are activated by icons found on the Event Cards. At the start of each new turn, the players will draw a card. They first look for the Carriage Movement Icons on the card and move Carriages according to their number. This is the only way that Carriages can move and it is random. Each time a Carriage moves from one space to an adjacent space, the Sheriff has the option of dragging along 1 Henchmen to the next space. This is for the protection of the Carriage and is important to keep Henchmen with the Carriages as they move to foil the Rob attempts by the Robin Hood player.
Disperse Deed
Our final Deed to investigate is the Disperse Deed. Disperse allows the Sheriff to drive Merry Men out of a Parish, even if they are hidden, and can potentially lead to the removal of any Camp found there. The Sheriff has to pay 3 Shillings to remove up to 2 pieces from 1 Parish that contains any Henchmen. The Merry Men may be removed from the space even if they are hidden but Camps may only be removed once no Merry Men remain, and all of these removed pieces go to Available Forces rather than Prison. In the event that a Camp is removed, the player can shift Royal Favour 1 step towards Order. After the actions of the Disperse Deed, the Parish will be set to Revolting.
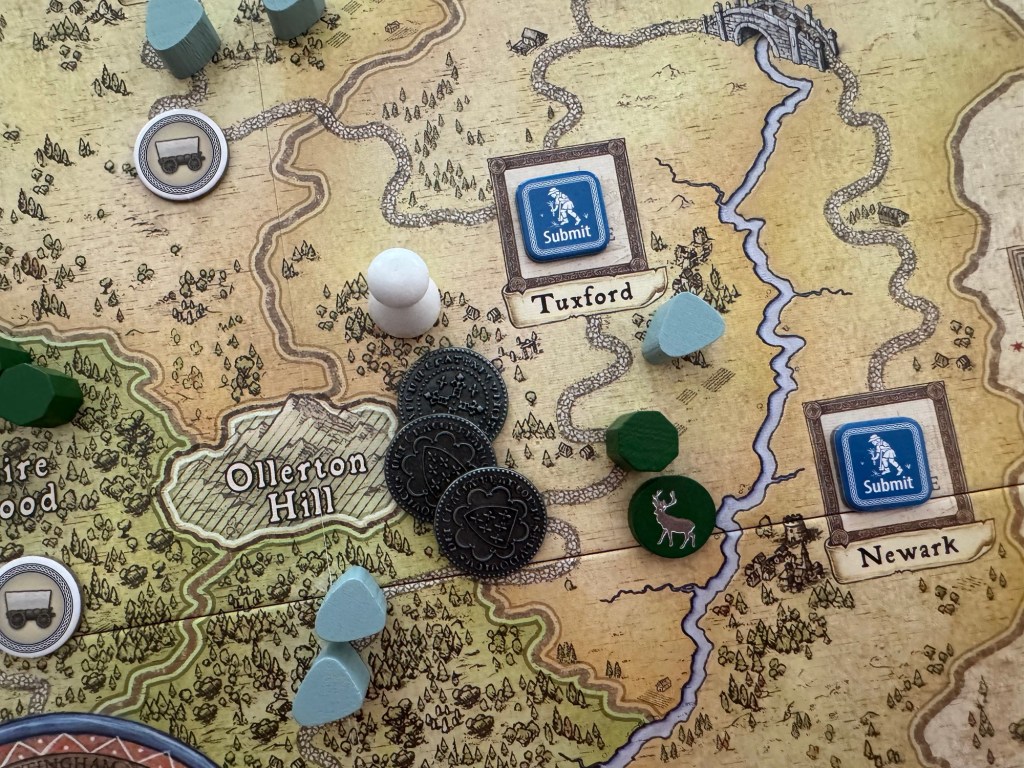
This is a very expensive Deed at the cost of 3 Shillings. But it is nice to perform occasionally and can be used to great effect to protect Carriages before they can be Robbed or to soften up areas that are rife for Submission. In this example, the Sheriff chooses to Disperse in Tuxford where there is a single Merry Man and a Camp there. One of the reasons this is being done is to get rid of the Camp, which will give a Royal Favour movement in the Sheriff’s favor while also taking out a potential ambush on a key Carriage.
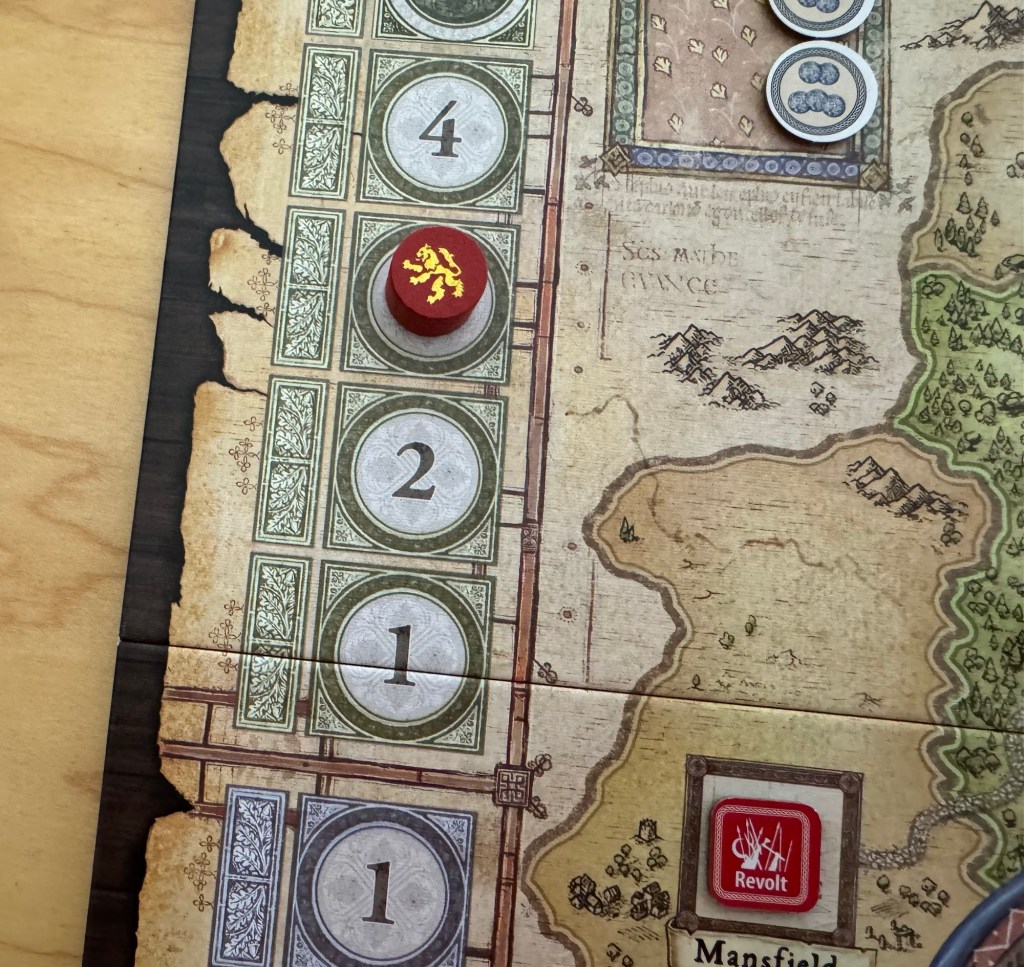
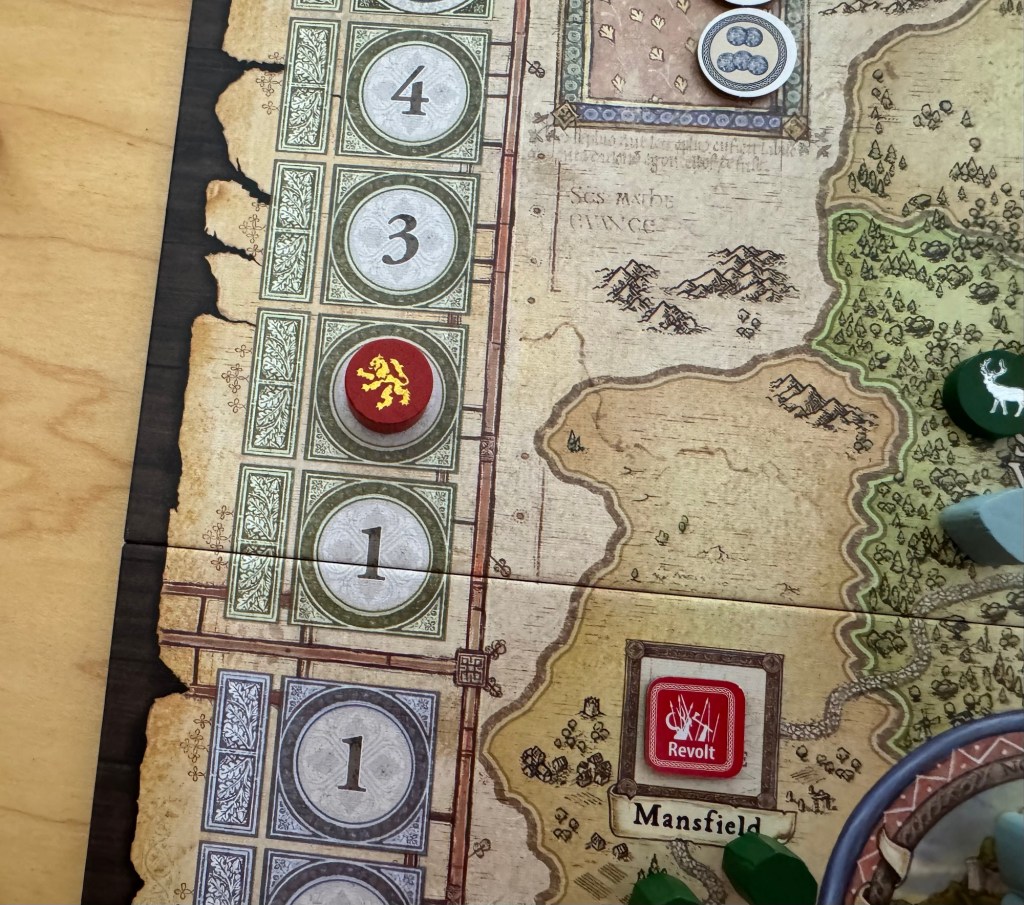
The space has a Henchmen and after payment is made the player simply removes the single Merry Man and the Camp to the Robin Hood player’s Available Forces.
After removing the Camp, the Royal Favour Track is moved 1 step closer to Order. It currently rests on the 3 space and will end up at the 2 space.
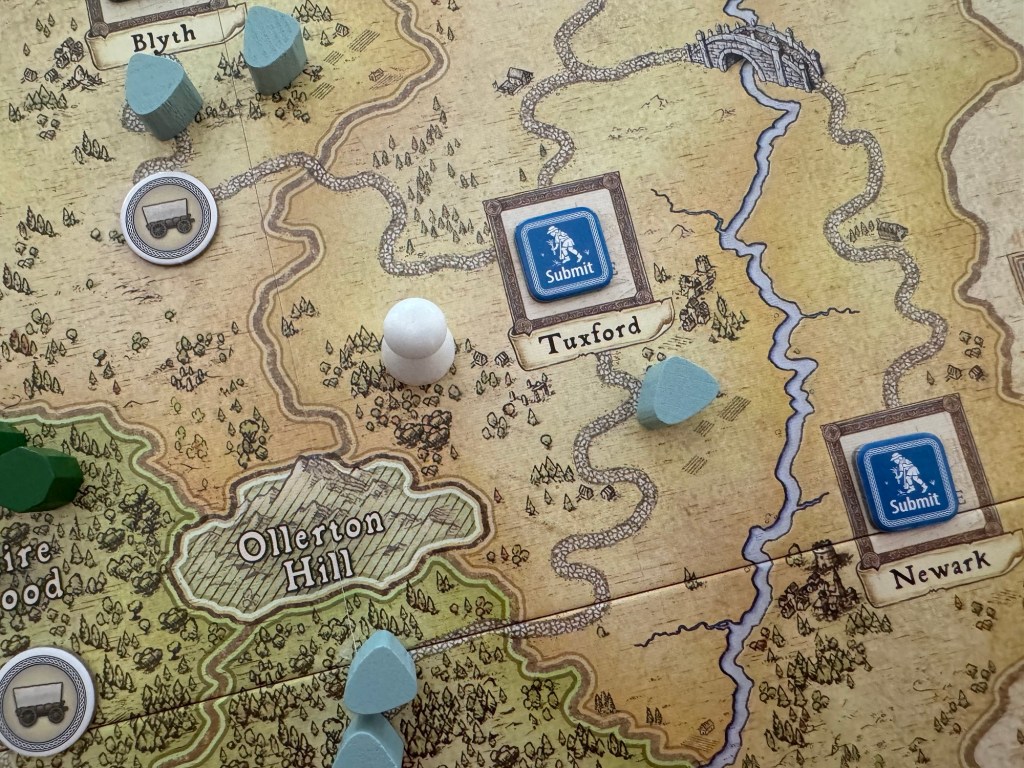
The final step in the execution of the Deed is to set the Parish to Revolting by flipping the Submit marker over to its red side.
I hope that you have enjoyed learning about the utility of the Sheriff’s Plots & Deeds and how they are executed. The game is pretty simple really but there is a systematic process to properly carrying out these actions.
In Action Point 4, we will compare and contrast the menu of Plots & Deeds for Robin Hood and his Merry Men.
If you are interested, you can read our interview with designer Fred Serval at the following link: https://theplayersaid.com/2022/11/21/interview-with-fred-serval-designer-of-a-gest-of-robin-hood-insurrection-in-nottinghamshire-from-gmt-games/
-Grant

Hi Grant, in the hire plot at Mansfield you do not get to flip the parish to submissive and add two henchmen. The rules are quite clear on this at 3.3.1 Procedure.
LikeLiked by 1 person
I have learned that since but would disagree that the rules are quite clear. I will make the change. Thank you.
LikeLike
When you discuss Plots and Deeds further down your explanation, you mention the rule that you can only do each Plot once in each space. Using the Hire Plot to both place henchmen and flip the parish to submissive violates this rule.
But minor mistakes aside, these are good explanations of the game and it’s difficult to get everything right straight off.
LikeLiked by 1 person
Thanks for pointing that out. These are not easy to write and they take a lot of time and sometimes I am going to make a mistake, as we all do with games, from time to time.
LikeLike