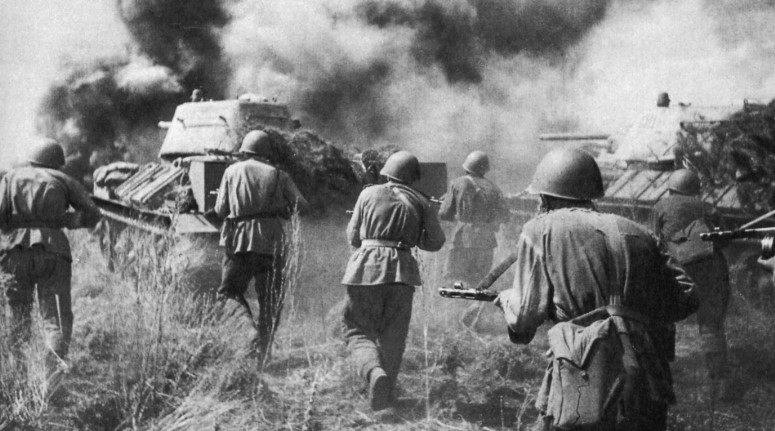
We have played a lot of wargames over the past 10 years but some of the classics have eluded us thus far. That is why I am a bit hesitant to put this post out there as it is really just from a small sampling of the many East Front games out there. But, here goes. The East Front games are always focused on things such as weather, movement, supply, and of course combat as the combatants fought it out over the fate of World War II over the short period of a few key months in 1941-1943. Typically, these games all tell the same outcome, that of the Germans punching the Soviets in the mouth for the first few months of June, July and August 1941 until they got their feet underneath them and then punch back as the weather worsened and the Soviet people mobilized to defeat the invaders. Then what follows are major Soviet victories creating pockets of trapped German armies that are struggling to break out and just survive. The outcome of these East Front games are not necessarily pre-ordained, but unless something different happens, their outcome rarely if ever changes.
With that being said, I actually really do enjoy playing East Front games. There is something a bit romantic in the way they play out with large stacks, long contiguous lines and dealing with tough terrain and even tougher weather. In this entry in the Best 3 Games with… Series, I want to share the best games I have played on this pivotal historical campaign in World War II that is the East Front!
3. A Victory Awaits: Operation Barbarossa 1941 from Multi-Man Publishing
Sometimes good, old fashioned hex and counter wargames are the best! You line up your counters in long lines and attack, pushing the enemy back, having your own forces fall back after an attack, waiting for your opportunity to pounce. And these kind of games on the East Front are always interesting for various reasons. A few years ago, we purchased a hot off the presses copy of A Victory Awaits: Operation Barbarossa 1941 from Multi-Man Publishing. The game uses a modified version of the A Victory Lost Series game system. designed by Tetsuya Nakamura and the system is highly playable and interesting. The game tells the story of Operation Barbarossa from the period covering June 22nd to mid-September, 1941. The system was very approachable and the rules were well written so we were able to get up and running very quickly. The system uses a chit-pull to activate different formations and plays very quickly with some hot and heavy action. One of the best parts of the game is that players can decide to play either the full campaign game, which contains 3 beautiful maps, or can choose to focus on any of the 3 fronts involved, including Army Group North and their push on Leningrad, Army Group Center focused on Smolensk or Army Group South and its focus on Ukraine. While we didn’t play the game this way, players can also play multiplayer with different players controlling forces on the different fronts and having to communicate and coordinate their attacks to work together.
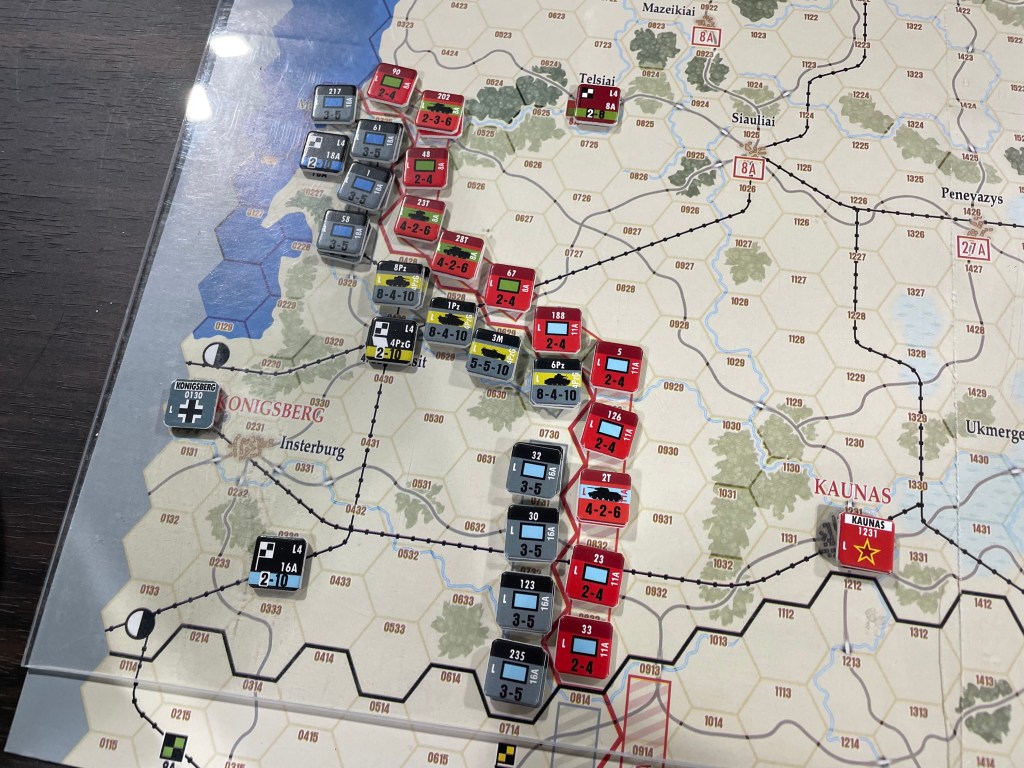
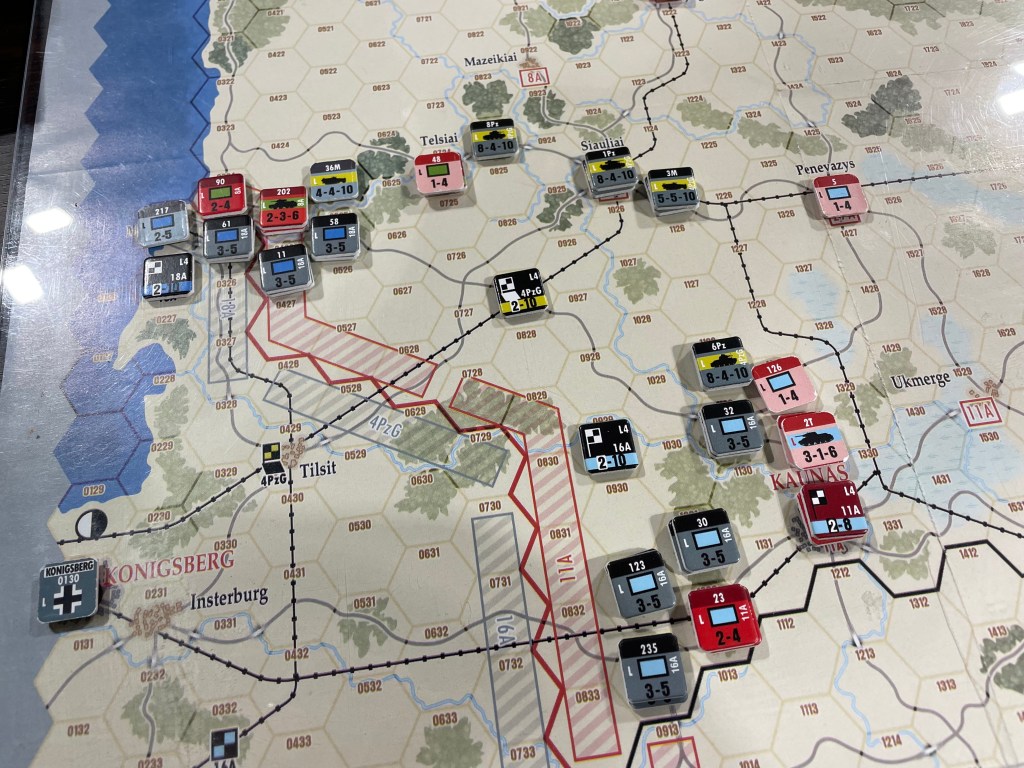
The best part of the design and the situation is the logistics and supply. As you can see from the pictures below, the landscape is crisscrossed by rail lines that connect to major cities and towns in the Russian countryside. These rail lines serve two purposes. First, they can be used to strategically move reinforcements from the rear up to the front where the action is. They have to be kept open and must also be protected as having these lines blocked by an interloping Soviet counter can cause delays in the German push on Leningrad and time is precious as you only have 10 turns to get to your goal in the first scenario.
Second and most importantly is the supply aspect of the rail lines. Supply is always tied back to a rail line and you have to keep those connections protected or risk losing your troops as they sit and suffer attrition each turn while not in supply. So this double edged sword of having to push hard and take risks to get your troops moving ahead for the Germans is complicated by the fact that the Russians also have reinforcements coming in from the rear and can utilize the rail line similarly to move troops ahead to the front. You have to take your time in looking at the situation and making decisions about how to use your security forces to stop Soviet troops before they can threaten your rail lines and supply sources. This is one aspect about East Front games that I do really enjoy and A Victory Awaits does this extremely well while keeping the process simple and understandable.
The chit pull is also well done as some of the formations have multiple chits and can be activated several times per turn. This is especially important for the Germans who have to use their best Panzer units to punch a hole in the Soviet defensive lines and put pressure on them to give up ground or be surrounded and cut off. Overall, this is a really solid game. Well produced, with good and understandable rules and mechanics that most of us wargamers know by heart. We had a great time playing it and also got into some of the theme as well by listening to Shastokovich’s Symphony #9 as we played.
Here is a link to our video review:
Just a really solid and playable East Front wargame, A Victory Awaits: Operation Barbarossa 1941 has really created in me an interest in this series and designer and we have also played a few of his other games including Traces of War.
2. Demyansk Shield: The Frozen Fortress, February-May 1942 from Legion Wargames
Demyansk Shield: The Frozen Fortress is a hex and counter wargame designed by one of the best in the business Vance von Borries that focuses on the fighting between the Germans and Soviets in the Valday Hills area as Army Group North was pushing toward Leningrad. Here, fighting began to settle down in early fall 1941 and by January 1942 had become static. Then the Soviets attacked and by late January, the Soviet 11th Army had broken the German front in several sectors and threatened to surround perhaps 80,000 Germans around Demyansk. When 3rd Shock Army broke the southern wing of the German 16th Army, Soviet advances threatened now to destroy 16th Army and open the flank to Leningrad. It is at this stage that game-play begins.

One of things that I really liked about this game was the makeup of the Combat Results Table. The CRT is one of the most interesting and unique that I have seen. It has some odds that are very uncommon but that make for a very interesting game. In the picture above, you can see that the different odds center around the range from 1-1 to 3-1. These odds are the 3-2 and 5-2. I have seen the 3-2 before but I cannot remember once ever seeing the 5-2 odds in a wargame. I would like to ask if there is anyone out there that can think of a game? Anyone?
Well, why is this CRT so unique in my opinion? It has to do with the odds for mainly the Attacker. If you look at the 1-1 column for example, you will notice that there are 5 results, out of a possible 6, that effect the Attacker. These results include A* (Special Loss), A2* (2 Unit step reductions and a Special Loss), A1s* (1 Unit step reduction and a Soviet only Special Loss), AR (Retreat) and A1 (1 Unit step reduction). That means at a 1-1 odds, the Attacker frankly shouldn’t attack. The asterisks are also a pretty interesting part of the game. The asterisk simply means that the player must take a Special Loss, which is defined as affecting all those units of one group that are participating in the combat. Each player has participating air and artillery units that can join in on combat. The air units are represented by such things as Stukas, Heinkels, Ju88’s and Yaks and can be used much more flexibly as they don’t have a range and are not tied to a unit represented in a hex. The artillery units are deployed on the board and have a range value that only allows them to support attacks within that range. These units are used to effectuate a column shift in either direction based upon who has the support superiority in a combat. More often than not, the Germans have the edge in this respect but when that Special Loss result comes up, it takes away their advantage and allows the Soviets to gain the column shift.
In the 3-2 and 5-2 columns, the discrepancy shifts to the Defender. As is expected, as the odds go higher than 3-1, the Attacker has the advantage, which is like most other wargames I have played. I would like to study this CRT more and gain greater insight into its main areas of advantage but after only one play, I just haven’t had the chance to see more of each range of results. Most combat in Demyansk Shield is based on infantry action. Infantry actions take a while to develop and, fortunately, the time scale here allows sufficient time for the battle to come to a resolution. Differential CRTs are appropriate for more tactical time frames. Operational infantry action is pushed along by having the odds in your favor. So, the combination of needed odds and sufficient time allows an odds-based CRT.

One of the other things that stood out to me were the Specialized Units. Specialized Units can raise player interest and raise the stakes in proper game-play to get the most out of these units. To this end, the designer Vance von Borries included several Specialized Units from the battle that I think are pretty neat inclusions. I have not yet figured out how to best utilize each type of unit but they are definitely interesting and fun to try out. The Specialized Units included in the game are Ski Infantry and Rocket Artillery.
Ski infantry have a larger movement allowance of 8; after all, they can just zip through the snow. They are not overly powered units as compared to most of the other Soviet Infantry units who have a 4-4-6 or 4-3-7, but they serve a purpose nonetheless. They might retreat before defending in combat (unless the weather that turn is Mud or Dry which doesn’t allow this retreat), which is really a neat mechanic that can be used to slow the advance of the Germans on flanks until units can be moved in to reinforce them, and this means they can also screen some sectors and simultaneously threaten an unguarded enemy rear. I found that I would simply play with the Germans, retreating when possible, and then once other units had joined the Ski Infantry, I would put their 3 attack power to use to stage effective counter attacks. They are not great at defending, being assigned only a 1 defense factor, but their mobility makes up for that.
The Katyusha multiple rocket launcher is a type of rocket artillery first built and fielded by the Soviet Union in World War II. Multiple rocket launchers such as these deliver explosives to a target area more quickly than conventional artillery, but with lower accuracy and requiring a longer time to reload. They are fragile compared to artillery guns, but are inexpensive, easy to produce, and usable on any chassis. In Demyansk Shield, the Katyusha units have a line of 3-1-6, so they are tailor made as mobile artillery support. They have a 2 range and can be lined up behind units assaulting German strongpoints to provide their 3 attack factor to the combat. Rocket artillery automatically turn to their Fired side once it is used and will be unavailable until the next turn. This follows thematically the fact that they were difficult to reload.
Here is a link to our video review:
We really enjoyed our plays of Demyansk Shield and were really impressed with the varied specialized units, the combat system, including the CRT, and the overall production of the game. Another hit from Legion Wargames and Vance von Borries.

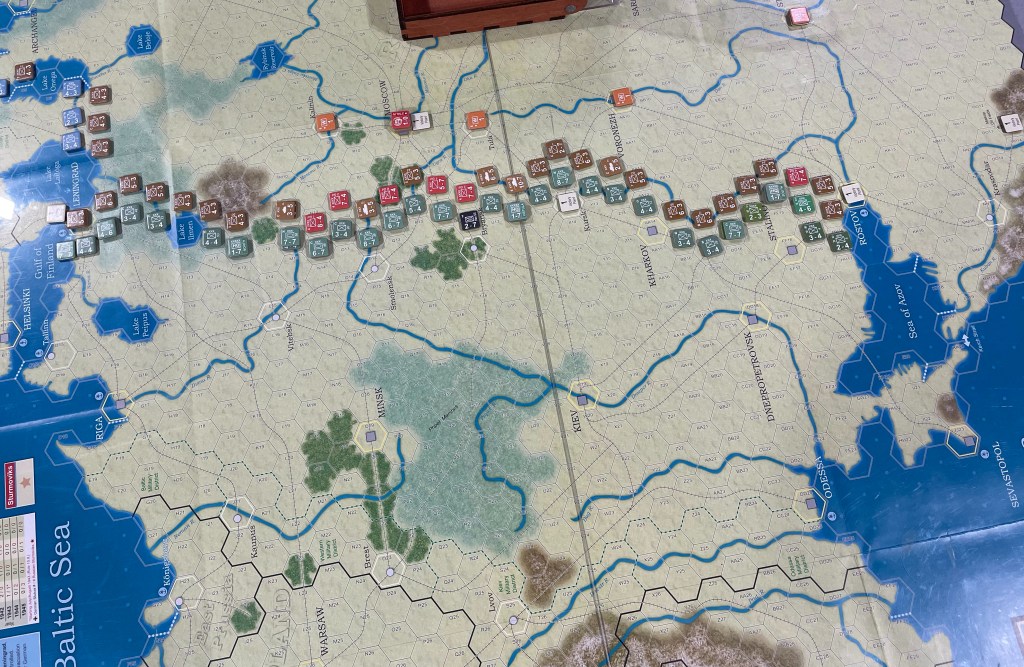
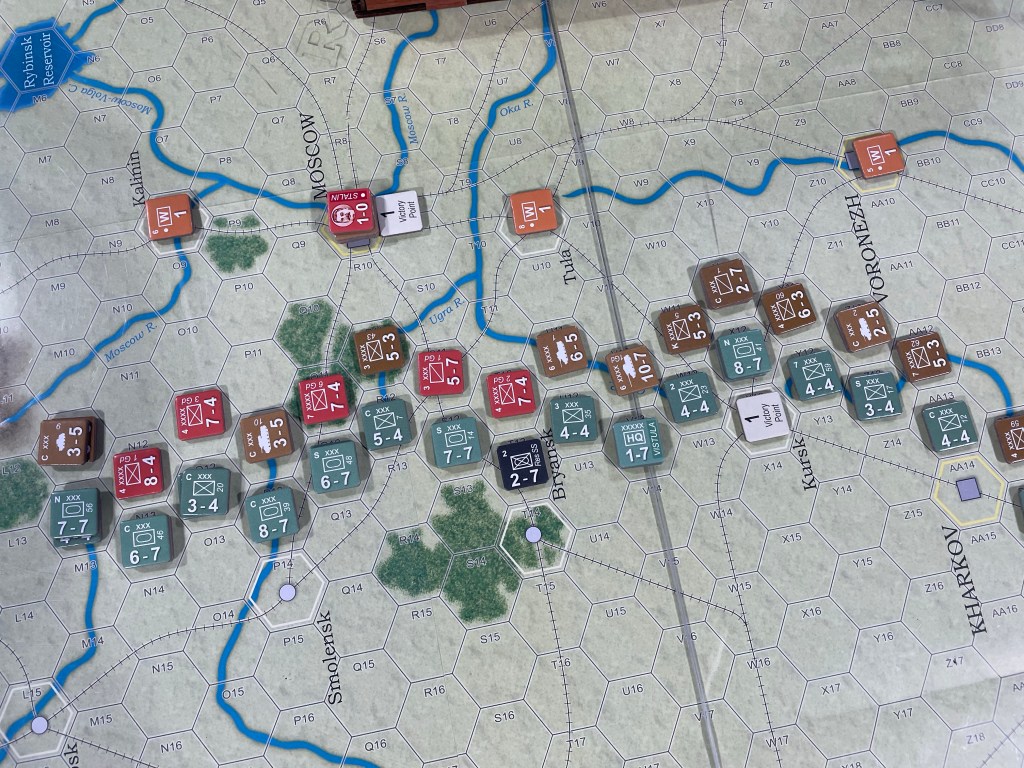
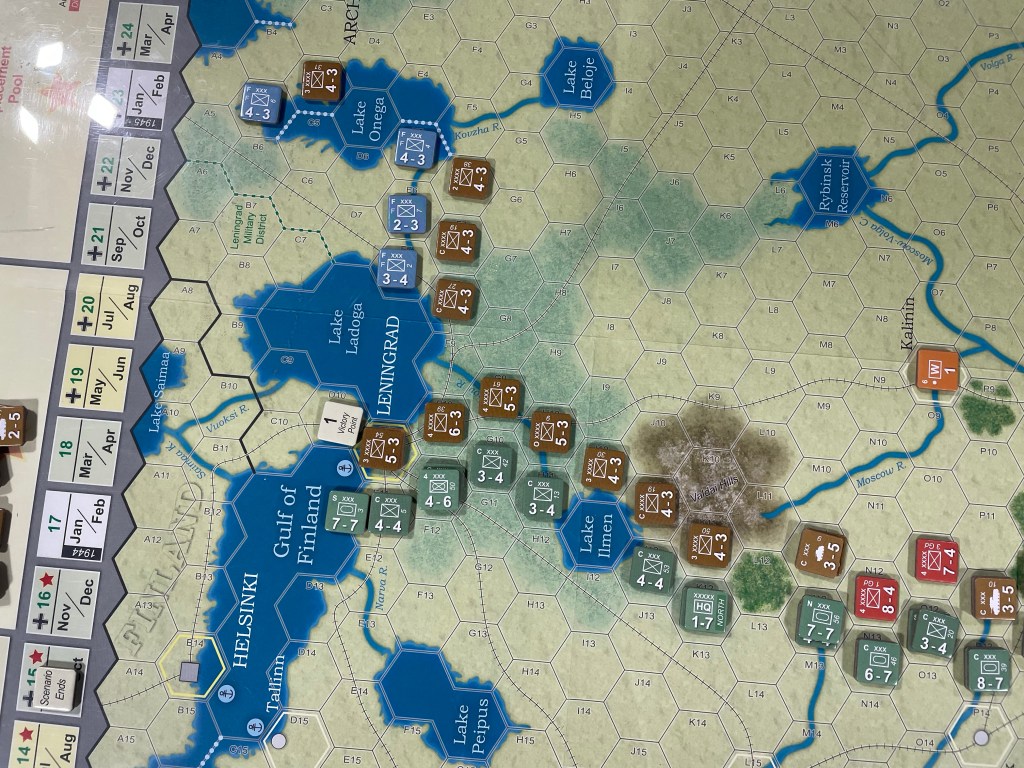
1. The Russian Campaign Deluxe 5th Edition from GMT Games
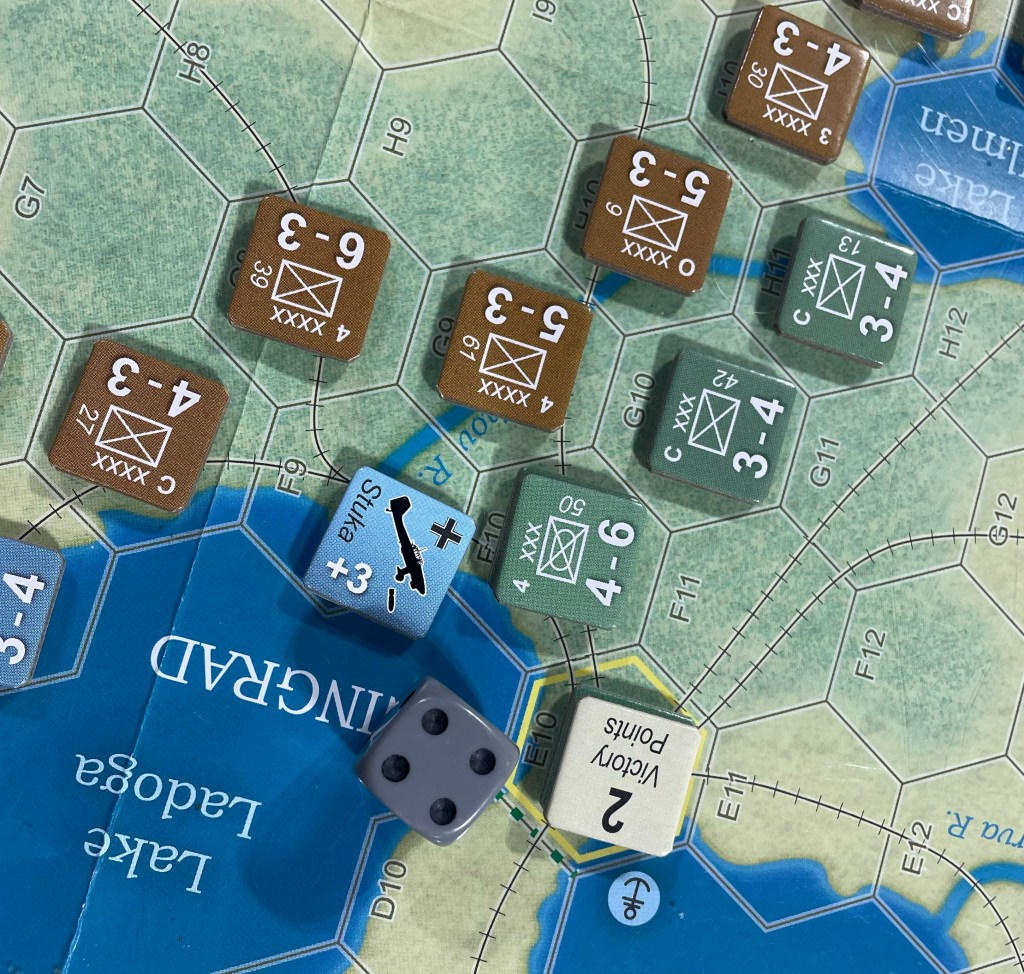
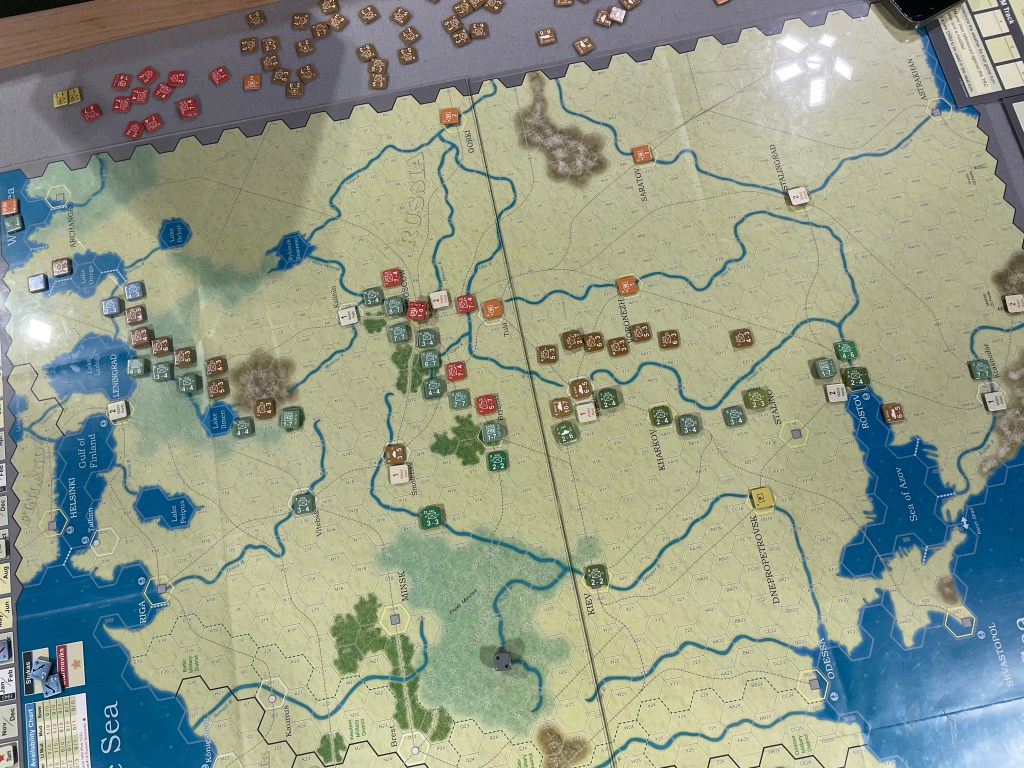
We waited and waited on our chance to play this classis and when the Deluxe 5th Edition came out in 2023, after many years of waiting I might add, we finally were able to get it to the table and immediately saw why so many were fond of the game and its systems. The Russian Campaign Deluxe 5th Edition is true to its name as it represents the entirety of the East Front of World War II stretching from Leningrad and Finland in the north all the way to the Caucasus Oil Fields, Rostov and Stalingrad in the south. I have said this before, but there is something a bit romantic about East Front games. Long lines of contiguous counters. The German blitzkrieg pushing the Soviets back for the first dozen turns. The Soviets gaining their strength, bringing up bigger replacement units and pushing back. A continuous bloody wave of motion and combat and attrition. Bad terrain, bad weather and bad luck all combining to spoil the best laid plans of commanders. It is all here. The entire East Front in all its glory and beauty and I think that this is one of the main draws of the game and the genre. Can my decisions lead to better advances? Can I do more than historical? Can the Germans break the red wall of Soviet units and capture Moscow to knock them out of the war? All great questions that can be answered in this fairly simple and standard wargame.
One of the things that I really liked from the get go was the fact that units that start a turn in an enemy Zone of Control must attack that turn. This doesn’t mean that each unit has to attack the unit’s Zone of Control they are in but must be a part of an attack. So in typical East Front wargame fashion players will be stacking different units in adjacent hexes to make more powerful attacks against the enemy. It is important that you remember this rule because it is key to the design and creates a definitive experience with this moving front that replicates what was experienced in the war in 1941 and 1942. If you are up front and in contact with the enemy, you will have to fight or move to the back.
The other great thing about the way the game starts is that the Finnish front is more key than I have seen in other wargames on the subject. What I mean by “more key” is that if the Germans don’t at least try to put up a simple defense here with the few Finnish units available, the game can go very wrong if the Soviets capture Helsinki and the Germans will find themselves mired in the meat grinder that is Leningrad and the slow moving marshes located outside of the city proper. This area is key to the German effort and must be neutralized to give a realistic chance at taking Moscow.
When I play wargames like this, meaning a true blue dyed in the wool hex and counter wargame, I feel the love and affection for this genre swell and grow in my whole mind! Just awesome simplicity that creates a very tenses and back and forth experience. I have truly grown to love East Front wargames and I am glad that I was finally able to get to The Russian Campaign.
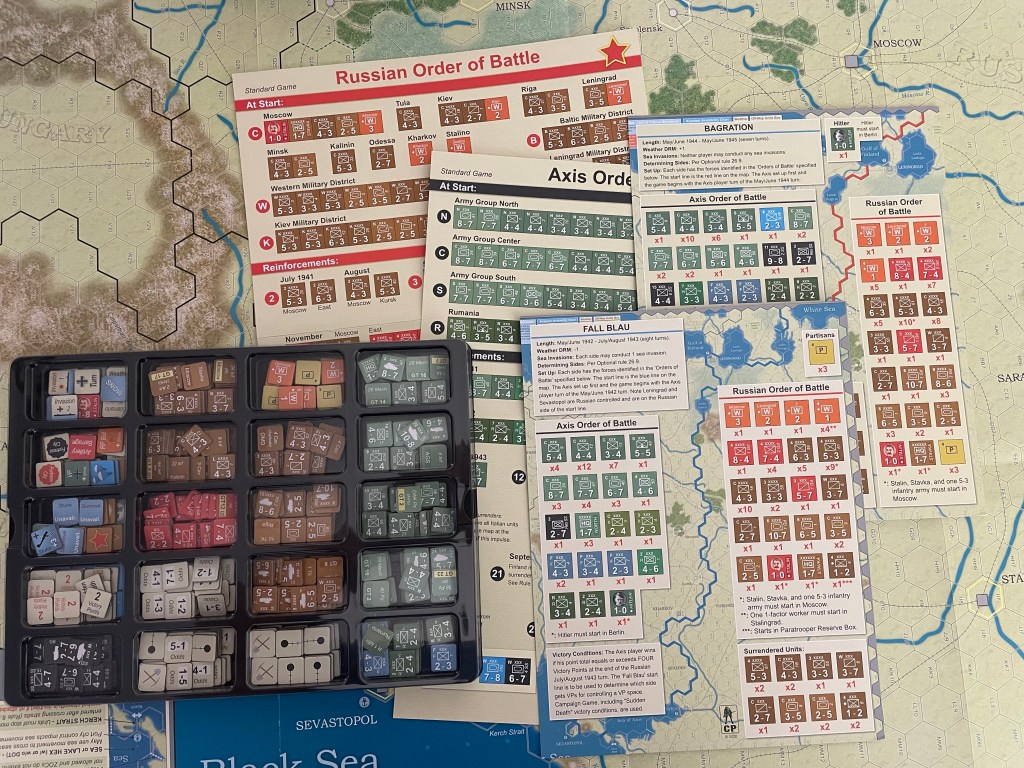
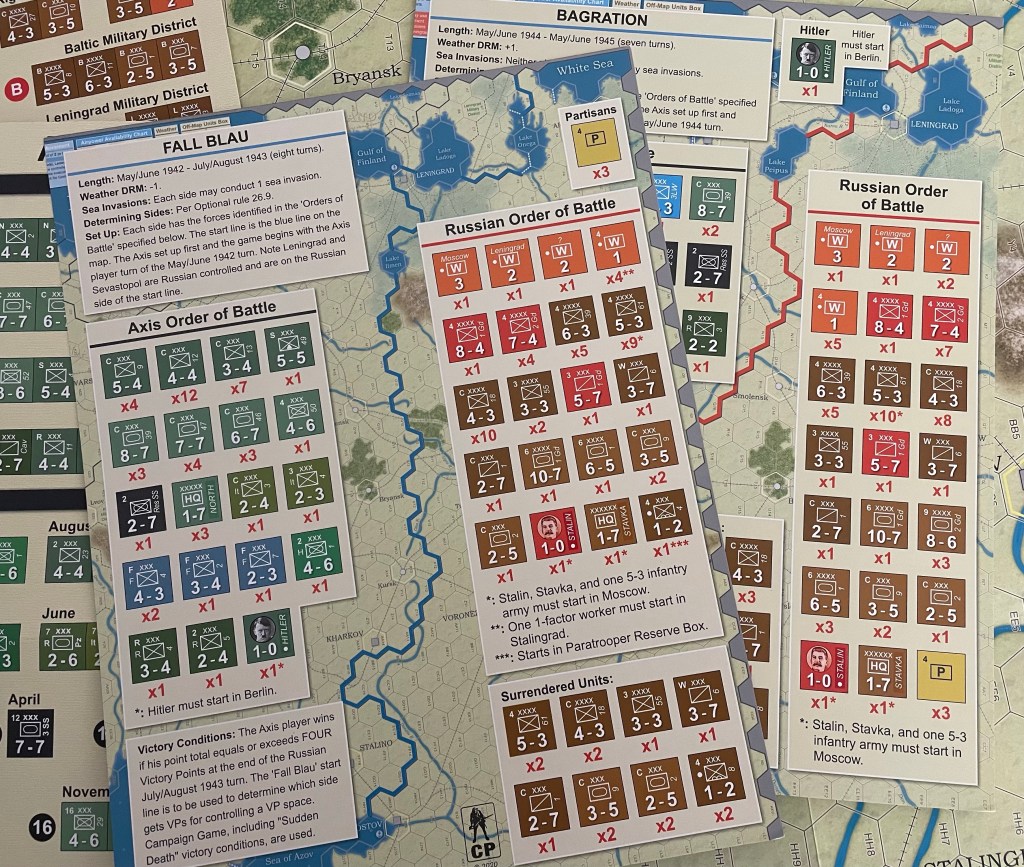
I also really love that there are many ways to play and experience The Russian Campaign. If you are in it for the long haul, you can play the 25 Turn Campaign game where you will see the whole of Operation Barbarossa all the way through to the end of the war in May 1945. This is the way that I would like to experience the game but for time’s sake, and to allow ourselves to get the rules down on our first play, we chose to do the 8 Turn Fall Blau Scenario. There are a total of 5 scenarios ranging from 5-10 Turns and these include The Breaking Storm (May/June 1941-January/February 1942 – 5 Turns), Barbarossa (May/June 1941-November/December 1942 – 10 Turns), Fall Blau (May/June 1942-July/August 1943 – 8 Turns), Zitadelle (May/June 1943-March/April 1944 – 6 Turns) and Bagration (May/June 1944-May/June 1945 – 7 Turns). Each of these have their own set-up cards and Orders of Battle as shown in the picture below.
You will note on the Fall Blau and Bagration Scenario Cards you can see a blue and red line that shows where the front starts and where each side will start the game. The Soviet units can setup on the eastern side of that line while the Germans must stay on the western side. I thought the cards were very helpful but I really found it difficult to identify quickly where those lines were on the map and how the line on the setup cards translated to the individual hexes on the map. The hex numbers are found on the setup card but frankly they were pretty small, too small to read for me, and caused confusion. I wish that they would have taken the opportunity to put those thick, heavy colored lines directly onto the maps to make setup easier.
One of the things that I found really interesting was regarding setup as each player had the freedom to place any of their units anywhere along the front identified in the setup. There are no communication or command restrictions in the design so this provided a lot of freedom. The Germans setup first generally and then the Soviets can setup after and use what they see on the front to their advantage.
There are HQ Units that are included in the setup but they are typically only used to direct Air Strikes from the various air assets provided to players. These HQ’s have to be within 8 hexes of a hex that is targeted for the use of a Stuka or Sturmovik unit. The HQ units do have a 1 combat value that is added to an attack when they are directly located in an attacking stack.
I took the tact that I wanted 3 different axis of advance in the game along the front including assaults on Leningrad, the area to the east of Kharkov and then toward Rostov in the south. With this in mind, I placed my most powerful armor units along with my best infantry units in these areas and focused the use of air power here to make the most effect from attacks. I really liked the setup freedom and enjoyed being able to make these decisions for myself. Normally in these classic hex and counter wargames, the setup is very rigid and is typically along the Army/Formation level with HQ’s located historically.
The game is established using a multiple impulse phase approach with regard to activations where there is a First Impulse Movement Phase followed by a First Impulse Combat Phase. Once the first phase is completed by the first player, the same player then continues into the Second Impulse Movement Phase followed by a Second Impulse Combat Phase. With Movement being the first step in each phase followed by a combat phase there are lots of decisions that need to be made here with regard to unit withdrawals and then filling those gaps created on the line with new reinforcements and then leading into combat. During the First Impulse Combat Phase, the player will force enemy units to retreat but cannot fill those holes created until the Second Impulse Movement Phase. This really creates some issues at the end of the Second Impulse Combat Phase as you will be unable to take advantage of combat and move into position but must sit there and watch as your opponent moves back into position, sometimes with stronger units, to take their revenge and counterattack. The other key with the Second Impulse Movement Phase is that only certain units are allowed to move a second time, including mobile units such as armor, mobile infantry and the like. I really did like this situation though and found it to be pretty interesting and create some really interesting situations that I don’t think that I have necessarily experienced with other systems. I liked it but don’t know if this was a standard form back in the day or if this was something that was unique then.
All air units must be used by the players in their First Impulse Combat Phase and are unavailable in the Second Impulse Combat Phase if not used.
As I mentioned earlier, there is a mandatory combat requirement when units are located in an enemy Zone of Control. This was a definite different philosophy from other wargames I have played, as The Russian Campaign follows a classic model of not allowing units to be adjacent without having combat. This was the only part that we had to really think about as we played the game as we just co0uldn’t keep in our head that all units had to attack when in the EZOC. This sometimes leads to very poor odds attacks and losses so you really have to keep this in mind as you go down the line doing your attacks and planning your future moves. The game really works hard to make the players think about how best to deploy and use their forces as contact means combat.
One of the ways I have started assessing games is how playable they are. This includes the accessibility of the rules, the clarity of the language used and whether or not examples are provided. I also look to see how the rules and the system work together to create a good simulation. I also don’t really like fiddly mechanics and systems as they lead to slow playing and plodding games that cannot hold my interest. What I found here with The Russian campaign is an eminently playable game. The game is pretty straight forward, the system works well with the situation and creates a lot of opportunity for proper deployment of units, quick movement to the front to fill holes and mount offensives and there were very few real rules questions once we got through the first turn and got used to the double impulse situation.
There are also lots of options included in the game as Optional Rules. These are not required to play the game but they give the players some more effects and mechanics to explore and decide whether they improve or detract from the game. I am not going to give a full accounting of these Optional Rules here but there are plenty of them, some major and some really very minor, and some that really do improve the game. These include things like Fortress Cities, Strategic Movement, Russian Recovery, SS Unit Replenishment amongst others. One that I noticed was that there are optional counters and rules that can be used to increase the role of the two dictators in the war in Hitler and Stalin. They can be used on the front lines to add to their combat value to stacks. But, if they are lost their are negative effects on their units over the next turn as their movement value will be zero.
In my opinion, the Optional Rules can be used to achieve a play-balance depending upon which side you are more familiar with playing and the skill level of your opponent. Less experienced players should be allowed to use some of the Optional Rules to aid them in grocking the system and giving them more of a competitive chance. But, once both players are very familiar with the game, and its strategies, I would say no to Option Rules and just leave it at that. The random weather generation really leads to the game being winnable by the Germans and still unwinnable if the rolls are poor.
We found that the game was a very good game with solid mechanics and that seemed to really flow very well. We were actually able to play our 8 Turn scenario in about 4 hours, which was very surprising to both of us. The game had lots of tension and it was very possible for the Germans to gain a victory. Especially if you are using the random weather table and not the historical weather.
The other really strong part of the game is that it creates a very good narrative. Almost like a tactical game as movements and maneuver make a huge difference to the situation and provide the players with lots of alternatives to think about as they go about the game and find opportunities.

So that is why I have placed this game in the #1 spot and I am prepared to defend that decision. Just a solid play experience with lots of classic systems and approaches.
Here is a link to our video review:
Some other games that I have really enjoyed set on the East Front of WWII are No Retreat!: The Russian Front GMT Games, Donnerschlag: Escape from Stalingrad from VUCA Simulations, Traces of War from VUCA Simulations and Rostov ’41: Race to the Don from Multi-Man Publishing to name just a few.
I hope you have enjoyed my look at the best East Front WWII games. What games have you played that are set on this pivotal front?
-Grant

Interesting article Grant and very difficult to select just three from the many East Front games that are available. Personally my two favorites are The Dark Valley by Ted Raicer and White Death by Frank Chadwick this one a real blast from the past, around 1979 I think.
LikeLiked by 1 person
Thanks. I am slowly playing more classics but my pool is much more limited than others.
LikeLiked by 1 person
It just takes time. There are so many great games out that that we want to experience but we only have limited time.
LikeLike
TRC is a true Classic. Perhaps even
more so than PanzerBlitz/Leader or Afrika Korps because it really stood the test of time.
Exciting when I played it in the 70’s and still a great simulation now for the casual historical wargamer.
You ARE correct about the different starting point scenarios!
On the best known classic 3rd edition of TRC from Avalon Hill there were dotted lines in different colors printed on the map which was a far better feature for competitive play.
You recognized better the goals to win the different scenarios by having these dotted lines on the map itself and they enhanced even more the competitive feeling of the game.
This new version has Panzer silhouettes as a choice though and that was a great idea.
I have 3 copies of TRC 3rd edition (one STILL in shrink after 42 years 🤓), 1 copy of the 4th De Luxe edition and one 5th edition with the extra mounted map.
To me the 3 best wargames published by Avalon Hill were TRC, Up Front and Rise and Decline of the 3Reich.
The latter has been replaced by other strategic WW2 wargames (Unconditional Surrender and – despite hated by you – Hitler’s Reich), so 3rd Reich is no longer actively played.
But TRC and Up Front are played on a regular basis and still are among the very best wargames ever published. Both are must haves in a collection.
LikeLiked by 1 person
Thanks for the insights Ben. Up Front is amazing and I have played that dozens of times with my Father in Law. That game has a high degree of nostalgia for me!
LikeLike
There was a time when y’all weren’t that high on East Front games. But never say “No” to growth and change.
LikeLiked by 1 person
Yeah I’ve definitely changed my tune. Not all of them are great but it is a very interesting situation to play.
LikeLike