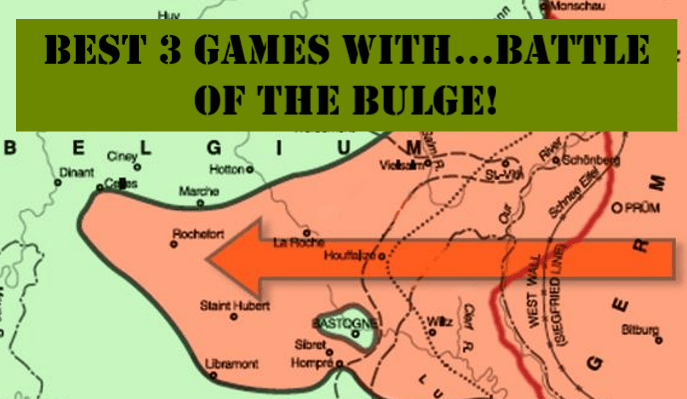
The Battle of the Bulge was the last major German offensive campaign on the Western Front during World War II. The battle lasted for five weeks from December 16, 1944 through January 28, 1945. The offensive was launched through the densely forested Ardennes region located between Belgium and Luxembourg. The primary objectives of this last ditch effort were to deny the Allies further use of the Belgian Port located at Antwerp and to split the Allied lines, which potentially could have allowed the Germans to encircle and destroy the Allied forces.
When I hear the word Bulge game, I immediately think of a huge monstrous wargame with 3+ maps and literally thousands of counters (see A Time for Trumpets from GMT Games). They take days to play, have stacks that are 6″ high and require large tweezers and good lighting. Don’t get me wrong. That is great but not always realistic for gamers like us who have kids and lack the table space to play anything above a 1-2 mapper. A game covering this topic, namely the last ditch effort for the dying Nazi war machine to strike back at the advancing Allies as they approached the Rhine and German territory, has to by its very nature and topic be a monster. Or does it? Not all of the Bulge games I have played are huge monsters. Some are very approachable, good games and tell the story sufficiently for any fan of history. In this post, I want to share my Best 3 Games with…Battle of the Bulge.

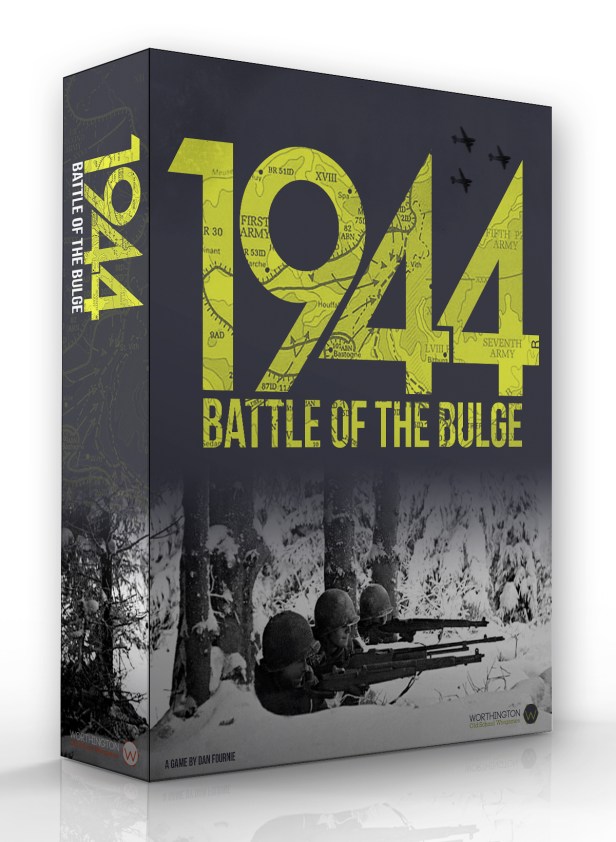
3. 1944 Battle of the Bulge from Worthington Publishing
Over the years, we have played our share of Bulge games, but I want to point out that we are not experts nor have we played every game on the subject. But when we played 2021’s 1944 Battle of the Bulge from Worthington Publishing, I initially was unsure about what to expect as the game was marketed as a Bulge game that played in under 2 hours. But, after our initial play, what I would say is that we really enjoyed the overall experience and actually found it was very captivating and engaging, for a game that really only had about 30 counters on the board at any given time.
At the start of the game at setup, the Germans have a total of 18 counters on the board, in addition to 4 off board assets in the form of Artillery units and one Leader (Manteuffel). Among the starting German units there are 3 different Armies, including the 7th Army, 5th Panzer and 6th Panzer. These are made up of 11 Infantry units, 2 Airborne units and 5 Armor units. On the other side of the line, the Allies have just 12 units defending the Bulge at the start with units from the American 1st Army and American 3rd Army/VIII Corps. These are made up of 7 Infantry units, 3 Armor units and 2 Mechanized Cavalry units. Later in the game, the Allies will receive Artillery units and Air units which can be used to increase the number of dice in combats. That is not a lot of counters and frankly it simplifies the decisions from turn to turn. Many of these units are multi-step units and have their breakdown counters stored off board on the OOB Cards and when they are hit and take losses, you simple replace those counters with their breakdown counters until they are eliminated. The great thing about the low counter density is that it allows the players to actually plan their attacks, by being able to see their units quickly and what is arrayed against them and then make decisions about how best to go about doing what they need to do. As opposed to hunching over those large stacks in typical Bulge games desperately looking for a few more Combat Factors to get to the next odds column on the CRT. This keeps the game play moving along and that was palpable as we actually got the feeling of tension as we were trying to break through and push ahead.
One of the most interesting parts of the game is the simple combat system. This game doesn’t use a CRT and the dice you roll are not looking for a specific number but rather a combination of symbols shown on them. First, you need to understand the information found on the counters and how that translates to the combat system. Across the bottom of each counter, appears 3 numbers. Left to right the numbers stand for Dice Rolled in Combat (DRC), Strength Points or unit steps (SP) and Movement Points (MP). For example, an Armor unit will have 2 to 5 dice that are rolled in combat, 1 to 6 steps and 5 or 6 movement. The important number to know for combat through is the DRC.
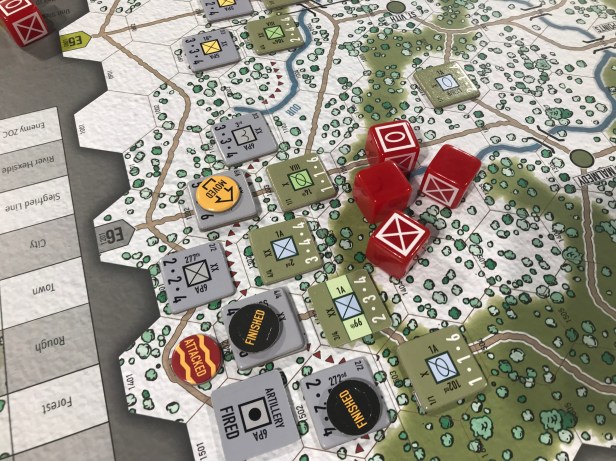
The next thing you need to understand is about the dice. The dice are 6-side dice but they only have 2 results on each die, a NATO symbol for Infantry and one for Armor. The other 4 sides on the die are blank. Yeah, you read that right, a 6-sided die with only 2 results. There are lots of opportunities for those dice to roll nothing for you and that is both a blessing and curse as you want them to roll well for you but not for your opponent as each combat is simultaneous and both sides get to attack.
The real problem with lots of simulation style wargames is that they always typically play the same. Same set up. Same objectives. Same victory conditions. Anything that can make the game imminently repayable is a good thing and welcomed. In 1944 Battle of the Bulge, there are several different ways to create different variable objectives to effect the scoring and outcome of the game. There are 4 variable German Objective Cards that the German player will draw secretly at the beginning of the game and which they will keep secret from the Allied player. These include Hitler’s Autumn Mist (standard victory conditions), Rundstedt’s Plan Martin (a “small solution” plan) and Spoiling Attack (victory based on attrition—units eliminated). This creates a great deal of realistic uncertainty for the Allied player, and provides great re-playability. We found this to be one of the best parts of the design and reminded us of another Worthington Publishing game in Dunkirk: France 1940 designed by Doug Bryant.
I have played several Bulge games and this one is definitely up there for me, mainly due to its short playtime, interesting modeling of various elements and very different combat system. But don’t think that this will compete with the likes of A Time for Trumpets from GMT Games, Deadly Woods from Revolution Games or Enemy Action: Ardennes from Compass Games. Those games are in a different class and simulate the game in a more traditional style of wargame. But if you are looking for a game that can be played quickly, and even multiple times in a day or evening, and that is variable with changing objectives, then 1944 Battle of the Bulge is for you. The game also takes a step up in the production realm for Worthington as the map is simply gorgeous, and doesn’t just use the earth tone grey, lighter grey and brown for the various hexes but now has well drawn forests, rivers, bridges and roads to adorn the playing surface.
If you are interested, I wrote a full First Impression style post on the blog and you can read that at the following link embedded in the picture below.
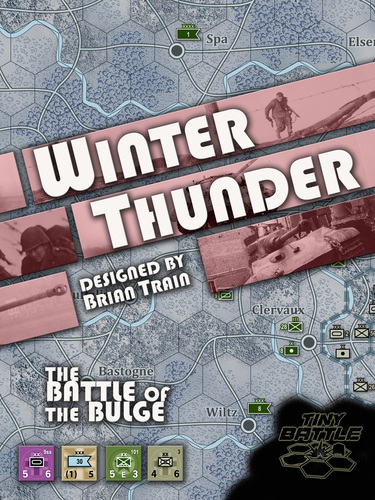
2. Winter Thunder: The Battle of the Bulge from Tiny Battle Publishing
Winter Thunder: The Battle of the Bulge is a substantial revision of a previous design from Brian Train called Autumn Mist: The Battle of the Bulge published in 2004 by Fiery Dragon Productions. The new updated version includes many changes to that original game, including a newly researched Order of Battle, with revised counter values and reinforcement schedule; cleaned-up rules including a solitaire play system; and a drastically revised map (the former map was literally contained on a post card) with a different ground scale and treatment of terrain.
This game is a historical simulation of one of the most famous battles of the European Theater of World War II, the Battle of the Bulge. The same as the historic conflict, the Germans catch the Allies off guard in this game and at first have them outclassed and overmatched. The game is intended to play out as a see-saw affair, with the first 3-4 rounds of the game swaying to the German side, as their mighty Panzer divisions simply roll over the weaker American units. Then, as the Allies recover from the initial shock and awe of the campaign, and begin to finally receive their better reinforcements over the course of the game (check out what they get in round 3!), the worm will turn and the Germans will be at a disadvantage and will begin to see their forces weakened through continual attrition after attack after attack. The key to the game is about effectively using the Mission Matrix Table to your benefit to get the results that works best for your situation, whether that is the Germans or the Allies.

For the Americans/Allies, this means strategically falling back to more defensible positions from which to counter attack in future rounds, while at the same time, taking advantage of occasional situational favorable odds to deal decisive blows to the attacking Germans causing unit losses that they cannot afford to replace. In the early rounds, as the Americans, I will gladly trade a step for a step or two. For the Germans, this mostly means attacking consistently with favorable odds and overpowering the Allies. Blitzing through openings using the advantage of Exploitation movement whenever possible to cause havoc and to force the Allies to react. Just understand, as the Americans/Allies, your first few rounds will be a little bit depressing as you are beaten in each attack and can’t seem to muster enough power to do anything. Don’t worry though, this is what the design intended. Just continue to prepare for the inevitable counterattack when the weather clears, slow down the advance of the bulge using Road Blocks and Improved Positions when possible, and you will have more assets such as Air Points at your disposal to turn the battle in your favor.
When a combat is initiated from an adjacent hex, each player will secretly choose a chit from among those aligning with their posture, either from the red colored Attack Mission chits or the blue Defend Mission chits. The Attack Mission chits include actions such as Balanced Attack, Infiltrate, Blitz and Frontal Attack. The Defend Mission chits include actions such as Stand Fast, Balanced Defense, Defend in Depth, Counter Attack, Delay and Withdraw. These drawn chits are revealed and then located on the Mission Matrix Table and DRMs are given for attack and defend actions and whether one side or both will take casualties. Notice that sometimes, neither side will take casualties. This is very strategic as you must choose an action that has a realm of outcomes that you can live with after your attack. The worst thing is to choose an action chit only to find out that you chose poorly and lost a few steps, that you will be unable to recover only to gain one hex. Choose wisely!
This system is really neat and took us a few rounds to really figure out. Each action chosen should be chosen for a specific purpose in mind and can go along with the strategy needed to win the game. During the early rounds as the Americans/Allies, I found myself choosing Delay or Withdraw often as I didn’t have the powerful units to stand up to the mighty German forces. This meant I was able to retreat without taking casualties in order to delay the German advance until my more powerful units, such as the 82nd Airborne and 101st Airborne units, would appear in round 3. Or I could even choose a Balanced Defense if I wanted to force the Germans to take casualties if I only had one step units defending, as their loss didn’t count toward Victory Points in the end but would hurt the Germans if they happened to lose a 2 step unit.

Overall, Winter Thunder is a very unique take on the Battle of the Bulge and is an enjoyable play experience. I really found that the meat of the game, and the element that held my attention the most, was the Mission Matrix. This is a very unique and well designed element to handle the outcome of combat, and frankly, I don’t know that I have ever played a game with such a system. I really liked this part of the design and found that I spent a lot of time trying to figure out what actions made the most sense for the situation while also trying to anticipate what my opponent would do so I could capitalize on his errors. This design is very tight and there isn’t a lot of wasted motion or effort on elements that don’t add to the playability of the system. I really like that the game didn’t seem fiddly at all and all elements worked well together and were very easy to pick up, at least for their utility.
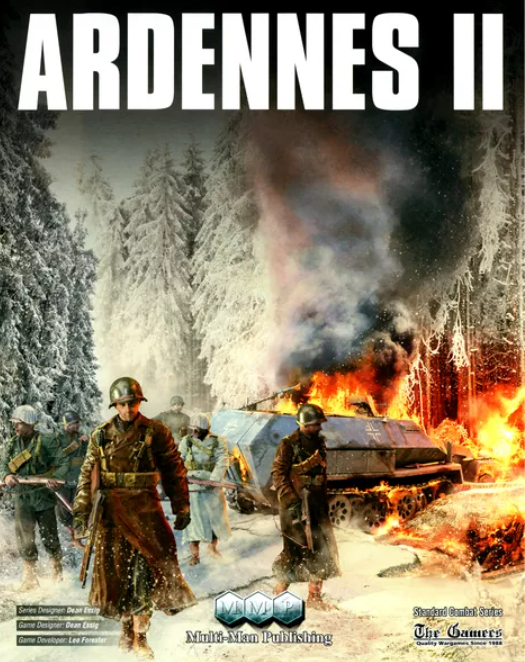
1. SCS Ardennes II from Multi-Man Publishing
The Standard Combat Series is quickly becoming one of my favorite WWII systems and for good reason as the mechanics make sense but are also very playable. I really love the push your luck nature of playing the Germans in Ardennes II and the many decisions forced upon players about how to best use their limited artillery and where to fall back and defend. I really like the addition of the retreat before combat rule and the ZOC Bonds as they created a very interesting puzzle for both sides.
The change in Zones of Control in this volume was very interesting as the ZOC’s were not sticky and players can simply pay an additional +1 Movement Point to move one hex adjacent to an enemy unit to another such hex. But, this change was dwarfed by the addition of the ZOC Bonds. A ZOC Bond can form between two different 2 step infantry units. The hex between the units will become a ZOC Bond and will add a required additional +4 Movement Points for enemy units wishing to move into that space. These can be used to keep attacking units at bay and will be best used to slow the German overall advance. Another element that is unique here is that retreating units that are required to move through a ZOC Bond because of CRT results will be unable to retreat through and will have to stick and take step losses for each remaining required retreat space.
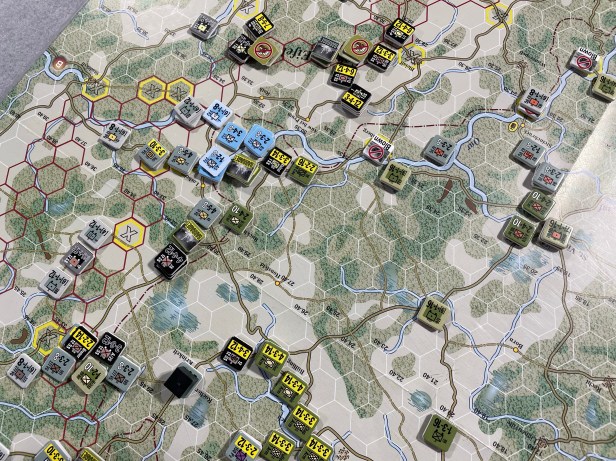
The ZOC Bonds also will block supply for units caught behind them and this is an important aspect of the game in many regards as being out of supply has significant combat effects. If a friendly unit is in the hex it will negate the blockage of supply and this is another aspect that both sides need to consider.
The addition of these ZOC Bonds was a good one in my opinion as the map is very difficult to get moving on because of the thick forests and terrible terrain and the punitive requirement for +2 or +4 Movement Points to even get into combat with a unit would have made the game that much more difficult for the German player. That is another thing that I really liked about this game was the attention to detail of these type of things in the overall focus of the simulation. Very well done!
Another new addition to the system was the defender option to retreat before odds are calculated for combat. This game enforces a strict no peaking into stacks rule and you are not allowed to necessarily know what the odds coming against you are before you get a choice to retreat or stand and fight. If retreat is chosen, the player must retreat that unit a full 5 hexes worth of Movement Points but this is sometimes better than losing a decent unit just because they was out of position or not protected by other friendly units. Once the retreat before combat option is chosen the attacking unit is to have been considered to win and can then advance after combat into that vacated hex.
There is no choice to retreat before combat however if the unit is located in a city hex or under a Barrage Marker. In this instance, the unit must stand and fight and will most likely pay the price. I really liked this option as not that many games provide it in their mechanics. We all have been told to not start a fight we can’t finish and this is a really good representation of that maxim.
This was a really great look at the Battle of the Bulge. Ardennes II was a fun game with some really interesting and new mechanics for the Standard Combat Series that created a very unique and interesting experience. I really was drawn to this title for several reasons but I am glad that we spent some time with it and highly recommend this game to anyone interested in the subject.
If you are interested, I wrote a full First Impression style post on the blog and you can read that at the following link embedded in the picture below.

So those were my 3 Best Games with…Battle of the Bulge! and I hope that you enjoyed what I shared and also got into the spirit of the post and started thinking about games that do this key historic battle well. What are your favorite Battle of the Bulge wargames?
-Grant

Telling us #2 and #3 are two of the best games is like telling us that 2 games published in another galaxy are two of the best games. Most of us won’t play block games and you two are the only ones that I know that have purchased Tiny Battle Publishing games. #1 is fine, something we all can be aware about, find lots about it on various gaming sites. How about sticking to no more esoteric than Compass Games? I wanted to share this on Twitter, but nope.
LikeLiked by 1 person
Well that’s an odd response. I found good games, played them, thought they were very good, gave reasons why. I am not going to just cover the big guys. There are other good games out there.
LikeLiked by 3 people
Winter Thunder is an EXCELLENT choice. I think picking the best games is what matters. Not the biggest publisher here. I don’t understand the previous posters comment as Winter Thunder is still available as well at a reasonable price. Odd Comment
LikeLiked by 2 people
I will admit that I have not played Bitter Woods, A Time for Trumpets nor a full game of Ardennes ’44 and those are great games I am sure but I can only choose what I have experienced and the 3 I chose are very playable games that keep the situation interesting and are not simply rehashing old games.
LikeLiked by 1 person
I have played A Time for Trumpets and it is a TRUE monster. I would not list it as an accessible Bulge game as it takes forever to play. Is it a good game yes but the time needed to play it is immense. So I like your list. I have played all of the games on it. I have not played Ardennes II to completion yet but I have played the original all the way through and imagine the time commitment is the same.
LikeLike
There are so many damn Bulge games that I don’t know where to begin. As much as I love the Bulge (my grandfather fought there), I refuse to buy any more games because you generally get the same result: the Germans not only will not capture Antwerp, they probably won’t get across the Meuse. So why bother? I picked up Winter Thunder because I was interested in the diceless CRT (and Brian Train’s perverse sense of humor with the purple SS unit counters, LOL). I got 1944 BoB because it looked easy to play, but it has weird play balance issues. I will forever fall back on Danny Parker’s old SPI Battles for the Ardennes quad. I just played it recently with my buddy while chatting with Danny Parker at Compass Expo. It was a dream come true. https://twitter.com/aaron_danis/status/1724595461669994876
LikeLiked by 1 person
Nice! Thanks for sharing Aaron.
LikeLike
Heh, thanks Aaron!
I wanted hot pink for the SS, but ended up with a kind of magenta. My contribution to the stupid and endless white-on-black non-debate about how to show the Schitzenstiffers, which I think began in 1968 with that colour scheme in Avalon Hill’s Anzio game.
LikeLiked by 1 person
Thanks so much Grant! Of all the Bulge games out there, you thought so highly of mine, and I’m touched.
I used the Mission Matrix system in two other published games, Summer Lightning from Lock n Load (Poland 1939 campaign, now available only as an expensive print and play from the company) and Balkan Gamble (Allied invasions of Greece and Yugoslavia that never were, available as a very cheap print and play from my BTR Games imprint).
LikeLiked by 1 person
Great little game Brian! It has always stuck with me and as you know I love that Battle Matrix. Such great design work with that one. How is China’s War coming along?
LikeLike
The two main hooks of the system – the activation by HQ and near-diceless combat based on mission choices – were not common features of wargames back in 2002 when I designed Autumn Mist, the predecessor of Winter Thunder. Over 20 years later they are now common and I still like the idea.
As for China’s War, the map is done and the game is in its final mechanical form, but a number of items remain such as:
– final design and art for the Event Cards;
– final design and art for the box and player aid materials;
– working out the solo system and the Tutorial material (likely it will be the Arjuna method but won’t be me on either job);
– finishing the material for the Playbook: besides the Tutorial there will be the usual designer’s notes, notes on play and mechanics, background information on the Event Cards, pronunciation guide, bibliography, and a short history of the 1937-41 phase of the war – this is all done except for the Tutorial and solo stuff.
Priority of development team effort has been accorded to Red Dust Rebellion which is an item that is closer to completion and frankly has a much larger amount of pre-orders and customer interest (I’m not kicking about that, I would rather take more time to bring out a good product via full attention to it).
It’s possible that this one will be out by end of 2024, though I cannot be sure – on top of everything else there are the continuing logistical challenges in the supply chain, from simple production to assembly and shipping.
Again, I am not kicking about this… I have been the one working on it the longest, and think I have been the most patient!
I got it to the nearly-done stage in 2015; I shelved it to finish Colonial Twilight properly, and I don’t think anyone regrets that.
LikeLiked by 1 person
Remember we would be more than willing to host a series of Event Card Spoilers on the game, even without final art.
LikeLike
1 Enemy Action Ardennes. 3 games in one. Solo both sides. Incredible deep AI system and a further development of the DDay at system. No dice.
2 The Last Blitzkrieg. Ground breaking new BCS system. You can play shorter scenarios, but it deletes the traditional ZoC and combat odds.
3 Race for Bastogne. Grand tactical system. Superb insight in what happened.
I still have fond memories about Battle of the Bulge 81 from Avalon Hill. Got it as a birthday present of my wife back in 1987.
LikeLiked by 1 person
I just purchased The Last Blitzkrieg. I’ve been eyeing Race to Bastogne.
LikeLike
We have not got around to playing EA Ardennes and need to. I think you know my experience with EA Kharkov but I would think it will be different here.
LikeLike
I agree totally Ben. December is Bulge month for me and these are the 3 games I’ve played. All are excellent.
LikeLiked by 1 person
The Germans attacked with new tanks and 1/4 tank of gas.
LikeLiked by 1 person
Are you sure they weren’t used? I think they got a deal.
LikeLike
Thank you for bringing Winter Thunder to my attention, going to go purchase. I am not overly interested in the Battle of the Bulge and thus a reasonably priced game that might let me see the battle differently is excellent.
LikeLiked by 2 people
You are most welcome!
LikeLike
Thanks, I hope you will enjoy it. There aren’t many division-level games on the Bulge out there.
LikeLiked by 2 people
I have the original SPI “Bulge/Big Red One” with a small map and mostly divisions (https://boardgamegeek.com/boardgame/4252/big-red-one-game-first-infantry-division-battle-bu). Of the “other” Bulge games out there I like Rev Games “Celles” and 3W’s old “Race to the Meuse,” which I still have yet to figure out.
LikeLiked by 1 person
Looks pretty good! I am sure it is a classic.
LikeLike
I played Big Red One a couple of weeks ago. It’s curious that it has received a lot of negative press; I found it to be pretty balanced and, as far as I could see, realistic. The only problem is the rules. They are only four pages long, but a bit too compressed, so that some important rules are easy to miss.
LikeLiked by 1 person
Wow, so many comments and other suggestions. Great to see so much interaction on the blog. My only bulge game is Lanzerath Ridge by newcomer designer David Thompson. 😉
LikeLiked by 1 person
Lanzerath Ridge is very good and I love the series. It takes a look only at a small part of the Bulge but is a great game in its own right. And beautiful as well!
LikeLike
Grant
The new standard will be Last Gamble by Danny Parker. I played it with Bruno Sinigaglio at Compass Con with Danny and Rich Hoffman, the developer , and it is a terrific regimental Bulge game. The research is immaculate and the components are top notch.
LikeLiked by 1 person
Awesome! Looking forward to it. Any idea on timing?
LikeLike
March 2024
LikeLiked by 1 person