Not often does a game get a 2nd Edition. And even more rare is a 2nd Edition with new rules, new art and new graphics. But SCS Ardennes has done just this with the release of Ardennes II from Multi-Man Publishing. Ardennes II is a part of the Standard Combat Series and is a reissuing of the award-winning game Ardennes from 1994. The new edition uses the additional research available from BCS Last Blitzkrieg, which was published in 2016, and also changes some basic concepts from the SCS system.
In addition to spotlighting the better OOB and map research first used in Last Blitzkrieg, the game has some differences from the first printing mainly in the area of how artillery works and and as well as giving units the opportunity to withdraw before an enemy attack. The game also removed some major focus on chrome rules which caused more playing issues than they were worth. But there are still really familiar and solid mechanics here from the Standard Combat Series and the game is a joy to play and look at as the graphics are significantly better in every possible way. I want to share my thoughts here about SCS Ardennes II in this First Impressions post.

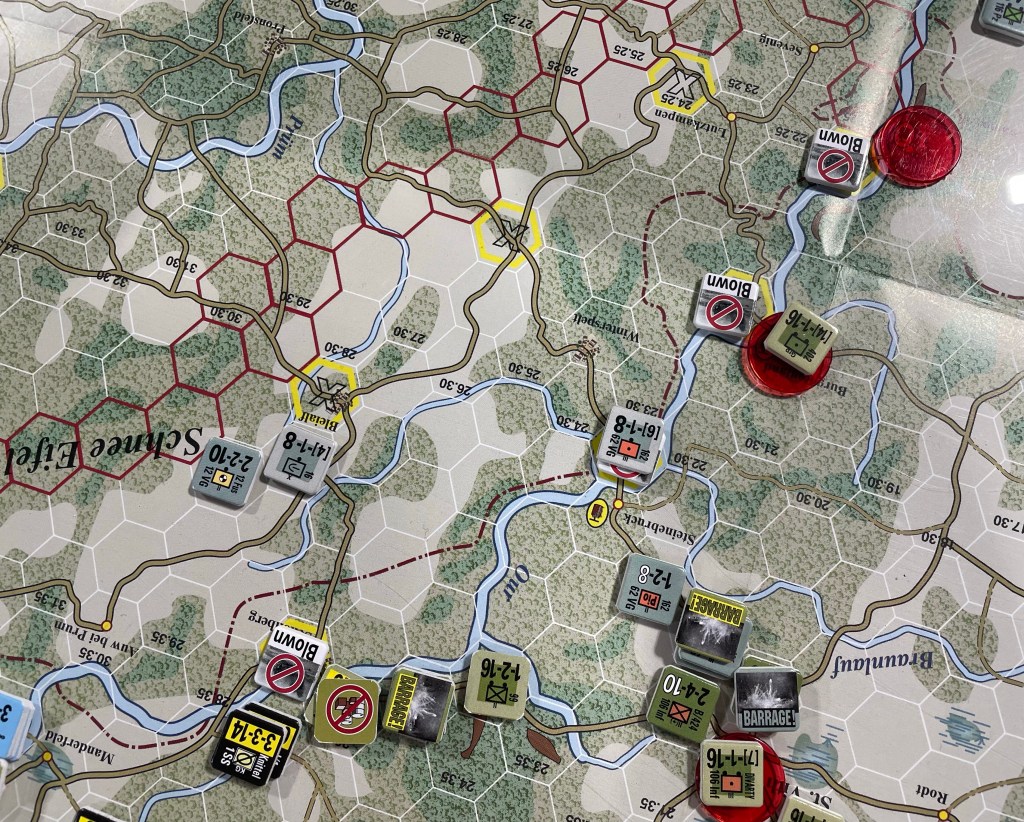
Barrage Differences
The first difference from other Standard Combat Series games that I want to dive into is the difference in Barrage. In other Standard Combat Series games, a Barrage will typically inflict step losses to units targeted or at a minimum place a DG or Disorganized Marker. This is the first of the major changes found here in the 2nd Edition of Ardennes II as the different Barrage Markers used in the process of artillery attacks will effect the units Attack, Defense and Movement values. If one Barrage Marker is placed, it will effectively halve those values and if a 2nd is placed it will compound the effect and quarter those values. This was a nice change as I liked how the artillery felt like it was softening up the enemy before attacks were made.

Barrage also has a modifier to the roll including a benefit for Barraging into a hex with multiple units as you add a +1 DRM to the total for each unit above the first unit in a hex. So if a stack has two units, the Barrage attack would get a +1 DRM. The Barrage attack will hit on a modified 5-6 on a d6 and a Barrage Marker is placed. On a 3 or 4, a 1/2 Barrage Marker is placed and then later in the turn a d6 is rolled to determine if it becomes full on a 4-6. If there are 2 1/2 Barrage Markers, they will convert to a full Barrage without the need for a roll.

The Artillery units are also linked to a specific formation, unless they are of the generic variety, and they can only be used to fire onto units within two hexes of one of that artillery units’ same formation. This “spotter” unit then cannot move after being used to spot for artillery.
One of the best parts of the Barrage concept was that the Barrage Markers do not move with any units in the hex but will stay in that hex until removed later in the turn. This means you have to be careful about how and where you are going to Barrage as it can mess with your plans to make progress after the attacks as you will have to pay 1 extra Movement Point if you move through a friendly Barrage Area. Also, if you move into an enemy Barrage the effect is that your units will immediately lose half their movement points. This was a very thematic addition to the game as we know that the artillery in the Ardennes was crazy and consistent after it hit and each side shelled their own positions from time to time.
One last very interesting thing about the Barrage Phase is that because the American player can attempt Barrages after the German Movement Phase, it is possible that some German units will be under Barrage at the start of their Exploitation Phase and will be significantly impacted in their overall movement capacity. Also, during the Exploitation Phase no Exploitation Move capable unit which started under a Barrage Marker can move at all, and any exploiting unit which enters an enemy Barrage hex immediately stops its movement. I need to give this some more play to better understand the strategy with the use of artillery but there are definitely some really interesting concepts at play here.
No Sticky Zones of Control but ZOC Bonds
The change in Zones of Control in this volume was very interesting as the ZOC’s were not sticky and players can simply pay an additional +1 Movement Point to move one hex adjacent to an enemy unit to another such hex. But, this change was dwarfed by the addition of the ZOC Bonds. A ZOC Bond can form between two different 2 step infantry units. The hex between the units will become a ZOC Bond and will add a required additional +4 Movement Points for enemy units wishing to move into that space. These can be used to keep attacking units at bay and will be best used to slow the German overall advance. Another element that is unique here is that retreating units that are required to move through a ZOC Bond because of CRT results will be unable to retreat through and will have to stick and take step losses for each remaining required retreat space.
The ZOC Bonds also will block supply for units caught behind them and this is an important aspect of the game in many regards as being out of supply has significant combat effects. If a friendly unit is in the hex it will negate the blockage of supply and this is another aspect that both sides need to consider.
The addition of these ZOC Bonds was a good one in my opinion as the map is very difficult to get moving on because of the thick forests and terrible terrain and the punitive requirement for +2 or +4 Movement Points to even get into combat with a unit would have made the game that much more difficult for the German player. That is another thing that I really liked about this game was the attention to detail of these type of things in the overall focus of the simulation. Very well done!
Retreat Before Combat Option – Bug Out
Another new addition to the system was the defender option to retreat before odds are calculated for combat. This game enforces a strict no peaking into stacks rule and you are not allowed to necessarily know what the odds coming against you are before you get a choice to retreat or stand and fight. If retreat is chosen, the player must retreat that unit a full 5 hexes worth of Movement Points but this is sometimes better than losing a decent unit just because they was out of position or not protected by other friendly units. Once the retreat before combat option is chosen the attacking unit is to have been considered to win and can then advance after combat into that vacated hex.
There is no choice to retreat before combat however if the unit is located in a city hex or under a Barrage Marker. In this instance, the unit must stand and fight and will most likely pay the price. I really liked this option as not that many games provide it in their mechanics. We all have been told to not start a fight we can’t finish and this is a really good representation of that maxim.
One other interesting element of this same concept was with artillery units that are located near an enemy counter. If a 2+ SP enemy unit moves adjacent to or artillery units start adjacent then they have to Bug Out and are able to get out of there before taking an attack. The unit will then teleport 8+ road hexes away to an in-supply hex which is not not adjacent to an enemy unit. The penalty here is that they become Disorganized and will be unable to move and fire until they recover. If the artillery unit is already DG’ed, they will have to stand and fight and it will not go well for them. I liked this aspect as I would move a few units ahead of the main push to try and dislodge their artillery to stop their effectiveness. This worked pretty well for me and was an interesting rule.
Bridge Blowing
At the start of the game, the American player has an option to attempt to blow several key bridges across the Our River which is the only way for the Germans to advance into the Ardennes from the east. There are little yellow plunger detonator symbols on the bridges on the map that can be blown and there is a roll that will determine whether they can be blown or not. The key here is that the American player cannot blow the bridges too early as they have several units across the Our River and they don’t want to strand them there as they will be easy pickings for the Germans. The American player can also not blow the bridge if any German unit occupies any hex which is made up by the bridge’s hexside. This means that timing is everything here.

The rules for the Bridge blowing process are very simple but there is an error on the Bridge Blowing Table which was given errata by the designer. There is no -1 DRM for a German unit occupying any hex containing a part of the bridge. This was a pretty big error in the rules here but we will let it slide. The American player can blow the bridge from within 2 spaces by rolling a d6 and getting a result of 3+. This attempt can only be tried once per game and if blown the bridge is unusable to cross the Our River. If the roll is a failure, a Bridge Tested Marker will be placed denoting that it cannot be attempted again. This really causes issues for the Germans as they will then have to move to the north or south to attempt to cross on one of the intact bridges. This will cause a lot of delay and keep them from advancing as quickly as needed.

I know whey the bridge blowing rules are there but my only concern was the ease of the check being a success. Needing a 3+ means this is a 66.7% chance of succeeding and I am not even sure why it was included. But, there is a slight chance of failure (Alexander failed one of the rolls and left a key bridge open) so it leaves a bit of variety in the design for this crucial aspect.
Traffic Hexes
Traffic Hexes are shown on the map with a yellow highlight in the hexes with a large X in the center. These hexes will apply a DG Marker to any German units that start movement in or enter these hexes as they simulate the trouble with driving lots of tanks, trucks and other vehicles on the small one lane roads throughout the Ardennes. You can stack in the Traffic Hex, but only if you move the units as a stack into it. If you send one unit into the hex, no others can enter it. Once you move a stack in there, the hex becomes prohibited for all others afterward which is the intent of the designer to stop other units from entering whether just to go there, or to attempt to scoot past the traffic on the road by using the off-road MP costs.
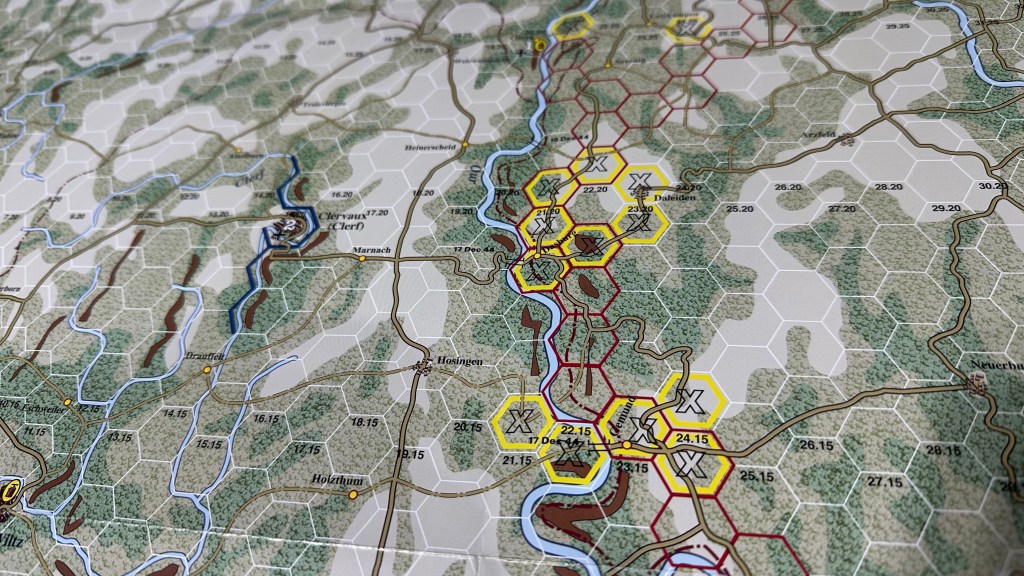
The end result of these hexes is that the Germans have a bear of a time moving their units at the outset and their progress is really slowed as this will turn into a real crawl as units will stack up and become ineffective with those DG Markers.
After the Traffic Hexes are cleared, mobile units like tanks must stay on roads. The terrain here is very brutal and the roads have very weird loops and double backs into the same spaces which simulates these issues. Tanks also simply cannot enter the forested hexes and have to do their fighting from the road hexes.
Victory Determination
I never had the opportunity to play the original, but victory in Ardennes II is achieved through the accumulation of Victory Points for taking and holding key towns and cities. This Victory Point total though is a sort of continuum that will ebb and flow as areas are taken by the Germans and then recaptured by the Allies. The Victory Condition is the high water mark of the German VP’s so if you get the highest total of a 45, that is the measurement you will use at the end of the game when calculating victory. At first glance, this is a tough one for the Germans, and historically that is accurate so I have no real problem with this aspect. Major German/Major Allied Victory will lie at the extremes of the continuum and Minor victories and a Draw will be found in the middle. As we only played once, I am still trying to understand a better working strategy for the Germans but this Victory Continuum was a very cool addition to the system that I really liked. I can’t really say whether a German victory is possible but I can say that the way it is setup it is probable. With some luck, good dice rolling and some minor Allied mistakes, the Germans can push into the Ardennes and threaten many of the larger Victory Hexes. I will posit that based on my limited experience, both sides have an equal shot at coming out on top.
I would give the following advice to the German player though as I learned some valuable lessons.
The German player must maximize the Overrun and Exploitation Movement rules. Any opportunity to gain ground each turn through these movements must be taken advantage of. You have to be bold and simply move ahead, placing your units in jeopardy of being caught out of supply. Force the hand of the American player to move and intercept you leaving open other areas for attacks. You also have to get into multiple combats in all three Phases of the game or you will find you cannot build the momentum to get ahead.
You must Keep your artillery moving forward and don’t let it fall behind. I never take the long range shots and would rather move them up closer to the action. You will definitely need the artillery the closer you get to major City and Town hexes such as Bastogne so you should not fall behind.

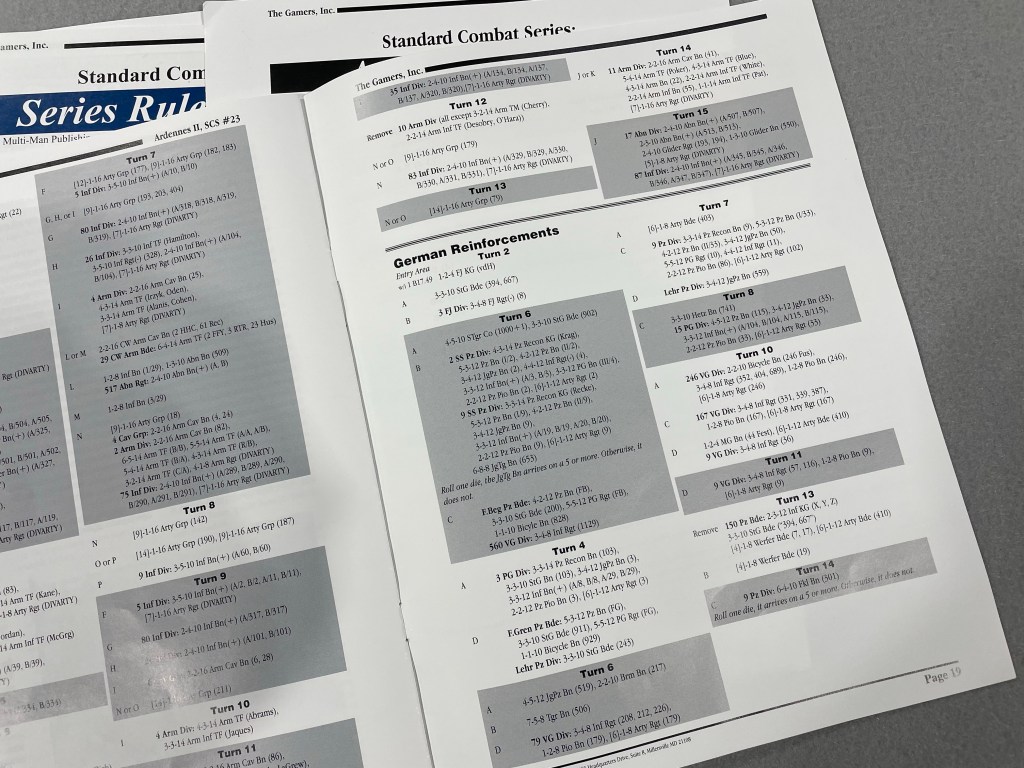
Lots of Errata
The only problem that I have with the game was that there seemed to be a ton of rules errata. Also, the Reinforcement Schedule for the Germans for the scenario we played was wrong as the schedule said Turn 6 but meant to be Turn 3. This caused a significant change in the outcome of the battle and I am upset that it wasn’t somehow caught.
The other issue I noted was the mistake on the Bridge Blowing Table with the -1 DRM if a German unit is in any part of the bridge hex. This is not correct as noted above.
Production
The game was presented really well and the new graphics were a big change. The map was absolutely beautiful and had such a good use of different shades of green and browns and created a very thematic and immersive experience. In fact, the map was so good that I am going to do an entry for it in my Beautiful Boards of Wargaming! Series. My only issue with the map was that the counters, which were colored green, gray and light green, seemed to blend in and were pretty well camouflaged. I also am not a huge fan of the front cover art but it is definitely better than the original.

Final Thoughts
I would love to write more but I am busy and have to move on but Ardennes II is a really great wargame. The Standard Combat Series is quickly becoming one of my favorite WWII systems and for good reason as the mechanics make sense but are also very playable. I really love the push your luck nature of playing the Germans and the many decisions forced upon players about how to best use their limited artillery and where to fall back and defend. I really like the addition of the retreat before combat rule and the ZOC Bonds as they created a very interesting puzzle for both sides. I would play this one again in a heartbeat and really would like to get this back to the table soon.
Here is a link to our unboxing to give you a good look at the components:
You can also check out our video review at the following link:
If you are interested in SCS Ardennes II, you can order a copy for $80.00 from the Multi-Man Publishing website at the following link: https://mmpgamers.com/ardennes-ii-p-377
-Grant
