
The Red Burnoose: Algeria 1857 is a 1-4 player historical cooperative game that deals with the resistance of Fadhma N’Soumer and the Kabyle people in their fight against the invading French armies in the Kabylie region of Algeria in 1857. The name refers to the garb worn by the villagers here and specifically refers to the color of garb worn by Fadhma. The game uses very interesting mechanics such as deck-building to tell the story of villagers working together to defeat the invading French. The players will join forces and play cooperatively to survive as the French advance on their villages, either winning together or losing together. Players will all have a starting deck of cards that make up their available villagers who each have a special ability and function and can be used to perform various actions, such as ambush, gathering resources or mobilizing forces to the Game Board.
In this series of Action Points, we will take a look at the Game Board focused on the various villages located in the rugged mountain terrain and the launching points for the invading armies, dive into the various Village Cards and their abilities and benefits, take a look at the player’s decks and the makeup of the different Start Decks, Leaders and Recruitable Cards, examine the various actions that players can take and how the process of Ambush works, take a look inside the French Automata Deck and discuss how it operates and finally explain how the game is won or lost.
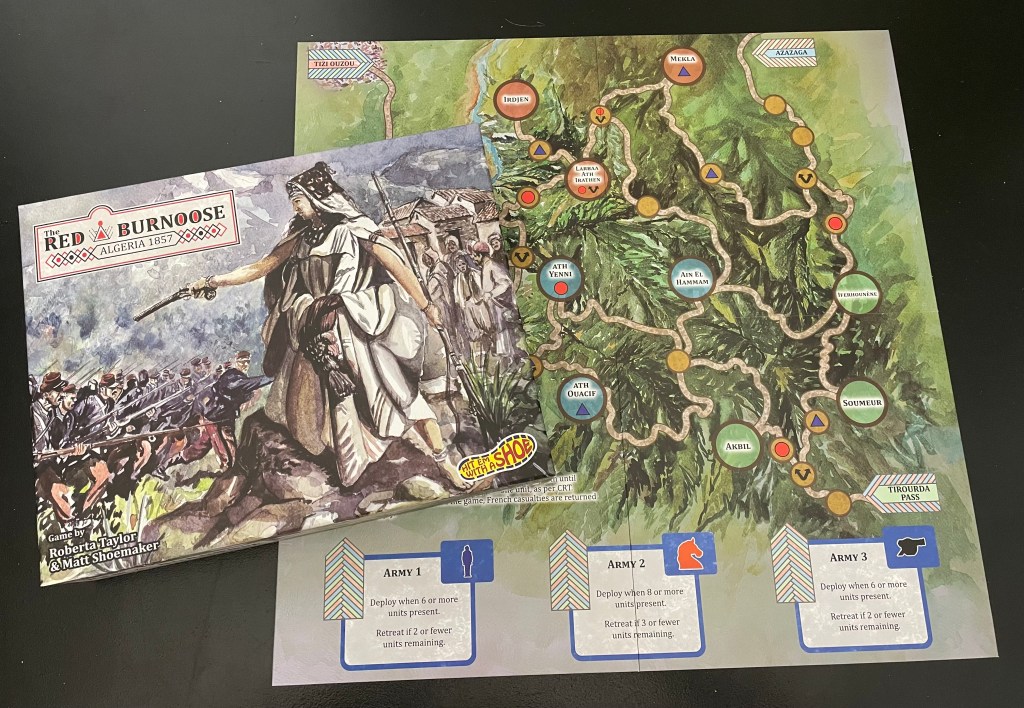
Game Board
The Game Board for The Red Burnoose is focused on the various Kabylie villages located in the Tell Atlas Mountain range in Northern Algeria. The villages are divided into 3 distinct color coded regions and can be played by up to 4 players by dividing them into specific territories that are called out in the rule book. There are a total of 9 different villages divided amongst 3 different colored regions including blue (located generally in the center of the Game Board), green (located toward the bottom of the Game Board) and orange (located on the top of the Game Board).
Village Spaces
The orange villages are part of the Thaqvilth Ath Irathen Region including Irdjen, Larbaa Ath Irathen and Mekla. The green villages are part of the Thaqvilth Ath Ijjeur Region including Iferhounène, Soumeur and Akbil. Finally, the blue region villages are part of the Thaqvilth Ath Menguellat Region including Ath Yenni, Ain El Hammam and Ath Ouacif.
The interesting thing about the placement of the villages and their connections is that the players know what specific villages might be targeted for attack first as they are the ones located nearest to the various French Army starting positions. The players won’t know which armies will activate first, as it is a random factor, but they can know which of their various villages will be the front line of defense and can prepare accordingly. Some of the regions have branching paths that can lead to the targeting of one village or another, such as in the case of either Ath Yenni or Ath Ouacif in the Thaqvilth Ath Menguellat Region.
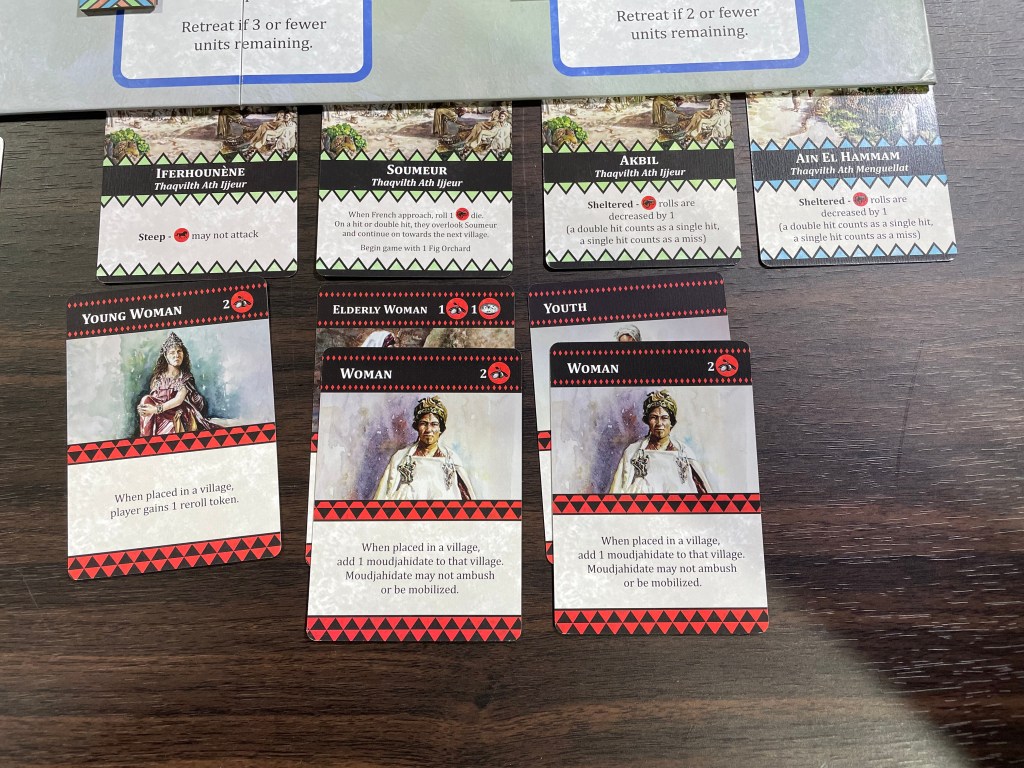
Each of these villages also has a corresponding Village Card that will be placed in front of the player controlling the specific village and this card is the space representing that village’s residents as they are played from the player’s hands to each village. The Recruitable Cards are considered located in that specific village and any attack on that village can effect those cards. Each of these Village Cards has specific special abilities, such as with Ath Yenni the player begins the game with 3 Reroll Tokens, and benefits to the defenders located here, such as with Iferhounène that is considered Steep and Cavalry may not attack. We will cover these Village Cards more thoroughly in a later post.
The villages are connected via a network of meandering brown lines that represent the path and trails in the region. You will notice that there are various symbols located on these paths that mean different things, some of which coincide with the Automata Deck Cards and are linked to activation and movement of the French armies and some that are simply notes of points where forward movement will be stopped or indicators of an either path choice. Let’s take a closer look at these symbols and discuss their meaning to the game.
The Tan Circle spaces are simply locations along the paths that are considered stops. They represent the time and effort for a marching army to reach that point on the pathway. There is no roll or movement value associated with the location but it is used to measure the number of movement activations it will take a French army to reach the targeted village. The French will move one of these circles on each activation and then be forced to stop. So, the players can see them coming and can even look at the distance and get a good feel for how long they have to perform ambush attacks and ready their defenses. For example, in the picture below, both the villages of Akbil and Soumer are 4 locations from the French Army Start Location of Tirourda Pass. Once a French army reaches that Tan Circle space, its activation will end and it will have to wait there until activated again with a future Automata Card draw.
The two branching arrows shown in a Tan Circle are representative of a Decision Point space where a French army that has stopped here previously can either move toward the Red Circle or Blue Triangle in a future activation on an Automata Card draw.
The colored symbols of a Red Circle and Blue Triangle are French Army Move Indicators that coincide with the various Automata Deck Cards that are drawn each turn to determine the actions of the French armies. If this symbol appears on a path, when a matching symbol on an Automata Deck Card is drawn, the French army on that path will choose to move toward that symbol.
French Army Start Locations
There are three multi-colored pastel spaces on the Game Board called French Army Start Locations. This is the space where an activated French Army will come onto the Game Board and begin their advance on the player’s villages. These spaces are named Tizi Ouzou in the upper left corner of the Game Board, Azazaga in the upper right corner of the Game Board and Tirourda Pass in the bottom right corner of the Game Board. At the beginning of the game, the players will randomly place hidden tokens of these spaces into the Army 1, Army 2 and Army 3 spaces that will instruct the player where to Deploy the French Army located there. The really cool thing about this is that the players never know which of the armies will Deploy to what French Army Start Locations and you must equally prepare your defenses or hedge your bets and throw your defenders into one village.
French Army Muster Areas
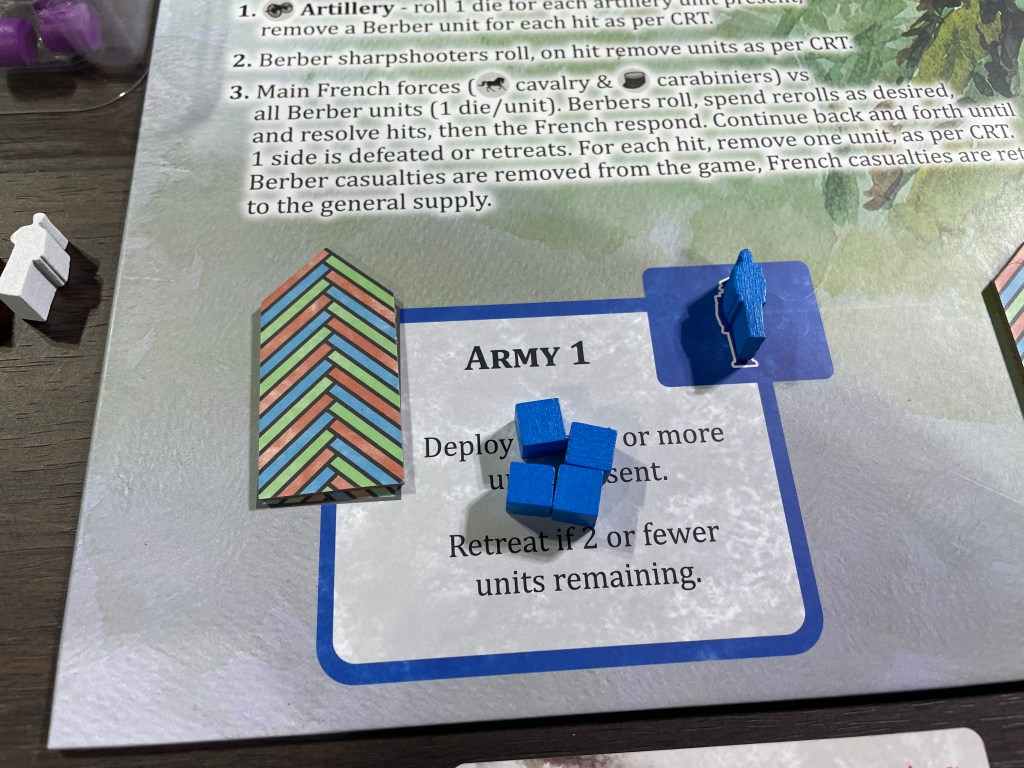
Located at the bottom of the Game Board are the 3 different French Army Muster Areas. They each have their own symbol printed in the upper right corner of the areas, one of which is a blue man, an orange horse head and a black artillery piece. There are corresponding meeples that are stored here until the Army has met its conditions to be Deployed out onto the Game Board at which time the meeple is moved to the path directed leaving the accumulated units in the box for easy reference. Each of the Deploy Conditions for the various armies are slightly different as follows:
Army 1 states that it will Deploy when 6 or more units are present in that space and it will Retreat if there are 2 or fewer units. Army 2 states that it will Deploy when 8 or more units are present in that space and it will Retreat if there are 3 or fewer units. And finally, Army 3 states that it will Deploy when 6 or more units are present in that space and it will Retreat if there are 2 or few units.
In the multi-colored spaces in the top left corner of each of these French Army Muster Areas will be placed the randomly determined hidden tokens mentioned previously that will instruct the player where to Deploy the French Army located there.
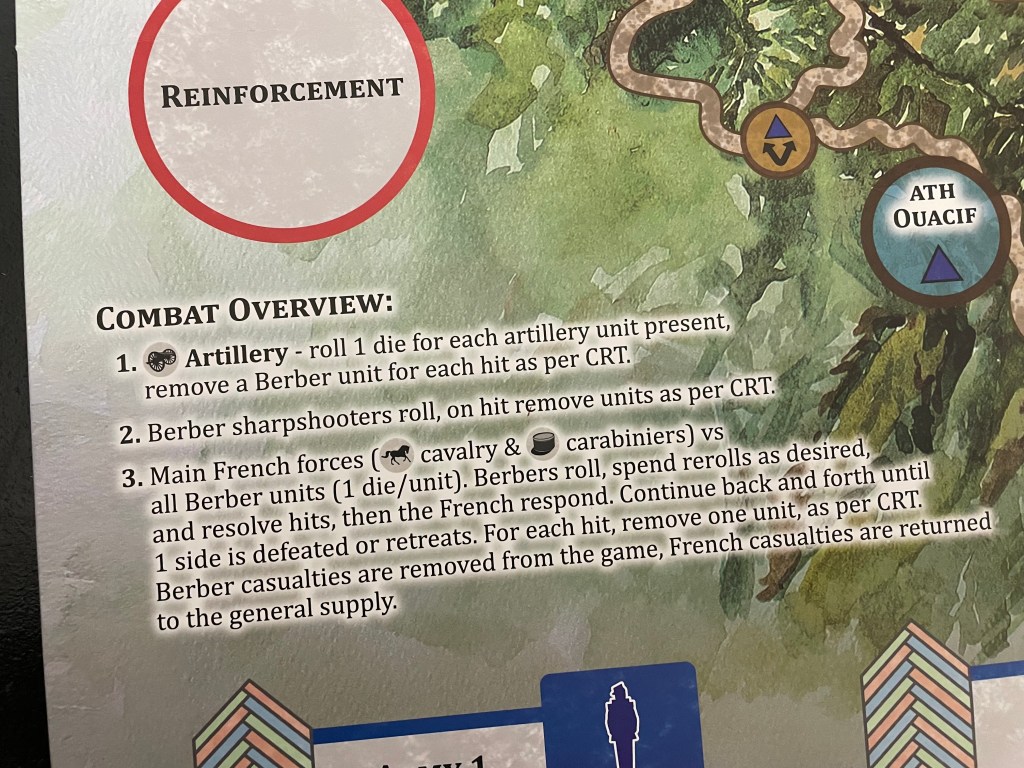
Reinforcement Space
The final space we will examine on the Game Board is the Reinforcement Space. When each Automata Card is drawn at the beginning of a turn, if all 3 of the French Armies are Deployed onto the Game Board and the card instructs the players to add French units to the French Army Muster Areas, they will instead be placed into the Reinforcement Space. From there, any of the Deployed Armies on the Game Board that are currently Retreating because of suffering losses at or below their Retreat condition mentioned in the French Army Muster Areas will receive Reinforcement units to that army until it meets the condition to Redeploy to the Game Board. Because there are units sitting here in full view of the players, it is kind of surreal looking at the units that will come back into the armies that are you currently fighting. It is a losing proposition as you will not ever totally destroy the French Armies but can only slow them or force them to retreat for a time until they receive more units to bolster them and get them back onto the business of advancing on your villages to destroy you.
Below the Reinforcement Space is a very helpful aid to the players that goes over how the process of Combat plays out called the Combat Overview. We will not cover this process at this point in the series, but wanted to simply mention how the game was designed with some player aids in mind and we found this very helpful in playing the game and enjoying it without having to have our heads buried in a complex rule book.
I hope you have had an enjoyable time reading through this post familiarizing you with the Game Board for The Red Burnoose. I didn’t say much about the board aesthetics in this post, but the Game Board is very attractive and well done graphically. It is clear, easily understood upon first glance but also very pleasing to the eye. The use of color and lines to mark terrain changes and elevation really give the players a feeling of being on top of a mountain desperately defending their village from a dark and lonely narrow path.
In Action Point 2, we will dive into the various Village Cards and their differing abilities and benefits.
-Grant

Looking forward to Action Point 2! 🙂
LikeLiked by 1 person