
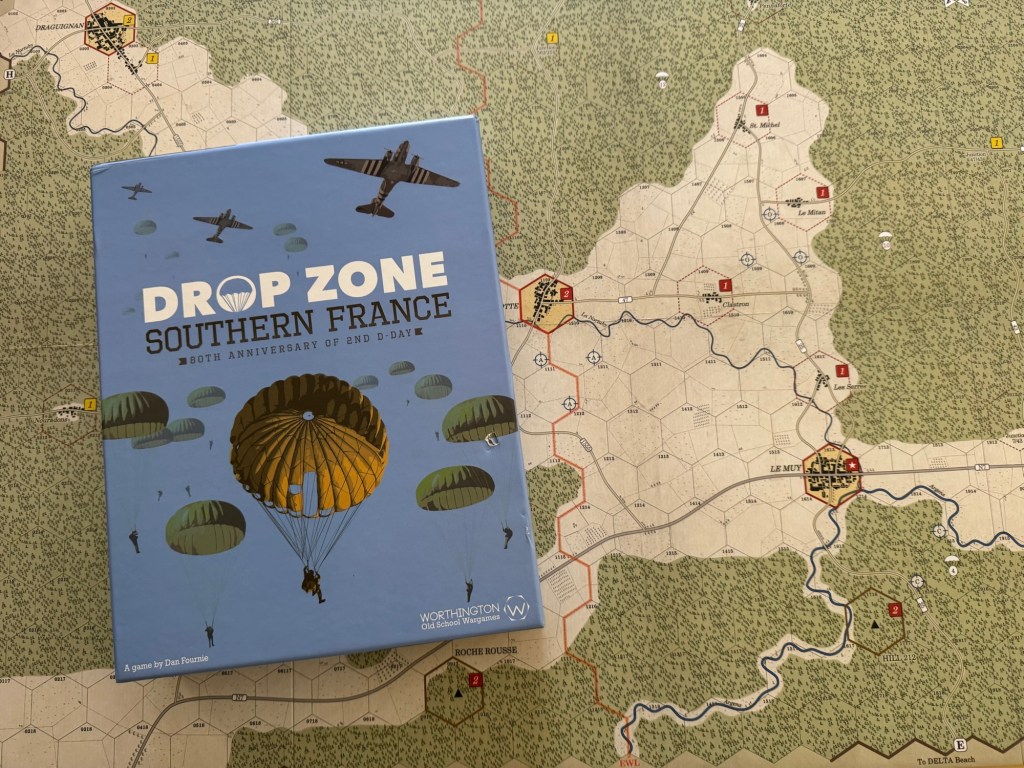
Drop Zone: Southern France is a company-level wargame covering the Allied airborne assault that spearheaded Operation Dragoon, which was the invasion of Southern France or the Second D-Day on August 15, 1944. The history behind this operation is really very interesting as early on the morning of D-Day, the allied First Airborne Task Force (1st ABTF) parachuted a dozen miles behind the Riviera landing beaches to seize key towns and road junctions, to prevent the German occupation forces from counter-attacking the amphibious landing, and to facilitate the advance of Allied forces. The 4:00 AM parachute drop was badly scattered due to an unexpected dense fog bank that blanketed the battlefield. Drop Zone: Southern France covers the first two days of this airborne operation in six game turns, when the American and British paratroopers and glider-men fought surrounded and alone, supported only by French resistance bands. This game is very good and is just a solid wargame.
In this series of Action Points, we will take a look at the Game Board paying attention to the airdrop zones, the terrain and the objective spaces highlighted in yellow and red, take a look at the airdrop procedure and cover an example of both the airborne and glider landings, take a look at the hidden units for the Allies and why this is such an interesting aspect, review the chit pull activation process, cover an example of combat with the cool custom dice and finally go over the victory conditions and how the Allies can claim victory.
Game Board
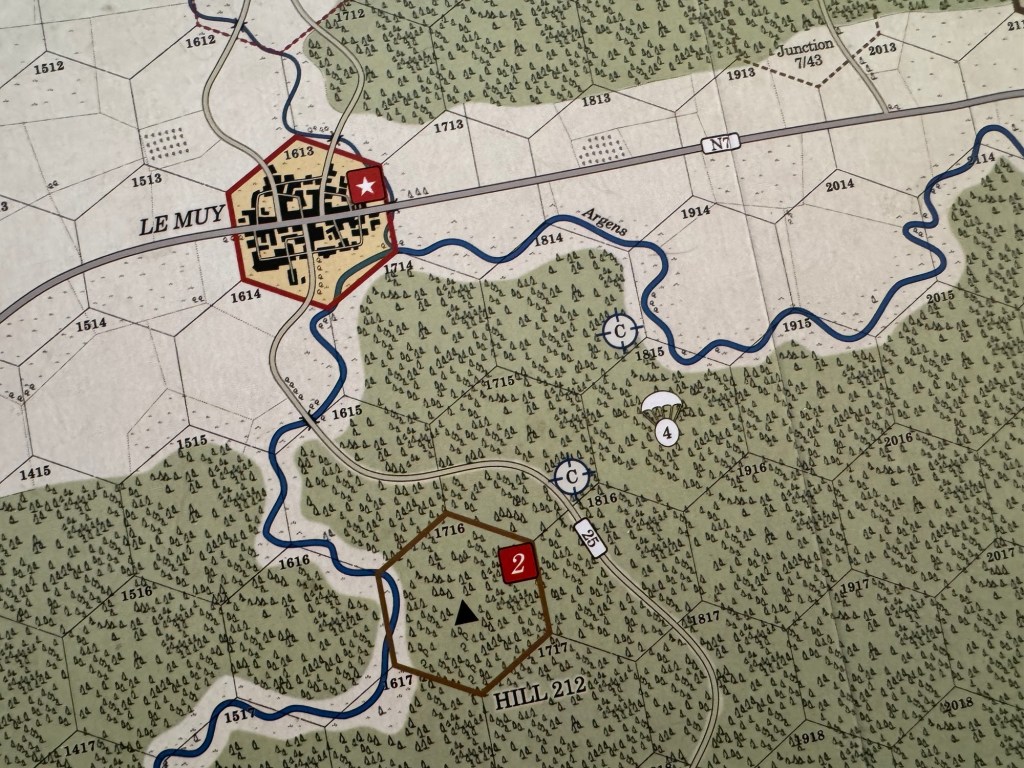
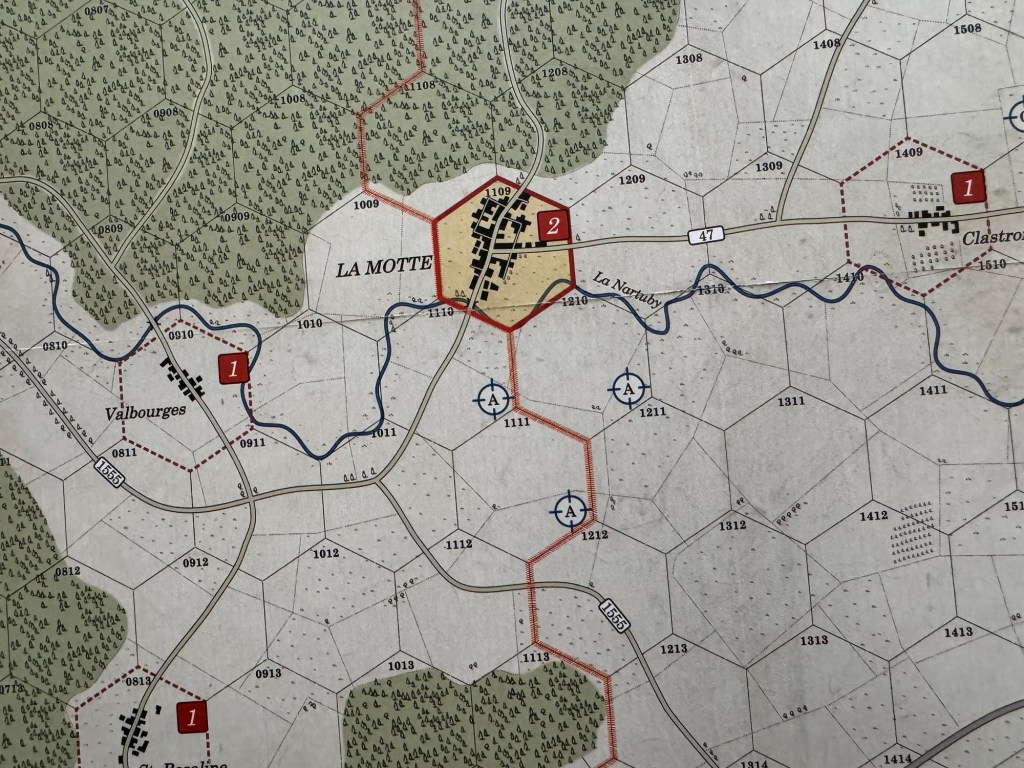
The Game Board is a hex map that covers the area of the Argens and Naturby River valleys and surrounding areas in Provence, Southern France, which covers the area of operations of Operation Dragoon. The key towns, villages, roads, rivers, and bridges that were fought over are indicated on the board and the overall aesthetic of the board is very good with clear roads, good thickness on the hex lines and very good terrain elements like the nice thick blue rivers and the trees. I would classify the Game Board as extremely functional and not necessarily a candidate for my Beautiful Boards of Wargaming! Series.
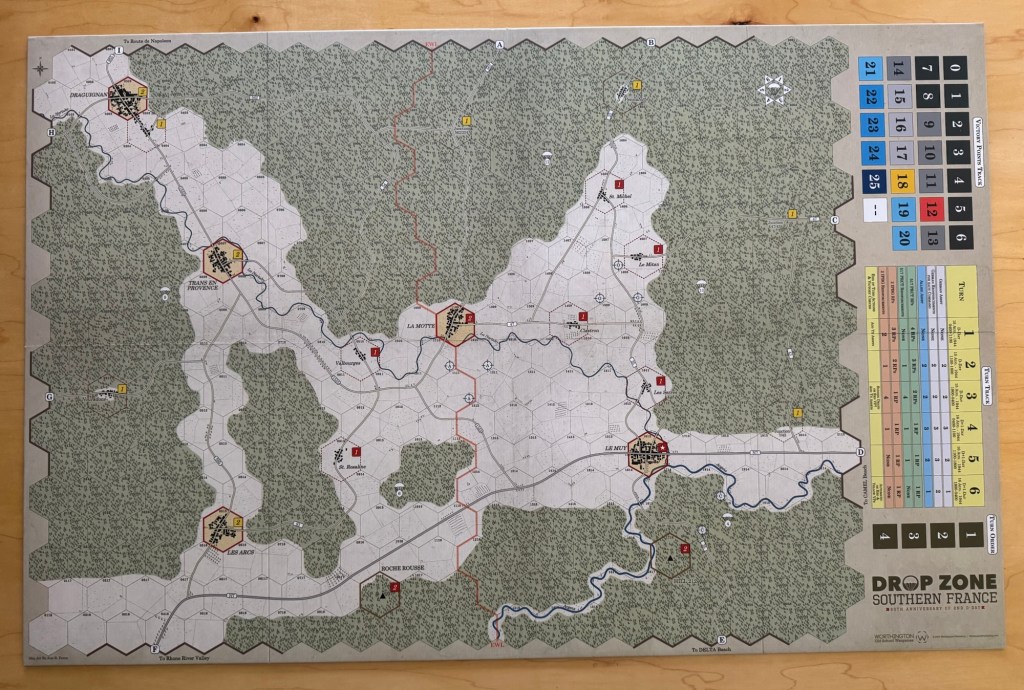
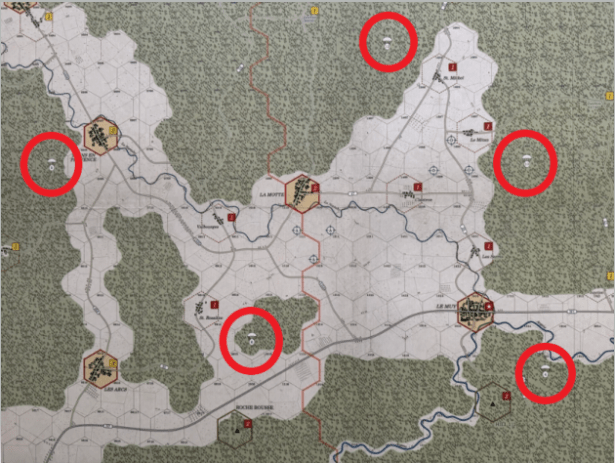
The most important part of the Game Board at the start are the Landing Zones. There are 5 of these Landing Zones identified on the board with a small white circle with black letters and a parachute icon at the top of the symbol. These are not to be confused though with the Glider Landing Zones that come into play later in the game. The Landing Zones are numbered 4 (located a few hexes to the east of Hill 212 located in Hex #1815), 6 (located a few hexes north of Roche Rousse in Hex #1014), 9 (located a few hexes west of Trans En Provence in Hex #0408), 10 (located a few hexes southeast of Le Mitan in Hex #1808) and 12 (located a few hexes west of St. Michel in Hex #1304). There are assigned Allied formations that will attempt to land at each of these Landing Zones during the first turn. We will cover the landing procedure in greater detail in a future Action Point post.
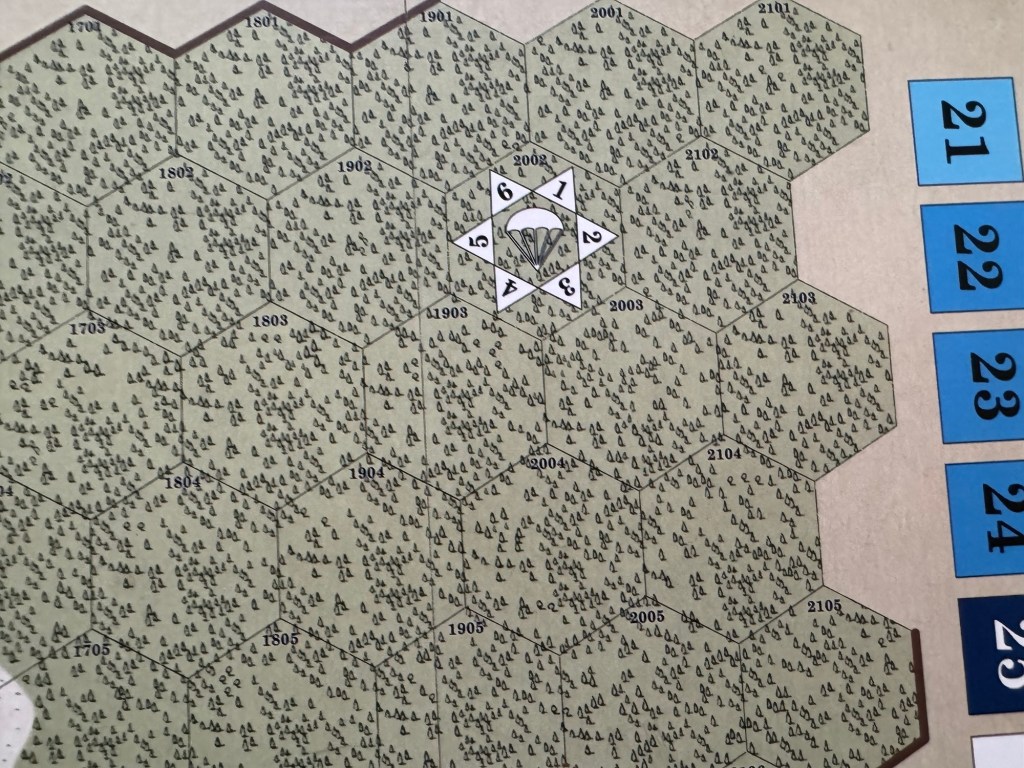
Also included on the board is the scatter diagram that provides the players with the direction that their landings will drift when occurring. As you can see, the diagram is attuned to a 6-sided die and and the player will actually roll 2d6 with the red die determining the scatter direction and the white die determining how many hexes the landings will drift. This is such an interesting and always chaotic first step of most airborne games and is so important as having a cohesive landing where units are together will aid in their initial attacks and making headway on their objectives. But, the dice can be unkind and some of the landings will not go as planned and the Allied player will have to adjust and get them back on track to get moving.
There also is a later landing phase for the gliders and this is marked on the board with a white circle with a target on it and a black letter. There are 3 different landing areas for these gliders and they are marked as A, C and O. There are a possible 3 landing hexes at A, 2 at C and 3 at O.
One of the most important objectives of the initial paradrop landings is to secure these areas and capture the villages and cities adjacent to these spaces as this will allow the gliders to land safely and without consequence during Turn 3.
The Glider Landings will bring in fresh troops to relive the beleaguered initial paratroopers and will give the Allies the strength to push forward with their plans to capture their objectives. This game is somewhat attritional and the player that can manage those losses and retain strong fighting assets will come out on top.

The other point that is important to point out in the above picture is the objectives that are marked with red boxes. These areas are key if the Allied player plans to go for the automatic victory at the end of Turn 3 by capturing all 10 of the red objectives, which are referred to as the D-Day Objectives. But in addition they must capture 2 of the yellow objectives referred as D+1 Objectives for this immediate victory. This is a tough ask and most likely will not occur regularly in the game. There are just too many steps for the defending Germans to consistently win this way but it is possible and in our first play I was just 1 step short of taking the final needed space.
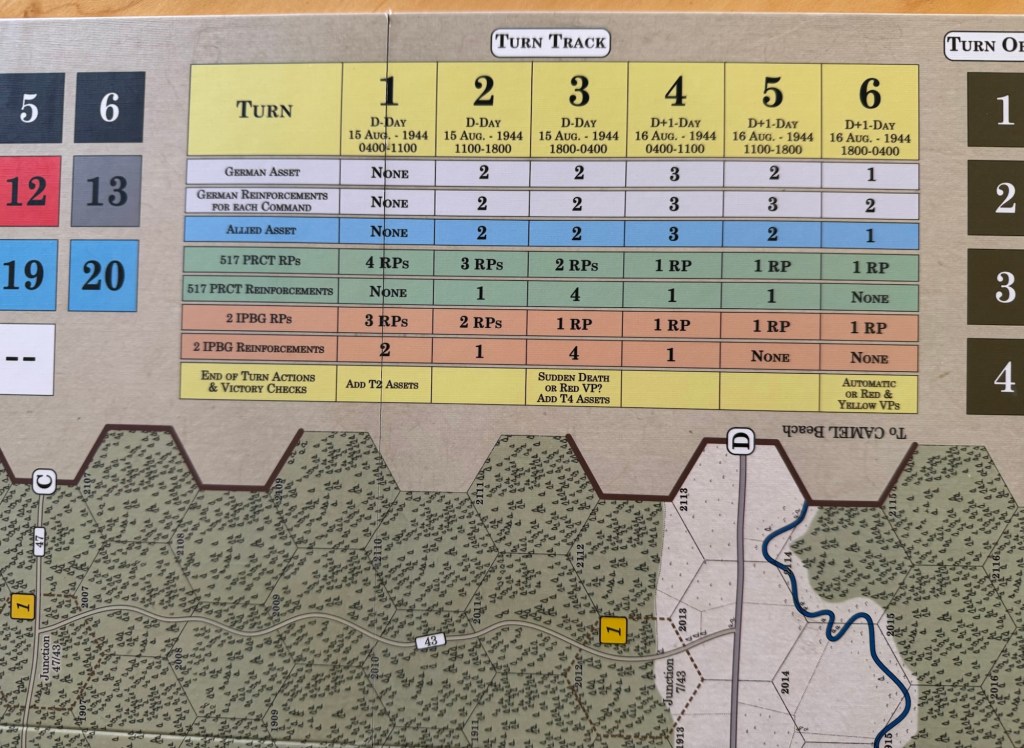
One thing that the Game Board does really well is that there are plenty of necessary player aids found printed directly on the board. For example, the Turn Track is more than just marking the passing of time and the various turns but also provides reminders about Assets that are to be drawn by both the German and Allied players, Reinforcements that arrive, Replacement Points (RP’s) than can be used and reminders about victory checks.
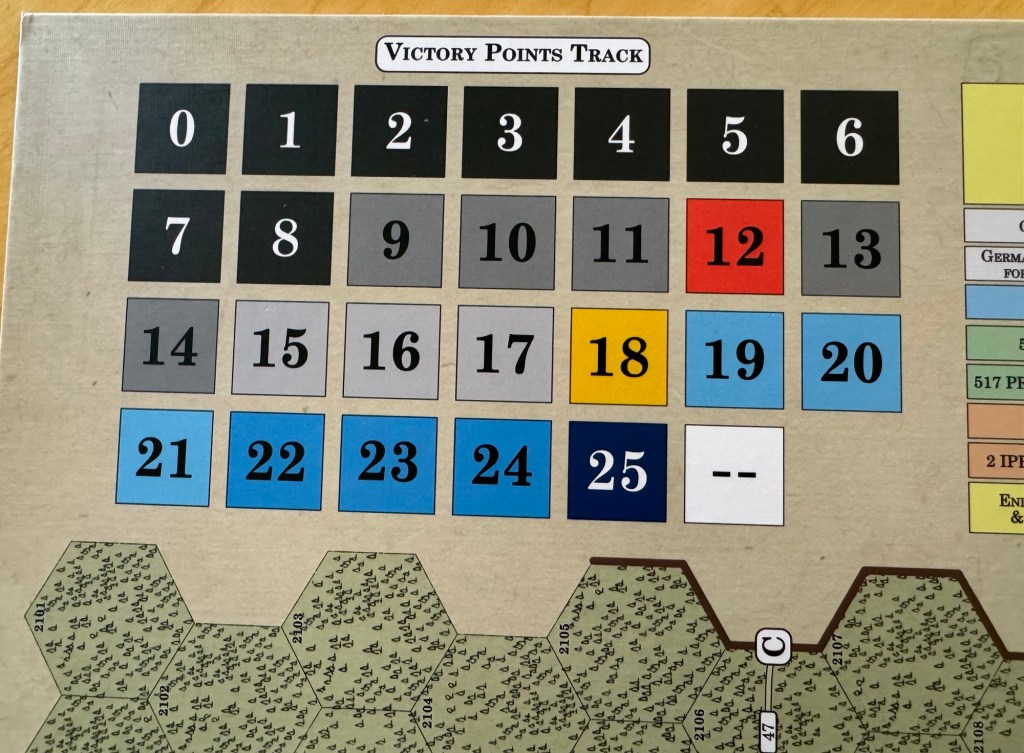
The Victory Points Track is also very functional and has reminders printed directly on the track using colors to remind of the various goals for the automatic end of Turn 3 victory (marked in red at 12 VP’s because that is the sum of the 10 objectives), the end of game victory minimum of 18 (marked in yellow) and then the various degrees of victory with the dark boxes at the beginning that are black being a major German victory, the gray boxes meaning a marginal victory and then the blue shades of boxes being marginal and major victories for the Allies.
This game is surprisingly good and we had a great time playing it! There are just so many interesting elements to consider including the various operations, objectives and paths to take for the Allies to attempt to capture their objectives as planned. We found the game to be imminently playable and were very pleased with the strategy and planning required to do well. This one is a winner and I would recommend it highly as an introductory wargame that plays in 90-120 minutes but gives some real meat to chew on.
In Action Point 2, we will take a look at the airdrop procedure and cover an example of both the airborne and glider landings.
-Grant
