
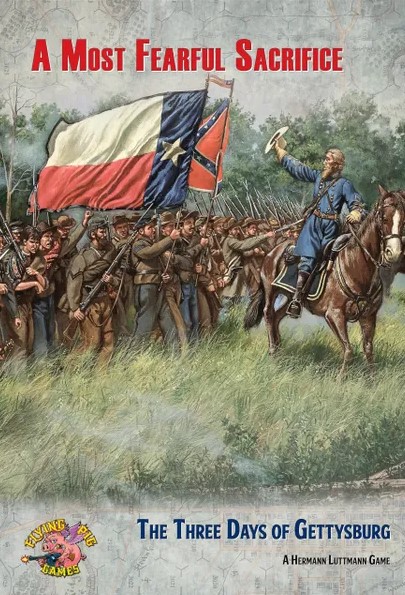
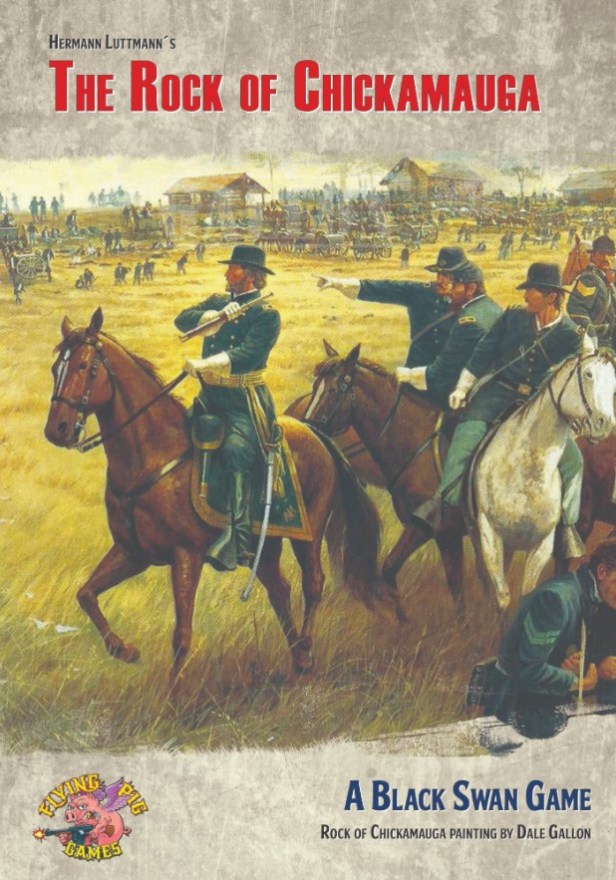
We have very much enjoyed the American Civil War designs of Hermann Luttmann. A Most Fearful Sacrifice: The Three Days of Gettysburg was a fantastic game and was my game of the year in 2022! Since that initial release it has now sold out 2 full printings and I heard that it will be going back to Kickstarter later this year for a 3rd. The 2nd game in this new Black Swan Series is called The Rock of Chickamauga and is set to go to Kickstarter tomorrow. We reached out to Hermann and he was more than willing to give us some more insight into the design and answer our questions.
If you are interested in The Rock of Chickamauga, you can check out the Kickstarter campaign page at the following link: https://www.kickstarter.com/projects/markhwalker/the-rock-of-chickamauga

Grant: What have you thought about the reception of your Black Swan Series?
Hermann: Oh man, I’m overwhelmed by the response! Gamers have been so kind with their comments and support. When we decided to take on this design challenge, I felt that we were taking a bit of a risk. There are obviously a huge number of quality game designs out there covering Gettysburg and I already had a Blind Swords Series game covering the second day (Longstreet Attacks) and a Tiny Battle Publishing design on the first day of battle (The Devil’s To Pay). So, we really needed to do something memorable and special if we were going to tackle this assignment. Thankfully, we seem to have been able to produce a comprehensive game system that is both playable and realistic and that people have enjoyed. And I am very grateful for their support and patronage.
Grant: Why do you believe A Most Fearful Sacrifice has now had 2 printings and won the Charles S. Roberts Award for Best Wargame?
Hermann: We’re actually on our third printing now! It’s just unbelievable. I think that we were able to put together the “perfect storm” of game design with this effort. The game system is heavily based on the very popular Blind Swords System, the map artwork is by the late, great Rick Barber, the other art and graphics are the work of the amazingly talented Jose Faura, the development team is made up three of the most experienced and hard working developers in the hobby – Claude Whalen, Stephen Poitinger, and Fred Manzo – and the production is by one of the best game publishers out there with Flying Pig Games. A real All-Star Team of talent. So, we were able to produce a grand game that was not too heavy or difficult to play, but that still had enough historical gravitas to be a good simulation of the ACW battlefield and the Gettysburg battle, in particular. In addition, we had terrific art and production, and the game is physically impressive in every definition of that word. Just a perfect combo and I feel blessed that we all were able to produce this gem of a wargame.
Grant: What is the next upcoming volume in the Black Swan Series?
Hermann: Well, we haven’t really decided on that just yet, though I am leaning towards Antietam or maybe Stones River. These games are just so much work, even with the established system there is still a ton of research to do and testing to be performed. One of the key aspects of this series is that I want each volume to feel like it was hand crafted for the particular battle that the game is covering…not just a superficial re-skinning of A Most Fearful Sacrifice. I think players will find that the soon upcoming The Rock of Chickamauga, despite using 90% of AMFS’s rules and mechanics, will feel like a different experience. But that amount of attention to detail does mean these designs take a lot of time and effort to publish.
Grant: What does the “Rock of Chickamauga” name reference?
Hermann: This was the sobriquet given to General George H. Thomas, commander of XIV Corps, because of his leadership not only during the entire battle, but more poignantly during the final Union stand at Horseshoe Ridge on September 20th. The Army of the Cumberland was at the point of collapse, with its commander-in-chief General William S. Rosecrans having fled the field, along with a sizeable portion of the army. It was Thomas who organized a last-ditch defense (with the help of some timely reinforcements) and under his determined leadership these brave soldiers were able to prevent the total destruction of the Union army, but at great cost to themselves.
Grant: What is the historical situation at the Battle of Chickamauga?
Hermann: The Union Army of the Cumberland, under Rosecrans, has been essentially chasing the Confederate Army of Tennessee, under Gen. Braxton Bragg, across southeastern Tennessee and into the Chattanooga area. In order to attempt to trap Bragg’s army, Rosecrans moved columns south and east across the mountains in an effort to get behind the Army of Tennessee. But Bragg realized what was happening and withdrew into northern Georgia. With the Union army now widespread and strung out, Bragg quickly pivoted and drew up a plan to gather a strong force along Peavine Ridge and turn on the extended Union forces with a strong counterattack. His main effort was to separate the Army of the Cumberland from Chattanooga and its supply lines north. The two armies took swipes at one another in small engagements to the south but when the main Rebel effort came, it was a full offensive into the valley of Chickamauga Creek. The opposing forces raced into the area in a confused and essentially blind meeting engagement with one another. The Rebels kept trying to outflank the Union army to the north while Rosecrans and Thomas kept maneuvering to avoid that effort.
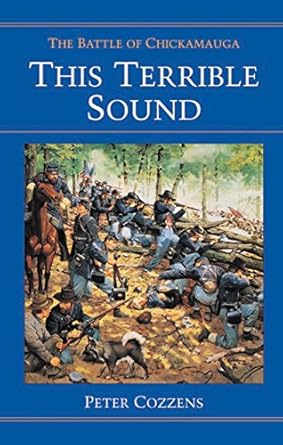
Grant: What sources did you consult on the battle? What one source is your must read recommendation?
Hermann: My main source was David Powell’s The Maps of Chickamauga, along with This Terrible Sound by Peter Cozzens. Another wonderful source is David Powell’s The Chickamauga Campaign trilogy – an enormous and wonderfully detailed work. Added to those are various online resources, video tours of the National Park, and my own personal visit to the battlefield (which is absolutely beautiful, on par with Gettysburg).
Grant: What from the history of this engagement did you need to model in the design?
Hermann: The key factor we really wanted to capture was the outright confusion and true fog of war that existed not only due to the commanders’ lack of precise information about their opponent but also due to the physical nature of the battlefield. Both sides basically went into battle stumbling and bumbling through the woods, searching out what they thought was the enemy’s flank and actually being way off in their assumptions. The woods themselves were so uniquely characteristic in that they were mostly thickly grouped with little undergrowth (being cleared by the local farmers and millers), but still displaying significant canopies. This canopy functioned like a tropical jungle “roof” and trapped smoke and dust within it. To add to that, there had been little rain in the area and the trails, lanes, and roads were exceedingly dry and produced clouds of dust. My main concern therefore was replicating all that confusion and ignorance of the location of opposing forces and thankfully, that’s what the entire Blind Swords/Black Swan System is modeled to reflect. Therefore, I just doubled-down on the inherent “chaos” elements of the core system and made those factors even more prevalent.
To handle the uniqueness of the foliage in the Chickamauga area, I modeled three variations of Woods density – Partial, Full, and Thick – to fine tune the terrain even more. This has had a wonderful effect on the movement and strategy of the two sides and reflects the actual historical movements of each quite well. To keep players from having to guess whether a Woods hex is Partial, Full, or Thick, we’ve added icons to middle of those hexes, so players know immediately what they are dealing with and the hex’s tangible game effects.
One factor related to the nature of the area’s terrain that really stuck with me – while watching a video hosted by a National Park Ranger giving a tour of the battlefield – was his constant use of the term “marching to the sound of the guns”. This is a common military term and most wargamers are familiar with what it means, but his emphasis on it in a number of presentations really took hold with me. This was a legitimate and oft-used tactic at Chickamauga because of the obfuscated nature of the fighting. So much so, that units would have to blindly march towards the sound of the fighting rather than following any prearranged orders of maneuver. As such, I added “March to the Sound of the Guns” Event Cards to both side’s pool of available cards. These work very interestingly in that you can play them when any Fire Combat occurs to march units toward the units that just fired. Artillery units attract attention at any range, but units can only use this card for infantry fire if they are within 10 hexes of that infantry. I’m not sure whether any other wargame has modeled this, but it works great with this game.
Finally, both armies have some singular command structure issues. The Confederate command chain was infamously broken – no one liked Bragg, Bragg really didn’t like Polk, Polk didn’t like D.H. Hill, and there was much animosity and disrespect throughout headquarters. To make things worse, Longstreet arriving threw a monkey wrench into everything as he was highly respected and one of the Confederacy’s best generals, so Bragg was forced to re-structure the command chain to get Longstreet directly involved. He created two separate wings of the army and that just wrought more confusion. By the same token, the Union side of the field was only slightly less of a mess. Rosecrans was also disliked by many of his underlings. In fact, it was that friction that helped cause the infamous “fateful order” which helped bring about the defeat of the Union army. Thomas, on the other hand, was beloved and respected, but his forceful nature, persistence, and initiative created real confusion as he not only insisted on reinforcements from everyone in the army but was not afraid to just grab other commander’s units for his own use. And then of course we have the presence of Charles A. Dana, the Assistant Secretary of War and Washington “babysitter”, who made everyone in the Army of the Cumberland nervous and annoyed. His intervention in the battle at a critical juncture just made matters worse for the Union army.
All these factors – and more! – are represented seamlessly in the game and we hope players enjoy them. We really worked hard to make this game “feel” like Chickamauga.
Grant: What is the scale of the design?
Hermann: These units are the same scale as used in A Most Fearful Sacrifice, so they are each made up of from one to four regiments, depending on how they were deployed at the battle. For example, Stoval’s Rebel Brigade has three counters – a 4-4 representing the 67th Georgia and 60th North Carolina regiments; a 3-3 for the 1st and 3rd Florida regiments; and a 2-3 for the lone 4th Florida regiment. Artillery units each represent one battery of 4-6 guns. The game therefore allows the necessary flexibility of deployment in order that players can, if they wish, replicate the movements of the actual units at the battle. Or they can do something entirely different. The other benefit of doing the unit organization in this manner is that it allows a more precise setup and reinforcement schedule for each individual scenario since I can fine tune it to the actual regimental deployments.
Grant: What different types of units make up each sides Order of Battle?
Hermann: As far as types of units, there are the standard units for any ACW game – infantry, artillery and cavalry. As a side note, the Western Theater units did not have the variety and quality of uniforms that graced the Eastern Theater units. These poor units wore much more mundane uniforms and soldiers had a distinctly more motley appearance. The exceptions were the U.S Regulars and the recently arrived soldiers of Longstreet’s Corps, who had sparkling new – but distinctly blue – uniforms. This made for some interesting reactions on the Union side of the battlefield. Yet, Jose still added a lot of character to the uniforms and especially to the various Confederate battle flags, so the counter art is still very immersive.
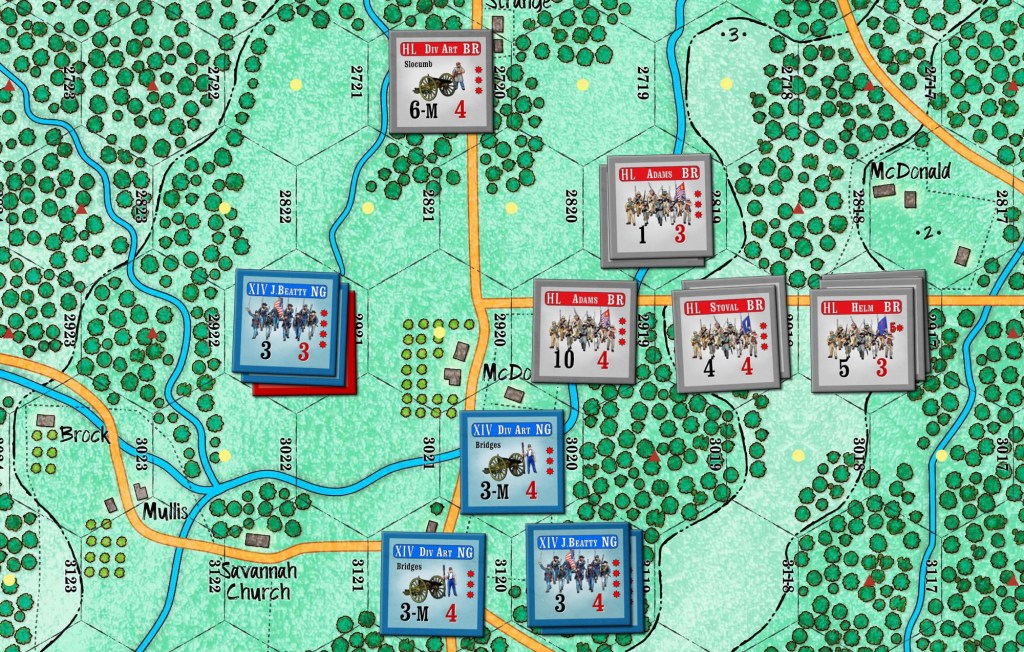
Grant: What is the anatomy of the counters?
Hermann: The counters in this game are displayed in the same manner as in AMFS. At the top is the information needed to identify the unit (its Brigade name) and where it fits in the army’s organization (Division and Corps affiliation). On the right side of the counter is a number of asterisks and this tells the player how many separate counters make up that Brigade. There are two numbers at the bottom – the first is the Strength Points (SP) of the unit (1 SP per 100 men or 1 SP per artillery piece) and the second is the Cohesion Rating (CR) of the unit (which is an abstract grading of its experience, morale and/or training).

Grant: What is the purpose of a unit’s Cohesion Rating? How does this value fluctuate throughout the battle?
Hermann: The Cohesion Rating (CR) of a unit is essentially a catch-all for its morale, training and experience…what the unit’s intangible fighting qualities are, other than just sheer number of men. It is probably the most important aspect of the game engine as it is the key element that will determine how well a unit will fight – and survive – during the battle. It is used throughout the game to measure a unit’s ability to fight and endure on the battlefield. The CR will fluctuate during the entire game, and it will do so often. Units that are Shaken and/or Battleworn will have their CR suffer. Units can also raise their CR temporarily through the use of various events or by providing them with Unit Support (which is handled differently in this game as opposed to AMFS). A low CR makes units more vulnerable and increases their risk during a Break Test, which will cause them to leave the game if they fail.
Grant: How does the Cohesion Rating relate a unit being forced to roll on the Break Test Table? What is the makeup of this table and what did you feel this should reflect?
Hermann: The Cohesion Rating is the quality that is checked during a Break Test, so it is fundamental to a unit’s survival. A Break Test is conducted whenever a unit suffers a Depleted result (which causes the unit to lose a step) and it is already Battleworn. This is the unit’s big challenge – does it break and flee from the accumulated casualties, or does it maintain cohesion and stay in the fight? A unit can only actually be eliminated from the game by failing that Break Test, so its existence is dependent on the morale fiber of the unit and the will of the troops to maintain their “élan” in combat despite the losses. A unit’s elimination just means that it has lost all its cohesion and ability to put up organized resistance – there is no “wiping out” a unit to the last man. Most of the men still exist on the field, just not for game purposes. There is a mechanism for players to try and get them rallied back into the battle and the unit could therefore return.
Grant: What different type of cards are used in the game?
Hermann: There are a number of cards used in the game and each has a unique function:
- Corps Activation Cards: These are the main drivers in the game. They get seeded into the main card pile and when drawn, they tell you which Corps can be activated. You then roll on the Command Table on the card (each Corps is different) to see which of your divisions can be activated. Some cards, at either extreme of bad and good generals, have automatic bad results (in red) and automatic good results (in green).
- Division Activation Cards: These cards do not go in the draw deck. Instead, these are placed on their respective Command Displays in priority order within the Corps to which they belong. The first Division Card (Division Priority #1) is the most likely to be activated when the Corps card is drawn. The second Division Activation card is less likely, but still possible with a good Corps commander or a lucky roll. The third (and in the Union XIV Corps, fourth) Division will rarely activate through the normal activation process…you need some other things to happen to get those units into the action.
- Event Cards: Events Cards are the central narrative element to the design and proper use of them can make or break your efforts. Players can normally choose one or more events to seed into the deck – the rest of the Event Cards are random. The Event conditions and procedures are written right on the card – no looking them up on a separate table.
- Fog of War: For this battle, two of these cards go into the draw deck because of the extra “fog” needed. This card will generate even more oddities, including possible leader casualties.
- Friction of War: The steady deterioration of the battlefield and of the fighting soldiers is reflected with up to two of these cards being added to the draw deck. They will cancel or modify the next card drawn.
- Commander-in-Chief Cards: The commanding officers in each army are represented by this card. CIC cards allow the players more flexibility in commanding units or manipulating the card draws. For Chickamauga, I’ve developed some unique CIC mechanics to reflect the rather bizarre command circumstances on both sides. The Union has two CIC cards for Rosecrans and Thomas, since Thomas essentially acted as a CIC for most of the battle. The Confederates likewise have multiple CIC cards to reflect the changing command structure each day. There are regular CIC cards the first two days and then the Rebels create a “Wing” system that requires new and more intricate CIC cards.
Grant: How do players use the Command Displays? What information is tracked on the display?
Hermann: The Command Displays are where the players maintain the command assignments for each of their Corps. Players will physically place the corresponding Division Activation Cards for each Corps in priority order, indicating which Divisions the player feels are essential to activate in the upcoming turn. In addition, the displays contain the Broken and Crushed Unit boxes where units in those conditions are placed. These Command Displays are also the place where you can check out how cool each of your generals’ beards look!
Grant: What are the three different colors of dice used for?
Hermann: The black and the white dice are used together for most of the table results and are read as a “base 6” number, so from 11-66 with the black die read first. The red die is used only when rolling on the CRT and is the Cohesion die…it is added to the target unit’s Cohesion Rating to get the actual result of the combat. So, results are an interesting combination of the general effect of the fire and the specific applied effect of the fire.
Grant: What occurs in the Command Decision Phase? Why is this so key to the game? What types of strategy and decisions go into this phase?
Hermann: Some of the most important decisions are made during this phase of the game. First, the players each need to decide on their Division Priority for every Corps that is active in the game. After that, they determine if they are willing to sacrifice some of their Event Cards to get additional Preliminary Bombardment. Both sides can conduct artillery fire before the turn begins with just one brigade of artillery. But a player can invest in getting more artillery bombardment during this Preliminary Bombardment by discarding one or more random Event Cards. Each discarded card gains an extra brigade of artillery fire during the Preliminary Bombardment. Players then each choose one or two Key Event Cards (depending on the scenario being played), these being specific Event Cards that they wish to see being drawn during the upcoming Game Turn. Obviously, this is a decisive part of the game as players can set up the possibility of certain events appearing and thus being exploited by them during gameplay. However, it is still possible that the chosen cards will get nixed by a Friction of War Card! Finally, a number of random Event Cards – minus the number of cards that you discarded for Preliminary Bombardment – are added to the draw pile for the turn. As you can see, this is a very important phase of the game as both players are determining which divisions need to activate this turn, the makeup of the Event Cards in the draw pile and how much preliminary bombardment they’d like to throw at the enemy.
Grant: What are the different orders players can issue during the Order Step?
Hermann: There are only three basic Orders that a player can issue to his active units: Attack, Defend and Maneuver. Each has its own unique abilities and restrictions regarding how far units can move and what they are allowed to do during their activation. So, players must think about what it is they are trying to accomplish with the currently activated units as they will not be able to do everything. These Orders are issued only at the moment the units activate. Depending on the Division’s Command Table die roll, activated units may be restricted to all performing the same Order or, with a better roll, each brigade may be able to perform their own Order. It should be noted that these Orders are only in effect during the unit’s activation – Orders do not linger throughout the turn, as there is no game function for them while the units are not active.
Grant: How does Fire Combat work?
Hermann: Fire Combat is a “firepower” based system, meaning that the number of troops or guns firing determines the strength/volume of the fire being issued. This initial firepower strength can then be modified through the use of column shifts – there are no die roll modifiers used in the system, it’s always column shifts – which reflect the effects of various combat conditions. A final net column is calculated, and the black and white dice are rolled to achieve a Cohesion Test level. This test is then taken by the target unit by adding a red die roll to the target unit’s CR and getting an effect. The effects are in the form of Shaken and/or Skeddadle results, along with the more severe Depleted results. There is another element added to the mix in the form of Combat Events, which are unusual historical events that may occur when you roll “doubles” on the black/white dice roll.
Grant: How do Combat Events come into the equation? What are some examples of these events?
Hermann: As mentioned above, when you roll “doubles” you go to the Combat Events Chart and cross reference the actual double-number rolled with the situation you are resolving (that’s right – you don’t have to make another die roll!). This will give you an event that may or may not occur, depending on circumstances. For example, if I am firing at a unit and roll a “22”, I would apply the rolled result normally. Then on top of that, I check the Combat Events Chart and cross reference “22” with “Firing Unit Roll”. This tells me that someone in my firing unit has demonstrated Inspirational Leadership or performed a Heroic Action and that causes an additional “Shaken” result to be applied to the targeted unit. The players are encouraged to create their own narrative to justify this event – the more colorful, the better! Combat Events can also occur in Assault Combat.
Grant: How does Assault Combat work differently?
Hermann: Assault Combat is resolved basically the same way as Fire Combat, except that an attacker can bring in support units to assist and combat results are normally more dynamic. The other major difference is that both sides will roll on the CRT and the two Cohesion Test results achieved are cross-referenced with one another to get a net effect for the combat. This will result in one side or the other having to apply the usual array of results to their units. If doubles are rolled by either or even both sides, then the Combat Event procedure is enacted as described above. If both sides happen to roll the same Cohesion Test result, then this is a Close Fight and players must refer to the Close Fight Resolution Table. Both players roll a die, and those dice are added together. This sum is cross-referenced on the table, and it tells the players what the result of the combat is. This table is also narratively built so that a story emerges regarding what exactly happened during this combat. Finally, Assault Combat allows a winning attacker to conduct an Attacker Breakthrough, which will allow those units to possible exploit their success and even conduct another Assault Combat.
Grant: Is there anything interesting or unique about the Combat Results Table? How did you formulate it to get the results typical of the fighting in the ACW?
Hermann: Well, the CRT is built to be easy to implement and concentrates on combat power vs. cohesion (or morale). It all boils down to that. It’s also designed to reduce math work. I despise games with laundry lists of modifiers to dice rolls and/or unit strengths. I prefer keeping the value of the dice you roll consistent, and just changing the column you will be rolling on – it’s much easier to remember. As far as ACW fighting “feel”, I wanted to make true assaults rather infrequent. Most of the fighting was done through standing, close-range firefights and the system encourages players to do just that. The assaults are only done when the enemy is particularly vulnerable and/or you need to take the ground the defender occupies. Also, units are very hard to eliminate in the game. Most of the time, you will cause retreats and defeated units will be running away, looking for a place to rally. Even when units break and leave the game, they can return through rallying. It’s only when units get “Crushed” are they truly eliminated. Units in the ACW were rarely wiped out but rather they were made combat ineffective and that’s how this system tries to handle this aspect of combat.
Grant: How is victory determined? Is it scenario specific?
Hermann: Each scenario has its own victory conditions. These usually involve one or more of the following:
- Victory Hexes: these are pre-designated hexes that one side or the other needs to control at the end of the game. This will usually be a particular Farm (representing the entire area of open fields), a crossroads, or hexes of the LaFayette Road (which was the main north/south thoroughfare on the battlefield).
- Enemy Casualties: enemy units that are either Broken or Crushed earn you victory points. In the larger scenarios, you can also get points for overall damage inflicted to enemy Brigades and Divisions.
- Union LOC Hexes: The Union army’s Line of Communications back to Chattanooga was a major factor for both armies. The Union could not afford to get cut off from their supply lines north and, by the same token, Bragg and the Army of Tennessee were desperate to force the withdrawal of the Army of the Cumberland from Georgia and southeastern Tennessee by threatening those very same lines.
Grant: What scenarios are included?
Hermann: There are 14 scenarios in this game, and they range from small to very large situations. The scenarios cover the various engagements from September 18th (which may be unique to this Chickamauga game), through the 19th and 20th. There is one scenario that simulates all the day’s fighting on the 20th along with a Grand Battle scenario handling the entire three days. So, we have a terrific offering of variously sized scenarios that cover numerous tactical situations. It was quite a task to figure out how to divide this complex and whirlwind battle into bite-sized and logical pieces that each offer a balanced and entertaining scenario. I hope players enjoy the diverse selection of battle situations.
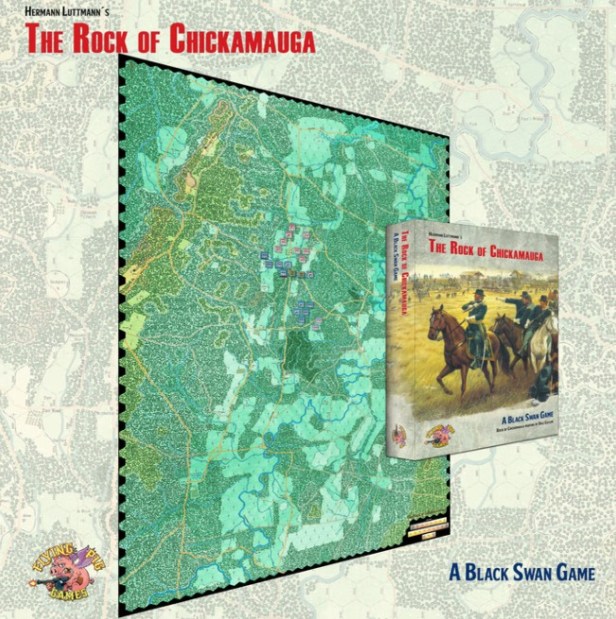
Grant: Who is the artist for the board? How have they tried to mimic the work of Rick Barber?
Hermann: The map art for The Rock of Chickamauga is drawn by the amazing Jose Faura, who also did the counters for AMFS and does the same for this game. As you can see from screen shots, Jose has managed to pay tribute to Rick’s overall style while keeping it his own work. In fact, when I saw the first prototype of a section of the map, I thought to myself “I didn’t know Rick already drew a colored map of Chickamauga”. That’s how close it was to Rick’s style. We were obviously concerned that with Rick’s passing, we couldn’t replicate his beautiful map work. But Jose has really stepped up and done a masterful job honoring Rick Barber’s legend.

Grant: What are you most pleased with about the design?
Hermann: Wow – as with AMFS…everything! Mark Walker and Flying Pig Games again went all out with their support of this follow up design. With the success of AMFS, we just went with the exact same “quality first” approach, and it shows. The developers and testers were magnificent and provided vital feedback. The game looks great and comprehensively covers every aspect of the Battle of Chickamauga – a complex and swirling battle that I hope is easy and fairly quick to play. Our goal was to make the best Chickamauga wargame possible by covering all that battle’s wonderfully unique and quirky aspects and character in one comprehensive, beautiful, and playable package.
Grant: How has your development and playtest team contributed to this effort?
Hermann: The team of developers and testers are Claude Whalen, Steve Poitinger, and Fred Manzo. Their contributions to this design were priceless. Fred helped with developing the new ideas for this entry into the series and Claude and Steve played every scenario numerous times. They both kept up a consistent back and forth with me and each other, comparing notes and results. This constant massaging and tweaking got these scenarios finely tuned, balanced, and entertaining. Every designer should be blessed with a team like this, and I am so grateful to all three of them for helping make this design so special.
Grant: What other battles or even different conflicts could you see this system used in?
Hermann: I would still love to do Antietam using this system one day. That battle is the one that I based my 15mm miniatures army on way back in the 1990’s when my gaming group was doing ACW miniatures campaigns. So, I have a special place in my heart for that battle. Otherwise, I could see revisiting the Franco-Prussian War and early World War I as well. The Battle of Inkerman (during the Crimean War) would be the perfect battle to do with this system, as well. That battle was pure confusion and chaos and I think this system is one of the few that could do that battle justice.
Thanks so much again for letting me do this interview and talk about The Rock of Chickamauga. It’s been a pleasure doing this for you – I consider you both not only hobby colleagues but good friends as well! Good gaming!
As always it was a pleasure speaking with you Hermann. I am very excited about this one as it sounds very interesting and as I loved AMFS this one seems to use that same payable system that creates great chaos and uncertainty but also you have added some new elements to better represent the battle here in northwestern Georgia.
If you are interested in The Rock of Chickamauga, you can check out the Kickstarter campaign page at the following link: https://www.kickstarter.com/projects/markhwalker/the-rock-of-chickamauga
The Kickstarter is set to start as of Thursday, October 24th at 12:00noon EST.
-Grant
