Smaller games on lesser gamed battles are always a welcome sight. And if you don’t know much about Tiny Battle Publishing, they specialize in smaller games with big return as the game play is very good. Their newest offering covers the American Civil War battles of Cross Keys and Port Republic and uses the Shattered Union Series found in Herman Luttmann’s The Hill of Death but this game is designed by Claude Whalen, who has his own experience with American Civil War Series such as Blind Swords. We reached out to Claude to get some insight into the design and he was more than willing to share.
Following the release of The Hill of Death, Conquering the Valley is the second game in the Shattered Union Series. Heavily influenced by 2022’s A Most Fearful Sacrifice, Herm Luttmann’s Shattered Union Series is a new line of American Civil War wargames designed to be accessible to gamers of any experience level and playable in 3 hours.
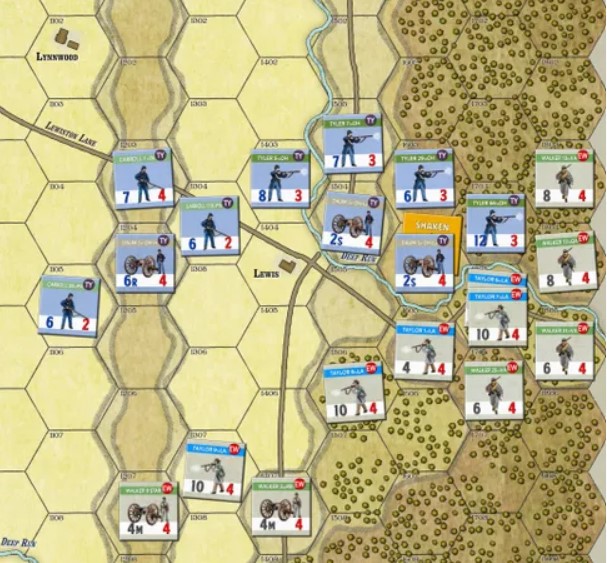
Conquering the Valley covers the final two battles of Stonewall Jackson’s Valley Campaign of 1862. Jackson fights two Union armies, beats them both, and then heads off to Richmond for “The Seven Days”.
Grant: First off Claude please tell us a little about yourself. What are your hobbies? What’s your day job?
Claude: I used to be a Certified Financial Planner in my father’s firm but I retired a few years ago. I found retirement boring and since I have an autistic son, I now work with IDD adults. It is a fairly easy job so I have plenty of time to design/develop/test games. My college mentor, Dr. Charles Turner, always said that I should teach and write so I guess that I finally listened to some of his advice decades later.
As for hobbies, I used to collect wine and Single Malt Scotch and tend to a collection of salt water fish. The arrival of my son squelched those hobbies in the mid-90’s so now I’m down to collecting cactus and seashells. I don’t actually travel to deserts or foreign beaches, I just buy the items from dealers and auctions.
Grant: What motivated you to break into game design? What have you enjoyed most about the experience thus far?

Claude: I started to purchase new games after I retired and I found a pre-order for Longstreet Attacks: The Second Day at Gettysburg on the Revolution Games site. I purchased a copy of Stonewall’s Sword: The Battle of Cedar Mountain to get a taste for Hermann Luttmann’s system, loved it, started talking to Hermann and Roger Miller and ended up playtesting Longstreet Attacks as it was moving through development! Designing and developing games came soon after that.
What I enjoy most about game design/development is learning to look at a battlefield from a cartographer’s point of view. After walking Gettysburg with Rick Barber a few times, I got a completely new way to enjoy these sites. Using what Rick showed me, I am now getting a fresh view of battlefields that I started visiting 50+ years ago. I now take multiple trips per year to various battlefields.

Grant: What is your game Conquering the Valley about?
Claude: Conquering the Valley is about the final two battles of Jackson’s Valley Campaign. Cross Keys was fought on June 8, 1862 and Port Republic occurred the next day. After these two victories, Jackson’s troops marched off to Richmond and the “Seven Days”.
Grant: What does the title of the game reference? What should it convey to players about the situation?
Claude: I went to school at Washington & Lee University so I drove up & down I-81 five times per year. I went past many of Jackson’s battlefields but I never stopped to actually walk those sites. Years later, I started to write games and since Kernstown was my first game, it just made sense to do these two battles.
Grant: What is significant about the battles of Cross Keys/Port Republic? What interesting challenges did these battles present?
Claude: Jackson’s force has to prevent the two Union armies pursuing him from joining forces so his goal is to defeat them in detail. The key to the fight is the bridge over the North River. Jackson needs to defeat Fremont at Cross Keys, cross over the North River Bridge, burn it to prevent Fremont’s remaining forces from crossing and then defeat Tyler’s forces at Port Republic. Handling the bridge is the key point of the game, as the “what If” game shows. Even if Fremont is successful in pushing Ewell back at Cross Keys, they are naturally going to retreat towards the bridge. It comes down to the fight on June 9th, Jackson has to both fight Tyler AND get all of his forces over the North River Bridge before it historically burned.
Grant: What elements from the American Civil War is most important to include in the design?
Claude: Without a doubt, the chaos of Civil War fighting. Hermann Luttmann’s basic system shows that chaos so well that I feel that it is the key to all three systems (Blind Swords, Black Swan & Shattered Union).
Grant: What have you included in the design to model Stonewall Jackson’s leadership ability?
Claude: Jackson is interesting as he had plenty of very good days and some days when you wonder “what is he doing?” (The Seven Days). He is excellent strategically but makes some “interesting” choices tactically (Kernstown & Cedar Mountain). Jackson is clearly the best General out of the bunch so to illustrate that, I’ll compare him to the next best General, Ewell.
Each uninjured General gets five activation cards in each game and the players get to choose two of those cards each turn. Ewell is a little more defensive minded so he gets one Attack card, two Defend cards and two Maneuver cards. Jackson is much more aggressive so he gets two Attack cards, one Defend card and two Maneuver cards. Jackson can also activate two Brigades at a time with a command roll of 4, 5 or 6. Ewell can activate two Brigades at a time by rolling either a 5 or 6. In summation, Jackson can attack more often and he has a better chance of activating more men.
Grant: What research did you do to get the details correct? What one must read source would you recommend?

Claude: A must read book would be Conquering the Valley by Robert Krick.
A few things always slip through the cracks but I took a very nice guided tour of the battlefield (courtesy of a wargamer that lives in Port Republic) and learned a few things about the lay of the land.
From my field survey at Cross Keys, Ewell’s position above Mill Creek was extremely strong except for his left flank. Walking the ground shows that the ridge is VERY steep and you need to put your hand down on the ground in order to balance yourself as you scramble up the slope. It had to be nearly impossible to load and fire a rifle as you climbed that hill. There is a small logging trail that started at the base of the ridge on Ewell’s right front and then rose up to the top of the hill on Ewell’s left that allowed the Rebel skirmishers to rapidly ascend the hill. Any attacking Union troops couldn’t have maintained a line of battle on that trail and even if they tried to use the trail, they would have exposed their left flank the entire way up the slope.
One final problem faced the Union at Mill Creek. As they approached the creek, the ground sloped down towards the water which made it even harder for them to fire at any troops at the top of the ridge. After actually looking at the lay of the land, you would understand why the Union troops only attempted a half-hearted frontal attack.
Moving onto the Port Republic battlefield, the first problem that both sides faced was the issue presented by the three rivers in the area. The North River and the South Fork of the Shenandoah were impassable without proper bridging and looking at the actual rivers, it was clear that they were substantial barriers. The bridge over the North River was the only reliable way to cross and it turned out to be a key to the battle. On the other hand, the South River was a river in name only. When I saw it, I thought that Antietam Creek was more of a barrier. Rain swollen at the time of the battle, it was slightly more of a problem so Jackson had a bridge made of wagons and his troops crossed that way. Being a crude “wagon-bridge”, it became a choke point for the Confederate troops and caused them to trickle into the fight with Tyler’s forces.
The final two points about the Port Republic battlefield would not be noted unless you actually walked the field; maps wouldn’t have shown these key points. The first point is that there is a ridge running down the middle of the fields. Since the North River makes a hard-left-hand turn when it merges into the South Fork of the Shenandoah River, this ridge was obviously an ancient river bank. When we drove down Lewiston Lane, the road cut through this ridge and it became clear that this ridge was a substantial ground feature (easily 15 feet deep). Add in any crops growing on it at the time of the battle and it clearly blocked line of sight from one side of the valley floor to the river. Hence for infantry on the floor of the valley, they couldn’t see the entire field. Once you were up on the Union artillery platform on “The Coaling”, the ridge DIDN’T conceal troops or limit their line-of-sight. Though high ground is always important, this line-of-sight issue made “The Coaling” the dominant position of the battle. Possess it and you control the battlefield.
The last point was the actual size of “The Coaling”. Though modern woods may have encroached on the site, it still is a remarkably small ledge. There is room for guns but not much else. Also, the Confederate route of attack is tough terrain, heavily wooded and a sloped hillside. The only advantage that the Rebels would have had was that once they came out of the woods, they would have been right on the Union guns. It was all very interesting ground and if I hadn’t actually walked it, no map would have been able to give me the true feel of the land.
Grant: What is the scale of the game and force structure of units?
Claude: The game scale is 300 yards per hex and 100 men per strength point. Though Hermann’s Champion Hill game uses one hour turns, this game uses 45-minute turns. In testing, we found that Jackson didn’t have enough time to complete both of his goals. Since he was able to do it historically, testing showed that 45-minute turns gave him the ability to complete the goals in the historical time frame. It isn’t easy but he can do it.

Grant: How was it designing a game in an established system like the Shattered Union Series?
Claude: Actually, Hermann and I talked about the Shattered Union System as he wrote the Basic Series Rules so I got in on the ground floor. A better example would be my first game in the Blind Swords System (Kernstown). Hermann was extremely helpful with suggestions, technical help (I still use his template for my testing counters) and over-all encouragement. He gets my vote for the gaming “Hall of Fame”.
Grant: For those that don’t know, what are the hallmarks of the Shattered Union Series system?
Claude: The three “F’s of War”: Fog, Fortune and Friction. When you read about the war and then look at the battlefields, you often wonder “what were they thinking?” The chaos of war is a key hallmark to all three series.
Grant: Can the game be played as separate battles? How does the campaign game better reflect the historical outcome and challenge?
Claude: YES! Both battles can be played on their own.
The Campaign game is probably going to be a little less historical because the Union player knows what happens the next day so he probably is going to focus on damaging the Louisiana troops as much as possible. If they are badly damaged on the 8th, they will have a much harder time capturing “The Coaling” on the 9th. We can’t get around that player knowledge so the Campaign game gives both sides a chance to refresh themselves overnight. This is very important for Jackson if the Union player went head-hunting for specific Rebel units instead of trying to drive the Rebels from the field.
Grant: I understand there is a “What If” scenario included. What does it cover?
Claude: 95% of the background for the “What If” scenario actually happened! Jackson’s cavalry had lost its leader, Turner Ashby, and had become a demoralized, ineffective force. On the morning of June 8th, the Union cavalry rode into Port Republic, captured some of Jackson’s staff, almost nabbed Jackson himself, almost captured the Rebel ammunition wagons and CAPTURED the North River Bridge. They didn’t have orders to burn the bridge but since they couldn’t hold it, they tried to do so anyway. Rebel troops on the Cross Keys side of the bridge realized what was going on, were able to retake the bridge and put out the fire in time. If the Bridge had been burned, Jackson’s entire army would have been stuck on the Cross Keys side of the river and been unable to get to their ammunition train. Jackson would have been hard-pressed to defeat Fremont’s army and probably would not have been able to get to Richmond in time for “The Seven Days” battles.
Grant: How does combat work in the design?
Claude: All three systems (Blind Swords, Black Swan & Shattered Union) use the “Fire-Move-Assault” sequence.
Grant: What are the different colored 6-sided dice used for?
Claude: The red/white dice are read together and will give a two-digit number ranging from 11 to 66 with the red die number read first and the white die number second. The Union player takes the Blue die roll and adds it to his highest modified CR number then it is compared to the Confederate gray die roll and his highest modified CR number. The attacking unit subtracts the defending units’ colored die roll result and then the final result is applied to the combat. For example, the Union stack has a CR of “3” and he gets a blue die roll of “1” so his total roll is “4”. The Confederate player has a CR of “4” and his gray die roll is “2” for a total of “6”. The Union player is attacking so the result is “4-6= -2” The overall result is “-2” so you apply that result to the appropriate combat chart. Since you roll all four dice at once, combat should be resolved faster.
Grant: How does activation work in the design?
Claude: You shuffle the card deck and start drawing cards. For each Commander card, you roll one die and apply the result according to the card wording. Using Ewell as an example, he will activate one Brigade if he rolls a “1-4” but if he rolls a “5-6”, he can activate two Brigades.

Grant: What challenges does activation cause the players to deal with?
Claude: The big challenge involves Jackson at Port Republic. If he rolls poorly, the Confederate player will be forced to decide whether to sacrifice part of his army on the wrong side of the North River Bridge while he focuses on fighting Tyler. If he focuses on saving his army, Jackson may not have enough troops available to take “The Coaling” and potentially lose the game.
Grant: How is victory achieved?
Claude: Victory Points come from holding “VP Hexes”, putting units in the Broken Box and putting Infantry & Artillery units in Battleworn status (Cavalry units are always battleworn so they don’t count for VP purposes). At Cross Keys, the Mill Creek Ridge line is the key position while “The Coaling” is the key portion of the Port Republic battlefield. Also note that the game awards lesser Victory Hex points if the hex is still being contested at the end of the game (i.e. an enemy combat unit is still next to the hex).
Grant: What other games in the series are you working on?
Claude: Hermann is going to do the Battle of Fredericksburg (probably with more of a focus on the southern portion of the battlefield) and I have already completed Brawner’s Farm, which is a demi-company fight between Jackson’s forces (mainly the Stonewall Brigade) and the Iron Brigade at the start of the Battle of 2nd Manassas. The Brawner’s Farm graphics are on hold right now because….
I have just finished an expansion game for A Most Fearful Sacrifice based on Meade deciding to withdraw from Gettysburg after July 2nd and continuing the fight at Pipe Creek. Rick Barber always liked the idea so he surveyed the ground and completed an initial map of the southern half of Meade’s Pipe Creek Line. After purchasing the map from Rick’s estate, I had it blown up to the AMFS hex size but the whole thing was 44 square feet (and people thought that the AMFS map was too big for their table)! In order to solve the size problem, we decided to focus on Meade’s left flank as that had the best terrain for a turning movement. Jose Faura completed the final map and it focuses on the area around the Middleburg, Maryland.
Players will need a copy of AMFS for some of the counters and cards but with this expansion game, they will get one mounted map (half the size of the AMFS setup), additional counters to reflect Gettysburg casualties, most of the cavalry from the East Cavalry Field fight (Custer and Stuart), some extra artillery AND (if they want) they can add Pickett’s two missing Brigades (Corse and Jenkins) to the battle.
There are three Pipe Creek scenarios and you can play the scenarios with, or without, Pickett’s extra men. Since Pipe Creek is a true “What If” battle, players get a bonus “What If” scenario for A Most Fearful Sacrifice. Longstreet claimed that 15,000 couldn’t take that position so Lee listens to Longstreet and gives him potentially 23,300 men to make the charge. Will it be enough?
Then we will get back to Brawner’s Farm, get that game out and you and I can talk again. Thank you for taking the time to chat and good gaming!

The game is available and when we got our copy we immediately shot an unboxing video and you can take a look at that for more detail about the components:
If you are interested in Conquering the Valley, you can order a copy for $55.00 from the Tiny Battle Publishing website at the following link: https://tinybattlepublishing.com/products/conquering-the-valley
-Grant

What is the name of the AMFS expansion? When will this come out? (Before or after Chickamauga?)
LikeLike
I don’t think that it has been announced as of yet.
LikeLike
It’s Pipe Creek. It’ll come out before Chickamauga.
LikeLiked by 1 person