In our 1st Action Point covering the solitaire game Pavlov’s House: The Battle of Stalingrad from Dan Verssen Games, we took a look at the Volga River operational-level board to understand how those actions hinder or help the defenders in Pavlov’s House. In Action Point 2, we took a closer look at the 9 January Square portion of the board and how the Wehrmacht Cards work. In this Action Point, we will take a look at the inside of Pavlov’s House and how the player can use the Soviet counters to ward off the Germans.

Pavlov’s House
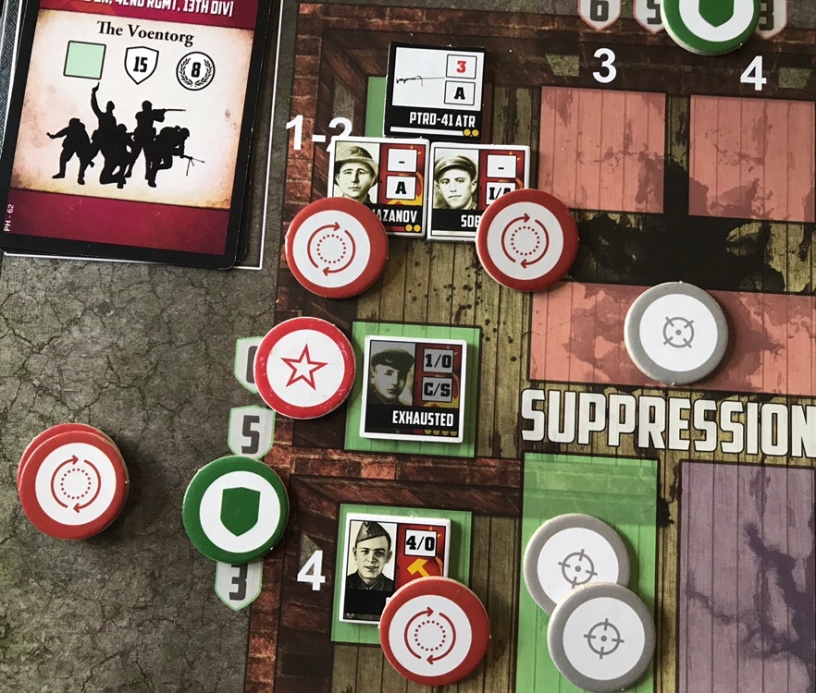
On the left side of the game board is a view of the inside of Pavlov’s House which covers the tactical-level movement and actions of the Soviet defenders in the form of counters. These defenders were elements of the 7th Rifle Company, 3rd Machine Gun Company, 3rd Rifle Battalion, 42nd Guards Rifle Regiment and 13th Guards Division that historically took part in the defense of Pavlov’s House.
During each Soviet Counter Phase, the player is allowed to move up to to three Soviet Counters around the board and then can take up to three actions with those counters. Once you have taken an action with a counter, you will place an Action Token on top of the counter and the action taken may also require you to exhaust the counter by flipping it over to its grayed out side.
It is possible to move four Soviet Counters and take up to four actions in a turn if you started the turn with all three of the Soviet Counters with the Command special action designation in the house and occupying combat positions (meaning not just in the Reserves Box). This is a great advantage and will aid you greatly in the defense so try to get your leaders out as soon as is possible.

Actions
The Actions available for the counters include Attack, Suppress, Command, Request Reinforcements, Forward Observer, Anti-tank, Machine Gun, Mortar and Recover. Let’s take a look at a few of these Actions.
Attack
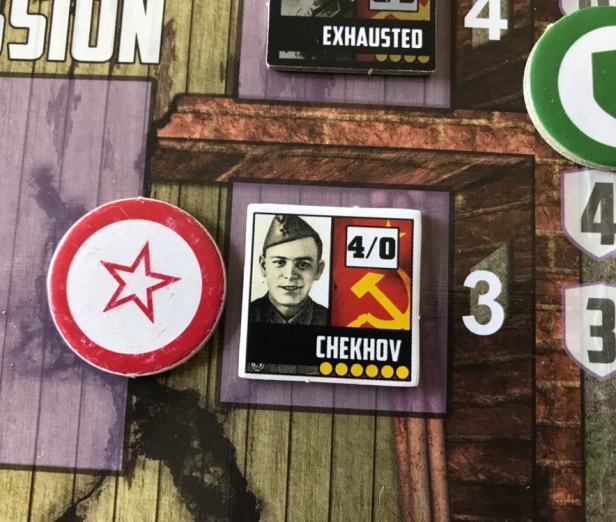
In the upper right corner of each counter is listed that unit’s Attack Value and its Suppress Value listed like so 1/1 or 4/0. When a unit wants to take the Attack Action, first it must have line of sight to its target. This simply means that the counter is located in a Combat Position that is the same color as the target counter. If these colors match, and some of the Combat Positions have two colors, it can then exhaust and roll the number of dice equal to its Attack Value to attempt to kill the target unit. You must remember though that Infantry units can only be attacked by counters that can Attack infantry units. This roll is then compared to the Defense Value of the Wehrmacht Infantry Counter. In the picture below, you will see that Chekhov, who is located in a purple Combat Position, is Attacking the Riflemen Infantry Counter that is also located in a purple position. Chekhov has an Attack Value of 4 and will roll 4 dice trying to roll at least one 4 to overcome the Riflemen unit’s Defense Value of 4.
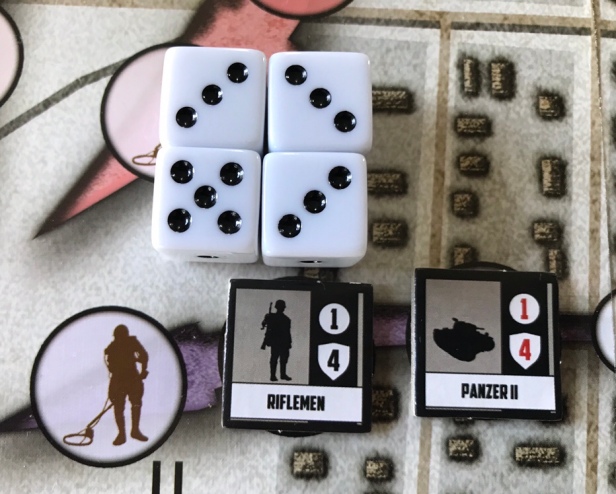
Chekhov rolls a 3, 3, 3, and 4. The 3’s are misses but the 4 equals the Defense Value and the Riflemen counter will now be removed from the board as a casualty. This will now exhaust Chekhov who will be flipped to his grayed our side and will need to be Recovered in a future turn in order to take another action.
Suppress
The Suppress Action is one of the more important Actions in the game as it is a very reliable method of eliminating Wehrmacht Unit Counters by stopping them from coming onto the board in one of the assault lanes. Each Soviet Counter has a Suppress Value (ranging from 0-6) and can take this Action to move a certain number of Suppression Tokens from the Supply to the Suppression Boxes for each of the various assault track colors.

In the above picture, you will notice that the Masijashvili Counter has a Suppression Value of 1. When this unit takes the Suppress Action, he will exhaust and move 1 Suppression Token from the Supply to the green Suppression Box. This token is then available to be used at any time to Suppress a Wehrmacht unit Counter from coming on the board when drawn during the Wehrmacht Card Phase. When the token is used to attempt to Suppress a unit, it doesn’t require an Action to be used.

Command
Only a Soviet Counter with the Command special action designation (“C”) located in a Combat position (not just in the Reserves Box) can take the Command Action. When a Soviet Counter uses the Command Action, it can provide three free and immediate Recover Actions to any other Soviet Counters, but not to other Soviet Counters that have the “C” special action designation.

This Action is absolutely vital to the player having any chance at winning the game. There are three counters with the Command special action designation and it is very important to get them all out as soon as is possible so that you can keep your troops fresh enough to fight off the assaulting Wehrmacht units. Also, as mentioned earlier, having all three out at the same time in a Combat position grants the player an additional Action each turn as you have your Command Team formed.
This fourth Action is basically the difference between success and failure. I really enjoy the dance of trying to manage this ability. It is not as easy as you would think as you have to place a Command Token on any unit that is recovered and this means they can’t take an action that round. Mismanagement and not having enough counters out can lead to nothing happening go a turn it two and this is also really bad.

Forward Observer
Incoming! The Forward Observer is a great unit that you have to use well to stave off the never ending German hordes. This unit allows the player to call in an artillery strike on two side by side German Wehrmacht counters that the Forward Observer has a line of sight to. You just have to have an artillery token on the 32nd Guards Artillery Regiment location on the Volga River operational-level part of the board.

In the picture above, you can see the Soviet Counter that has the Forward Observer special action designation has line of sight to the two Wehrmacht counters (a Riflemen and a Panzer II) that are adjacent. They simply must then discard an available artillery token from the 32nd Guards Artillery Regiment location on the Volga River operational-level part of the board and then roll two dice for each unit.

As you can see in the picture below, the artillery strike was true as the rolls both equaled or exceeded the Defense Value of the units and both units were killed. Take note…that is two kills for only one action. Very efficient and you will want to get this combo out as soon as possible to thin the numbers of the attackers.

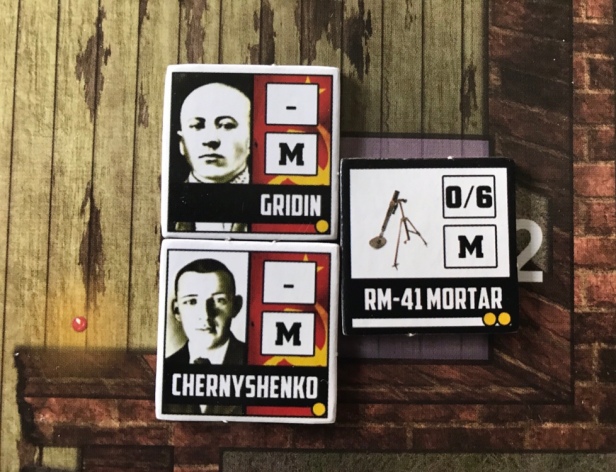
Anti-tank, Machine Gun and Mortars
A less efficient way to kill the attackers, or even stop them from getting on the board, is the use of the Anti-tank, Machine Gun and Mortar teams.

That are three Actions that are associated with Soviet Counters and Weapons Counters. There are some basics to the use of these “teams” that we will cover here. First off, whenever a Soviet Counter moves it can take along a Weapon Counter with the same special action designation as the counter. Also, usually the rules prohibit two counters from occupying the same Combat Position on the board, but in the case of two counters with the same special action designation, they can occupy the same Combat Position as long as a Weapon Counter with their same special action designation is also in that space. If a Weapon Counter is ever left alone in a space it is immediately moved to the Reserves Box.

In order to use these “teams” to fire or suppress enemy units, the player must use two Actions and exhaust both of the Soviet Counters. This can be very expensive and make It so that your use of your Recovery attempts through the use of a Command Action are difficult and inefficient. You also get a number of dice based on the Attack Value of the type of artillery or MG that is being used as well as potential addition of dice from the presence of a unit that has the Inspire attribute. But, the down side is you must roll and live with the result and nothing is guaranteed. I have committed two Actions multiple times only to miss and it can be really devastating. So plan these Actions carefully and consider whether some other more efficient Action is better, such as the aforementioned artillery strike or even using a Counter with a high Attack Value, such as Chekhov.
I hope you got a good feel for how the Soviet Counter Phase works and the Actions that are available for the player to use to try and hold out until the very end of the siege. Pavlov’s House is a great and enjoyable solo game that I just can’t seem to get enough of. Look for my video play through coming soon and potentially an additional Action Point talking about the various variants.
-Grant

Awesome! I have this game, and haven’t had time to really get an understanding of the rules, especially as there are 3 mini games in here, so these Action Points are sweet! Thanks a lot Grant
LikeLiked by 1 person
Its a great game that I have enjoyed quite a lot.
LikeLike
Am I seeing that right, mortar fire from inside the house? or is it the roof? Maybe I am just not getting it. Thanks
LikeLike
Great point. The counters are located inside the house but they could be firing off of the roof or from the courtyard. Not that specific with the location other than boxes.
LikeLike