In our final Action Point covering Fort Sumter: The Secession Crisis, 1860-61, we are going to take a look at the Final Crisis mechanics. The Final Crisis is a rather tricky proposition as you are attempting to plan for your last round at the beginning of the game. Why is this tricky you might ask? Well, you simply do not know how things are going to go over the first 3 rounds of the game and you are trying to predict what you will need to do at that time NOW.
The Final Crisis
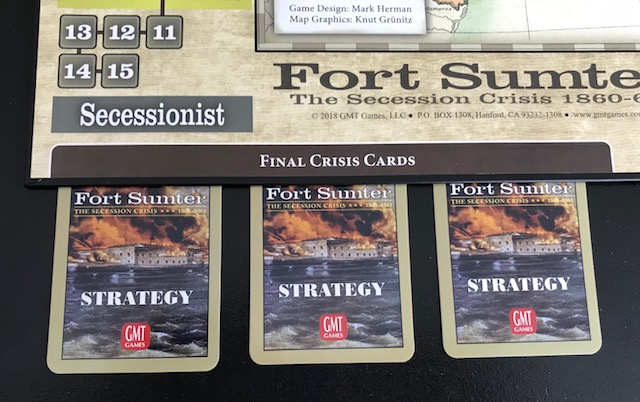
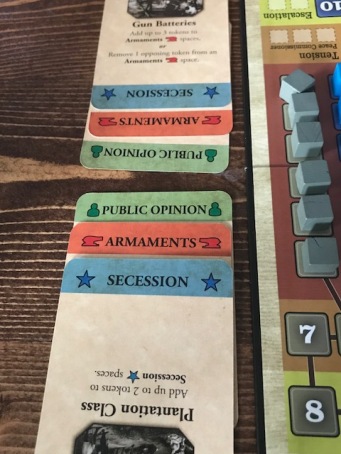
As I have said previously in the various Action Points, players are dealt 4 Strategy cards plus 2 Objective cards each round. Players will play 3 of these cards during the round for either their value or for the event. The 4th card will be placed under the Final Crisis Cards section of the board and will be saved to use during the Final Crisis round.
 At the end of any round where both Final Crisis zones have been breached on the Crisis Track or at the end of the third round of Strategy card play, players will then perform the Final Crisis. This Final Crisis will include the following actions:
- The Peace Commissioner will be removed from the game. This will allow the spot where it resided now to be manipulated by card play.
- Players will then take their Final Crisis Strategy cards into their hand (this will most likely be three cards that were set aside at the end of each round but if the Final Crisis was triggered early by both players breaching the Final Crisis Zone there could be less cards). In the case where less than 3 cards are available, players will simply be dealt cards up to 3. At this point, players will ignore all aspects of the cards except for the colored bar located on the bottom.
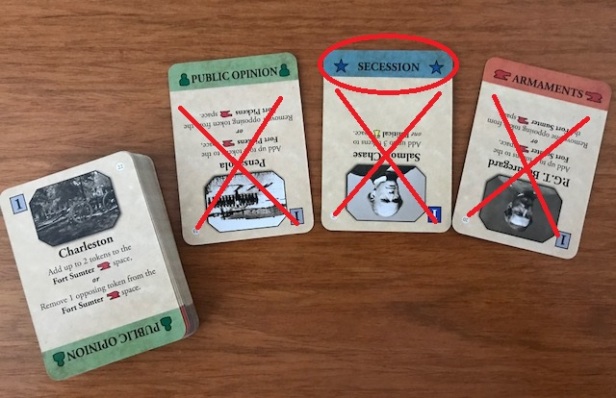
- Each player will then secretly place their 3 Final Crisis Strategy cards face-down on the table, remembering to place them in the order that they wish to play them. This is very important because you cannot choose what card to play but have to simply follow your gut and instincts on how the round will play out. You must also remember that each Crisis Dimension will score again so you have to try and nab a few points here to either makeup ground or widen your lead.
- Both players then reveal their top cards simultaneously. There are two possible outcomes from this action. If the two cards revealed match the same location, each player starting with the 1st player will remove one of their Political Capital Tokens from a space of that type. If they have no Political Capital Tokens in that type of space, or if they choose to, they must remove two of their tokens from any spaces on the board. If the two cards don’t match, each player may move up to two tokens from any spaces or their token pool to any spaces that match the played card. So, if you played a Public Opinion card, and it didn’t match the card played by your opponent, you can choose to move tokens from your pool or from other spaces into the matching color of space.
- Players simply repeat this process for all three of the Final Crisis Strategy Cards and then move to a Final Crisis Scoring round.

Pretty simple mechanically, but how to properly and strategically do it is a bit more difficult. In my humble opinion, you must be paying attention to what you are doing during your three rounds of Strategy card play, as well as look at how your position for control of Crisis Dimensions is in comparison to that of your opponent. Remember there are no Political activity cards in the Final Crisis as the political process has failed and no one is listening any longer. This doesn’t mean that the Political Crisis Dimension is unimportant, as it will still score again, but you will have less luck manipulating its tokens for your gain.
 It is also very important to understand whether you are playing to protect a lead in VP or are behind and must be more aggressive. If you have a lead going into the Final Crisis, you should plan to play your Final Crisis Strategy cards to hold that lead by trying to almost anticipate what it is that your opponent is going to do and play your cards in the order you think they will as this will not allow them to gain ground on your lead. This is easier said than done though and can become somewhat of a crap shoot. In the picture to the left, during our 4th game, a Secessionist victory, I played my cards to try and anticipate what it was that he was doing. In this instance it worked for me and gave me a 1VP victory as I had the lead going into this Final Crisis round. It is also very important to have Political Capital Tokens in your pool that are available for placement on the map. As I have mentioned in earlier posts, making sure you are managing the Crisis Track and gaining as many of the bonus tokens as possible is very key here as if you have none in your pool, you will have to weaken your position on the board to manipulate tokens by moving them around rather than taking them from your pool.
The Final Crisis phase is difficult and for new players will seem random and absent the ability to proactively plan. This is not the case though and through experience, that only will come with multiple plays, players will soon realize that they can plan their cards out to make a difference in the end. You simply have to make up your mind which Crisis Dimensions you want to control and then plan for that to happen by setting aside that type of card.
I plan to write a more in-depth look at strategy for the game but will leave this post off with this comment. There is very little randomness in the game. Yes card draws are random, but you have the power to use your cards to your benefit. You just have to plan for it….easier said though than done.
Thanks for reading along in our series of Action Point posts for Fort Sumter: The Secession Crisis, 1860-61 from GMT Games. If you missed the pervious three posts in this  series here are links to them:
Action Point 1 – a look at the map spaces and makeup of a Crisis Dimension along with Strategy card play.
Action Point 2 – a look at the Crisis Track and how affects the game.
Action Point 3 – a look at the different ways to score VPs.
Look for an in-depth written review coming soon and also keep your eye out for my attempt at a strategy guide where I plan to break down the makeup of the Strategy card deck and show you who has what advantage and where, and also talk about some of the different types of cards that can be used and abused by players to accomplish your goals.
-Grant

I just received the game and have played solo several times. I can definitely see many options available to both players. Mark Herman makes masterpieces. I’m hoping to have Grant’s luck with getting my wife to play this also. I’d like to see a YouTube playthrough of this game (and Hitler’s Reich) with Grant and Alexander just to hear their commentary.
LikeLike
It is a great game. I have now logged 15 plays, and 13 of those are with my wife. She loves it! We have a video coming out this week where my wife and I play through a game so you can check that out. I definitely think Alexander and I will do video play throughs of both Fort Sumter and Hitler’s Reich. Thanks for reading.
LikeLiked by 1 person
I just showed this to Carole and she said, ‘Wow’
LikeLiked by 1 person
She said wow because she thinks I’m obsessed? Or surprised that I would find it that interesting to invest 15 plays?
LikeLiked by 1 person
I have 6 plays in, and I’m still not that good at the Final Crisis. Thanks for the valuable pointers!
LikeLiked by 1 person
No problem. The phrase “easy to learn, fast to play but hard to master” applies here. This game is NOT as simple as it looks on the surface. But after multiple plays, things come into focus. I’m at play 15 now and around 10 things seemed to click for me.
LikeLiked by 1 person
We can do a play through at WBC.
LikeLiked by 1 person
Absolutely!
LikeLiked by 1 person