This week on War Game Wednesday, Alexander and I chose to play Scenario #6 Paralyzed from the West Down of Combat Commander: Europe. I played as the Americans (Attacker) and he played the Germans (Defender).
From the playbook we read the following about the scenario:
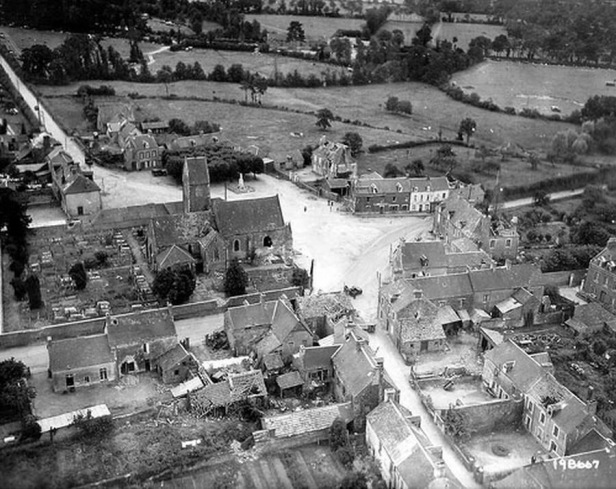
Sainte-Mère-Église, France, June 7, 1944 – In the evening on D-Day, the German 1058th Grenadier Regiment counterattacked Sainte-Mère-Église and recaptured the edge of town. Elements of the US 505th Parachute Regiment were ordered to repulse this enemy force the following morning.
At dawn on June 7, an American Lieutenant by the name of Waverly Wray scouted ahead and came across several German soldiers around a radio, whom he promptly shot dead. Wray high-tailed it back to his company to begin the assault, unaware that he had just killed the eight officers in charge of the Grenadier Regiment’s 1st Battalion.
If you don’t know, the French town of Sainte-Mère-Église is located on the eastern edge of the Cotentin Peninsula which was the location of Utah Beach which represented the westernmost edge of the D-Day landings. It was the first village in Normandy to be liberated by the Americans.


The scenario set the Surrender condition at 9 for the Germans (as they would start with defensible positions in the buildings in the middle of the map) and the Americans were set at 11 units. The American units consisted of 10 Paratroop with a good Morale at 8, 5 Movement (boxed), 6 FP (boxed) and Range at 4 along with 2 Weapon teams with Medium MG’s. The German units consisted of 3 each of Rifle with Morale 7, 5 Movement and 5 FP, Parachute with Morale 8, 5 Movement and 5 FP and Conscripts with Morale 6, 3 Movement and 5 FP plus 2 Weapon teams with 2 Heavy MG’s and 3 Light MG’s. The balancer for the scenario was that the Germans started with only 1 order and would gain an additional order each Time Check to a maximum of 3. The VP marker was at 9 (Axis) and the Time Marker was at 0 with Sudden Death at the 6 space. The German’s were to set up first and were to be 8 hexes deep with the Americans setting up after and being 2 hexes deep.

The Germans took up positions in the group of buildings in the center of the map. He did place weaker Conscript units on his right flank so that was where I decided I would make my attack.
I set up my units in three separate teams. My left flank was led by Sgt. Smith (Command 2, Morale 8) with 6 Paratroop units all within his Command radius and a Weapon team with one of the 2 Medium MG’s. This would be my main force backed up by Corporal Hubbard (Command 1, Morale 7) to the right taking the center leading 3 Paratroop units. Lt. Wray (Command 2, Morale 9) was setup in the building with the courtyard in the center with the other Weapon team and a Medium MG and a Paratroop unit to attempt fire on the Germans as Sgt. Smith would advance up the right flank.


My first draw was advantageous to me as I had 2 Move orders and was able to aggressively move up the left side of the map to begin assaulting the German right flank. Due to the +1 movement bonus for being on a road, Sgt. Smith was able to move all the way up to the wall, scaling it and taking up a good position in the building adjacent to the German Conscript unit guarding that advance. The Germans chose not to Fire on this group but would take a shot at my center group as they advanced in the same turn.

Lt. Wray then moved up in the large central building in order to take up a firing position from which to harass the German units. As he moved, the Germans fired but were unable to damage the team due to the +3 cover bonus offered by the buildings and due to Wray’s +2 Command bonus. After the game was over, I regretted not putting Wray in charge of the center team as his +2 Command bonus would have offered better protection to that advancing group.

The Germans then retreated the Conscript unit but I did get a Fire action off with my lone Paratroop unit that had line of sight breaking him. This had me off to a great start and I began feeling very confident (ultimately too confident!). On my next turn, Lt. Wray’s group fired on the Rifle unit across the street with a Sustained Fire (+2 when firing an MG) and breaking him.

I followed up the Fire with a Rout order which caused the previously broken Conscript to fail his morale check and retreat right off of the board giving me my first 4VP (the scenario doubled the elimination points so the eliminated team, which usually would have given only 2VP, doubled for a total of 4 and moved the VP marker from 9 for the Axis to 5.) A great start! But it was a little like Fool’s Gold as it was only a Conscript and the hardened German units remaining would perform much better.

I then would fire on Sgt. Esser with Lt. Wray’s group breaking them both with a great roll of a 12 for a total FP21. I would then play a Move order to advance Cpl. Hubbard’s group up to begin assaulting the center. As soon as he came into view of the Heavy MG team to the right around the building and in the open with no cover (big mistake on my part!) they opened fire while playing a Sustained Fire breaking both Hubbard and the Paratroop unit. My luck was changing for the worse.

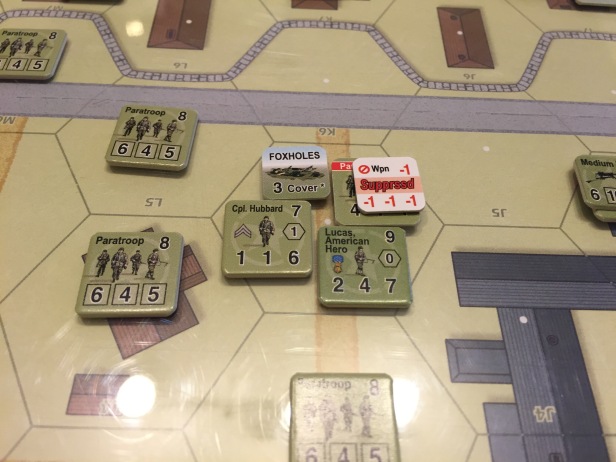
I then got a fortuitous event calling in my hero Lucas who I placed in the hex with Cpl. Hubbard (who I had recovered) and the broken Paratroop unit. We also hit a Time Check and I was able to dig in and place a fox hole in that hex. Was my luck changing back for the better?


I then moved up over the wall to take up positions in the buildings to the right (the German Veteran Heavy MG team would eventually vacate to join up with Sgt. Esser) and left of Sgt. Esser. I was hoping to be able to draw an Advance order to move in and destroy him in hand to hand combat but I didn’t get an Advance card and we exchanged Fire orders whittling each other down little by little.


Meanwhile on the Germans right flank, I was able to kill another Rifle unit and suppress the unit hold up in the buildings at Objective #2. This is where my American blood lust reared its ugly head! Notice my position in the picture below in relation to the few German units on the right. I could have moved the Paratroop unit there off the map for 2VP as well as the one to Sgt. Smith’s left. This would have given me the lead in VP but all I was focused on was killing the 6 needed remaining units to force a German Surrender! (I hate to win by VP as it feels very unsatisfying and inglorious!)

I did finally kill the Rifle unit with Sgt. Esser and added another unit to the casualty total bringing me within 5 units of forcing Surrender. I also was able to finally draw an Advance order to be able to move into hand to hand and finish off Sgt. Esser with my base FP being 8 to his 2.

The fight then started to get really tense as we hit the 6th Time Marker and we were into Sudden Death. The first roll was an 11 so I would live to fight on and try to kill just 2 more units. When in actuality I could have taken the VP lead if I simply would have moved my units off the board. But my damned American bloodlust got in the way of victory!


We hit the 2nd Sudden Death and the roll was 9 so we would fight on. I was now feeling real pressure and knowing I only needed one more kill went hard at the Parachute in the back of the map hoping to break him and either finish him off or Rout him off the board. I fired three times in the next few rounds but could never muster the Fire Power to defeat him. Notice how I could have gained 7 or 8 VP by moving the group led by Private Adamson off the board. Dumb of me but I was seeing red, wanted glory and totally forgot that option!


I then fired on him breaking both units with a 21FP and then followed that up with a Rout order only to see him hold. I gave up the Initiative card to force a re-roll only to see him save again. That was my last chance as a Time check came up and in the 4th Sudden Death he rolled a 5 ending the game! I had lost, mainly because of my pride and bloodlust! The Germans were victorious although their forces were severely reduced with a total of 8 losses, only one shy of Surrender!

What a great scenario and all was good with me, even the outcome! This was Alexander’s first victory and I hold the overall lead 5-1. I love Combat Commander and look forward to our next opportunity to play Scenario #7.
-Grant


Interesting game never played it but I like the flow the rules seem good and I would think it would have lots of replay value. Thanks for sharing.
LikeLiked by 1 person
I recommend you give CC a try. I have the base game and the Paratrooper expansion so I have 22 scenarios to play. We just finished #6 so we heave 16 more. I love it!
LikeLike
The game is great, I play grant regularly, and I often lose, but it’s still great to play. To me, the measure of a good game is one that is still fun in Ina losing effort, because the game itself is a joy to play, and CC:Europe is definitely that.
LikeLike
The aerial photo is Saint-Clair-sur-l’Elle, France, not Sainte-Mere_Eglise, a mistake I see a lot of people have made. There is an aerial of Sainte-Mere-Eglise.
LikeLike